Attention all registered users. The new forum upgrade requires you to reset your password as you logon for the first time.
To reset your password choose this option that is displayed when you attempted to login with your username: "Forgotten your password? Click here!"
You will be sent an e-mail to the address that is associated with your forum account. Follow the simple directions to reset your password.
If this is your first visit, be sure to
check out the FAQ by clicking the
link above. You may have to register
before you can post: click the register link above to proceed. To start viewing messages,
select the forum that you want to visit from the selection below.
Yes, Mr. LaRue, those holes look wonderful and that's the sort of thing I'll be trying for.
Paul, as with all things, thanks for your help, ol' buddy.
TomC, those chain locker drains were covered better by Paul much earlier in this thread somewhere. I'd go back and search for the page(s) for ya, but I'm not up to it at the moment. Sorry...
Jeff, no worries, I found the pages, you just take care of yourself.
I had no plans showing them, but so far I found the launching of Growler and Drum, you can sorta make out the holes, but on the Flying Fish.....just look at the shot, perfect!
I expect this shot's gonna come out sideways or upside down because it was taken on my phone, but you'll still get the idea. These are the 1:72 20mm cannons I ordered from Shapeways recently. Love 'em because they feature the correct tripod mounts (other aftermarket 20mm's do not) and they've got the cool blast shields which although Harder definitely had 'em, I believe they were pretty rare on submarines in general: lots of drag!
Note these parts are very delicate! One of them is already missing a shoulder extension; not sure if it broke off in transit (despite being extremely well-packaged) or if I've simply unknowingly broken it off myself. The missing piece will be replaced with a PE duplicate, so no big deal. In fact, I hope/plan to glue on assorted PE pieces to these guns to beef them up somewhat for the rigors of eventually forthcoming South Pacific patrols.
Paul I missed this thread and I just love all the work you have done on this boat. Quite inspiring. Wayne Frey sent me one years ago he had started but never finished. It had a subdriver in it but I converted to RCABS. I have never got the handle on using the gas. It works great. Could use more freeboard(I'm working on that) but I enjoy the good handling of the boat and how smooth it is underwater.
Can't wait to see the finished boat!
Thanks, Neil. Got a severe case of rivet counting on this one so it will take a while. I remember Wayne passing that kit on to you. It looks great. Speaking of Wayne, he has resurfaced outside Austin. Who knows, he may get working on a project again.
Actually making some progress on Trigger lately. Right now I am attaching the deck to the hull to prepare for teak decking in the near future. My question is for those folks who have built up the Revell Gato into a working model and are familiar with David Merriman's conversion kit for for same. I like the tabs he designed and included with the conversion kit that slide under the crossmembers up under the extreme forward deck and will be utilizing those up there, but in the stern he uses a resin plug under the extreme terminus of the turtle back and a tiny, tiny, machine screw through the deck and into the resin block to hold the stern part of the deck in place.
I'm going to lose that screw if I look at it sideways and it seems there could be a better way. A better way someone brilliant already thought of! Magnets maybe? Anyhow, what have you guys done in this regard and extra credit if I won't have the head of some ugly screw showing when I'm done.
Thanks, and I will have a real progress post soon.
 And embedded the video. Was that shot at 3:00am or what?
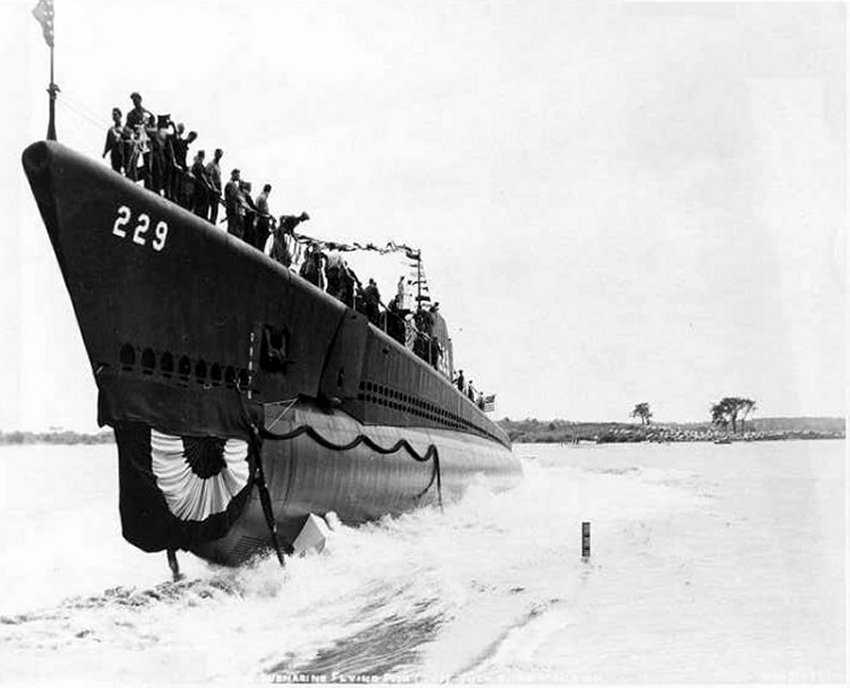
Comment