
Re: 1/144 Scale USS Batfish (SS310)
UPDATE 91
Hi Guys!
Confirming what Tom D said earlier, I received the following response from Paul Farace to a Post I put on the Submarinemuseums.org site…
“Prior to 1952 the messenger rescue bouy was a cylinder held vertically in a well on the deck edge aft and in the superstructure forward beside the escape trunk (port on EB subs) ... The forward one would have been flush with the deck and the aft one slightly above the deck because the superstructure standoff aft is much less above the pressure hull. But these were NEVER carried on a war patrol!!! A blank round metal plate would have been welded over the empty sockets in wartime. You didn't want them blown loose by a depth charge and float to the surface to give away your position.. since they were attached to your forward and after torpedo room hatches with a steel cable to allow the McCann rescue bell to follow it down to the boat!!! There are plenty of photos to document this for model builders. The rescue bouys we all have today were installed in 1953 and originally were painted yellow. They were changed to orange in the mid 60s.â€
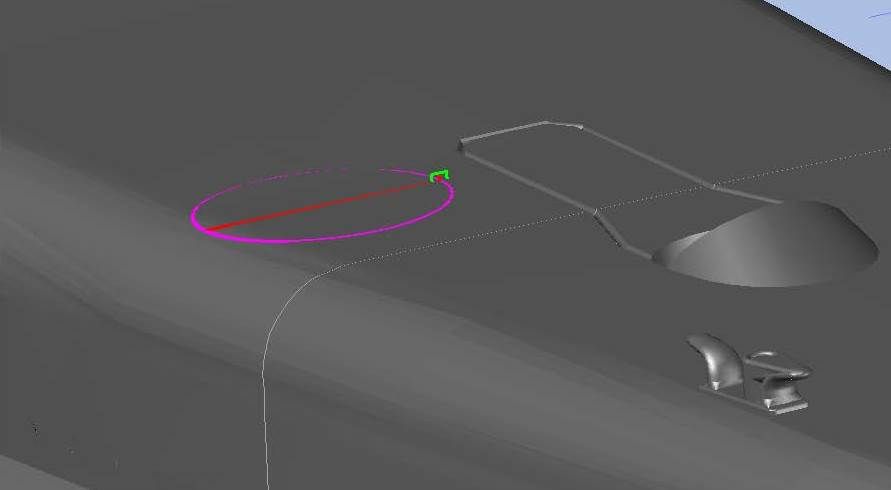
This inspired me to go ahead and make the part in both configurations, so I saved my “Batfish-144-Part08-Hull08†part as “Batfish-144-Part08-Hull08-OldMessengerBuoyâ€and went at it. I started with the plans tracing the (new) old round messenger buoy…
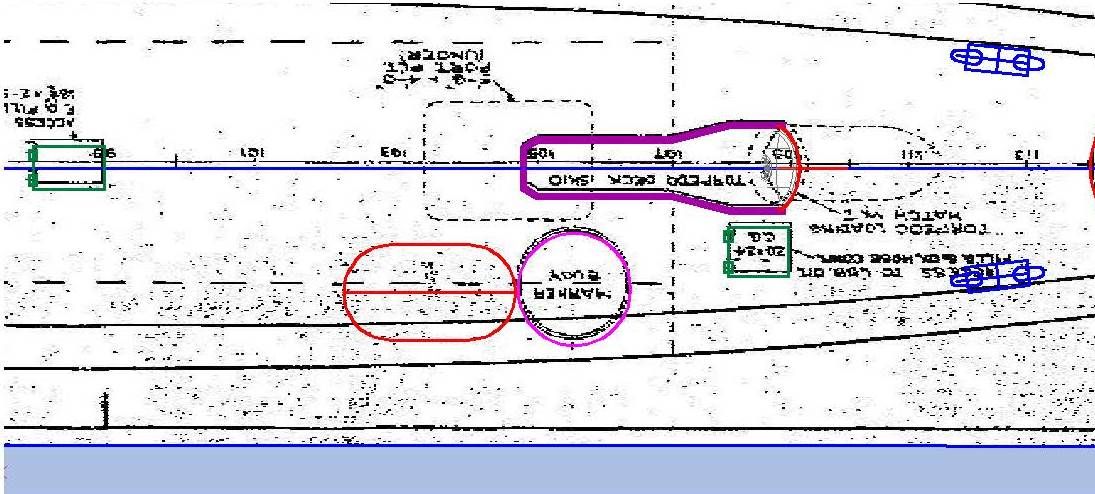
…Which I copied to the plans.
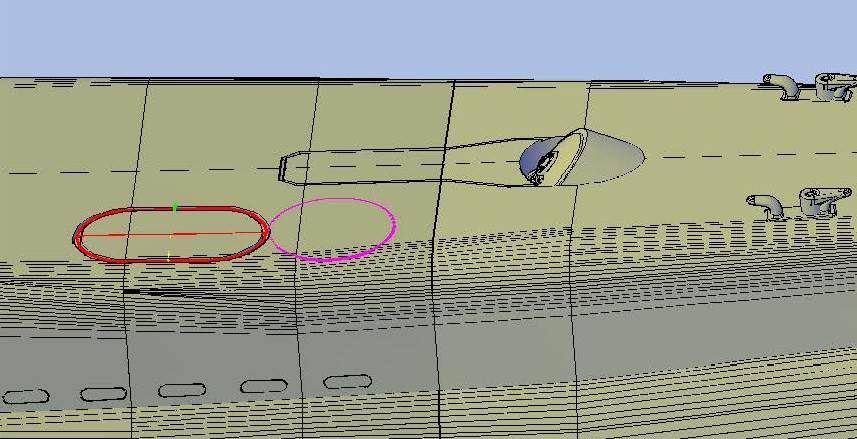
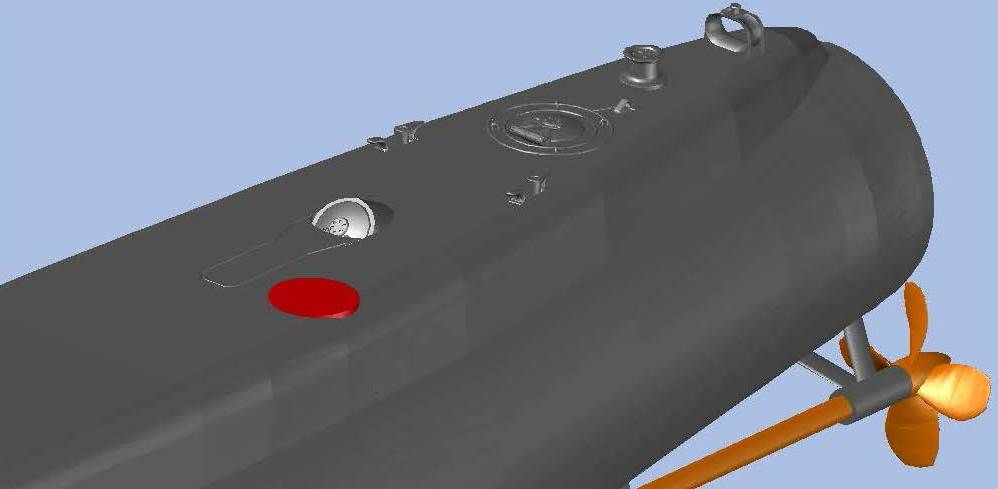
I started with the oval buoy which had to be filled in, which was more difficult than cutting it, due to the fact that the deck isn’t flat.
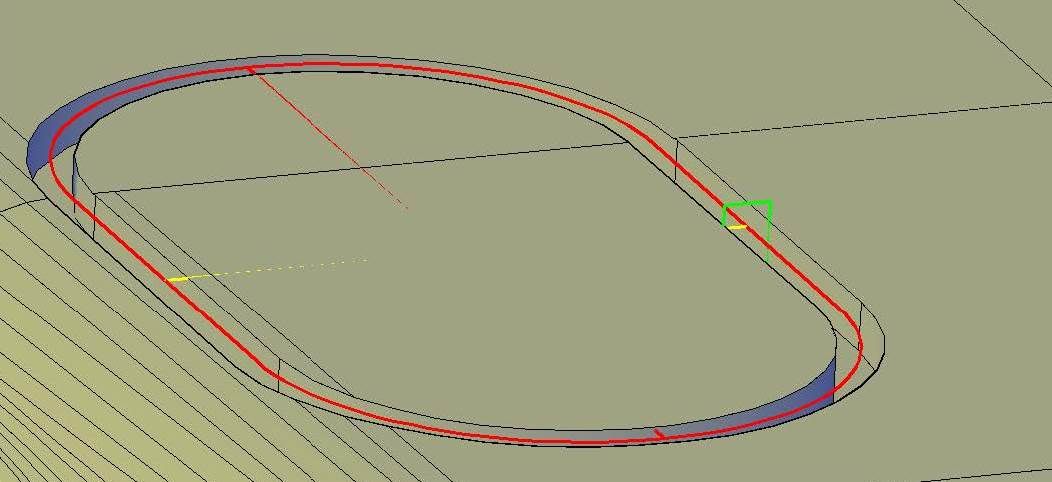
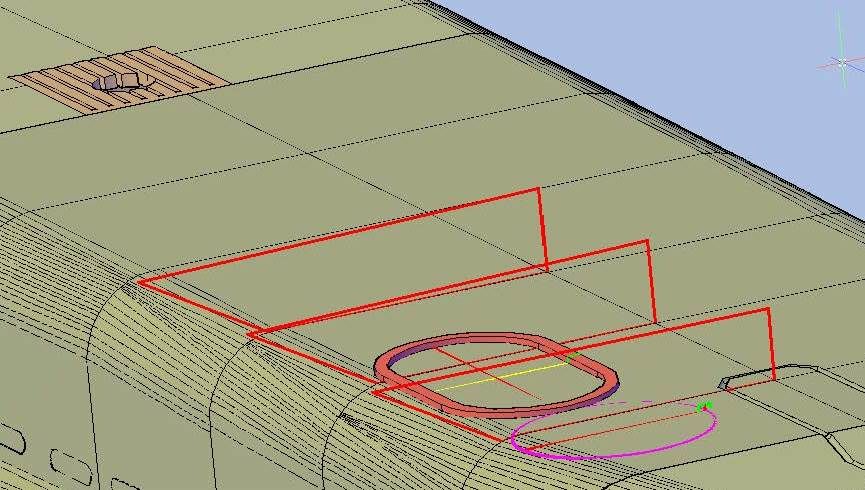
To fill it I slightly enlarged the green rectangle and extruded it around the oval.
Because the deck isn’t flat, I used three polylines with the lower parts connecting points on the deck.
I then lofted between the polylines…
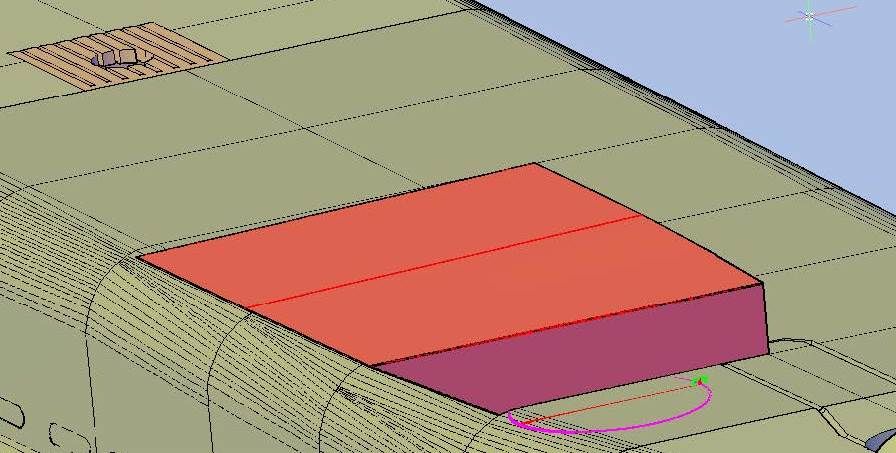
…Then subtracted it from the extruded oval, leaving the oval pretty much flush with the deck.
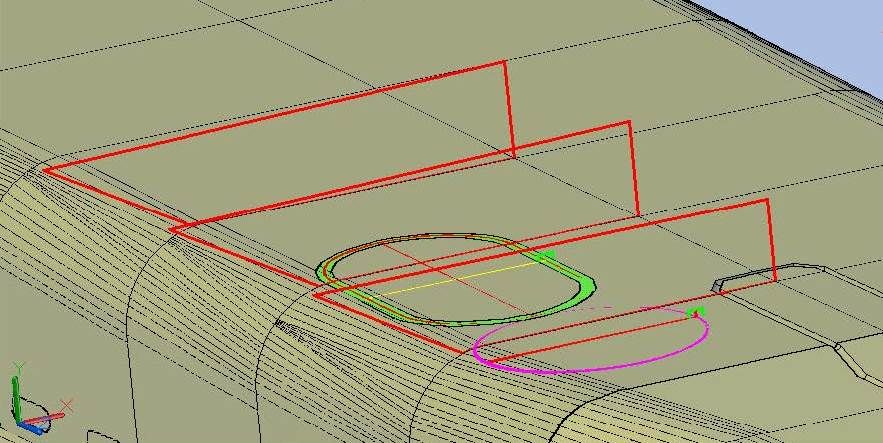
I then joined it to the deck. In the image below you can see the difficulty of cutting an object on a curved surface, as you can still see the outline of the oval buoy in Conceptual Visual style. This is because the deck surface and the surface of the extruded polylines wasn’t exactly the same, even though I traced the deck points to make the polylines.
In Realistic Visual style these lines go away and will not show up on the printed part.
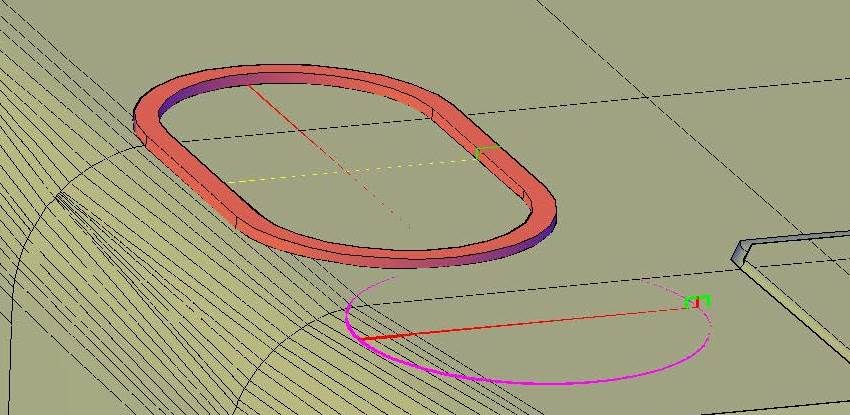
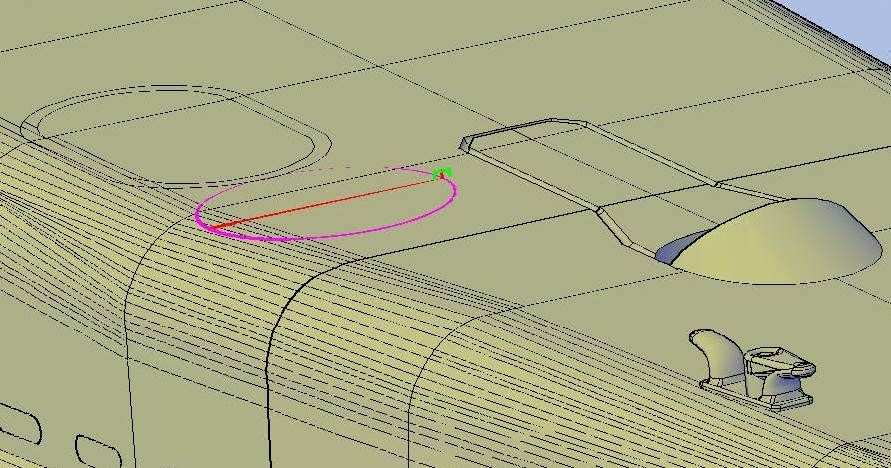
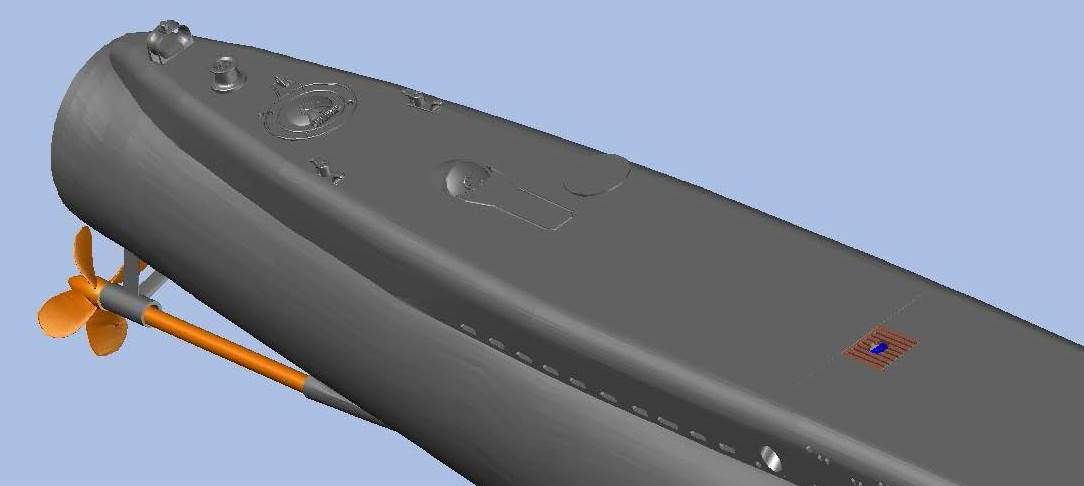
For the new (old) round buoy, since Paul says that they wouldn’t have been on the ship during the war, and that instead “a blank round metal plate would have been welded over the empty socketsâ€, I simply moved the circle up 0.010†and extrude it into the deck.

Last, I joined it to the deck.
I’m not sure that I will ever use this part, because I have come to realize that in order to model Batfish in February, 1945, I would essentially have to redo the entire bridge and masts, but never say never.
CHEERS!!!
UPDATE 91
Hi Guys!
Confirming what Tom D said earlier, I received the following response from Paul Farace to a Post I put on the Submarinemuseums.org site…
“Prior to 1952 the messenger rescue bouy was a cylinder held vertically in a well on the deck edge aft and in the superstructure forward beside the escape trunk (port on EB subs) ... The forward one would have been flush with the deck and the aft one slightly above the deck because the superstructure standoff aft is much less above the pressure hull. But these were NEVER carried on a war patrol!!! A blank round metal plate would have been welded over the empty sockets in wartime. You didn't want them blown loose by a depth charge and float to the surface to give away your position.. since they were attached to your forward and after torpedo room hatches with a steel cable to allow the McCann rescue bell to follow it down to the boat!!! There are plenty of photos to document this for model builders. The rescue bouys we all have today were installed in 1953 and originally were painted yellow. They were changed to orange in the mid 60s.â€
This inspired me to go ahead and make the part in both configurations, so I saved my “Batfish-144-Part08-Hull08†part as “Batfish-144-Part08-Hull08-OldMessengerBuoyâ€and went at it. I started with the plans tracing the (new) old round messenger buoy…

…Which I copied to the plans.

I started with the oval buoy which had to be filled in, which was more difficult than cutting it, due to the fact that the deck isn’t flat.

To fill it I slightly enlarged the green rectangle and extruded it around the oval.

Because the deck isn’t flat, I used three polylines with the lower parts connecting points on the deck.

I then lofted between the polylines…

…Then subtracted it from the extruded oval, leaving the oval pretty much flush with the deck.

I then joined it to the deck. In the image below you can see the difficulty of cutting an object on a curved surface, as you can still see the outline of the oval buoy in Conceptual Visual style. This is because the deck surface and the surface of the extruded polylines wasn’t exactly the same, even though I traced the deck points to make the polylines.

In Realistic Visual style these lines go away and will not show up on the printed part.

For the new (old) round buoy, since Paul says that they wouldn’t have been on the ship during the war, and that instead “a blank round metal plate would have been welded over the empty socketsâ€, I simply moved the circle up 0.010†and extrude it into the deck.


Last, I joined it to the deck.


I’m not sure that I will ever use this part, because I have come to realize that in order to model Batfish in February, 1945, I would essentially have to redo the entire bridge and masts, but never say never.
CHEERS!!!


 [/url]
 [/url]


Comment