My Rescue Barge

Collapse
X
 
  • Time
  • Show
Clear All
new posts
  • Ralph --- SSBN 598
    Junior Member
    • Oct 2012
    • 1417

    #106
    I have 3 small boxes in the house where new un used parts are kept.
    Went through those boxes.
    I found 3 empty motor boxes.
    This is not good.
    Okay. . . . 1 motor went int he Skipjack. After thinking about it, the other motor went in the Gato.

    How did that happen.
    Well the 3rdf motor was going to go in the B-boat that has not been built because the hull plug failed.
    Then I ended up with a Gato boat kit.
    It sat on my back porch for a couple of years because I never planned to build it.
    But then I was between builds and decided to look in the box.
    I should have never done that.
    Found my self dry fitting parts together.
    Then came the glue.
    Then my work bench was covered with Gato parts being assembled.

    While looking for the extra motor this morning and finding 2 empty boxes, I got out and opened my build files.
    Looking through photos, I quickly found a photo of the motor sitting on the Gato equipment try.
    Yep, Akula II, Skipjack and Gato. . . that is 3 motors.

    So, I am still looking for a motor on the net.
    -------------------------
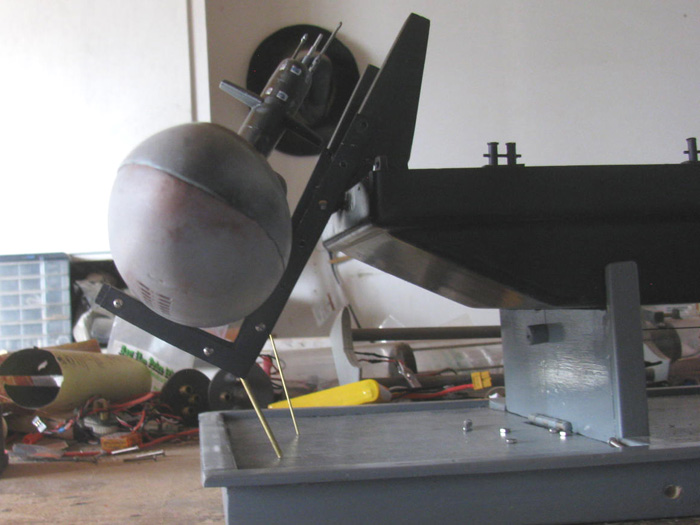
    I ordered the 180 degree high torque servo to use on the steering.
    I need the 180 degrees more than the torque but for the price, torque is good as well.
    Before ordering, I went out to the shop and tested the 20kg servo I have for the pusher bars.
    It does not have more than 80 to 90 degrees of travel using the Tx to get 140% on the servo.

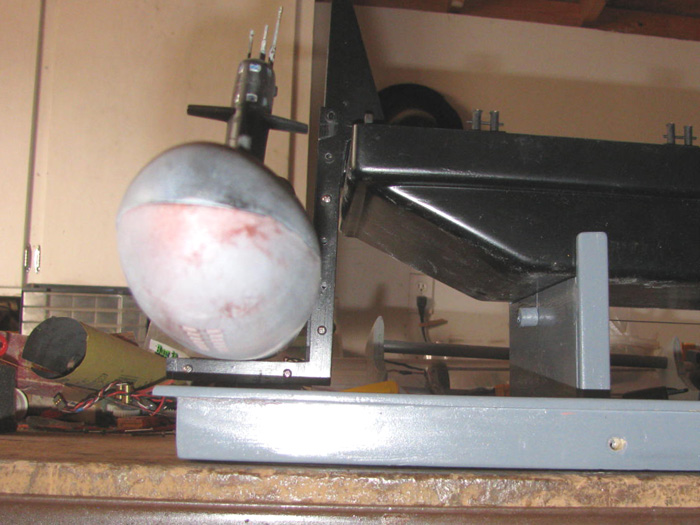
    I found a motor of the same physical size so it will fit in the pod.
    It is less than half the rpm of the motor I have been trying to get to work, which is good.
    750kv. (I would have liked to found a 300kv)
    I ordered it and will see how it preforms in this application.

    But for now, I have some waiting time.
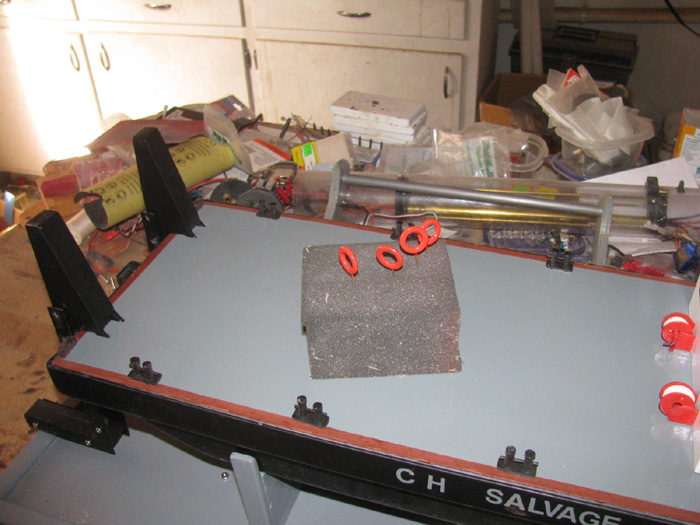
    I will finish up a few little things on the barge and maybe get back to the Gato cylinder which I put aside to do the barge.
    If I remember correctly, I only need to drill a hole shallow in the end cap to hold the safety cable.
    Then reassemble and test everything to figure out where I left off.
    I think the boat was very close to water testing again.
    Maybe I can get the Gato and the barge ready to test at the same time so I only have to fill the test tank once.
    Last edited by Ralph --- SSBN 598; 02-08-2021, 01:50 PM.

    Comment

    • Ralph --- SSBN 598
      Junior Member
      • Oct 2012
      • 1417

      #107
      And there is more

      I received the high torque servo arm. (it is made of titanium)
      I set up the Rx and 2 servos.
      Turned it all on and ran test to see where the limits where set.
      I reset the pusher bar servo to 25 degree both ways.
      Then I looked over the connection push control rod.
      I did not like it.
      It is too short and cause angles that might end up binding when a load is on the pusher bar lift arms.
      Easy enough to fix.
      Make another longer push control rod.
      Made it 3" longer.
      This appears to be much better and I have room to go maybe 12" long if needed.

      Drilled the ends for the pins and line everything up.
      Measured for the new servo base plate bolts holes.
      Drilled it.
      Counter sunk the holes.
      Applied CA glue to harden up the wood.

      Will recut the counter sunk holes tomorrow.
      Filled the old holes in and will sand then flat.
      Tomorrow I should have the pusher bar controls completely installed and test and adjust the throw of the servo arm.

      Once I recut the counter sunk holes, I can drill and counter sink the holes for the 8 deck mounting screws.
      I can also cut the flotation foam for the servo.
      I would cut for the battery but I want to wait until the barge is in the water to put the battery so the boat floats level in both axis. (fore and aft / bow to stern)
      .

      Comment

      • Ralph --- SSBN 598
        Junior Member
        • Oct 2012
        • 1417

        #108
        February 9th =================================================

        So far I have recut the pusher bar servo holes.
        The CA glue makes the wood very hard and I had to be careful the drill bit did not bit and pull through.
        Just be safe, I turned the drill bit with my fingers.
        Now I have sore fingers.
        Anyway the servo bracket with the servo is mounted to the underside of the deck.

        I removed all the pusher bar linkage.
        Reason is I am going to repaint the upper deck.
        Why, during all this messing with the under deck linkage stuff, I knocked off 2 bollards.
        I was not sure about just gluing them straight to the deck in the first place.

        I drilled a hole in to the underside of every bollard.
        I cut brass 1/16" pins and CA glued them in.
        After the deck is repainted, I will mark and drill through the deck for the pins.
        This should stop the bollards from being knocked off when tapped from the side.

        I lined up the fire extinguisher latches to the deck house pins.
        A close look showed it was not the latches of the pins, the fire extinguishers where 1/32" to long on the bottom and where touching the deck raising up the deck house.
        A couple touched with the grinding wheel and all is good.

        Cleaned the deck house for some touch up painted behind the fire extinguishers.
        Sanded the deck for repainting.
        Repainted the outside edge where the red primer outlines the deck.
        Letting it dry before taping to paint the main part of the deck.
        It is cold and sprinkling here so it may not get painted until Friday.
        Next two days I will be at the VA having scan test done.
        Nothing serious.
        Just trying to find what is causing a small issue that will not go away.

        I found an old plastic disk I turns some time ago and did not use.
        I chucked it up in the drill press and I turned t down to a new smaller diameter for the new servo coming.
        I was going to make a plastic part to hold the heavy control arm.
        Well, that is not going to work because the new disk is smaller in diameter.

        *** But while typing this, I thought of a way to make it work.
        Make a larger two layer disk that I can cut the arm in to.
        Then bond the smaller disk on top of it.
        I have room and the larger disk will help keep the control line not fall off the bottom of the pulley disk.

        This is something I can turn in a few minutes then take my time hand cutting in the servo ark profile with a drill, knife and file.
        Then I can drill a hole through it all to match up with the threaded hole in the control arm.

        I got a plan, I can do while it's cold and possible rain.

        Comment

        • Ralph --- SSBN 598
          Junior Member
          • Oct 2012
          • 1417

          #109
          ------------------
          With the idea on how to make the pulley control arm work, out to the shop I went.

          I cut and glues 4 layers of sheet plastic together.
          Clamped them in the table vise.

          While the glue cured, I decided to fit the 8 bollards on the deck.
          I needed to measure the 2 pins on the bottom of each bollard and drill the deck to match.
          I slowly worked my way around the deck fitting 1 at a time.
          This took maybe 30 minutes.
          All the bollards are fitted and will be removed when I paint the deck.
          Leaving them in will hopefully keep me from mixing them up.
          The pins are not in the same place on each bollard.

          Okay, back to the pulley parts.
          I need to drill a 1/4" hole in the center so I can turn the part in to a disk using the drill press.
          This takes about 5 minutes because I rough the shape in with the Dremel and cutting wheel.

          After making the disk the correct size for the finish part.
          I took it in to the shop and traced the outline of the servo arm on to the disk.
          I started to cut the hole for the arm with the cutting wheel then stopped.
          Measured the control arm and found that the end is a circle.

          Out to the tool shed and drilled a 9/16" hole using the 1/4" hole as a guide.
          I had the arm with me so I test fit it.
          It was very tight but a couple of hits with a round file would clean it up.

          Back to the shop.
          Cleaned the hole of burrs with an Exacto knife.
          The arm fits tight but with a little pressure it pushes right in.
          Also when I tighten up the arm end with the 2 small clamping bolts, the part should drop right in.

          With the arm end pressed in to the hole, I traced the am end on to the disk.
          With the Dremel cutoff wheel I cut the slot for the arm.

          This all took about 15 minutes.

          On the left is the original pulley that would make the 60 degree servo move the rudder 180+ degrees.
          On the right is the new pulley that is slight larger that the rudder pulley. (this gives me room to trim if needed)


          Here are the new pulley, servo arm and servo arm retaining ring.


          Arm pushed it to the retaining ring.


          New pulley assembly without the top disk to stop the cable from running off the top.
          The servo shaft is threaded.
          My local hardware store had a metric stainless bolt section.
          I should be able to find a bolt to fit and hold the pulley on the shaft.
          Though the arm clamp is suppose to do that as well.

          .

          Comment

          • Ralph --- SSBN 598
            Junior Member
            • Oct 2012
            • 1417

            #110
            February 10th =================================================

            Back from the VA.
            The 2 hours in the scan machine with good results.
            Nothing found at all. (all good)
            20 minutes talking with the neck surgeon. (all good)

            Back at home.
            A little lunch and out to the shop.

            The pusher bars servo was installed in a new location because of lengthening the control arm.
            I had 4 old holes to fill and sand.
            I also filled over the bolts through the deck so now the deck is flat with no bolts showing.
            Yes, I put CA on the holes in the wood then I put CA on the bolts to hold them from turning.

            The filler was put on yesterday so I could sand first thing when I got home.
            But a second coat was needed for 2 bolts.
            Filled the 2 spots.

            I cut 8 plastic sheet plastic squares.
            I glued the pieces in pairs.
            In to the table vise/

            I am going to see if I can make 4 life rings.
            Originally I wanted 2 but found a place for 2 more if they come out looking okay.

            Back to the deck I had set out in the sun.
            Brought it in to the shop
            Sand the 2 filled spots.
            Taped off the edges and the 8 locations for the bollards.

            Sprayed a very light coat of gray paint on the filled spots and the over sprayed primed edges.
            Waited 30 minutes and put a good coat of gray on the deck.
            I even repainted the stern block on the hull after taping the edges and chocks.

            I am going to let the paint dry over night before putting the tape.
            Just in case I need another coat of paint.

            I will work on the life rings tomorrow afternoon when I get back from town.

            For a day I expected to be gone all day, I got a lot done.

            Comment

            • Ralph --- SSBN 598
              Junior Member
              • Oct 2012
              • 1417

              #111
              =====================
              It was not as late as I thought.
              Okay, I had to go look at the paint.
              Looks good.
              Pulled the tape.
              I got a straight edge which for me is a miracle.

              Took the 4 plastic pieces of plastic I glued together out of the vise.
              Drill a center hole in each one.
              Out to the drill press to turn them in to disks.
              Brought them in to the shop a couple of times to see how they looks.
              There is no scale to this barge.
              If it looks good, that is the size the parts will be.
              Looks about 3/4" in diameter.
              While I still have a small hole in the center.
              I turned each disk and rounded the outer edge.

              Next I will have to drill the small hole larger to get rid of some material.
              Then I have to round off the inside edge. (by hand with a file or a length of sand paper I can draw back and forth)

              Now I am done for today!
              .

              Comment

              • Ralph --- SSBN 598
                Junior Member
                • Oct 2012
                • 1417

                #112
                February 11th =================================================

                In the shop for a few minutes.
                I needed to correct the bollard deck outlines.
                Decided to get rid of them because they never looked right to me.
                Besides they are hard to line up with the bollards because the bollard base plates are not all the same shape.
                So I just painted then out.

                On to the 4 life rings.
                Drilled the center hole larger.Knifed and files the edges round.
                Sanded smooth outsides.
                Mixed up some yellow and red to get a dark orange color.
                Got the first coat of paint on one side of the rings.

                Deck has dried enough to bring inside and pulled the tape.
                Set the deck on the hull to dry the rest of the way.

                I filed on the key hole slot in the steering pulley.
                The key hole was good but the servo arm has rounded corners that made the fit too tight.
                A couple of passes with the file and no more problems.

                I centered the pulley center section on to the bottom section using a drill bit.
                Applied the cement and got it in to the vise.

                The rudder post pulley. . . I needed to fit the over cut for the steering cable end.
                Not a problem.
                Find a scrap piece of plastic and shape it to fit the pulley top edge shoulder.
                Applied cement and clamped.

                Tomorrow I should be able to get another coat or two in the life rings.
                I should be able to install the 8 bollards back on the deck.

                Comment

                • Ralph --- SSBN 598
                  Junior Member
                  • Oct 2012
                  • 1417

                  #113
                  Couldn't wait.
                  I went out to the shop and put a second coat of orange on one side of the life rings.
                  It was a 5 minutes or less job.
                  The rings now look good.
                  No black showing thourgh the paint.

                  Comment

                  • Ralph --- SSBN 598
                    Junior Member
                    • Oct 2012
                    • 1417

                    #114
                    February 12th =================================================

                    I only had a short time int he shop.
                    Do as much as I can while there.

                    Finish painting the life rings.
                    They need to dry completely before I can put the rope around the rings and make the mounting brackets.
                    I might just paint the brackets on the rings.

                    Put the pusher bar linkage back on the under side of the deck.
                    I started cutting flotation foam to accept the servo and push rods.
                    This turned in to a mess.
                    Foam every where.

                    I thought about this and decided that I will cut the foam in to blocks as needed instead of trying to make it 1 big block of foam with cutouts for the linkage and servo.
                    If I cut blocks, I can fit them around the equipment.
                    That is the current plan.

                    The 8 bollards have been glued to the deck.
                    With the pins through the deck, the bollards should not fall off from a simple bump.

                    Comment

                    • Ralph --- SSBN 598
                      Junior Member
                      • Oct 2012
                      • 1417

                      #115
                      February 13th =================================================

                      Working on the life rings.
                      I used a very good white medical tape to make strips to put around the life rings to look like the canvas pieces where the hand rope attaches.
                      Sort of looks like this image.


                      Got them taped and began to clear coat them.
                      Well, I have said it many times, "I hate painting".

                      The clear coat came out of the can light gray.
                      I stopped.
                      I got the paint thinner out and a rag.
                      I cleaned of the gray.
                      I got most of the gray off and the orange seems to stay in place.

                      I tossed the clear coat "GRAY" in the trash.

                      I have a gloss clear coat I will try. . . on a test piece first.
                      I did not want the gloss but I can wire brush the shine off the gloss.

                      Letting the gloss dry, I am looking for a suitable thread to put around the rings.
                      I have a dark heavy thread for leather and a white standard thread.
                      The standard thread looks too thin.

                      I think I will stop for today.
                      The wind at 30 to 50 mph is putting too much dust in the air.
                      Even with the shop door closed I can see the dust moving around in the air.

                      Comment

                      • Ralph --- SSBN 598
                        Junior Member
                        • Oct 2012
                        • 1417

                        #116
                        Went and looked at the life rings.

                        What a mess!
                        The clear coat made the orange soft and it bleed through the white tape.
                        None of it is drying right.
                        I am going to bring the rings in the house where it is warm. (too cold outside)

                        I will let them dry for a couple of days then sand them down and start over.
                        I will clear a spot off the kitchen table so I can do it where it is warm and maybe the paint will cure.

                        I think I can save the rings at least.

                        Comment

                        • Ralph --- SSBN 598
                          Junior Member
                          • Oct 2012
                          • 1417

                          #117
                          February 14th =================================================

                          I brought the life rings in the house yesterday so they would stay warm and dry.
                          This morning the paint is dry and hard.
                          The warm house did the trick.

                          In the shop I did a little sanding to test the paint hardness all the way down to the black plastic.
                          This went well and I sanded all 4 rings.

                          I took a very small piano wire and cut it to fit the Dremel.
                          I drilled a small hole in the rings.
                          What I wanted was the wire to hold the ring so I could paint all of the rings and then stick the wire end in to a foam block to hold it.
                          I cut 4 pieces of piano wire and processed to drill in to the rings.
                          On the first 1, I pulled the wire out and put another wire in the hole.
                          This did not go well.
                          The new wire did not get tight in the hole and ring would fall off.
                          Looking at in the Dremel there was melted plastic on the end of the wire.

                          Okay, I took that wire and redrilled the hole and stopped when I got the wire in far enough without going through.
                          I unchucked the wire and it was stuck.
                          The melted plastic seems to be holding on. Quite well.
                          I did the other 3 rings.

                          Mixed the yellow and red to get the orange I want and thinned it down with a few drops of thinner.
                          Painted the ring and it covered well.
                          Stuck it on the foam block.
                          Did the other 3 rings.
                          Closed up the paint bottles and cleaned the brush.

                          In to the house with the foam block. (In my kitchen it is almost 70F.
                          Much better than the 43F in the shop.

                          I connected up the Rx, Speed controller and pusher bars servo.
                          Found center of travel.
                          Disconnected the linkage arm.
                          Now I can adjust the rotation from the 35% it is now to 100% to get to the 2 servo arm bolts to tighten them.
                          Turns out I do not have the right Allen wrench.
                          I have bigger and smaller.
                          Guess when the other servo gets here, I will take the arm and bolts to the hardware store to buy a couple the right size.

                          Might as well adjust the servo for travel.
                          35% up and 40% down seems to just touch the deck with out binding.
                          This is where I will start once the deck is bolted down. (after the new motor and servo are installed)

                          I am at a point I am just making work.
                          Next, I will measure and drill for the deck mounting bolts.
                          The layout of equipment is complete so I know where to put wooded mounting blocks.
                          But I thing the wooden frame I put in way back at the beginning may be in the correct position for this.

                          So I am done for today but I have to go outside and see what wind damage the house took yesterday.
                          Going to the shop I can see aluminum siding over 2 windows is either bent or missing.
                          There are roof shingles in the back yard, most likely from the out buildings.
                          The house is sheet aluminum so it should be okay.

                          Comment

                          • Ralph --- SSBN 598
                            Junior Member
                            • Oct 2012
                            • 1417

                            #118
                            February 15th =================================================

                            Earlier today, I was headed out to the shop.
                            I could hear the wind beating on the house and roof.
                            I opened the back door.
                            Well, that is not quite correct.
                            I started to open the back door when the door pushed me back in to the house.

                            Now I have lived in the desert for a long time.
                            I know what to expect and have survived the past.

                            I opened the front door which opens in, and looked out side to see what was going on.
                            Visibility was not good.
                            I can see the house accross the road but that is only 500' away.
                            I looked to the north which usually I can see about 40 miles.
                            Today, 1/4 to 1/2 miles it all I get.

                            So, there will be no painting or gluing today.
                            Well I could make the deck non skid by just spraying on a clear coat and letting the dust in the air take care of it.

                            So today I will try to stay warm.

                            Comment

                            • Ralph --- SSBN 598
                              Junior Member
                              • Oct 2012
                              • 1417

                              #119
                              February 16th =================================================

                              It is still very windy.
                              But I have to do somehting or the barge build stops.

                              Took the life rings out to the shop to put the ropes around the rings.
                              Working on 2 at a time, things went well for about 10 minutes.
                              Then the ropes did not look right.
                              They actually look like crap.

                              Okay, I came in the house and looked at more photos of barges and tugs.
                              I was surprised at how many life rings did not have the hand rope and only the toss rope.

                              If I had seem this easier, I would be done now.

                              Pulled the ropes of and filed and sanded the glue off.
                              This caused more painting.
                              Got that done.
                              I got real good at mixing yellow and red to get the orange.


                              I moved on to the push bars to make sure the mounting bolt holes lined up at 3" to 7" depth.
                              All went well until I got to the last hole and got it drill including 1/8" in to my finger which I was backing the second aluminum plate.
                              Wasn't a problem when there was longer plate.
                              Did not think it through on the last hole.
                              Oh well. I heal quickly.

                              I though I would show what I have been trying to accomplish with the push bars.
                              In the down position I should be able to move up against a boat.
                              By knowing the boat hull diameter I can set the push bars depth to go under the hull at decks awash.

                              Here is my George Washington sitting on the push bras. (3" diameter hull)


                              After pushing up against the hull, I can move the push bars to the tilt position.
                              Here the George Washington is in sitting on the push bars.
                              The brass brass holding the push bars up are there because the servo is not connected at this time.
                              It is a very high torque servo and I can not move it with out power. (20kg servo)
                              The push bars should lift the hull just a little to make it heavy on the push bars low.
                              The channel this is on is a knob so I can lift just what I need and not too much.
                              I hope this keeps the hull from going down and rolling under the barge when pushing.

                              .

                              Comment

                              • Ralph --- SSBN 598
                                Junior Member
                                • Oct 2012
                                • 1417

                                #120
                                February 17th =================================================

                                It is still very windy.
                                But I turned on the heat in the shop.
                                I figured I would be out there about20 minutes.

                                That did not happen.
                                I was trying to tape the life rings to paint the white stripes.
                                I could not get the tape to run where I wanted it.
                                The curve of the rings kept pulling the tape off line.

                                I tried painting on stripe I did get taped.
                                It failed and I cleaned the white off.

                                Off the options I thought of, hand paint with a brush seems the least stressful.

                                Found my smallest thinnest brush.
                                Put a couple more drops of white on my mixing board. (plastic)
                                Added a couple of drops of thinner.

                                Made a couple test passes on black plastic so I could see what was happening.
                                Turns out there was not going to be any brushing at all.
                                Just line the side of the brush where I wanted paint and just touch the part.
                                It is not perfect by any means but I am not going to work on this painting any more.
                                I did all 4 rings and they are what they are.

                                I do not like painting and working with small parts is not a problem but painting.
                                These rings are less than 3/4" at their widest.


                                Set these aside and I decided to drill holes through the deck for the brass screws that will hold the deck on.
                                I needed 2 near the front to hold the deck down when the pusher bars push and lift the sub or boat.
                                2 at the back and then instead of 2 down the sides, I put 1 center of the other 2.

                                I counter sunk the holes for the screw heads and then I applied thin CA to the bare wood to give it strength.
                                I will re-cut the counter sink holes after the CA cures to get the right depth.

                                Comment

                                Working...
                                X