My Rescue Barge

Collapse
X
 
  • Time
  • Show
Clear All
new posts
  • Ralph --- SSBN 598
    Junior Member
    • Oct 2012
    • 1417

    #91
    January 30th =================================================

    A bit chilly outside but warm enough to get some sanding done.
    No wind makes even better.
    Weather says 41F but looking at my thermometer on the shop wall says it is about 54F.

    Out to the steel work bench I do.
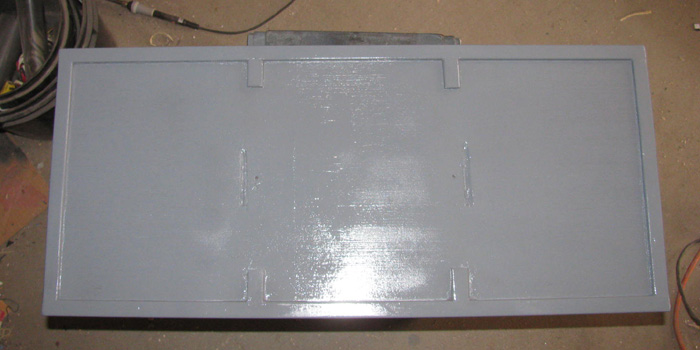
    Sanded the transportation box and the lid.
    I see a few more spots to glaze.
    Not much.
    Just seams that need more filling after the glaze shrank when it cured.

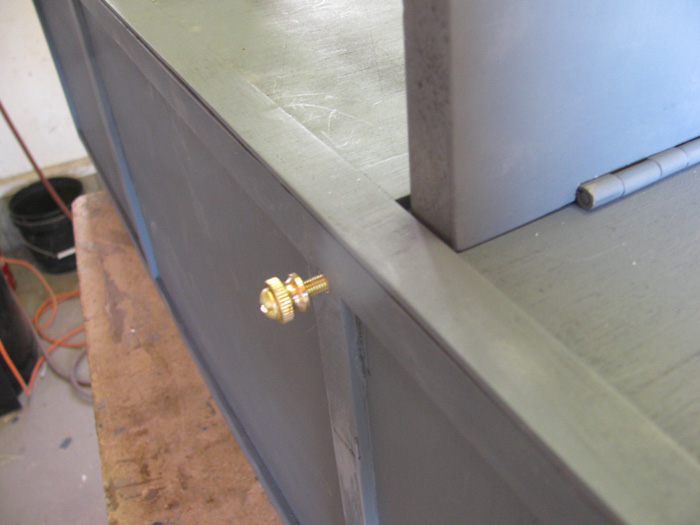
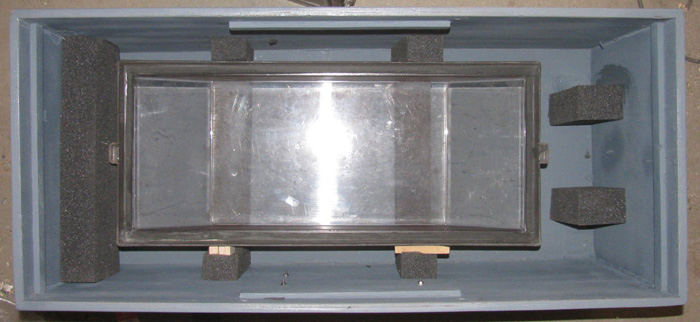
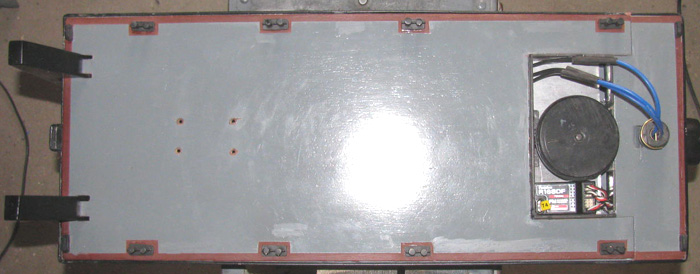
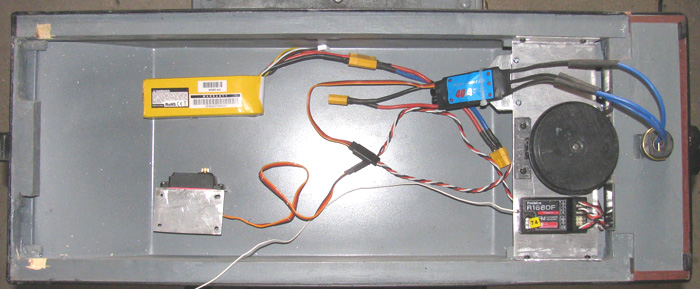
    Back in the shop I installed the 4 trim boards that the lid frame sits on to take any weight that might come it's way.
    The lid trim sits on the box top edge but is not very strong should there be weight on the lids.
    These 4 trim boards are down inside the box and the lid frame will sit on them taking the load off the lid trim boards.

    Glazed the few spots.
    I will probably hand sand them tomorrow with a wooded block.
    Maybe 5 minutes to do it all.

    If the weather is like today, I should be able to get the tack coat of paint on the box and lid.
    Might even get the first full coat on the box.

    After lunch, I think I will go out to the shop and paint the Tx case and mount the small badge.
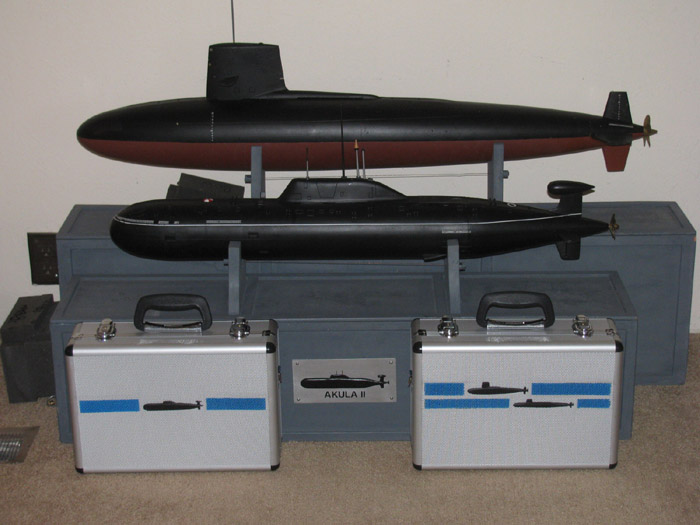
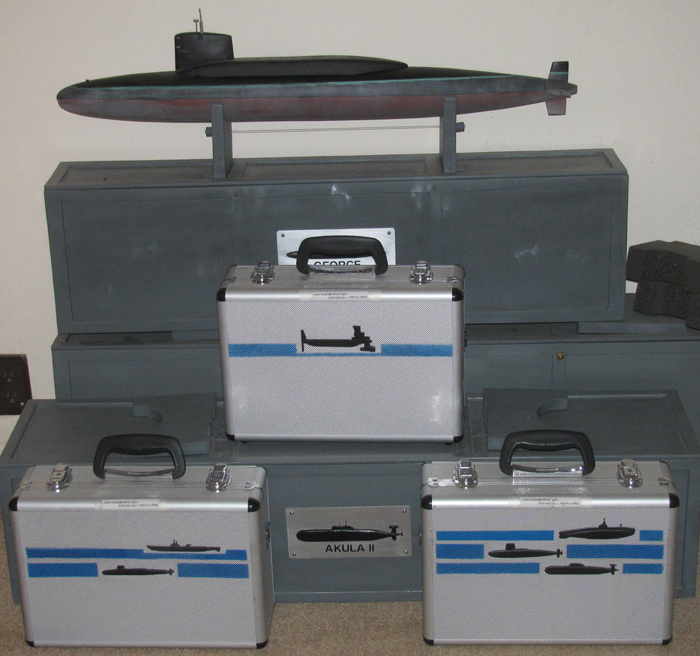
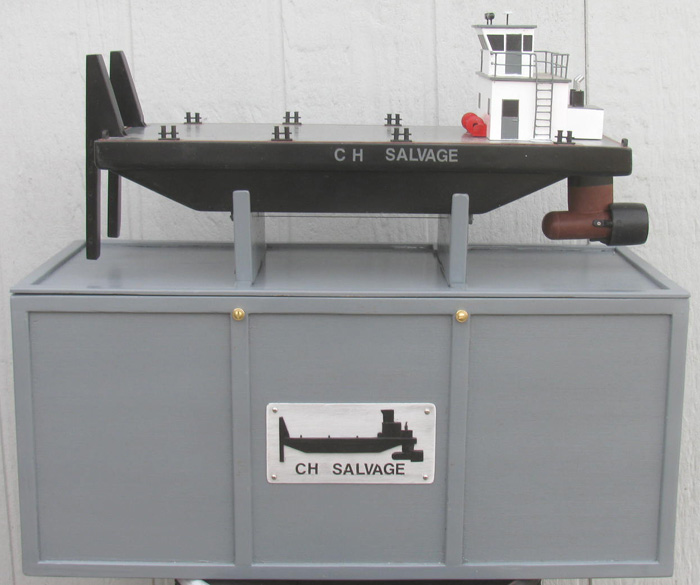
    Here are 2 Tx cases with their badges.
    Old photo. There are now 3 badges on the left case and 2 on the right case.
    (left case has B-boat, Skipjack and Akula II)
    (Right case has Gato and George Washington)

    The Rescue Barge has it's own Tx so there will be only 1 badge on the case at this point.
    (this is because if I need to rescue a boat I can not have the Rescue Barge on the same Tx)

    ----------------------------
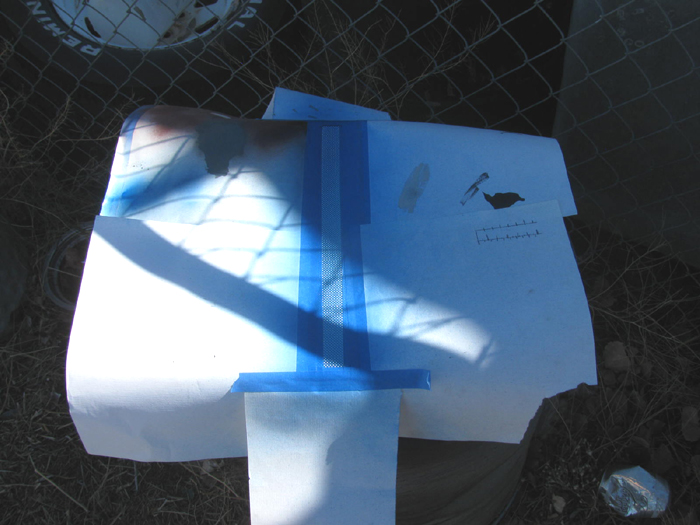
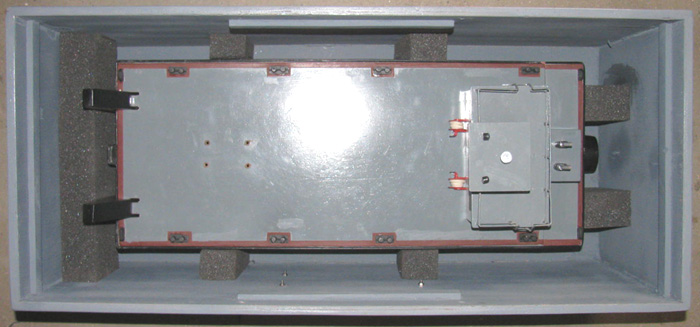
    Tx case measured and taped off.
    Tack coat applied.
    The front has been done.
    3 coats of paint on top of that.

    This is the back with it's tack coat.
    I did the 3 coats of paint but did not take photo.

    I will pull the tape tomorrow or tonight.
    I brought the case and the badge in the house where it is warmer to dry.

    .
    .
    Last edited by Ralph --- SSBN 598; 01-30-2021, 05:51 PM.

    Comment

    • Ralph --- SSBN 598
      Junior Member
      • Oct 2012
      • 1417

      #92
      Having mounted the barge badge on the Tx case, I thought I would update the case photo.

      .

      Comment

      • Ralph --- SSBN 598
        Junior Member
        • Oct 2012
        • 1417

        #93
        January 31st =================================================

        Nice day so far.
        No wind, sun shining and 50F at 10:20am.

        The sanding is done.
        No more glaze needed.
        Start up the sir compressor and blow off the work bench, box, lid and stand parts.

        The time has finally come.
        Painting.

        Took the paint cans out the work bench and set in the sun to warm up.
        Picked up the first can and shook.
        Opened up to find that the can was used and damaged.
        The top was crushed in and it would not spray.

        No need to bother with it.
        Get second can and shake.
        Open it up and it looks okay.
        Test spray and it works.

        I painted the bottom, both sides and both ends of the box.
        Only one side not painted and it is the down side.

        Moved on to the lid.
        Painted the under side and the frame.

        Painted the sides and one side of the stand pieces.

        This is a very light coat, hoping to seal the wood so the paint does not just soak in to the wood and not cover.

        Going to let this dry for an hour or so before turning the parts to paint the unpainted surfaces.

        I will paint the inside later.
        Basically I use cans that are almost empty to use up the left over paint.
        Then a final coat of the finish color after it all dries completely.
        Besides, I have more work to do on the inside.
        Figure out where to put the foam support blocks and end stops.

        It is really nice to see paint on the transportation box.

        Comment

        • Ralph --- SSBN 598
          Junior Member
          • Oct 2012
          • 1417

          #94
          More than an hour has passed.

          I started by putting the tack coat on the down side of the box.
          Moved on to second coat or first solid coat on the bottom of the lid.
          Painted the rest of the box and the bottom last.

          Turned the stand parts over and painted the other side.

          As of now, there is a tack coat and the first solid coat on all box outside panels and both sides of the lid.
          The stands are painted on both sides. 2 coats.

          Had my camera in my coat pocket so here ya go.

          Weather has turned cloudy so all the parts have been moved back in to the shop for the night.

          .

          Comment

          • Ralph --- SSBN 598
            Junior Member
            • Oct 2012
            • 1417

            #95
            February 1st =================================================

            I was in the shop early this morning.
            Not to work on boat or box but other.
            Looked at the transportation box and lid.
            It looks good so far except I missed 4 small trim boards.
            They go on top of the lid next to the stand.
            This is the first box I have built that has the stand exactly inline with the trim boards.

            There needs to be a short trim piece on each side of the stand.
            So I looked in the scrap and found enough trim board to make 4 pieces.
            Used the Dremel drum sander to remove the paint where these boards go.
            Cut the trim boards and glued them in place.
            Set weights on top of each to hold them down during curing.

            I also looked at the box color compared to the other boxes.
            Turns out, I have used the wrong color. (looks wrong all glossy)
            I used a gloss medium light gray and the other boxes are light flat gray to match the color of primer gray.
            While it is still early and cold, I am going to town for some brass bolts, thumb nuts and blind nuts for the 4 bolts that hold the lid on.
            Will look for the flat gray paint.

            I need something else from the hardware store but for the moment, I can not think what it is.
            Must not be important.

            Back from town with bolts and stuff.
            I have made up the 4 bolts with thumb nuts and installed the 4 blind nuts in the lid.
            Here is a photo of one of the 4 lid bolts. (from Skipjack build)
            Last edited by Ralph --- SSBN 598; 02-01-2021, 07:57 PM.

            Comment

            • Ralph --- SSBN 598
              Junior Member
              • Oct 2012
              • 1417

              #96
              February 2nd =================================================

              Learned something this morning.
              I looked up the Krylon numbers for their Flat Gray paint.
              Looked up a store that said they had 21 cans.
              I drove the 27 miles to that store only to find out that the Flat Gray paint does not exist.

              All the numbers I copied down from the Krylon site matched some cans on the shelf.
              But the cans are not labeled Flat Gray.
              The cans are labeled PRIMER.
              I was not happy.
              But I did take the time to read the complete label on the back of the cans.

              A surprise presented itself.

              Yes, this is Gray Primer.
              But it is Gray Primer/Paint.
              It is not clear on the web site or the front of the cans.

              But on the back it says the primer will seal the wooden projects and cure to a hard finish.
              Looking at other cans that were paint, they said the same thing.

              So, I got 2 cans to test on the inside of the box.
              My plan was to paint the inside and then match it to the other boxes I have already painted in the past.

              Originally they were painted with just primer so if they got scratched or damaged it would be easy to repair and repaint.

              But then came along the Flat Gray paint. (that's what it says on the old cans I have)
              Turned out Krylon changed to a paint with primer mixed in for a one shot painting system.
              The primer may very well be the same Flat Gray paint I used in the past.

              Anyway, I have painted the inside of the box.
              I have gotten 2 good coats on all the panels.
              Tomorrow I will compare this box with the others.

              I have options.
              Finding this flat gray has not been easy.
              How every the Krylon Smoke Gray is every where.
              This is what I used on the Barge deck.
              It is glossy.

              The option is, as the other boxes need refinishing, I use the Smoke Gray paint and live with the glossy look.

              Another thing to consider is the Smoke Gray covers much better than the primer gray.
              The primer gray tend to streak on the overlap passes.
              The Smoke Gray stayed wet long enough for the paint to flow out and level itself.
              I do not see over lay passes.
              --------------------------
              Now for good news.
              Tomorrow, I get back to the barge steering system.
              Means I get to install the pod assembly on the stern and wire up the new speed controller for testing.
              And I can solder up the pusher bar linkage.

              Truth is there is not much to finish on the barge if the speed controller works as needed.
              No pause when going from forward to reverse and back.

              I have 3 of those speed controllers.
              I was going to give them away.
              But I think they may end up in the trash so no one else has to deal with this strange pause between directions.
              If it was small pause no big deal but it is 3 to 5 seconds.
              When it was in my Skipjack I tried to learn how to deal with it. (I hated it)

              After several runs I pulled it out and tossed it in the parts box.

              Comment

              • Ralph --- SSBN 598
                Junior Member
                • Oct 2012
                • 1417

                #97
                February 3rd =================================================

                Did more painting on the lid.
                The 4 trim boards by the stand.


                I cut 4 aluminum 90 degree angles for the pusher bars.

                Drilled the holes that will allow me to adjust the depth of the bottom horizontal leg of the pusher bars.
                I can go from 3" below the water surface to 7".
                I should be able to recover a 6.5" diameter submarine that is on the surface without issues.
                Painted 4 angles pieces, the lower wooden parts and repainted the main pusher bars.

                I will get another finish coat on a little later today.

                Later in the day.


                The stainless bolts I planned to use are short.
                Next time in town I will get longer bolts.

                Tomorrow, I will be in the shop mid morning.
                My plan is to assemble the pusher bars and solder the control arms to length.
                This should let me locate where the servo will be mounted.
                I will drill through the deck and counter sink the holes for the flat head bolts.
                Then I will CA the holes in the wood to strengthen them.

                Note: The primer/paint I used on the inside of the box appears to be the same color I used on all the other boxes.
                When I try to scratch it, it does not act like primer at all.
                It acts like paint.
                It is hard to the tool and not soft like primer.

                While getting bolts, I will get 2 cans of this primer/paint and make it as box paint for future use.

                I ordered gray foam to make stands in the box to protect the barge.
                Like I do my submarines.
                It has been here a couple of weeks.
                Once I get the deck mounted on the barge, I can measure and cut the foam to fit in the box and the barge hull shape.

                Rescue Barge sitting on finished transportation box.

                .
                Last edited by Ralph --- SSBN 598; 02-03-2021, 08:19 PM.

                Comment

                • Ralph --- SSBN 598
                  Junior Member
                  • Oct 2012
                  • 1417

                  #98
                  February 4th =================================================

                  Started by repairing a mirror on the truck.
                  Took it apart and cut the spring shorter.
                  The threaded piece in the mirror housing was stripped.
                  To get the bolt down far enough to reach the existing threads I needed to get the bolt to drop 3/16" deeper in to the part.
                  Got that done.

                  The pusher bar 90 degre angles needed to be trimmed to length on the bottom leg.
                  Cut about 1/4" off so the aluminum would not stick out past the wood piece.
                  Sanded and painted all the parts again.

                  Got the push bar linkage parts out and assembled them on the deck to make sure they went where they needed to go.
                  Time to prepare and solder wheel collars to the brass rectangle tube arms.
                  I used a stainless rod to line up the parts and hold them straight.
                  Soldering done.

                  I drilled the servo aluminum bracket.
                  Then I drilled the main deck.
                  Reassembled the parts under the deck.

                  Of course there was a problem.
                  I can not find the high torque servo control arm. (an aluminum thing with 2 Allen bolts to clamp it on the shaft)
                  I looked and looked.

                  This is a major task because I currently have parts from the George Washington, Gato, Rescue Barge and the Alma on the work bench.
                  Work bench size is 30" by 60" in the center of the shop.

                  After looking off and on for about 2 hours, the only conclusion I can come up with is . . . . . CLEAN the WORK BENCH.
                  Sort all the parts in to trays as I go for the appropriate project.
                  Also, I can toss out bits of scrape plastic, brass tubing and rod.
                  Might as well toss the old sand paper pieces that are worn out of torn in to small pieces.
                  Then I should sort all the tools on the bench.
                  I really have places for them.

                  The holes drilled in the wooden deck for the counter sunk bolts have been treated with thin CA to harden up the wood.
                  I plan to also glue the aluminum bracket to the under side of the deck.
                  Just silicone glue so if I have to remove it, I can.

                  While having the deck off, I went ahead and installed the motor pod pulley and pinned it.
                  Everything is ready to install the new speed controller and test it.

                  I will keep looking for the high torques servo arm. (might have to sweep up the floor as well)

                  Comment

                  • Ralph --- SSBN 598
                    Junior Member
                    • Oct 2012
                    • 1417

                    #99
                    February 5th =================================================

                    In the shop, early.

                    Took a small plastic tray with me.
                    I started putting all the parts I know go on the Gato and ALMA in the tray.
                    Parts for the Rescue Barge are on the box lid.

                    Then I got a second tray to put parts that I was not sure of where they go and usable material in.
                    All the while checking for the missing servo control arm.
                    Well I have a clean work bench but no control arm.
                    It most likely is on the floor.
                    I am not ready to take on the floor.

                    I brought the servo in the house so I could read the labels on it.
                    Looked up the servo online where I bought it.
                    Then I did a search because the original seller did not have parts.
                    Found a seller that for less than $5 I get 2 new control arms for this servo.
                    And the seller is located about 60 miles from me so mail should take maybe 3 days.

                    If I find the original control arm, I will have 2 spares.


                    Moved on to cutting the gray foam that I will put in the transportation box to protect the barge from sliding around or moving up or down.
                    As I measure and cut, I glue them in to the transportation box with silicone glue.
                    I have the bottom supporting blocks in.
                    I have the front piece in that the pusher bars push against.
                    I have the stern blocks that will keep the pod nozzle from hitting the box.

                    Now a note: The box badges do several things.
                    One they identify what boat is in the box.
                    The direction of the badge tells me which way the front and stern of the boat is facing.
                    This makes it easier to place on the park table and have the boat facing the way I usually work on it.
                    The transportation boxes are built so the front of the boat faces towards the front of the car when traveling.
                    More foam thickness there for impact from braking of crash heaven forbid.
                    The stern is protected as well but the foam is 1/4" thinner. (usually)

                    This afternoon I plan to make the foam blocks that go down the sides of the hull to keep the boat centered in the box.
                    Also there will be 2 blocks that sit on the deck that will push down on the deck when the lid is on.
                    I try to get about 1/4" compression on the foam.
                    Because of the distance from the lid to the deck is several inches, I might build a wood frame to hold the foam block down closer to the deck.
                    Will not know until I gt to that point.

                    As far as I know, none of my subs have ever moved while in the box.
                    The foam keeps every thing snug and I think I could actually turn the boxed upside down and the boats would stay in place.

                    Back out to the shop.Measuring and cutting foam blocks to hold the hull from moving sideways.
                    Finished cutting and test fitting 4 blocks.

                    Applied silicone glue and placed in the box.
                    I have 2 extra barge hulls so I used one for fitting and to put pressure on the foam blocks while the silicone cures.
                    I also added 2 small wooden blocks to add more pressure on the foam.

                    Box with hull and foam blocks.
                    There is space on the right because this hull has no pusher bars on the left to take up the space.The blocks of foam on the right are spaced to allow the pod nozzle to sit between them.

                    .
                    Last edited by Ralph --- SSBN 598; 02-05-2021, 06:07 PM.

                    Comment

                    • Ralph --- SSBN 598
                      Junior Member
                      • Oct 2012
                      • 1417

                      #100
                      February 6th =================================================

                      Weather is nice this morning.
                      In the shop I went.

                      Starting with photo of Rescue Barge in the transportation box.


                      I have been soldering.
                      Power plug to the new speed controller.
                      Speed controller to the motor leads.

                      Make a bracket to hold the speed controller under the deck.
                      Reason is the speed controller is flat but it is longer than the space under the deck house.
                      Find a couple of servo extension wires.

                      Plug everything in and see what works.
                      Rudder works and the correct directions.
                      Pusher Bars tilt servo works and in the correct directions.
                      Speed controller to motor works but is not in the correct directions.
                      I could reverse the system at the Tx but I will resolder 2 wires and reverse the motor at the speed controller.
                      Done.
                      Speed controller works in correct directions.

                      Now I have an issue to over come.
                      The motor is way too fast.
                      The barge sitting on it's stand, the motor blew papers off the end of work bench.
                      I tried to reset the Tx to 50% but I did not see or hear a difference.

                      Less than 50% I get several new sounds from the speed controller.
                      I need to do some research and find instructions for this speed controller for setup.

                      This speed controller does not have a pause at neutral before changing direction.
                      In fact it has a very sensitive neutral position.
                      If it is not right on the correct notch the motor runs.
                      There is no little past neutral at all.

                      Photo with deck in place.


                      This photo is with the deck removed.
                      It is hard to believe after working on submarines for ever, that there is so much empty room under the deck.
                      This all the equipment that goes in the hull.
                      The pusher bars linkage is mounted to the under side of the deck, including the servo in the lower left of this photo.


                      The hull will be filled with white foam.
                      I have made the piece and it fits tight.
                      I only need to cut out areas for the battery and servo.
                      The bow corners (left side of photo) are already cut out for the pusher bar linkage.


                      Next, I plan to work on the steering cable.
                      Then I need to make something to hold the deck house on so it won't fall off on it's own that works easily without tools.
                      Got an idea to try.
                      I am going to make 2 fire extinguishers that go on the deck house sides and I can turn to release the latches.

                      Going to see what I can get done.
                      I have the rest of the day to work in the shop.

                      Comment

                      • salmon
                        Treasurer
                        • Jul 2011
                        • 2340

                        #101
                        Ralph,
                        I enjoy your work. Thank you for posting this.
                        Hopefully soon we can run again!
                        Peace,
                        Tom
                        If you can cut, drill, saw, hit things and swear a lot, you're well on the way to building a working model sub.

                        Comment

                        • Ralph --- SSBN 598
                          Junior Member
                          • Oct 2012
                          • 1417

                          #102
                          Thank you , Tom.
                          ----------------------------
                          I think I have an issue with the motor.
                          I have 3 of these motors and I think they were original going in the Skipjack.
                          If they are, I had a real problem with cogging at low rpm.

                          If this is the case, I will be looking for a low rpm bidirectional brushless motor to fit int he pod.

                          I will have to water test it before I know what I will do.

                          I know if I reduce the voltage to the speed controller the rpm will drop.
                          Learned while looking that the numbers on the motors says something about rpm.
                          The KV number multiplied by the voltage is suppose to give maximum rpm.
                          So instead of looking for something like 1000KV, I should be looking for something like a 300KV number or even less.

                          The cogging issues is something I under stand but don't know how to change it or look for in a motor.

                          I think I can test the voltage by using a smaller voltage battery.
                          I may have a couple of those laying around.
                          What I read said if I reduce the voltage by half, the rpm will drop by half. +-
                          As long as I keep the voltage up to run the Rx I should be fine.

                          Looking for brushless motors for boats is limited.
                          Not many to choose from unless I was something to go fast.
                          Last resort is to use a flattened propeller to reduce push at high rpm.
                          ======================
                          Anyone with brushless motor knowledge that has suggestions, post them here.
                          I will try almost anything.
                          I have to be careful now days because in trying new things, I have smoked a few ESC and 1 motor.
                          That was a few years ago and I hope it stays in my past.

                          Comment

                          • Ralph --- SSBN 598
                            Junior Member
                            • Oct 2012
                            • 1417

                            #103
                            Continuation of February 6th

                            I tried using the Tx computer to reduce the speed of the motor.
                            Got it down to 60% but another issue came up.
                            The motor gets hot running this slow.

                            So I think I will look for a slow rpm motor instead of trying to get this one to run at half speed.

                            Moved on to making latches to keep the deck house on.

                            Making 2 fire extinguishers was not hard at all.
                            Soldered tubing inside one another until I got the outside and inside where I wanted them.

                            The last piece on the inside is 1/16" rod that I bent and flattened to make the handles.
                            The long rods will go through the deck house walls and turn a latch rod.


                            Placed them in several places to decide where I want them.
                            The sides of the deck house is where I wanted them and after trying several places, they fit where I wanted them because the handles go under the ladder rails.
                            Here the fire extinguisher is in the locked position.


                            Here the fire extinguisher is in the unlocked position.


                            I will make the plastic locking blocks tomorrow or Monday.
                            .
                            Last edited by Ralph --- SSBN 598; 02-06-2021, 11:27 PM.

                            Comment

                            • Ralph --- SSBN 598
                              Junior Member
                              • Oct 2012
                              • 1417

                              #104
                              February 7th =================================================

                              Fire extinguisher are now painted.
                              The plastic latch lugs installed.
                              This was not a big project.
                              The deck house sits on the deck by it's own weight.
                              The latches are to keep the deck house from coming up and off the deck.
                              There did not need to be any pressure on the lugs, just something to keep the house from rising up and off the 3/8" deck house index rail.

                              I flattened some brass tubing and soldered to the 1/16" wheel collar.
                              Drilled 1/16" through the wheel collar and through the flattened tubing.
                              When soldering, I made sure I would be able to get to the set screw.
                              With the latch up like the far side, the Allen screw points down and easy to get to.

                              The photo.
                              The far latch is in the release position.
                              The fire Extinguisher is almost horizontal.
                              The close latch is in the hold position and the fire extinguisher is vertical.

                              In the opening on the deck, I put a 1/16" pin on each side to engage the slot in the fire extinguisher latch arm.
                              I plan to put a small rubber washer between the wheel collar and the deck house wall to provide friction so the latch does not move on it's own.
                              Now to disassemble and sand and repaint the red. (something about the red. it does not dry over night. it is still tacky)


                              I have been thinking about the pod motor.
                              I can get it to run slower but at a certain point it starts cogging.
                              I remember this is why I took it out of the Skipjack.

                              The fix is to remove the motor and look for something else.
                              I have a couple of smaller motors I used for water pumps.
                              Those also were in the Skipjack for a few years.
                              The speed was easy to control and I could run the pump at very slow rpm for trimming.
                              Until I put the piston it it. (love the pistons)

                              Anyway, I think I will put the smaller motor in the pod and see how it works.
                              The barge does not need to go fast.
                              I just want forward and reverse control for maneuvering to a disabled boat.
                              ----------------------

                              This afternoon, I disassembled the motor pod.
                              I then disassembled the old water pump system from the Skipjack.
                              Using jumper wires, I connected the pump motor up tot he barge Rx and battery.

                              It runs both forward and reverse with no problems.
                              I reduced the Tx to 25% on the throttle.
                              The motor does run at half speed with this setting.

                              The problem is this little motor runs so very fast.
                              I can throtle down and the motor will slow own but I can not get it down far enough.
                              Looked over the motor and found the kv number.
                              It is far too high at 1850kv.

                              I want something around 300kv.

                              Another issues is this small motor get to a point when slowing down, it just tops like it has a brake.
                              That is not a problem but interesting.

                              So, I think I need to research brushless 300kv motors som more.

                              I did a little more work on the deck house latches.
                              After 24 hours the red paint is still tacky and smears.
                              I was going to repaint them but I decided to take the paint off.
                              A little paint thinner and it all came off.
                              I think I am going to wire brush finish them and leave them brass colored.
                              I can always paint them later when I have a better red paint.
                              .
                              Last edited by Ralph --- SSBN 598; 02-07-2021, 07:44 PM.

                              Comment

                              • Ralph --- SSBN 598
                                Junior Member
                                • Oct 2012
                                • 1417

                                #105
                                February 8th =================================================

                                I am on there looking at motors.
                                Problem is the ones that match the motors in my Skipjack and Akula II are out of stock.
                                They have been out of stock for months.

                                Then a thought came to me.
                                I think I have a spare motor for the two boats sitting somewhere.
                                I planned to use it in the B-boat when I got it built.
                                But there has been no progress on the B-boat in a long time.
                                The wooden hull plug set long enough that it cracked beyond repair and will have to be remade.
                                Think, "What are the chances I will get back to it?" Not very good.

                                So, I think I will look through the parts boxes and see if I can find that motor.
                                If I do, I will install it in the Rescue Barge motor pod.
                                Every thing in the barge is compatible with that motor.
                                If I find that motor it is a 15 to 20 minute install.

                                And I got notice that the 2 new control arms for the high torque servo are at the post office ready for pickup.
                                3 days it took for delivery.
                                I will be in town later this morning.

                                The steering is still an issue.
                                The servo I am using does not have enough torque because I am trying to make this 60 degree servo move 180 degree rudder post.

                                I looked up the specs on the high torque servo I have.
                                It is rated at 20kg.
                                Just about enough to fold my barge in half.
                                But is is only 60 degrees.

                                BUT right next to this servo on the sellers web site is a 25kg servo that is. . . . a 180 degree servo.
                                I have a lot of time in the current servo trying to make it work.
                                $15 for this high torque 180 degree servo is not too much to pay.

                                I will be ordering after finding out it would be here in 2 to 3 weeks.
                                I am not in a hurry.
                                Can't go any where any way.

                                So the search of parts boxes will begin. . . soon.
                                ---------------------
                                Another project that is not critical at all.

                                I may make some detail parts.
                                Say, three 55 gallon oil drums.
                                Some coiled rope to put by two or three bollards.
                                Maybe a stack of lumber like rail road ties for blocking.
                                Some life rings for tossing to man overboard to mount around the barge.

                                These parts can be made any time after the Rescue Barge is operational.

                                Comment

                                Working...
                                X