March 30th ================================================
Got the white paint yesterday.
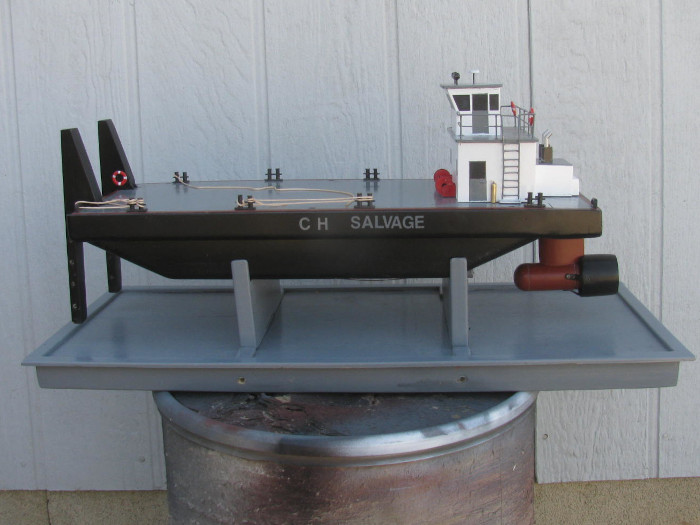
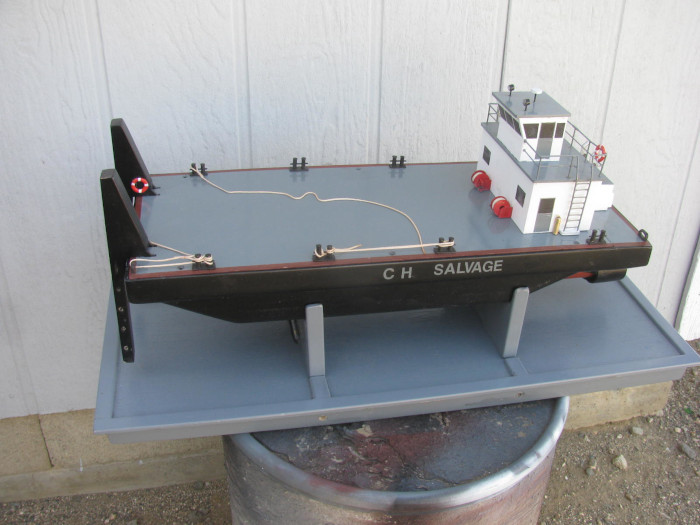
This morning the touch painting got done on the back of the deck house.
----------
Moved on to another project.
The last couple of days has said summer is coming, soon.
So it is time to get my cooler ready.
But for the last few years it has been patch this, patch that.
Today, I pulled the three pad grills off and the frame all but came down on it's own.
There is no floor pan left to work with.
The fix is to go out back and find the old commercial cooler frame I have.
It is not built like home coolers.
The metal is 2 or 3 time thicker and galvanized heavily.
Found it and hauled it to the outside work bench with my heavy duty hand truck.
The out going air opening is not the same size as the other cooler.
Went and removed the motor and other parts from the older cooler. (most came from the commercial cooler a few years back)
I took the frame off the wall so I could measure the hole in the house wall.
Using those numbers, I modified the commercial cooler air outlet to fit.
Remove a little duct pieces.
Cut the hole wider buy 1" on each side.
Cut a sheet metal flat piece to slide in where the dust piece was.
Make sure it fits and measure the 13.25" opening and mark.
Clean with sand paper and then apply engine silicone glue.
Slide the sheet metal plate in and clamp it in place on the marks.
Next I will have to measure and lower the old brackets that hold the cooler on the house wall.
The commercial cooler is about 6" taller.
The opening is the same at the top so I have to lower the brackets to get the holes to line up.
I need to remove one bolt to see how big they are.
I may have some in the stool shed.
Once the bracket is moved, I will lift the commercial frame up on the brackets and secure the unit to the wall.
Just two turn buckles.
Put the motor back in it.
Put the water pump back in and connect.
Hook up the water hoses.
Hook up the electrical.
While I have the 3 pad grills out, I can measure them to get new pads. (there are none now)
If I keep after this, I should have it running tomorrow afternoon or Thursday.
Evaporator coolers are not hard to repair or maintain for the season.
OR course it is a little more when replacing the compete unit.
Only issue I may have is lifting the frame up to the brackets.
I might have to catch the neighbor for a couple of minutes help.
It may be more than I can lift, even stripped down to the bare frame.
Got the white paint yesterday.
This morning the touch painting got done on the back of the deck house.
----------
Moved on to another project.
The last couple of days has said summer is coming, soon.
So it is time to get my cooler ready.
But for the last few years it has been patch this, patch that.
Today, I pulled the three pad grills off and the frame all but came down on it's own.
There is no floor pan left to work with.
The fix is to go out back and find the old commercial cooler frame I have.
It is not built like home coolers.
The metal is 2 or 3 time thicker and galvanized heavily.
Found it and hauled it to the outside work bench with my heavy duty hand truck.
The out going air opening is not the same size as the other cooler.
Went and removed the motor and other parts from the older cooler. (most came from the commercial cooler a few years back)
I took the frame off the wall so I could measure the hole in the house wall.
Using those numbers, I modified the commercial cooler air outlet to fit.
Remove a little duct pieces.
Cut the hole wider buy 1" on each side.
Cut a sheet metal flat piece to slide in where the dust piece was.
Make sure it fits and measure the 13.25" opening and mark.
Clean with sand paper and then apply engine silicone glue.
Slide the sheet metal plate in and clamp it in place on the marks.
Next I will have to measure and lower the old brackets that hold the cooler on the house wall.
The commercial cooler is about 6" taller.
The opening is the same at the top so I have to lower the brackets to get the holes to line up.
I need to remove one bolt to see how big they are.
I may have some in the stool shed.
Once the bracket is moved, I will lift the commercial frame up on the brackets and secure the unit to the wall.
Just two turn buckles.
Put the motor back in it.
Put the water pump back in and connect.
Hook up the water hoses.
Hook up the electrical.
While I have the 3 pad grills out, I can measure them to get new pads. (there are none now)
If I keep after this, I should have it running tomorrow afternoon or Thursday.
Evaporator coolers are not hard to repair or maintain for the season.
OR course it is a little more when replacing the compete unit.
Only issue I may have is lifting the frame up to the brackets.
I might have to catch the neighbor for a couple of minutes help.
It may be more than I can lift, even stripped down to the bare frame.


Comment