My Rescue Barge

Collapse
X
 
  • Time
  • Show
Clear All
new posts
  • Ralph --- SSBN 598
    Junior Member
    • Oct 2012
    • 1417

    #136
    March 1st ================================================

    Early this morning I had errands to do.
    While out, I picked up some line to try on the steering pulleys.

    This afternoon I was able to get in to the shop.
    But my plans of a couple hours was not to be.
    It seems yesterday when I was in the shop I turned on the heater because of the cold and high winds.
    When I went in the shop today, it was 95F because I forgot to turn off the heater.
    I thought I could hang in there but I was wrong.
    20 minutes or so is all I could take.

    So this is what I got done.

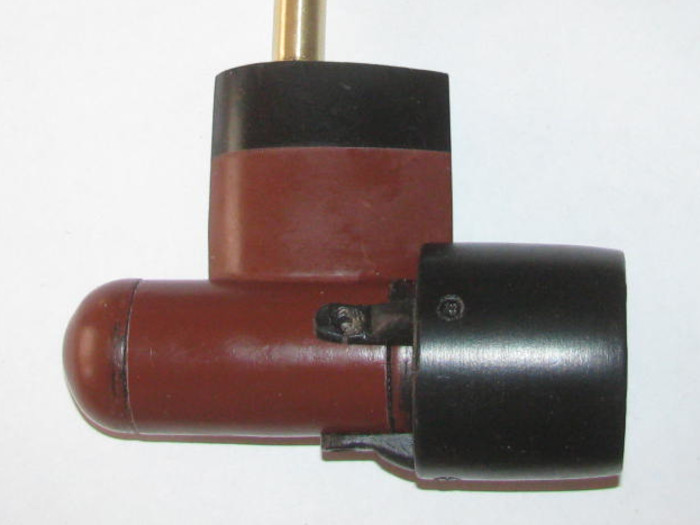
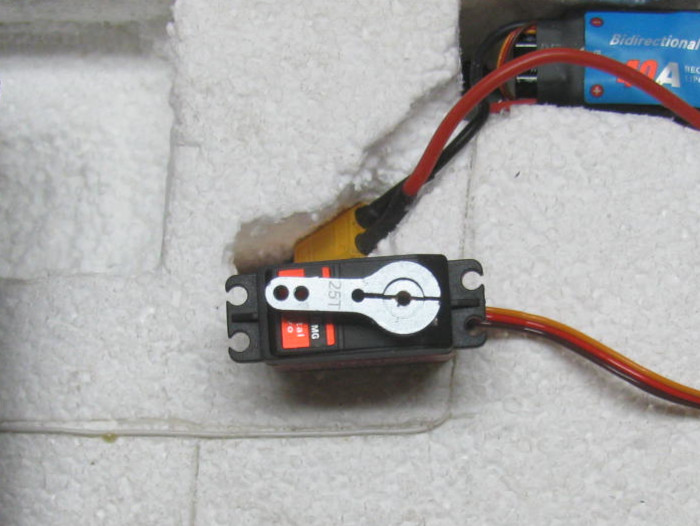
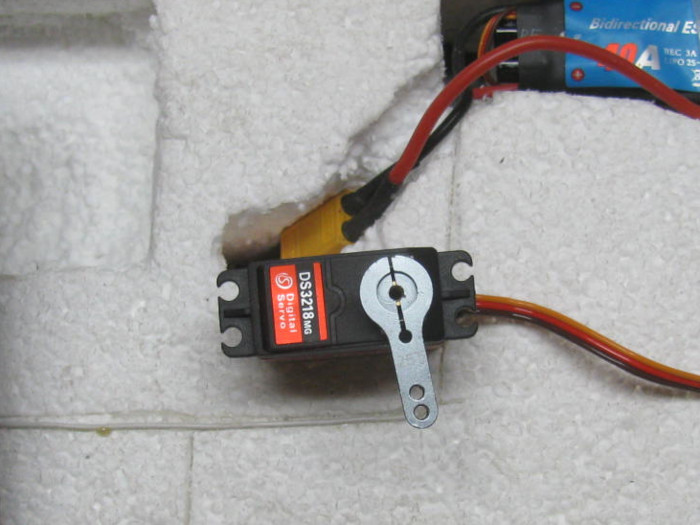
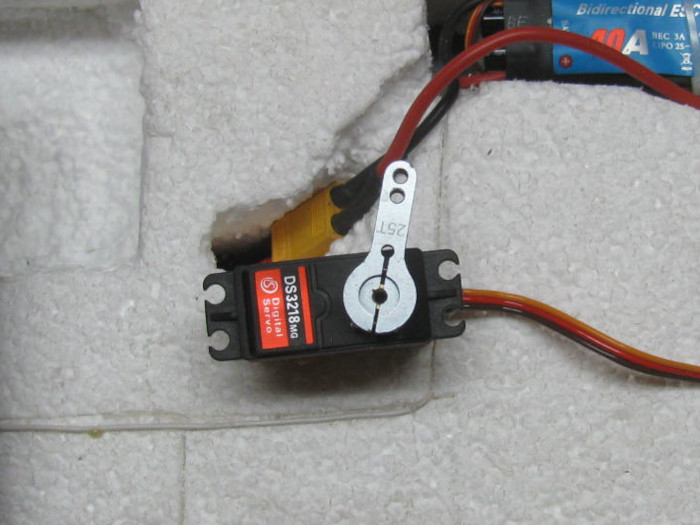
    I installed the pod shaft through the rudder shaft.
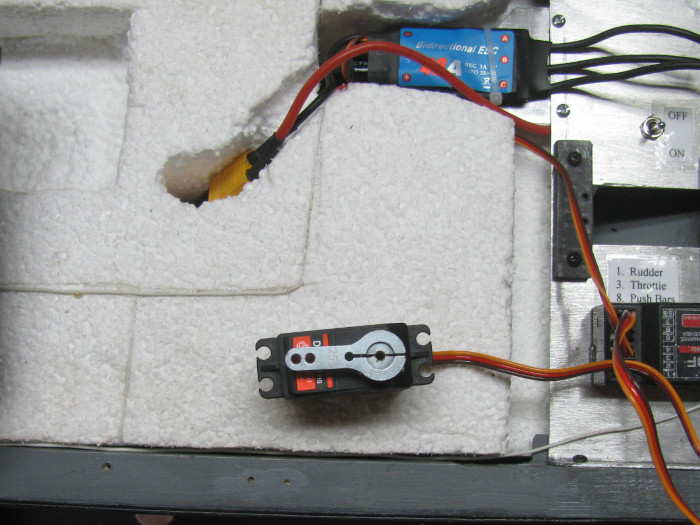
    I soldered the 3 motor wires to the speed controller.
    Covered the wires so they would not touch and short out.
    I turned on the Tx and Rx systems.
    Checked the propeller rotation.
    I got it right the first time.
    Checked the high speed. GOOD.
    Check low speed for cogging.
    There is but it is at the end of very slow rotation.
    The slow rotation is more than acceptable.

    I checked the solder joints to make sure I had got attachment.
    Let them cool and slipped the heat shrink tube over the soldered joints.
    I have not shrunk the tube yet.

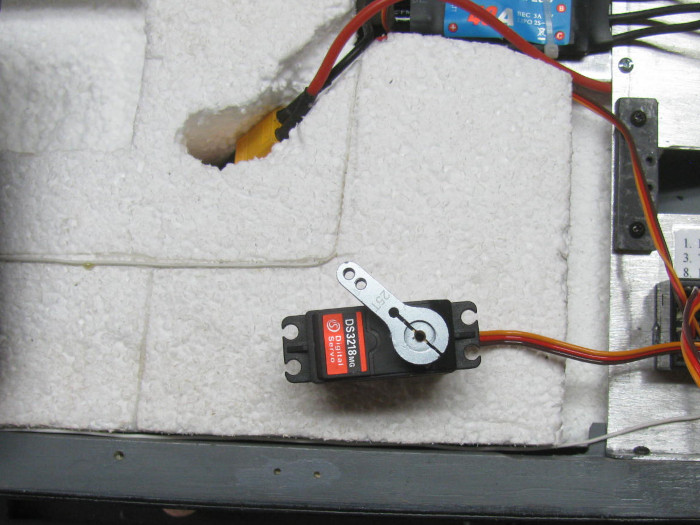
    I did more cutting in the foam for a better point to point for the battery wires.
    This gets rid of the 6" extension wires.

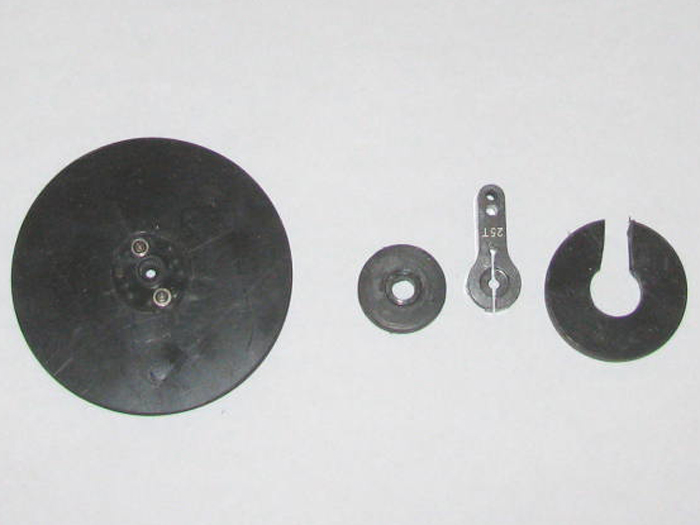
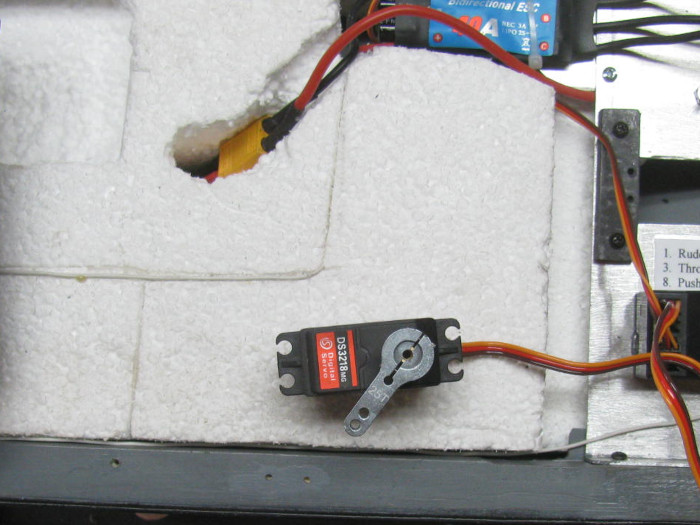
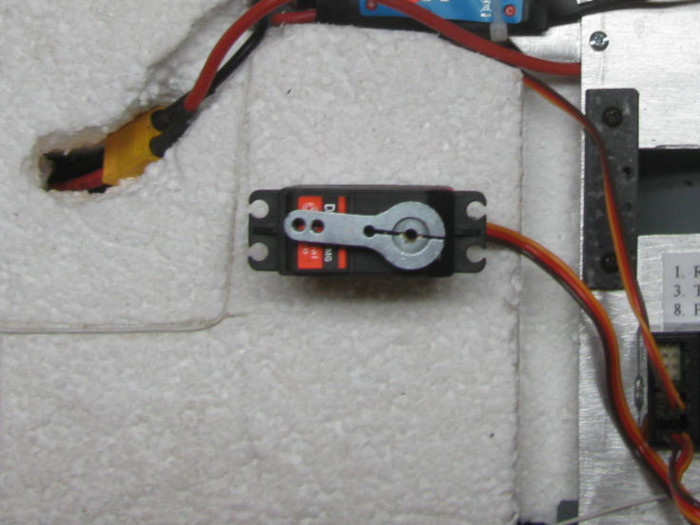
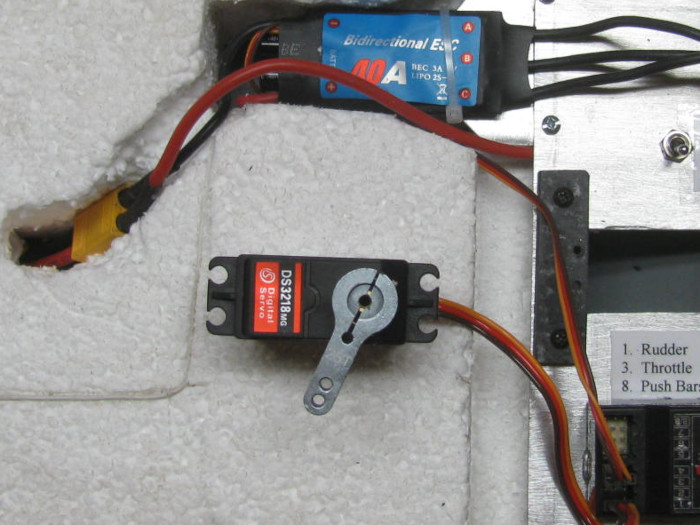
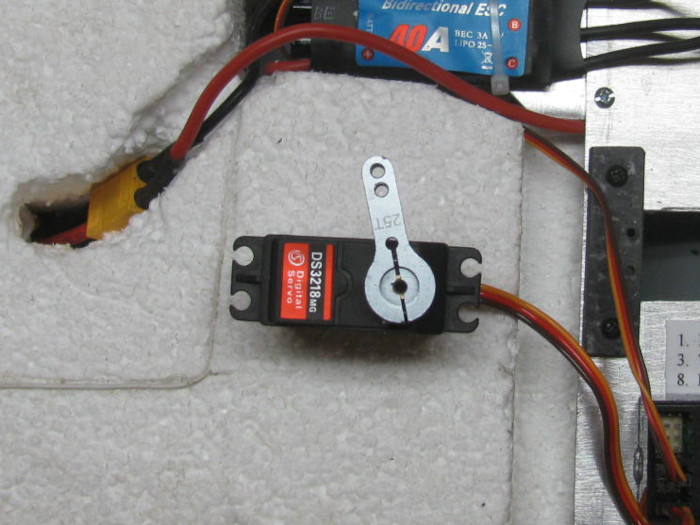
    I moved on to the deck pusher bar linkage.
    With the wheel collar set screws tight, the pusher bars slip on the connecting shaft.
    I marked the shaft for the set screw locations and removed the shaft to grind flats on the shaft.
    Should not slip any more.

    I started to put the motor shroud on the pod but it has been long enough in the hot house.
    I am done in the shop for today.
    Tomorrow is more VA surgery.
    2 appointments for 2 surgeries.
    It will all be good.

    Comment

    • Ralph --- SSBN 598
      Junior Member
      • Oct 2012
      • 1417

      #137
      March 4th ================================================

      Using this photo of the motor pod to show what I am talking about.
      I was in the shop today.
      Not long but I was able to get something done.

      I was assembling the pod shroud.
      The pod is installed in the hull so it was awkward at times.
      While I was getting the shroud ready to install on the pod, I dropped it.
      2 of the mounting tabs at the front of the brackets broke off.
      These brackets where made of plastic.


      Not happy about this but no reason to get upset.
      Just make new ones.

      As I was looking for small scraps of plastic to make 5 layers to shape.
      I decided to make the brackets out of 1/16" hard aluminum.
      My street sign aluminum.
      Happens to be lots of small pieces sitting on the bench from making other brackets.

      Cut 3 3/16" wide strips about 1.25" long.
      Drill a hole on one end of each and drill a counter sink for the bolts.

      Now it was just a matter of bending the strips to give about 1/4" offset. (maybe a little less)
      I did this trial and error.
      Got them made.

      Test fit several times.
      I am happy with the fit for now.
      The propeller has clearance all the way around.
      I need to get 3 nuts to go on the bolts as they go through the shroud. (tomorrow)

      Comment

      • Ralph --- SSBN 598
        Junior Member
        • Oct 2012
        • 1417

        #138
        March 5th ================================================

        The nuts where bought.
        Now to assemble and make sure everything fits right and lines up so the propeller does not touch the shroud.

        Mounted the 3 brackets to the shroud.
        This requires a bolt, and a nuts.
        So far everything is good.

        Next to mount the brackets to the pod.
        On the second bolt I was having trouble getting the bolt to start in to the pod plastic threads.
        Then I dropped the bolts.
        I will look for it later.
        I have an extra bolt.
        This bolt went right in to the pod threads.

        Okay, now I need to find the dropped bolt.
        With the flash light, I found it.
        I have an extra nuts so I tried to screw the bolt in to the nut.
        It would not start.
        Got out the 10X power gem loop.
        Looked at the bolt and the nut.
        Took on of the bolts in the pod out and compared the threads.
        Out of 6 bolts, all are fine thread except 1.
        I do not have extra bolts.
        Well, I do but they are round head and not counter sink heads.

        Okay have to get another bolt at the hardware store.
        I need to get 3 small washers for the bolts going through the shroud.
        I can see the bolts pulling through the plastic.
        Going to stop it before it happened.

        Disassemble the shroud from the pod.
        Sanded all the edges of the brackets round. (no sharp edges)

        Painted the parts Satin black.
        The shroud only needed touch up.
        The brackets will need to be turned over to get the other side once dried.

        Of the 3 brackets, I file 2 bracket holes to shroud to give me some adjustment movement.
        Once on the pod and clear the propeller, I will glue the screws and nuts in place.
        Mark the inside so I know where they go on the pod.
        It was very close but I had to force one bracket about 1/32" to 1/16" to get the shroud away from the propeller.

        I should get the pod completed tomorrow.
        -------------------------
        I looked at the repair on the Gato read cap.
        I was relocating bolt threads.
        I filled the hole with thin CA and I screwed the bolt in with silicone grease on the threads. (wiped clean)

        Today, after 3 days of curing, only because I forgot about it, I removed the bolt.
        It came out and I have good thread.
        The old threads where stripped the first 1/8" in to the hole.
        I needed new thread because I could not drill deeper without going through the end cap. (don't want that)

        So I got more than my 10 minutes in today.

        Comment

        • Ralph --- SSBN 598
          Junior Member
          • Oct 2012
          • 1417

          #139
          March 6th ================================================

          I now have the last pod bolt.
          I am repairing the over sized hole in the shroud.

          While doing this, I thought I would try something new.
          I have not had a phone for 20 years but because of the VA hospital stuff, I ended up getting a cell phone.
          I use it mainly for texting because what I had for 20 years was e-mail and this is as close as it gets.

          Anyway, the phone I bought was mainly for the camera.
          Today, I thought I would try making video.
          So this is my second every phone video.
          I will see how it goes.
          It is 15 seconds long.

          I see I need to figure out how to make the dpi smaller.
          The video is jumpy while loading but smooth when ran the second time.
          pusher bars video

          Comment

          • salmon
            Treasurer
            • Jul 2011
            • 2340

            #140
            Ralph,
            It came out great! Well done!
            Peace,
            Tom
            If you can cut, drill, saw, hit things and swear a lot, you're well on the way to building a working model sub.

            Comment

            • Ralph --- SSBN 598
              Junior Member
              • Oct 2012
              • 1417

              #141
              March 7th ================================================

              Yesterday, I repaired the shroud where the bolt pulled through making hole over sized.
              I taped the inside and filled the outside with CA and baking soda.
              Did it is 3 passes to make sure it cured all the way through.

              Today, I filed and sanded the outside of the shroud.
              Redrilled the hole for the bolt.
              Hand turned a drill bit to counter sink the hole.
              Repainted the shroud.

              Watching the video of the pusher bars in operation, I noticed that the bars do not come up to 90 degrees to the deck.
              So I looked it over and found where I could file a little material off the pusher bars so they would go to 90 degrees.
              I thought the file would remove the material easily.
              I was wrong.
              I had put plastic sheet on the step of the pusher bars so filing the plastic did not do well.
              A file on the flat plastic acts like a bearing surface and the file slides but does little cutting.
              So out comes the sanding drum on the Dremel and I carefully sanded the part down.
              Did it slowly and test fit often.
              This took some time because I had to install and uninstall the pusher bars to do this testing.

              Now it looks like I have the 90 degrees.
              Got the Tx out.
              Reset the limit on the servo to get the pusher bars to the right place without putting a strain on the servo.

              While I wait for the new servo to arrive, it seems all I am doing is small details to the hull.

              While I had the radio out and on, I spun the propeller and trimmed 1/64" of the blade ends.
              Basically making the propeller blades all the same length during spinning.
              That gives me an additional 1/32" clearance in the shroud.

              Time on the barge to day is about 1 hour.

              Comment

              • Ralph --- SSBN 598
                Junior Member
                • Oct 2012
                • 1417

                #142
                March 9th ================================================

                I have been doing little things to the Rescue Barge.
                Nothing really to report.

                Now the weather says it's going to rain tomorrow and the next day. (They may so that but until I see it, it is not happening)
                But this got me to thinking.
                I am going to put the plug in my outside test tank.
                If it rains it will hold the water.

                Oh, what I was thinking is this.
                The barge has all it's equipment in place.
                I am waiting for a new servo that is a 180 degree servo to replace the 60 degree servo for the steering.
                I think I can water test this barge.
                Just won't have the full rudder turn I want.
                But I can test to set the waterline.
                Level the boat and mark it to paint it.
                I can test propeller thrust.
                That is really all the testing it needs to be operational.
                The servo is just a change out job.

                So maybe I will be reporting on the water testing by Friday.

                All is going well because I haven't been going any where except to market and lunch a couple of times a week.
                Oh there are the trips to the VA hospital and the little things called surgery.
                Last Tuesday the surgeon took more from the left side of my nose.
                Had me wait until the sample was viewed.
                Said he got it all and I did not have to come back unless it sows up again.
                Now there is the second surgeon.
                He is doing follow up and making sure the area heals properly.
                From my point of view, all is going well.

                Later this month I get to see a third surgeon, who is working on my wrist.
                This the second of three applications on my wrist. (removal of a 1.5" diameter area on top of my wrist)
                This takes about 15 minutes per visit.

                Time to get back out to the shop.
                I am repainting parts that have been scratched while fitting the deck and pod.

                Comment

                • Ralph --- SSBN 598
                  Junior Member
                  • Oct 2012
                  • 1417

                  #143
                  March 12th ================================================

                  I did a little work on the motor pod day before yesterday.
                  Got it painted and then assembled including the shroud.
                  ---------------
                  Today, I was in town and one of my stops was the Post Office to pickup bills.
                  Opened the box and there were the bills and there was the servo.
                  The servo that is scheduled to arrive in mid April.

                  Got home and took the servo out to the shop and unpacked it.
                  Put on the barge so I could plug the servo in to the Rx.
                  Powered up the Tx and Rx and tested the servo for 180 degrees.
                  Well that is not what I expected.
                  I got about 90 degrees total..

                  Did some research and found out that the servo is setup for 180 degrees but the Tx signal does not support the signal needed to get the 180 degrees.

                  Checked for options.
                  I found 2 that I can do.
                  1. Open the servo and add two 2.2k to the potentiometer (about $5.00)
                  2. Order a servo adjustment circuit to put inline with the servo. (about $20 and has the ability to adjust the throw)
                  I am going to look in my parts box and see if I have 2 resistors at that value.
                  I am thinking what I have are capacitors and not resistors.

                  Anyway., tomorrow if the weather turns a little warmer, I will be putting the barge in the test tank to get a waterline and to test the motor pod thrust.

                  Comment

                  • Ralph --- SSBN 598
                    Junior Member
                    • Oct 2012
                    • 1417

                    #144
                    I have ordered the resistors.
                    Paid a big $3.22 for 80 of these little ... parts including shipping.
                    Will be here next Thursday.
                    Only need 2.

                    Thought about the servo tuner but it was $ $26 with shipping.
                    Would get here end of April to end of May.

                    So I can use 2 resistors and have a box full of spares and save $23.
                    Last edited by Ralph --- SSBN 598; 03-13-2021, 12:01 AM.

                    Comment

                    • Ralph --- SSBN 598
                      Junior Member
                      • Oct 2012
                      • 1417

                      #145
                      March 13th ================================================

                      I started to mount the rudder servo in the barge.
                      Turns out the control horn is not the same size as the other servo arm I use to make the pulley to fit.
                      The pulley I am referring to are the three parts on the right.
                      This is a photo of the first fitting using the horn from the other servo.
                      The new horn is a little bigger in overall diameter and the curves on each side near the big end are shallower.
                      I have to knife the hole diameter bigger and cut the points of the curves.
                      Was not a big job.
                      15 minutes of scraping and test fitting until the horn dropped in with a little pressure.
                      The fun part was the small plastic disk to the left of the horn is already glued to the notched plastic piece.

                      I have looked at several hardware store for a longer bolt that screws in to the servo drive shaft.
                      No luck.
                      The fix was to make a plastic disk to drop in to the large hole on the notched piece and glue it in place.
                      I had to remove plastic through the big hole down to the smaller disk and cut out 1/16" of plastic to allow room for the plastic disk on top of the control arm without making the control arm stick out proud.
                      Got it done using the drill press, a flat bottom cutting bit and setting the depth for the cut.
                      5 minutes.

                      Test fitting says it will work so I assembled the plastic parts.


                      Test fit in the barge to make sure I got the two pulleys lined up.
                      All is good, now.

                      I was going to float the barge to get a waterline and test the motor pod.
                      Not really cold outside but the20 to 35mph wind is not comfortable.
                      Besides, I would not be able to get a waterline with the wind whipped waves in the test tank.
                      Wait for tomorrow ans see if it gets better.
                      Weather says middle of the week, temps will go up and the wind should be gone.

                      I can wait the wind out.

                      Comment

                      • Ralph --- SSBN 598
                        Junior Member
                        • Oct 2012
                        • 1417

                        #146
                        March 14th ================================================

                        It is still windy but not as much as yesterday.
                        I am going to float the barge.

                        While filling the test tank with water, Test fit the rudder servo and it's pulley.
                        I needed to cut a couple of small notches for the Allen bolt heads that stuck out past the cut already in the pulley.
                        Done.

                        Tank was fill not to the top but enough to give 1" to 2" under the motor pod.
                        This left most of the barge below the top edge of the tank and shielded it from some of the wind.

                        Turned on every thing. (I did a power up test in the shop on the bench)

                        Placed the barge in the water.
                        What I see was not expected.
                        The stern is low and the bow is high.

                        Went and got a second battery
                        power pack.

                        This was NOT enough.
                        Went and got 1 of the steel ballast plates that go in the ALMA.

                        This was enough to bring the barge to level.
                        The waterline is much deeper than I thought it would be.

                        But I can live with it.
                        I have another plastic hull that I will float to see where it sits with no nothing in it.
                        Just to get a reference.

                        I was going to get a mark for the waterline for paint but now I think there will be no waterline needed.


                        Tested the pusher bars.
                        Work as designed.

                        Then the forward and reverse of the motor pod.
                        Good response.
                        I do not know what the speed will be but in the short tank it looks more than acceptable.

                        First water test video

                        -------------------------------------
                        Now for the failures.

                        Back in the shop, I removed the ballast weight and deck.
                        I turned the hull upside down to check for water in the pod.
                        Sure enough, a little water came out of the rudder post.

                        When I assembled the pod last week or so, I though this might happen.
                        The tail cone did not feel like it slid together right.
                        (but knowing brushless motors came run under water without being sealed, I did today's test)

                        The fix is simple enough.
                        Un solder the 3 power wires tot he motor.
                        Remove the motor pod from the hull so I can get a look all around.
                        Remove both the nose and tail cone and clean off all the silicone and start fresh.
                        While the tail cone is off, clean and re grease the propeller seal.

                        Comment

                        • Ralph --- SSBN 598
                          Junior Member
                          • Oct 2012
                          • 1417

                          #147
                          March 16th ================================================

                          A quick note about today. I have been thinking it was Saturday until about half an hour ago.

                          Back to the barge.

                          Un soldered the motor to speed controller.
                          Removed the brass pin that holds the rudder post in the rudder through tube.
                          Removed the motor pod from the barge.
                          Took it in the house and filled a pan with water. (enough to get the pod under water for leak testing)
                          Applied air pressure to the rudder post. (this will pressurize the motor pod)
                          Lower the pod in to the pan of water.
                          Looks like a fish tank aerator. (yep, it leaks)

                          When I assembled last week, I had emptied the silicone glue tube and I was using a small screw drive to reach in the tube to get glue.
                          I did not get a lot and was trying to spread it around to make the seal.
                          I usually put lots of silicone on the joint to where the glue squeezes out. (it didn't)

                          So today I have to clean all the old silicone off.
                          Sand a file the surfaces to make sure they are clean.

                          Time to removed the propeller and it's 2 wheel collars.
                          Exacto knifed the front cap and tail cone.
                          Pull the cap and tail cone out of the pod body.


                          Remove the 4 bolts holding the motor in the pod.
                          Pull the motor out and carefully pull on the 3 wires making sure not to pull them out of the motor. (I actually pushed the wired downt he rudder tube)

                          Exacto knifed the silicone of the pod edges and the inside of the pod.
                          Finally got to the sand paper and file.

                          Next, I removed the three screws that hold the propeller shaft cup seal on place in the tail cone.
                          I looked for a photo but I do not have one.
                          The tail cone is 2 pieces with the seal between the pieces in a recess cut.
                          Cleaned all the old silicone grease off the seal and out of the recess in the tail cone.

                          Re greased the recess and cup seal.
                          Reassembled the tail cone. (Glad I put index marks on the parts)

                          Made sure the propeller shaft connector wheel collars are tight and put the motor back in the pod.
                          Spun the motor to make sure the wheel collars do not touch the motor mount bracket. (good to go)

                          Put the pod in the small vise to keep the front of the pod up.
                          This new silicone glue is different. New and Improved.
                          It is thinner and runny.

                          I applied the glue to the bow cap ledge and shoulder.
                          Put in the pod with a little twist to spread the silicone.
                          As I push the cap in to the pod, I got the need silicone squeezing out of the joint.
                          Much better than lat time.

                          I will leave the pod in the vise and let the silicone cure before putting the tail cone in.

                          Going to read the label on the new and old tubes to see what the difference is.
                          Oh, one difference is the tube has a tapered application nose where the old one had the tapered nose but it could be unscrewed to get to the tube directly and to clean out the tapered nose off the tube.

                          I looked around at my lead weight blocks I use for ballast or making ballast shapes.
                          Found 1 that weight about the same as the steel ALMA ballast weight.
                          Of course it is smaller than the steel block and will fit better under the pusher bar linkage.

                          Comment

                          • Ralph --- SSBN 598
                            Junior Member
                            • Oct 2012
                            • 1417

                            #148
                            March 17th ================================================

                            The resistors ordered to make my high torque servo in to a 180 degree servo were in my mail box.
                            After doing the in town errands, I went out to the shop.
                            This is what I got for $3.22 for 80 2.2K resistors.

                            This project will require 2 resistors.
                            Here is where I got them.


                            First, I siliconed the tail cone on the motor pod.
                            Put it in the small vise to cure.
                            The front cap seal nicely.

                            Now for the servo.
                            Here is the servo before I make the modification.

                            Control stick centered.


                            Full left control stick.


                            Full control stick right.


                            I get about 60 degree right and 60 degrees left of center.

                            I opened up the servo removing the bottom cover.
                            Pull the control board out enough to see under the broad.
                            I want to see the control resistor pot.
                            There are 3 wires going to the pot.
                            I will be cutting 2 of the wires and adding in a 2.2K resistor to each line.
                            The wires to be cut are the outside wires, leaving the center wire as is.

                            Get 2 resistors and cut the end wires short for soldering.
                            I left about 1/16".
                            Tin the wire ends and the resistor wire ends.
                            Carefully solder the resistor making sure to keep the resistor on the same wire.
                            Best way is to do 1 wire at a time so there is no confusion.
                            I slipped a short piece of shrink tube on the wires before soldering.
                            After soldering I slipped the shrink tube over the resistor covering the end wire connections.
                            This high torque servo has lots of empty room in it but this can be done with the mini servos we use.

                            Total modification time. About 20 minutes.

                            Time to test the servo.

                            Control stick centered.


                            Full left on control stick.


                            Full right on the control stick.
                            It appears I am getting about 160 degrees of movement. (usable)


                            I am using a Futaba 9CAP Tx for this boat.
                            It has programming that will allow me to change the servo end points from 0 to 140 percent.
                            Let's see what this will do.

                            Control stick centered.


                            Full left on control stick. (140%)


                            Full right on control stick. (140%)


                            Using the Tx computer adjustments, it looks like I can get 190 degrees and a little more.

                            This will do everything I need to do with the steering.
                            I reset the servo to 90 percent so I do not break any thing when I install the steering system.
                            I will adjust it slowly aft installation.

                            Installation will happen as soon as I finish the motor pod sealing.

                            Comment

                            • Ralph --- SSBN 598
                              Junior Member
                              • Oct 2012
                              • 1417

                              #149
                              March 18th ================================================

                              Early this morning, I put the propeller and wheel collars on the pod motor shaft.
                              I checked the shroud for alignment and then installed with a drop (3) of silicone glue over the bolt holes.
                              I Check the shroud and propeller clearance. (GOOD)
                              I lifted up the barge and slipped the wires then the rudder post in to the rudder post bearing.
                              Put the top pulley and it's safety brass ring in place.
                              Got out my soldering iron to reconnect the 3 wires.
                              The iron was hot and I was ready to solder.

                              OH NO!

                              There are only 2 wires coming through the rudder post.
                              Looked on the bench and then the floor.
                              Got down on the floor and looked under the bench.
                              And there the 3rd wire was laying. (NOT GOOD at all)

                              Looked over the wire and see that the wire separated from the motor short wire at the solder joint.
                              The shrink tubing was still on the motor wire.

                              Easy enough to fix.

                              Completely disassemble the motor pod, I had just sealed up.
                              Even tested it for leaks.

                              Clean all the old silicone glue off the nose and tail cone
                              Clean all the silicone from inside the pod body.
                              This requires Exacto knife, sanding and file scraping.

                              Cut the shrink tubing off the wire.
                              I see the original wire broke off at the solder joint.
                              Remove wire insulation.
                              Tin the clean wire.
                              Get the table vise out and setup for soldering.

                              Do the soldering.
                              Check the joint.
                              Check the other joints.
                              Shrink the tubing over the joint.

                              Check the propeller shaft tight in wheel collars connector.
                              Put the motor back in the pod body.
                              4 screws and tighten.
                              Silicone on the nose part and slip in to pod.
                              Twist to spread silicone.
                              I used lots and it squeezed out all the way around.
                              Wipe off excess.

                              Add a little silicone grease on the propeller shaft.
                              Put silicone glue on the tail cone joint step.
                              Put it on with twisting to get the shaft to go through seal and then to spread the silicone glue.
                              Line up the index marks on the pod and tail cone.
                              Push the tail cone on to the pod.
                              Wipe off excess silicone.
                              Again good coverage.
                              Set pod in small vise with propeller shaft sticking up.
                              The pod will slip in the vise "V" groove.
                              I put 5 pounds of weight on the propeller shaft push the tail cone down and the pod down on to the nose piece.

                              That is how I left it.

                              Around 11 am I went to the big town.
                              I went to an RC off road racing store and track.
                              I went looking for 2 sized of Allen wrenches so I could tighten the bolts on the new high torque servo and for the odd Allen screws I have.

                              The store had them but I am not buying the fancy long with plastic colored handles at $19.95 each.
                              They do not have the standard "L" Allen wrenches.

                              Left there and went 2 block to Harbor Freight.
                              Same problem. Only have fancy plastic handled wrenches.
                              On way home, I stopped at an O'Reilly's auto parts.
                              All they had were sets of 6 to 10 wrenches in a package.
                              I opened 2 packages.
                              Metric and Standard to test the wrenches on the bolts I brought with me.

                              Found one to fit.
                              1/16".
                              So I bought the package of 10 for $4.

                              Now I can make sure the bolts are tight.
                              I had made a wench but it was starting to round off and become useless.

                              Today did not go as planned.
                              Rebuild motor pod and drive some 38 miles one way to town to get a $4 wrench.

                              So that is how my day has gone.

                              Parts are sitting on kitchen table for work in the shop tomorrow.

                              Comment

                              • Ralph --- SSBN 598
                                Junior Member
                                • Oct 2012
                                • 1417

                                #150
                                March 19th ================================================

                                I got a late start in the shop.
                                What I got done.

                                The motor pod has been reassembled.
                                The pod has been installed in the stern of the barge.
                                The 3 wires have been soldered to the speed controller.
                                Was easy because I marked the wires so they would go back together the way they were when I took them apart.

                                The horn has been installed on the servo.
                                The servo was installed in the bracket on to the electronics tray in the barge.

                                The pulley was installed.
                                I made the last plastic part that goes on top of the pulley to keep the control line from running off.
                                Glued it in place.

                                Once this cures, I will install the control line that will turn the motor pod.
                                The line is made up and waiting to be installed.

                                Tomorrow morning, I hope to finish this up.
                                Photos to come.
                                Maybe a video of the steering in action.

                                Comment

                                Working...
                                X