Attention all registered users. The new forum upgrade requires you to reset your password as you logon for the first time.
To reset your password choose this option that is displayed when you attempted to login with your username: "Forgotten your password? Click here!"
You will be sent an e-mail to the address that is associated with your forum account. Follow the simple directions to reset your password.
If this is your first visit, be sure to
check out the FAQ by clicking the
link above. You may have to register
before you can post: click the register link above to proceed. To start viewing messages,
select the forum that you want to visit from the selection below.
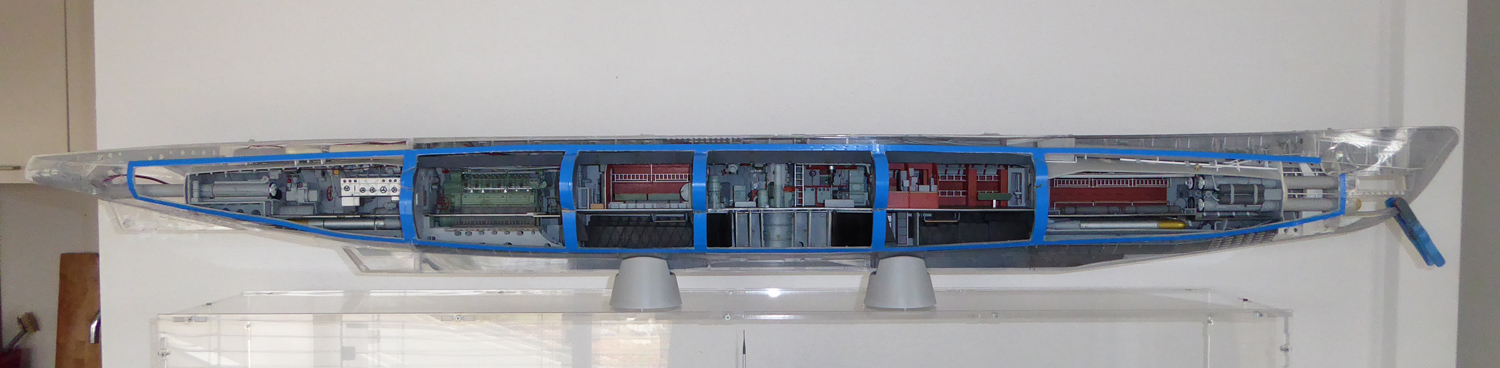
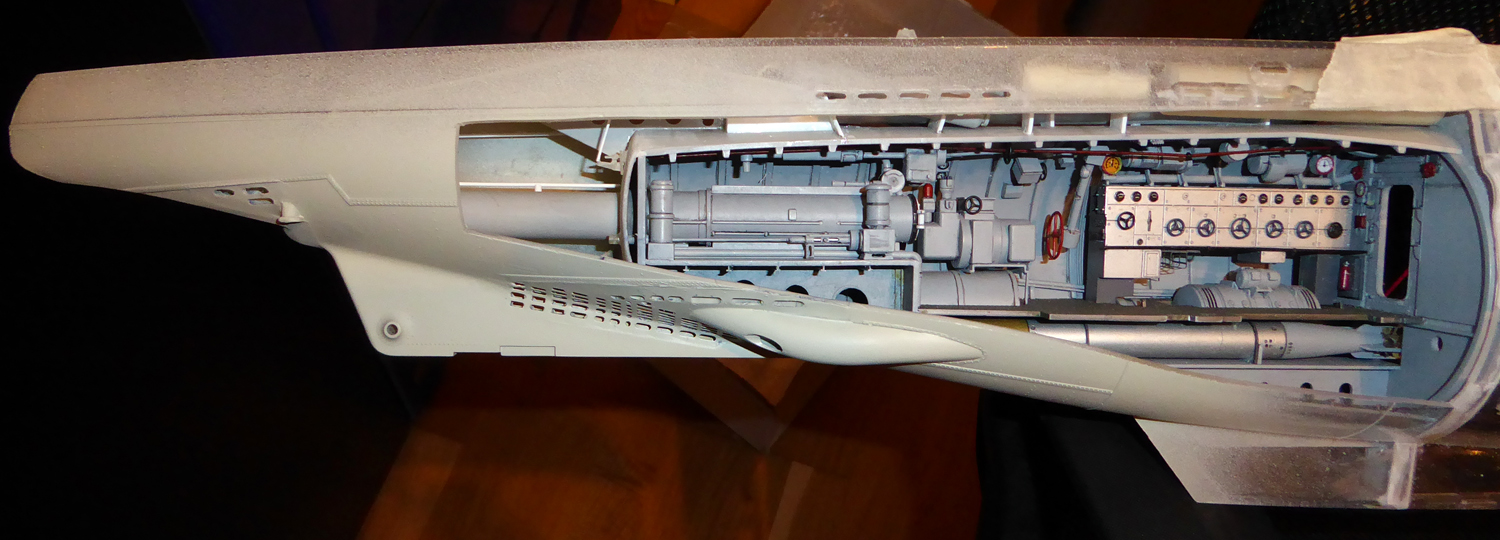
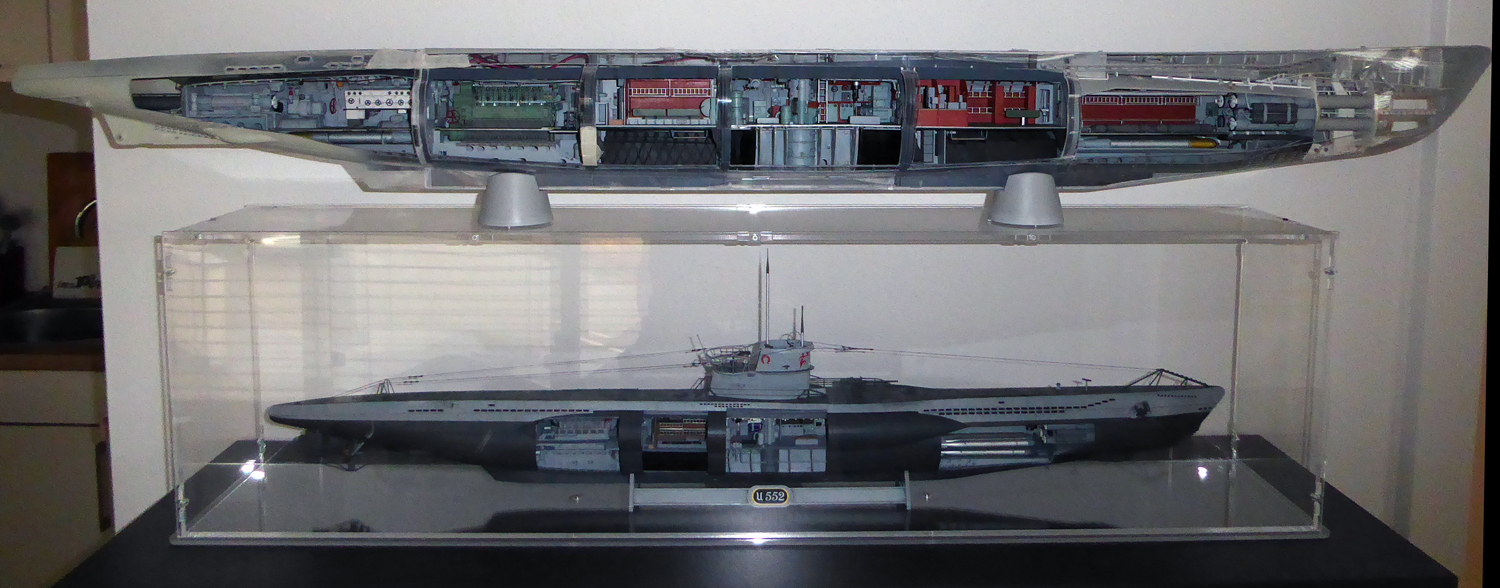
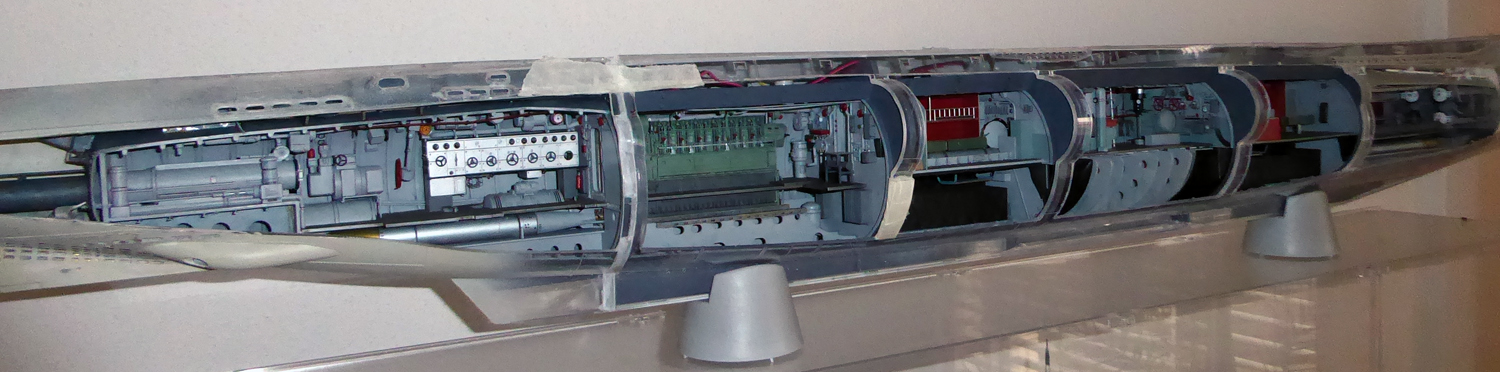
O.K., and with cut oprn hull. Need some minor adjustments and some small repais where I got to brutal, but all in all, I'm quite pleased with the look....
that does look better, I think the clear plastic distorts too much
Question: will the cut out pieces be removed permanently. or painted and able to come off and on ??
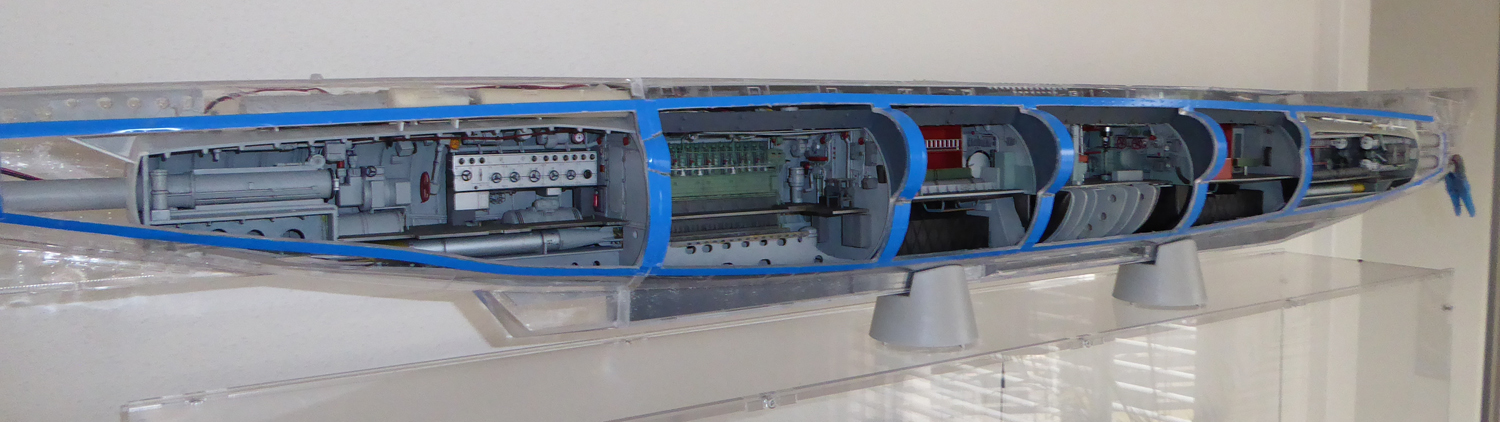
O.K., and with cut oprn hull. Need some minor adjustments and some small repais where I got to brutal, but all in all, I'm quite pleased with the look....
a true cutaway. I like it. I agree with knucklebutt; no distortion with this approach. If you got "too brutal" in a few places, I bet the parts you cut away might not cover/fit in place without some doctoring. great job on this kit.
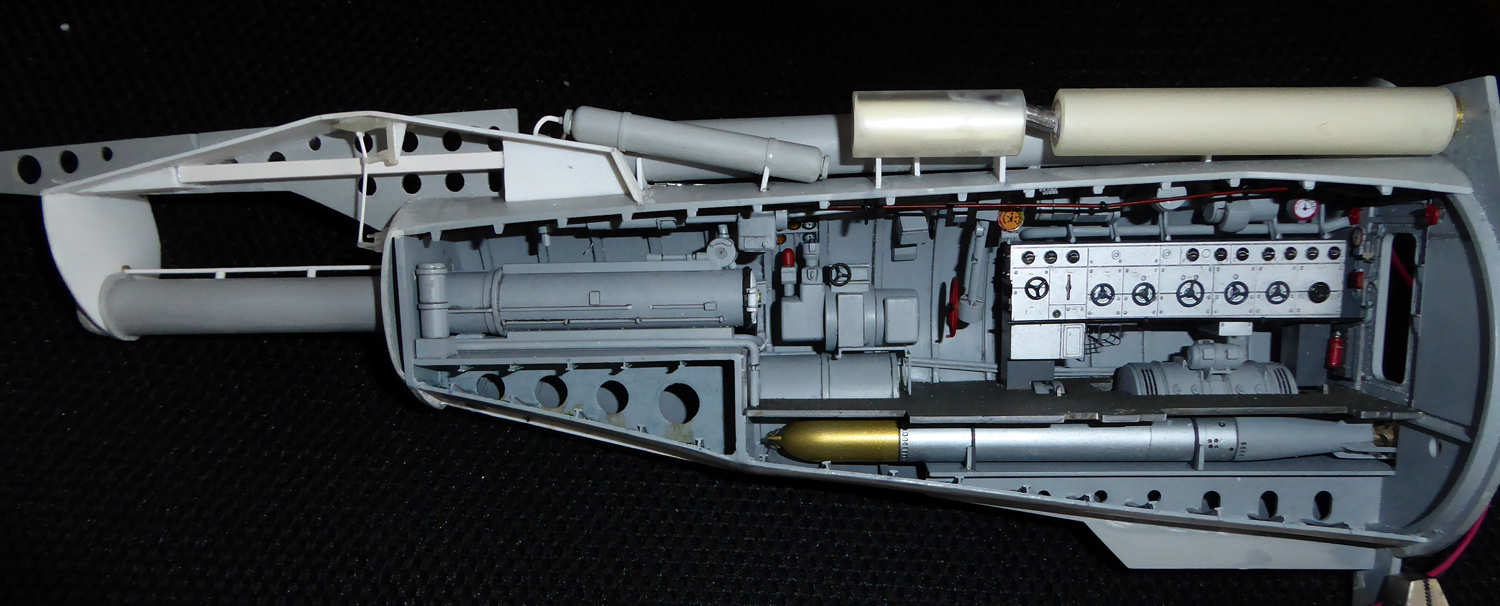
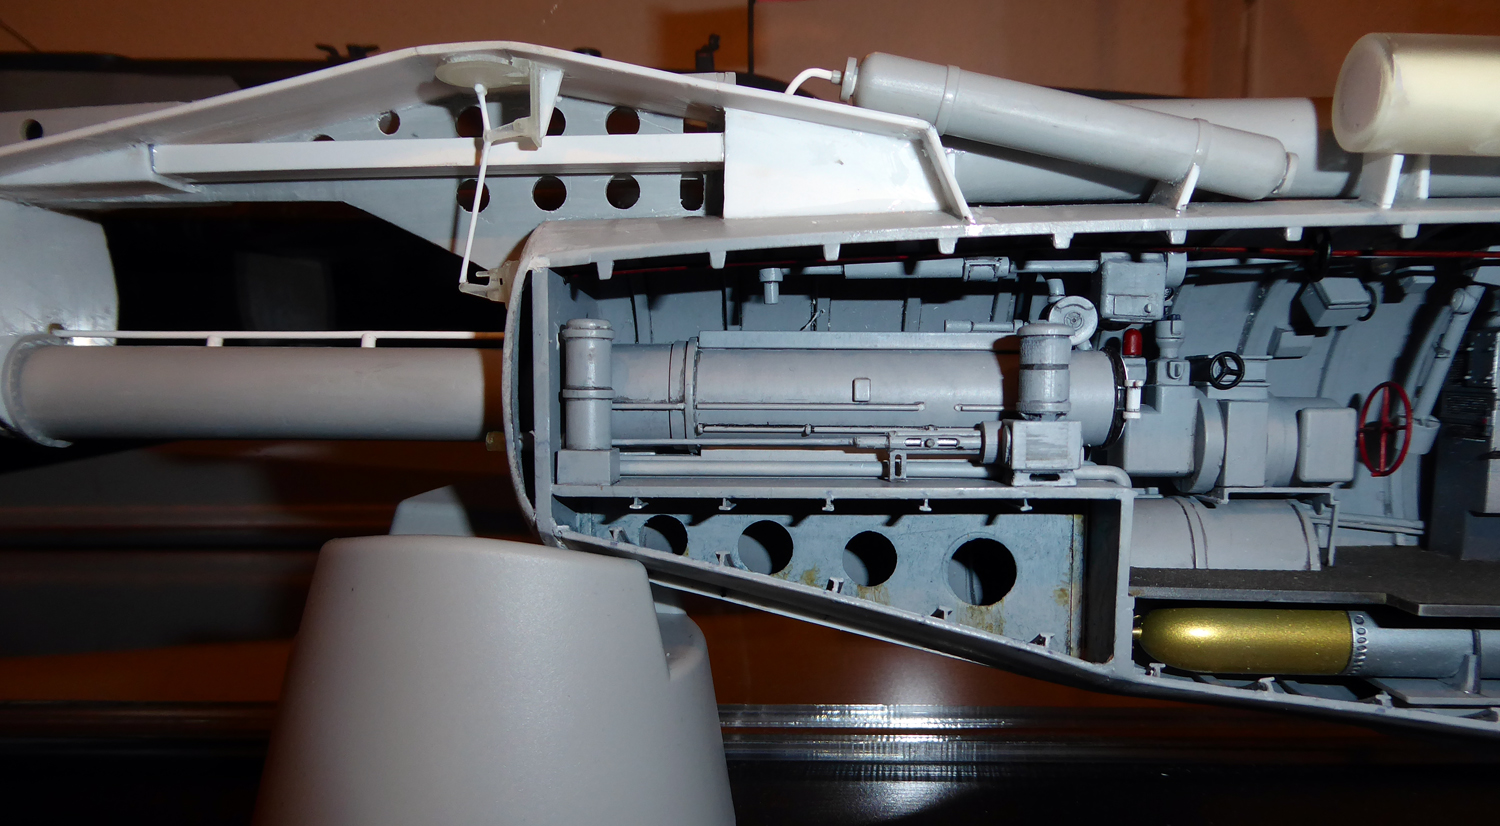
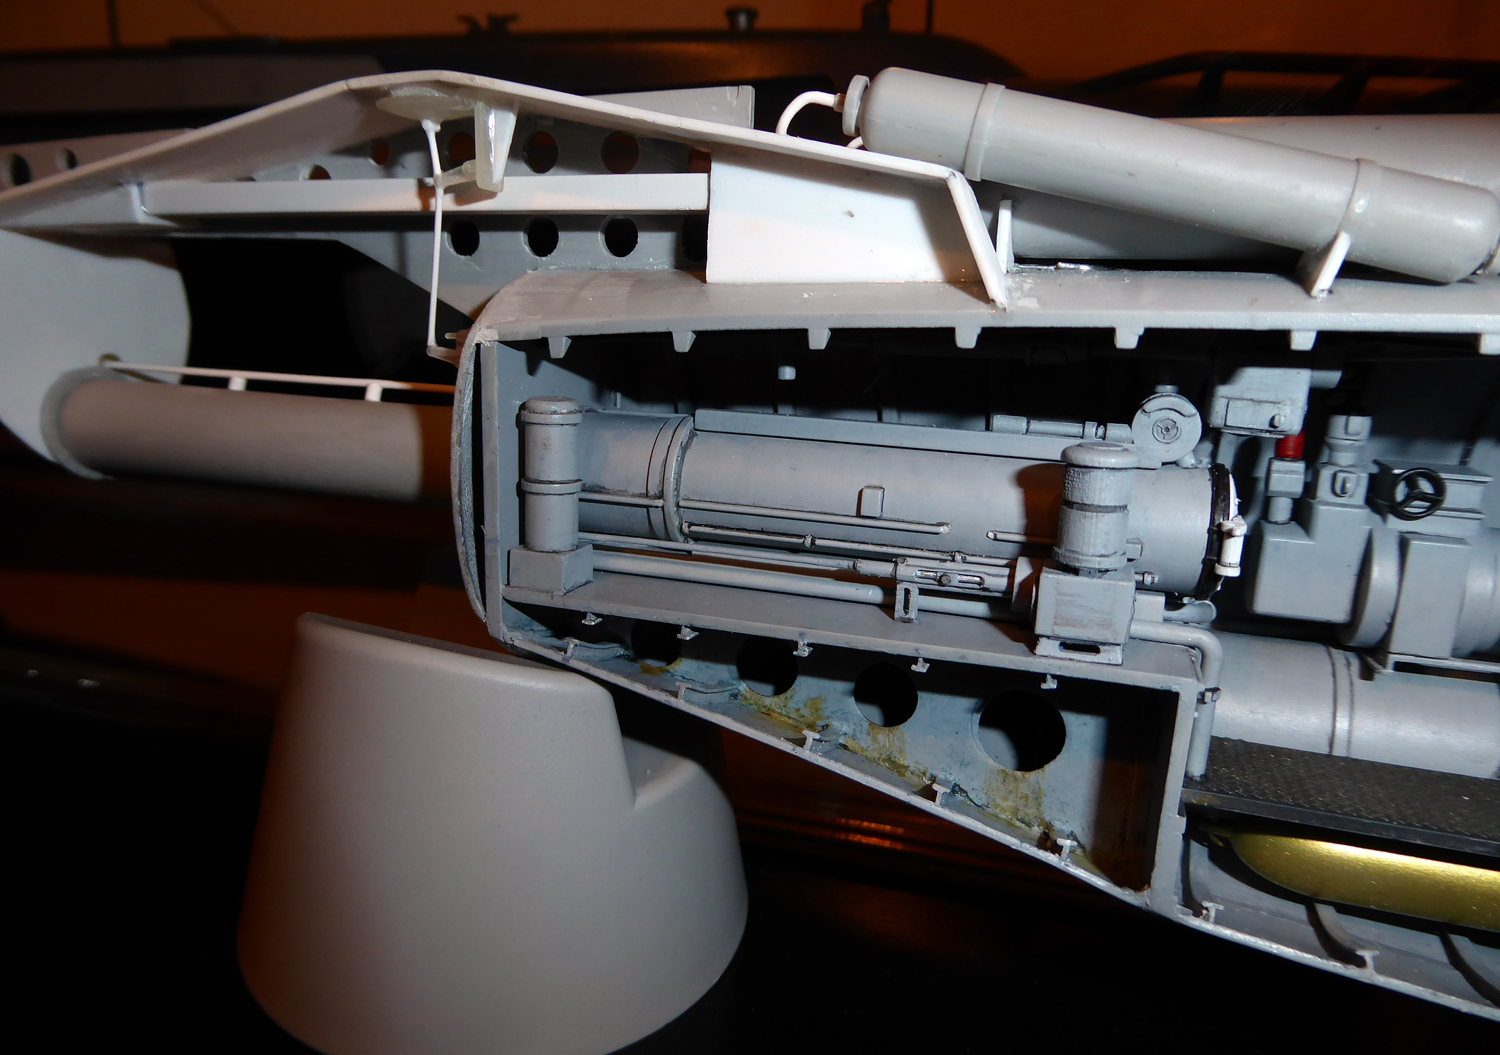
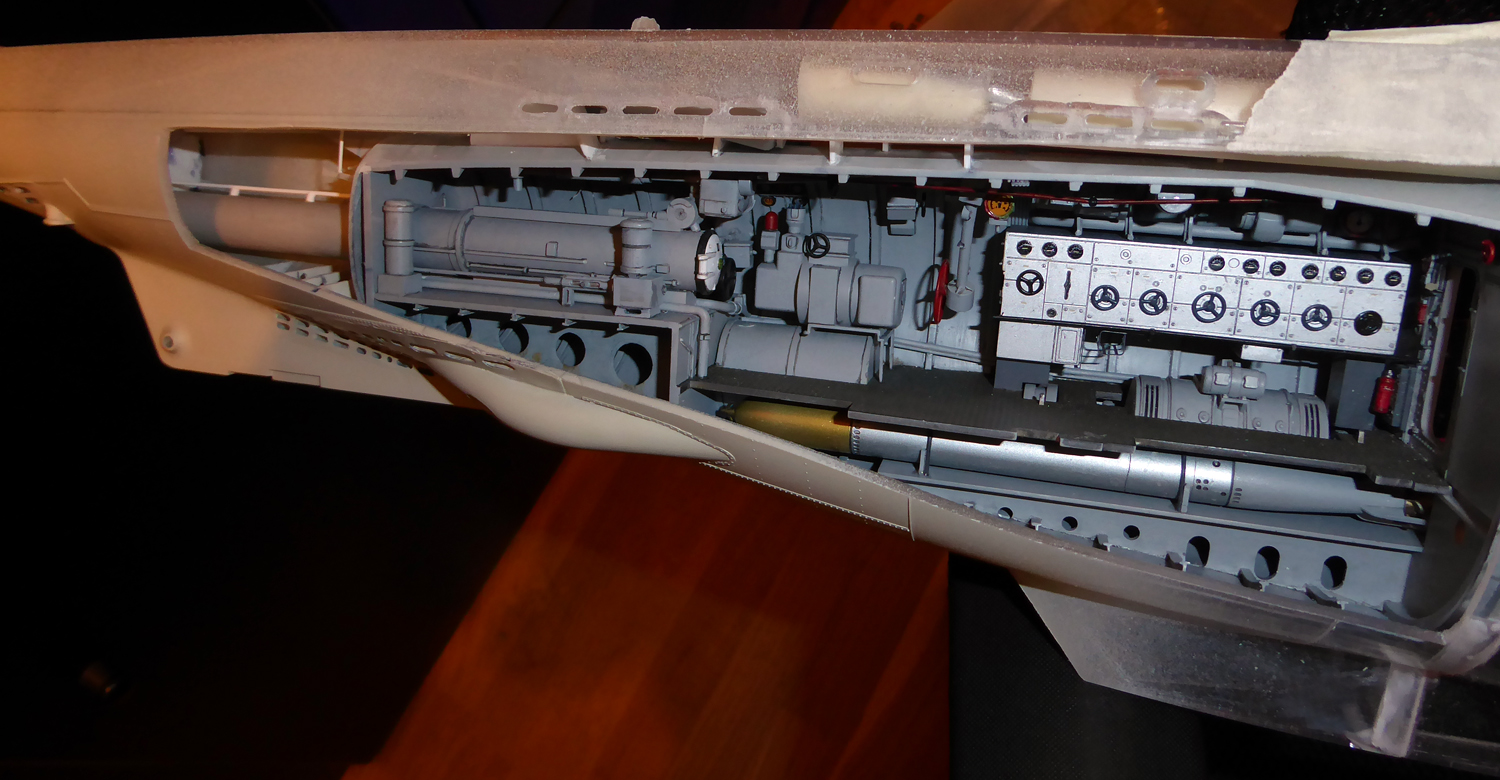
O.K., still slow progress. Mainly because I had to rebuild the aft dive bunker 3 times. Ripping of styrene, putting on new sheets in a new configuration. reason was, that the bunker has an intricate shape, that I had problems figuring out from the drawings I have. But now I guess is pretty accurate. The bunker has a dome like shape with the bow end splitting into two sections that sandwich the rudder lever (to which the drive shafts) for the rudders are attached and the spare torpedo compartment. The two bottles for compressed air rest on these sections, angled upwards. I also put in the blow valve for the bunker and the corresponding mechanics. I also added the drive shaft for the aft torpedo tube hatch and cover. What is still missing is the electric drive for the rear dive planes, it's drive shaft and the deflection mechanism that connects it with the planes. But I'll have to think a bit how I'm going to make that.
Again small progress. I decided to add the actuator for the rear dive planes. You can see it in front of the stern torpedo tube. It's basically an electric motor with a gear box and a push rod driven by a thread road. The thing is pretty much the same thing than the one driving the rudders. Modeled in CAD, 3D printed, painted......
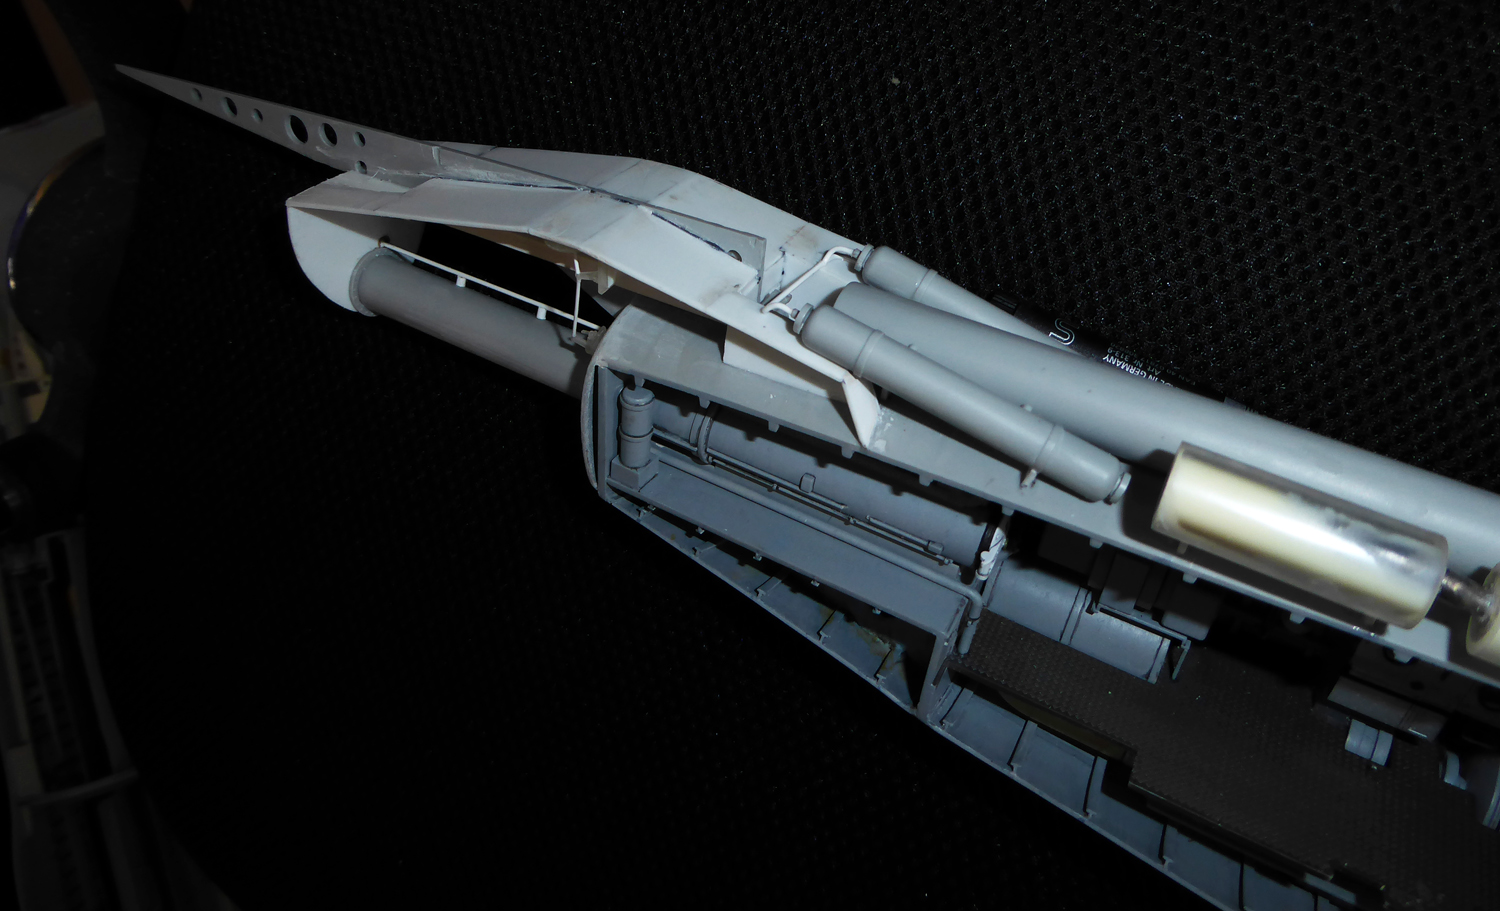
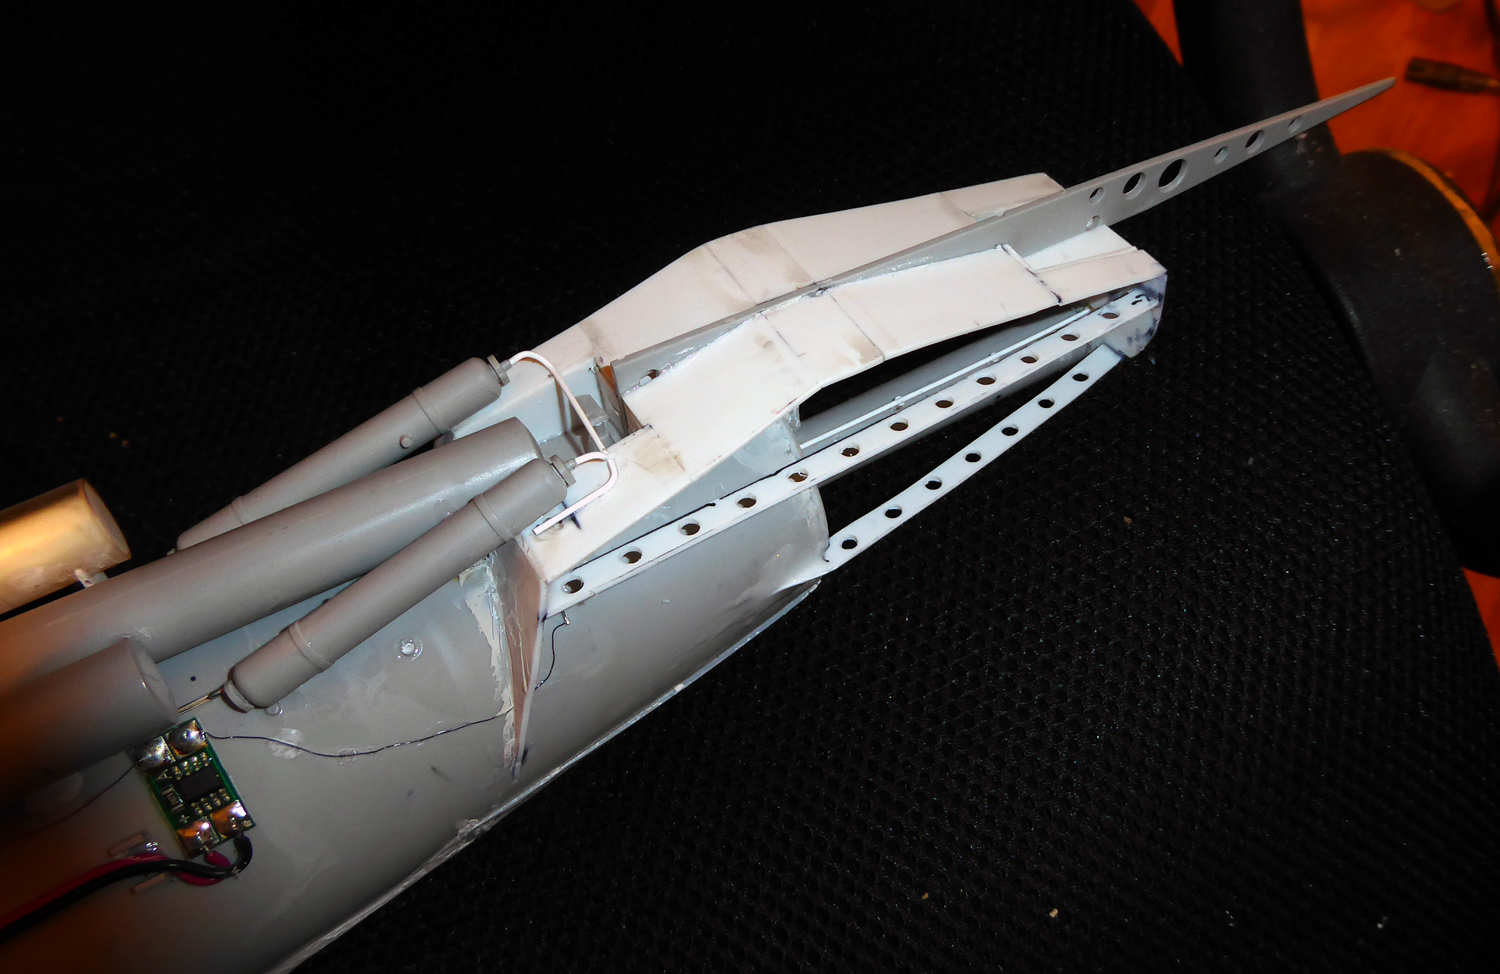
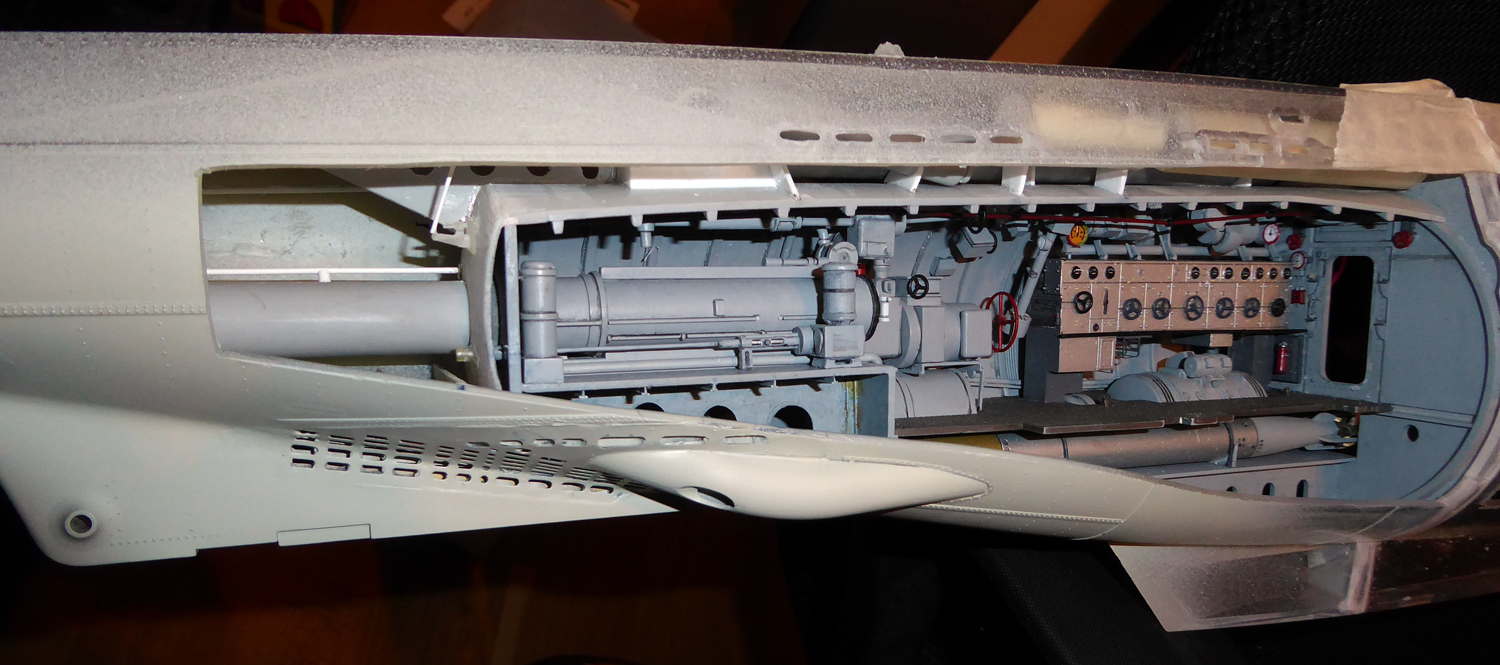
Progress is still slow. I attached the photo-etched parts for the stern limber holes. That was a first for me and took a while, especaially because I removed the hull sections so that the remaining parts resemble steel ribs. One can look inside this section, so it has to look good. Also scratch built and installed the lower bulkheads behind the end of the pressure hull. Also scratch built the stringers between the pressure hul and the bulkhead of the rear dive bunker. Pain in the ass, but I'm pleased with the result.
looks awesome. insetting that photo etch piece with all the limber holes had to be "fun".
I have the same sort of photo etch for the Type VII Arkmodel kit, but for a boat that is going to see water immersion, I think I'm going to pass on scraping out the hull to insert this detail.
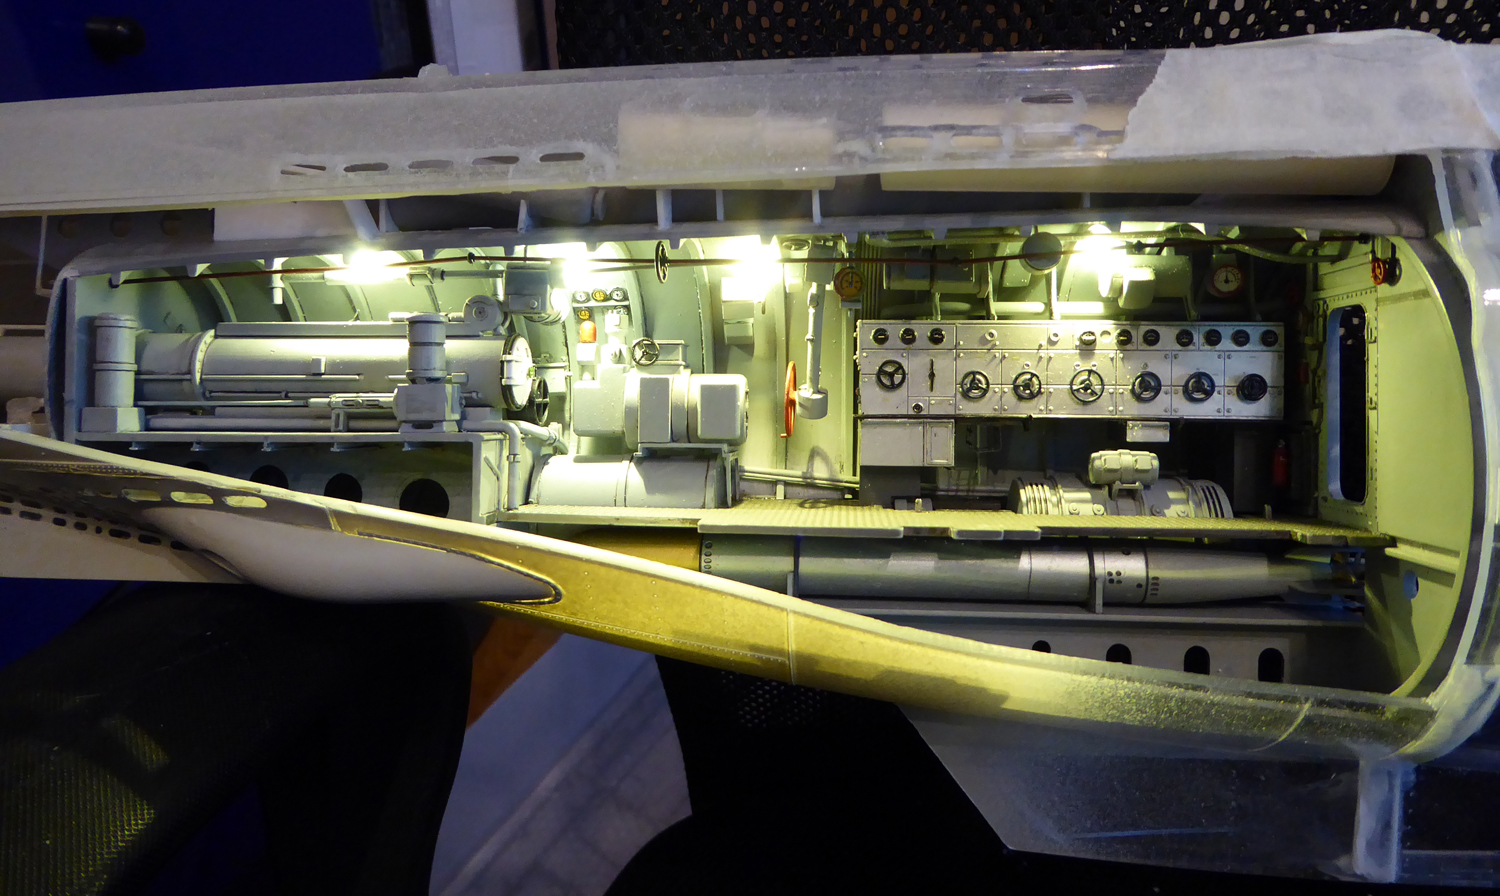
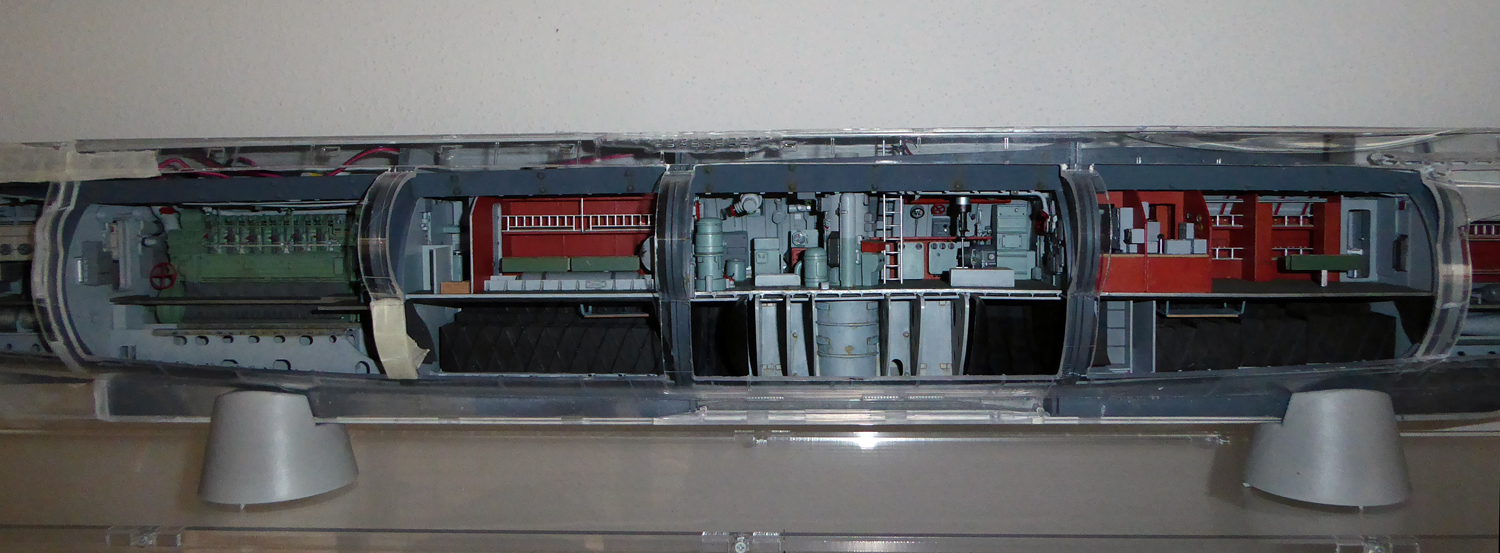
looks great , the lights actually make this alive, although I was not able to tell exactly where the red light went, I did sneak a couple in each compartment , gives it a bit of different atmosphere
Still slow progress. Had a lot other issues and so the work on the boat paused for a while. I started cutting the deck of the hull so that the photoetched deck will look real. I also started to paint and waether the outer section of the aft torpedo room....starts to look like something.


Comment