My Rescue Barge

Collapse
X
 
  • Time
  • Show
Clear All
new posts
  • Ralph --- SSBN 598
    Junior Member
    • Oct 2012
    • 1417

    #31
    December 14th =================================================

    I did not get much time in the shop.
    I got 15 minutes this morning and 30 minutes this afternoon.at the most.

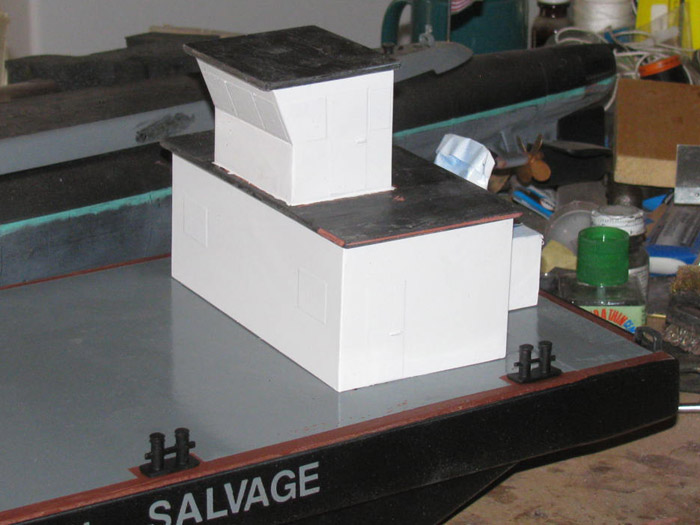
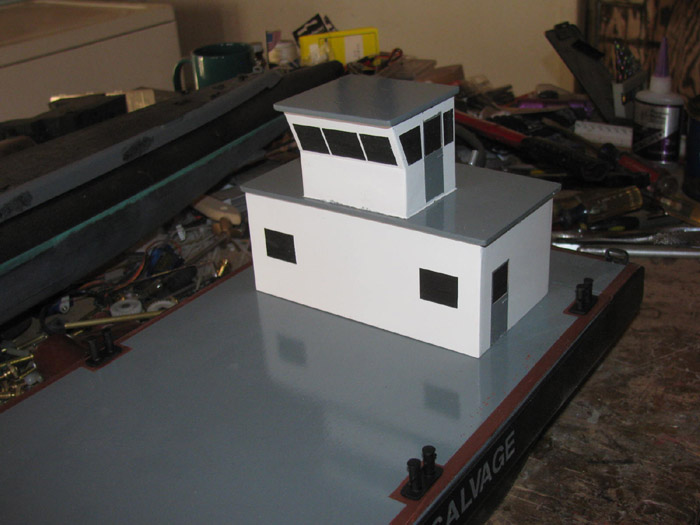
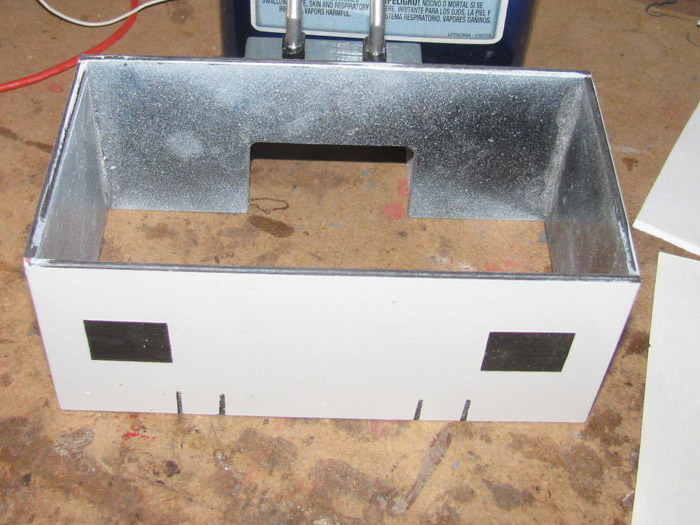
    I sanded the glaze on the deck house and wheel house.
    I had been thinking on how to make door details.
    I looked last night for my 1/64" wide tape to do an outline of the door frame that I woud paint over.
    I did not find the tape.
    When I got out to the shop, the first thing I did was fire up the heater.
    It was 45 F in the shop at 2pm.

    While doing that, I looked down at a test board.
    On it are various test I have done to check if something looked good or the glue would hold two different materials together.
    An on one edge there was the weld line test I did to reconstruct the weld lines on the Gato hull.

    I used 2 pieces of tape with a gap between for the weld line that I had glazed over.
    Then sanded down to the tape and removed the tape leaving a nice weld line.

    Thought. . . . Why wouldn't that work to make doors and frames?
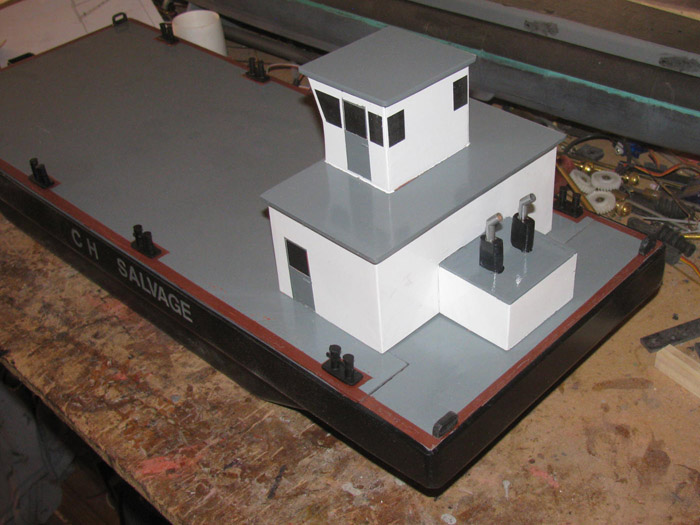
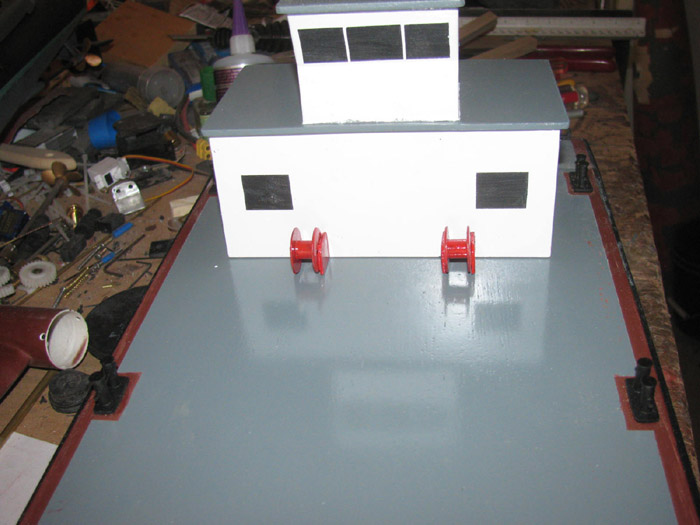
    So I taped off the door locations and glazed them this morning.
    I sanded and pulled tape this afternoon.
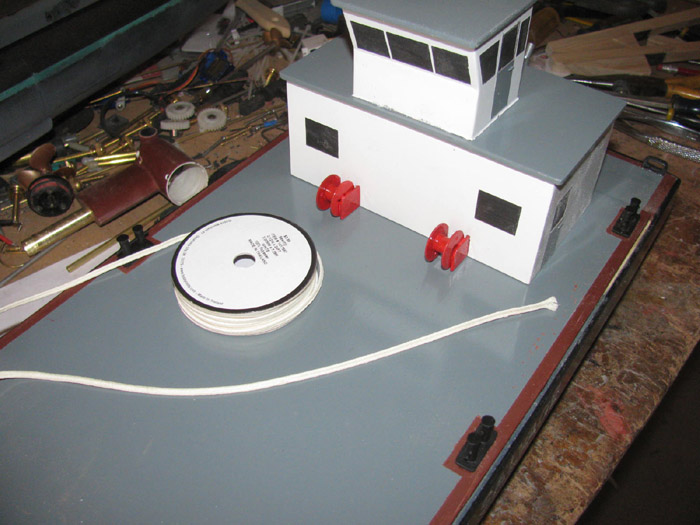
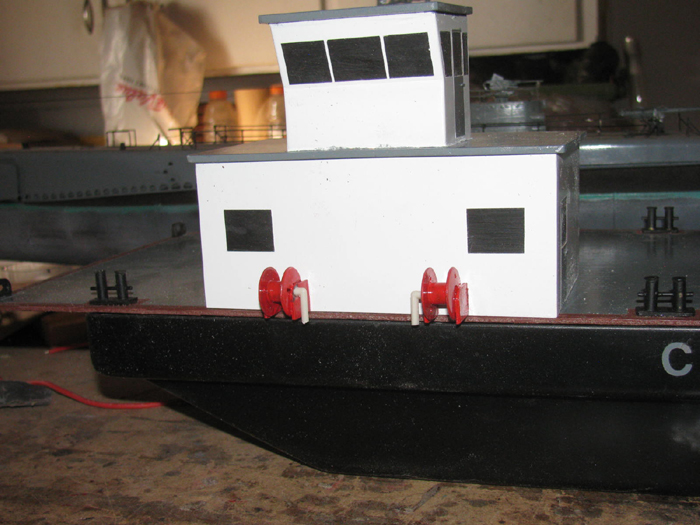
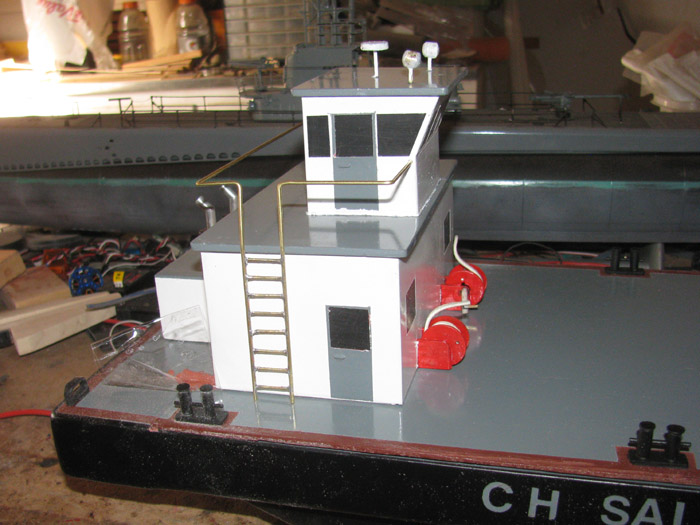
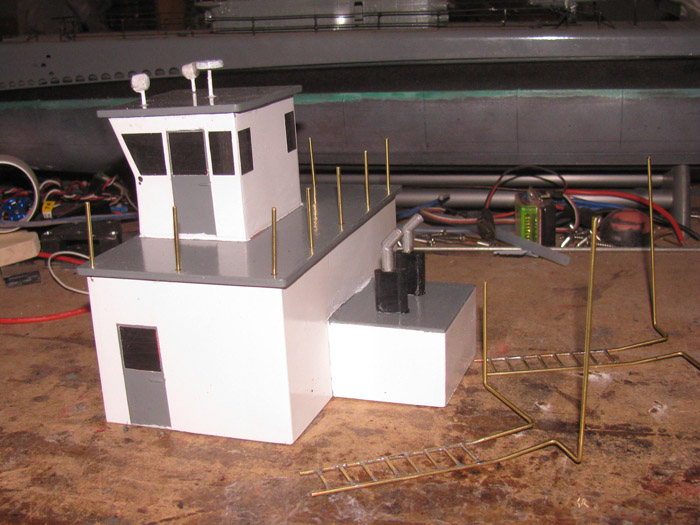
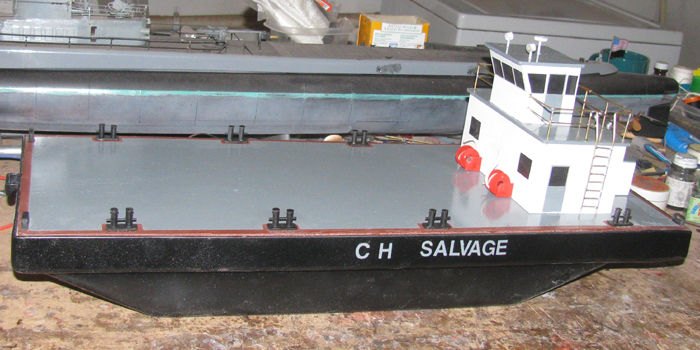
    The doors are raised slightly.

    The windows are still taped until I paint the white.

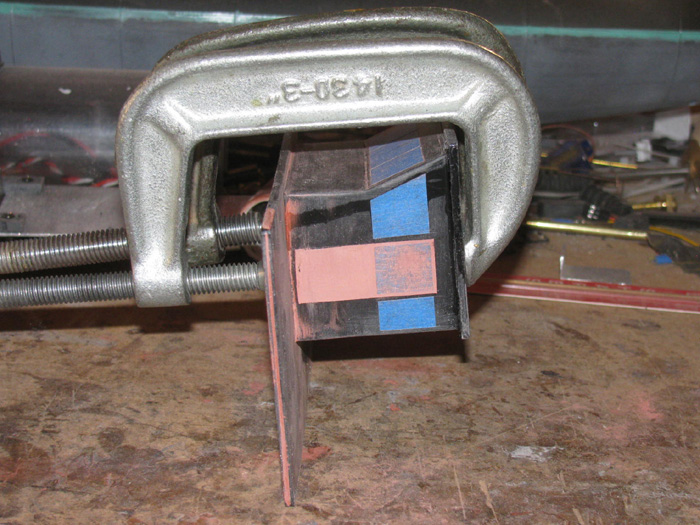
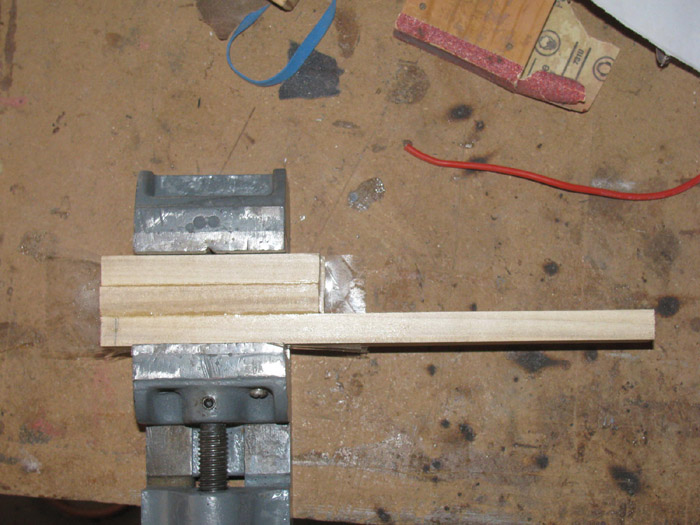
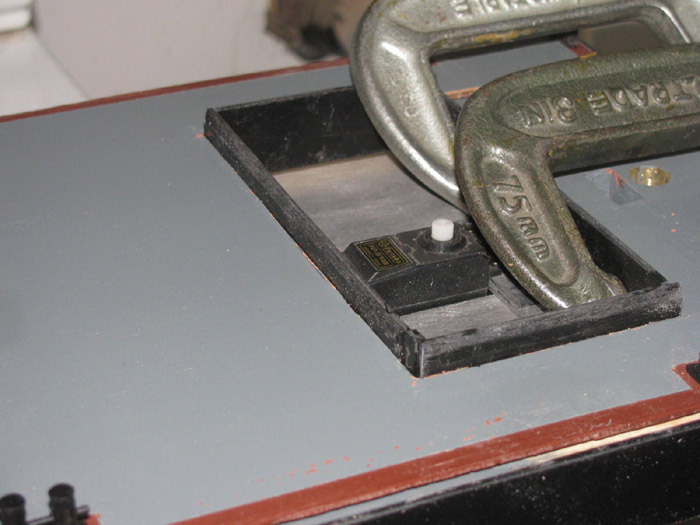
    Photo . . Roof being clamped after gluing.

    Comment

    • Ralph --- SSBN 598
      Junior Member
      • Oct 2012
      • 1417

      #32
      December 15th =================================================

      Almost didn't make it in to the shop.
      I stopped what I was doing and got 1 hour the shop.

      I cleaned up the deck house glazing and the wheel house glazing.
      I made 4 door handles for the doors.
      Quick and dirty.
      I cut 3/16" long brass wire.I am not sure what the diameter is.
      30 thousands? ? ?
      It is what I used for the lower rail on the Gato. (left overs)

      Taped off the roofs of the Deck house, wheel house and engine cover.
      They will be light gray like the main deck.

      It is a bit cold in the shop but the heater is on which helps a lot.

      A quick pass of white to tack the paint.
      Each pice was held above the heater about 3' to help it set.

      While I let the painted parts sit, I removed the vinyl letters on the hull.
      Again, I am amazed I got clean letter lines.
      I also mounted the 2 stern closed cleats on the stern block.


      Tomorrow I will paint the white again if it needs it.
      And I will install the electronics tray in to the hull.
      Then I can make up the steering cables.

      Still need to make the pusher bars for the bow.
      A couple of ladders and railing.

      Comment

      • Ralph --- SSBN 598
        Junior Member
        • Oct 2012
        • 1417

        #33
        December 16th =================================================

        Looked over the deck house and wheel house.
        There were some small runs.
        Sanded out the runs and repainted.
        Removed the roof tape.
        Window and door tape still in place.

        The roofs will be painted light gray like the main deck.


        Installed the electronics tray.

        I think I need to find another Rx with 6 channels.
        This Rx is out of another boat and will want it back.
        I have a 4 channel but I need a 5th channel to use with a knob control.
        A stick will not do.

        The rudder post bushing has been cleaned removing the over spray paint.


        Started the 2 push bars for the bow.
        1/2" square popular.
        The long piece is 9".
        Currently in vise until the glue cures.


        Almost forgot.
        Finished the motor pod tail cone and spacer.
        I had to deepen the cup seal recess about 1/16". Maybe a little less.
        I had to drill a recess in the front of the spacer for the shaft connector to fit in to.

        Installed the cup seal and put the 3 bolts in that hold the tail cone and spacer together.

        Problem.
        The propeller shaft would not turn without a lot of effort.
        Took it apart and removed the cup seal.
        Reassembled and using the propeller shaft, I found that the tail cone bushing and the spacer bushing are not straight enough.
        The shaft goes through but binds the shaft.

        Ran a 1/8" drill through the unit.
        Cleaning up the two bushings.
        Disassembled and reassembled several times.
        Even used a 1/8" round jeweler's file to remove burs.

        Finally, the shaft turned smoothly.
        In fact I can hold the shaft and spin the tail cone/spacer unit.

        Took it all apart and greased the cup seal and reassembled.
        Still turns easily but with seal resistance.

        I had to make another brass spacer for the rudder shaft.
        Turns out, while finishing the hull stern block, I must have sanded the post bottom and there was too much play in the rudder.
        Made a longer spacer and slowly sanded it down until the keeper pin went through the pulley and rudder post.

        Tomorrow I will be down in the big city.
        I will go by the large hobby shop and get wire for the main motor, and a couple of other things.
        Brass rod to make ladders is on the list.

        Comment

        • Ralph --- SSBN 598
          Junior Member
          • Oct 2012
          • 1417

          #34
          December 17th =================================================

          I the shop early.
          Turned on heater and sat down on my wooden milk crate and started taping off the doors and roofs to be painted gray.
          By the time I got the taping done, the shop was up to 60F.

          Time for the tack coat.
          Then wait before a second coat.

          Found a couple of plastic parts. (layers of plastic to make something)
          Problem is, I don't remember what they are for.
          Started to toss them in the track box.
          Then thought, I made these for something.
          The big issue is, I have parts on the work bench for 2 subs and this barge.

          As I assemble the barge parts it may come to me what they are for.

          Looked at the deck house and wheel house.
          Again. . . . I do not like painting.
          I painted 2 roofs and 4 doors.
          The doors on the wheel house look good.
          The doors on the deck house are all wrinkled and raised.
          Both had the same white paint on them that got painted over.

          Later today when I get home, I will sand them down and try another coat.
          ------Now later--------

          Sanding was done.
          Another coat of paint on the placed needed.
          Removed tape on windows where painting was not redone.
          After 45 minutes, I removed the rest of the tape.

          There will be some touch up after it all cures and I finish working on the deck house and wheel house.
          Railing to come.
          I am sure I will mess up the paint some.


          Painted the exhaust heat shields.
          Painted the exposed exhaust pipes.


          The barge is coming along and starting to look like something.


          Going to work on the push bars I glued up yesterday.
          They are ready to be shaped.
          Last edited by Ralph --- SSBN 598; 12-17-2020, 07:40 PM.

          Comment

          • Ralph --- SSBN 598
            Junior Member
            • Oct 2012
            • 1417

            #35
            December 18th =================================================

            Cut the pusher bars to shape.
            Need a spacer to make the pusher bars 90 degrees to work bench top.
            1/16" to 0 shim about 3/4" long on both pusher bars.
            Glued them on the back of the pusher bars and clamped in the vise.

            I had two things I wanted to get done today.

            Well the brass ladders did not go well.
            My soldering iron tip is so worn out, I could not get a pin point joint soldered.
            Worked on three steps and failed so I quit.
            Have to come up with a different idea or get a new soldering iron.

            Moved on to something than came up while I was trying to figure out how to hold the deck house on to the deck without gluing.
            I thought I would make a couple of small fire extinguishers on pins.
            Then while at the hobby store, I saw something that would make nice fire hose reels.
            So, I thought I would make a couple for detail.
            The hose reels are plastic sewing machine bobbins.
            A size that looks okay on the deck against the deck house.

            So, I am making 2 to see how they look when finished and painted red.

            But there is a problem.
            CA and plastic cement will not bond to the bobbins.

            Right now I have 1 on the work bench using epoxy to see if that will bond.
            I did sand all the parts.


            Day turned cold and I think it's time to go in the house.
            Tomorrow will come soon enough.

            Comment

            • Ralph --- SSBN 598
              Junior Member
              • Oct 2012
              • 1417

              #36
              December 19th =================================================

              The pusher bars shims have been shaped to make the pusher bars 90 degrees to the water.
              I have been sanded the pusher bars.
              Set aside.

              Time to make the pieces that go in the hole in the deck under the deck house
              What are they?
              Water dams?
              I made a lot of these when I was building sailboats. (50/800 class mostly)

              Cut several pieces of plastic to double up the layers.
              Rough cut to length.
              Applied glue and they are now clamped on the work bench to cure.

              Measured the deck opening to the deck house.
              Needed some filing to make the opening the size of the deck house.
              Got that done.
              Measured and cut 3 pieces of 1/2"x1/2" popular wood to glue under the deck to mount the plastic to.
              Mixed a little 30 minute epoxy and the wooden pieces are now clamped tothe underside of the deck.

              I have built 4 fire hose reels.
              The two you see in the photo and two using brass rod instead of the plastic sheet.
              Once the epoxy cures, I will see which ones look best to me.
              Those will get mounted to the front of the deck house.
              ----------------------
              I thought about going to town and getting a new soldering iron.
              But I have 3 appointments in town on Monday and Tuesday.
              I will hold off until I go in to town for those.
              Hey, it's 34 miles one way.
              ---------------------
              ---------------------
              Continuing.

              I trimmed the water dams to the correct height and length.
              I have epoxied three of the dams on the deck frame blocks under the deck.
              One goes on the stern block. (will go in later)
              Clamped them so they will stay in place while the epoxy cures.

              Looked over the 4 fire hose reels.
              Held them up to the deck house.
              The original effort seems like the one that will be installed.
              Painted them red.
              Original reels.


              Will get a second coat, tomorrow.
              I will clean up the water dams as well.
              Will fit the deck house on the dams.
              If I measured correctly, there should not be any clean up.

              I finish sanding on the push bars.
              Not sure exactly how I pan to mount them.
              If I put them on by mounting through the deck, it would take about 10 minutes if I have 4 stainless screws for the job.

              But my idea was to have the push bars lean back at the deck about 15 degrees or so with an arm sticking straight out at the bottom of the push bars.
              This wold make a cradle to hold the rescued boats while pushing them to shore.

              I have to check and see if my Tx channels can be reprogrammed from stick to knob.
              I want a knob so the leaning will stay where I stop it and not have to hold a stick in position because of the springs to center.
              Last edited by Ralph --- SSBN 598; 12-19-2020, 06:16 PM.

              Comment

              • salmon
                Treasurer
                • Jul 2011
                • 2340

                #37
                Ralph,
                You really do a great job of showing resourcefulness in building. Keep up the excellent work!
                If you can cut, drill, saw, hit things and swear a lot, you're well on the way to building a working model sub.

                Comment

                • Ralph --- SSBN 598
                  Junior Member
                  • Oct 2012
                  • 1417

                  #38
                  Thanks, Tom.

                  You ought to see my reject box(s).
                  Stuff that failed during the many builds I have done.
                  I have projects that look completed but are in the junk box because they did not work right.

                  This just means I have a box(s) of stuff I can go through for parts I might be able to use.

                  I was going to try and make brass wire hose reels but as I passed the sewing stuff in the store the other day, I saw these plastic bobbins.
                  Might as well see if I can make them work.
                  So far it looks like it will.

                  Comment

                  • crueby
                    Member
                    • May 2015
                    • 341

                    #39
                    Rather than a 'reject' box, I call that my 'ballast' box, the metal ones get re-used down in the bottom of the hull!

                    Comment

                    • Ralph --- SSBN 598
                      Junior Member
                      • Oct 2012
                      • 1417

                      #40
                      December 20th =================================================

                      Getting ready to put a second coat of paint on the hose reels.

                      Working on the push bars.
                      Looks good in the photo but what happened next was not pretty.
                      The plan here ended up with the hinge pieces needing more room in the deck than I wanted.
                      I did not want to have big grooves in the deck.

                      So, these push bars are now in the parts box and new ones have been cut and are glued up sitting in the vise.
                      Second plan is now starting.
                      [img]http://www.cliffhangershideout.com/barge/barge-74.jpg

                      I cleaned the paint off the front of the deck house where the 2 fire hose reels will be mounted.


                      The fourth side of the deck house water dam has been fitted and is now in place.
                      Clamped while epoxy cures.


                      -------------------------
                      A little more this afternoon.

                      Glued the wheel house on top of the deck house.
                      Actually the deck house roof was already mounted to the wheel house.
                      I Glued the deck house roof on the deck house.

                      Also, I installed the 2 fire hose reels.


                      When I bought the plastic bobbin spools, I found some fabric trim that looks like two hoises side by side.
                      Going to give it a try on the spools.
                      It looks right to me.
                      It frays very easily so this may take some effort.
                      I was thinking a little CA on the trim where I plan to cut it might stop the fraying.
                      Time will tell.


                      Got to make some sort of brass nozzle to mount on the wall next to the reels.
                      I also need to make a supply pipe to each spool with a shut off valve.

                      Comment

                      • Ralph --- SSBN 598
                        Junior Member
                        • Oct 2012
                        • 1417

                        #41
                        December 21st =================================================

                        Not much done today.
                        I was in town taking care of real life stuff.

                        Took the push bars out of the vice and sanded all the surfaces smooth in the belt sander.
                        Glued the spacer shims on and clamped back in the vise.

                        Cut 2 lengths of the sewing trim for the fire hose.
                        Soaked the ends in CA glue to keep them from fraying when I cut them again.

                        Tested 1 length on the fire hose reel.
                        I guessed the correct length and it looks good.
                        Took it off the reel and will install it tomorrow.

                        Needed to make 2 pipes that come up from the deck to the center of the reel.
                        Thought about this last night.
                        It soon be came obvious on how to do this.
                        Look through old plastic sprue parts trees for 2 90 degree corners with nothing near the corner so I could cut out enough to make the pipes.

                        First tree I picked up had 4 corners just like I needed.
                        Cut 2 and sanded to length.
                        Left the down pipe long so I could fit it once the glue on the end to reel cures.
                        Deck house is hanging over the side of the barge because the down pipes are long and will be trimmed later.

                        Comment

                        • Ralph --- SSBN 598
                          Junior Member
                          • Oct 2012
                          • 1417

                          #42
                          December 22nd =================================================

                          I have sanded the psuh bar shims t make the push bars sit at 90 degrees to teh deck/ waterline.
                          I will work on the installation of them later.

                          Back to the fire hose reels.
                          Let the plastic pipes I made yesterday cure over nigth.
                          (got a new soldering iron and needed to try it out)

                          This morning I made brass shut off valves.
                          Cut very short brass tubing for valve body and I ground 1/16" brass rod to represent the valve handles.

                          The fire hose reels are mounted on the deck house and lift off with the deck house.

                          Several photos of reels.


                          Not sure what I will work on next.
                          But once I get out in to the shop there is plenty to do.

                          Maybe I will try making the deck house railing now that I have a new soldering iron.

                          Need to make a tensioner for the large steering pulley.
                          I have been thinking about that for a week.
                          I think I got something in mind that will work and easy to build.
                          2 blocks of plastic and a long stainless bolt.

                          I have been looking for DC stranded wire to wire the motor pod. (lots of little wires and flexible)

                          This morning I used the new soldering iron and I started to toss the old one in the trash.
                          I stopped because the wire I am looking for is the same as the cord on the soldering iron.
                          Repurposing!
                          ----------------------

                          Working on making 2 roof top spotlights.
                          Brass tube for housing and 1/16" brass rod for pipe stand.
                          Filled with CA and baking soda.

                          I will shape the back of the housing and lens after the CA cures completely.

                          The flattened rod goes in to the rood to help it bind when gluing.


                          I also made a domed radar antenna.

                          I have 1 fire hose reel with hose installed and 1 ready to be finished off.
                          Last edited by Ralph --- SSBN 598; 12-22-2020, 05:46 PM.

                          Comment

                          • Ralph --- SSBN 598
                            Junior Member
                            • Oct 2012
                            • 1417

                            #43
                            December 23rd =================================================

                            Started making the steering cable adjuster.
                            Gluing plastic pieces together.
                            In the vise, now.

                            Cleaned up the 2 spotlights.
                            One on the left has been cleaned and the one on the right is next.


                            Primed the spotlights.
                            Installed on top of the wheel house.
                            Will paint later when touching up everything.

                            Did a little with the fire hose reels.
                            Wrapped the hoses around the reels.
                            CA on the under back side to hold in place.
                            I left the end loose so I can make and put some sort of nozzle on them of at least hose connectors and maybe may a nozzle and mount on deck wall.

                            Thought I would give my new soldering iron a go.
                            I made a ladder and hand railing.
                            It looks a bit wide but I do not think I will try to make it narrower.

                            I need to make a second ladder.

                            The upper hand railing is 1 piece of brass rod.
                            I think it will go all the way around and make the other ladder side.
                            If not, I will connect the railing at the center back.

                            There will be a few stanchions and a second smaller rail.

                            The ladder and railing is just set in place for a look.

                            I am thinking I will finish the ladder and railing and stop with the details.
                            I looked at pusher tug masts with light but they have too much stuff on them.
                            Lights, radar, Radar reflectors and antennas of all sorts.

                            I may add 1 or 2 whip antenna. (don't know)

                            Comment

                            • Ralph --- SSBN 598
                              Junior Member
                              • Oct 2012
                              • 1417

                              #44
                              December 24th =================================================

                              Finally got out to the shop.

                              Pulled my wooden milk crate over to the bench where I am working.
                              I build the second ladder and railing.

                              Measured the roof of the deck house for the locations of the stanchions.
                              Drilled the holes.
                              I cut brass rod for stanchions, one at a time.
                              Putting each stanchion on the deck house, I ground the stanchions to height.
                              Using a small machinist ruler with sliding T.

                              Once I got all the stanchions cut and ground to height, I went back and glued each stanchion if making sure it was straight
                              The photo is before gluing.


                              I have bent the left side ladder railing to fit the roof line.
                              Now I need to do the same to the right side ladder and railing.
                              It is just sitting there for the photo.

                              There will be a second railing made of smaller brass rod under the top rail.


                              I am also fixing a small gap on the deck where it meets the stern block.
                              One side had a gap of about 1/8" that looked bad.
                              I thought about dropping a coil of rope over it but this is where the deck comes off the hull.
                              So I am fixing it.
                              Just using glaze and paint.

                              Comment

                              • Ralph --- SSBN 598
                                Junior Member
                                • Oct 2012
                                • 1417

                                #45
                                December 25th =================================================

                                Yesterday, I prepared more railings.
                                This morning, I installed the second railing pieces.
                                Went on quick.

                                There is some solder clean up with a file but not much.
                                Once the solder is cleaned up, painting begins.

                                I think I will paint the railings and touch up the rest of the barge.

                                Still need to make fire hose fittings.
                                I think I am done for now with detailing.

                                Deck house and wheel house.


                                Deck house and wheel house on the deck of the barge.


                                I need to make 2 plastic pieces for the bottom of the ladders that will mount to the deck house and securely hold the ladder in place to the deck house.

                                Comment

                                Working...
                                X