My Rescue Barge

Collapse
X
 
  • Time
  • Show
Clear All
new posts
  • Ralph --- SSBN 598
    Junior Member
    • Oct 2012
    • 1417

    #16
    November 29th =================================================

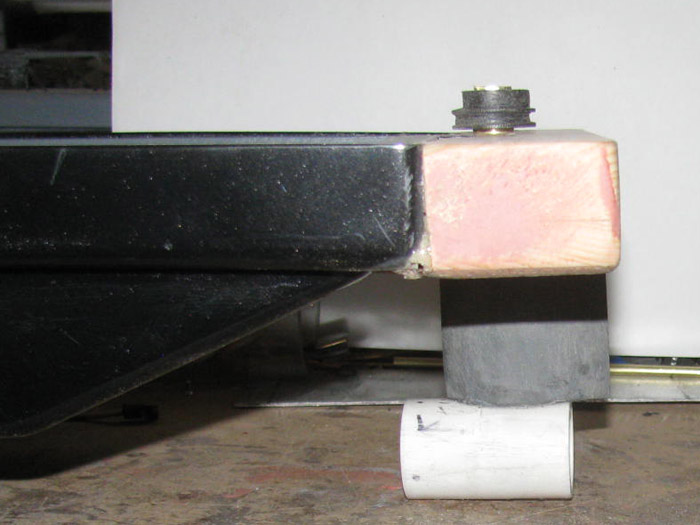
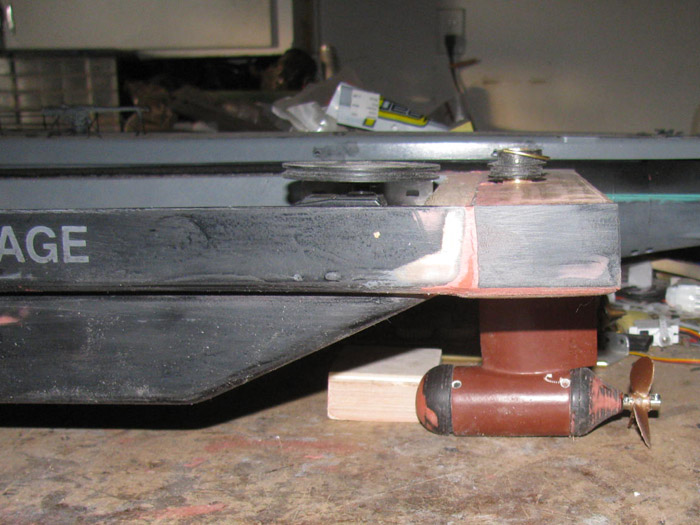
    Today, I fitted the rudder post in to the stern rudder through tube.
    The glue I use to install the rudder through tube, expands.
    It apparently expands enough to change the shape of the 1/2" brass tube.
    I had to use a Dremel 1/4" sanding drum and a couple of files.
    Round and half round to get the tube back to round.
    Polished it and the rudder post, several times until the rudder turned easily.

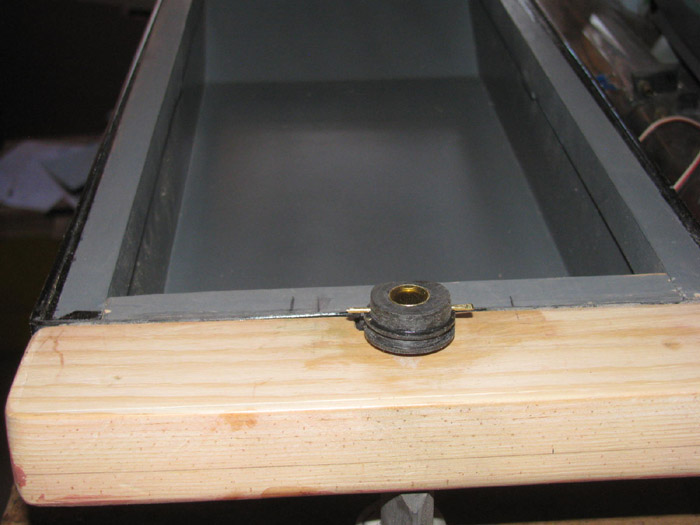
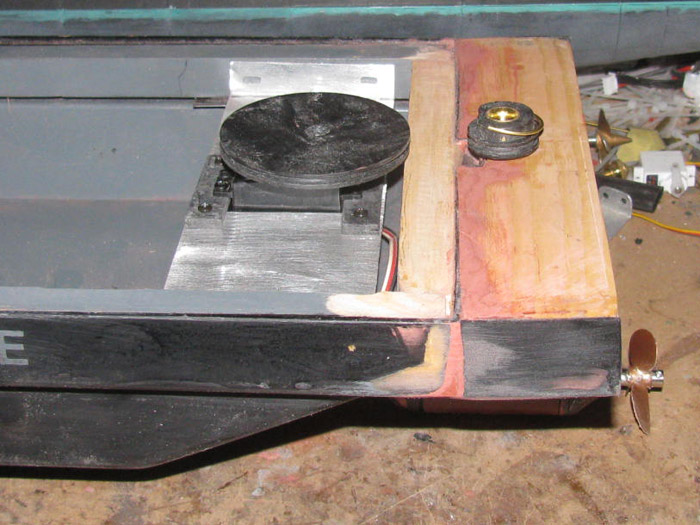
    Cleaned up the 2 spacer brass rings that go between the hull and the rudder and between the hull and pulley.


    Drilled the pulley and rudder post for a through pin of 1/16" rod.
    Also drilled the pulley for the cables but it is on the front side.


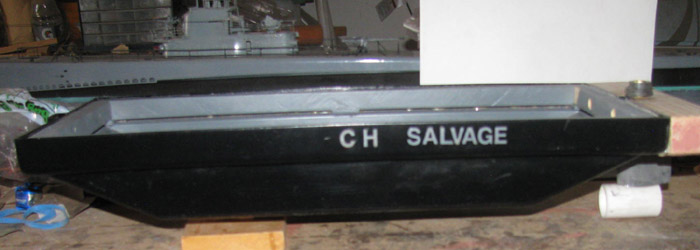
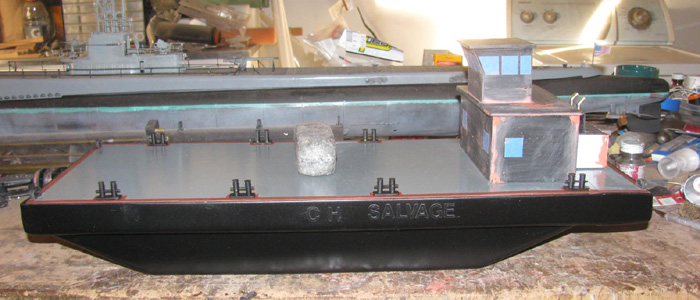
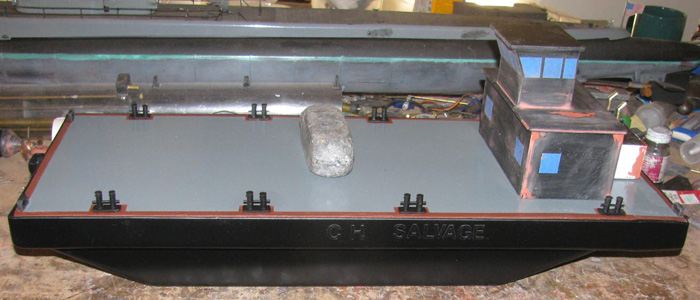
    Sat down on my milk crate and with Exacto knife, I removed the vinyl letters.
    I am actually surprised how well they came out.
    The vinyl letters are 1/2" tall.


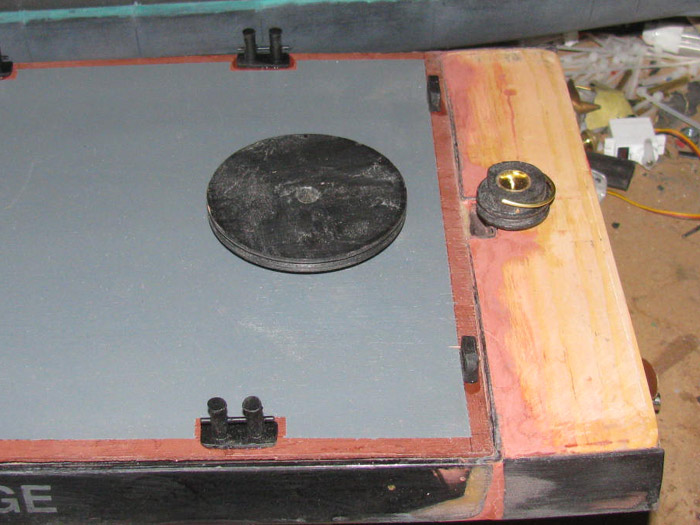
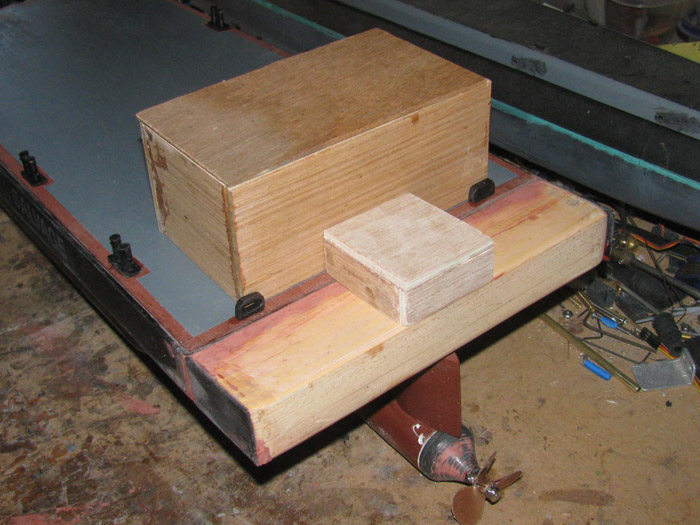
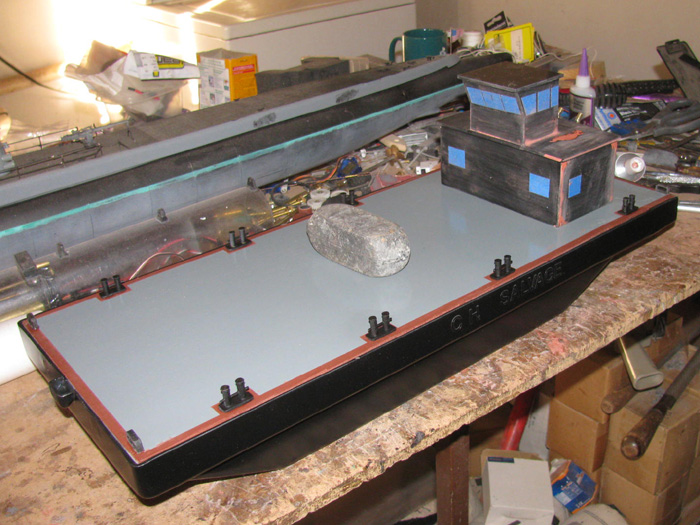
    I have removed the rudder and I am preparing the stern block for priming and painting.
    There is some glazing to do.
    I have jury duty tomorrow, so I plan to put the glazing on today and let it dry until I get done with jury duty.

    Comment

    • Ralph --- SSBN 598
      Junior Member
      • Oct 2012
      • 1417

      #17
      November 30th =================================================

      Last night I got the message that I was not needed for jury duty.

      So out to the shop I went this morning.
      A bit cold but it is warming up.

      I sanded the glazed parts of the hull. (stern block)
      Sanded the rudder where it needed a little glaze.

      Applied glaze in the spots not yet filled. (maybe 2 more times)

      Cut up plastic sheet to make 2 spacers for the rudder servo.
      It needs to be raised up so the 2 pulleys line up.

      I need to get 8 small bolts for the servo and the spacers.
      Going out to measure so while in town later today, I can get the bolts.

      Maybe 4 screws and 4 bolts.

      Done for now but I will be out in the shop later today.
      -------------------------------------------
      Now later in the day.

      Working on the electronics tray.
      Got the bolts while in town.
      Turns out, I will be using screws.

      Originally I was going have slots on the servo mount to apply tension on the steering cable.
      But I could not figure out how to get under the pulley to tighten the bolts.
      While fitting the tray in to the hull, it became obvious that if I slots in the end of the tray, I could move the whole tray and tighten the screws for tension.

      So there are slots in the end of the tray.
      The screws will go in to the deck frame that is screwed and glued in to the hull.

      Servo mounted on tray.


      Pulley mounted on to servo.


      The electronics tray set in place in the hull.
      The servo pulley and rudder post pulley line up.
      There is a plastic piece mounted to the bottom of the wooden frame that the tray sits on.


      I set the Rx and ESC in place for fit.
      I think this is the easiest install I have done.

      Comment

      • Ralph --- SSBN 598
        Junior Member
        • Oct 2012
        • 1417

        #18
        December 1st =================================================

        I was not sure what I was going to do in the shop today.
        I went out there any way.

        Sitting on the bench is the hull with the red glaze.
        So I will start sanding the glaze.
        Got that done and looked it over.
        Looks like it might be done.
        If not, a very light layer on one end will do.

        Before doing that, I needed to glue shims on each end of the stern block.
        In the above photo, I can see the small step on the wooden block on the side.
        The block ended up a little narrow, so I will build it up with a couple of 1/16" plastic shims I can sand down as needed.
        While the glue cures, I will do some thing else. ? ?

        With the pulleys sitting in place, I can measure for a deck house.
        My original thought was to make a deck house that lifts up to get access to the electronics.
        This requires building a deck house and a frame to fit through the deck standing proud about 3/8" to 1/2" to stop water from running in to the hull.

        But the more I think about it, the less I like the removable deck house.
        Consider this.
        I only need to get to an ON/OFF switch to run the boat.
        If there is an maintenance needed, I can remove the deck completely.

        So, I might glue as well glue the deck house direct to the deck eliminating the splash frame.

        I have a plan and I have decided on a size for the deck house.

        Out to the tool shed and cut some door skin to size.
        Back to the shop and start gluing the deck house walls together.

        This is a small job so I decided to try using epoxy to glue the deck house together.
        I do not use epoxy so I do not know how it will react to my parts.

        I was going to make the deck house out of sheet plastic.
        But the plastic I have is getting old and it has become brittle.
        It doesn't bend but cracks.
        ----------------------
        I now have a deck house made of wood door skin.
        I also made a much smaller deck house to cover the rudder pulley.
        I will make it look like an engine cover.
        Thinking of putting exhaust pipes and mufflers on it.

        I painted the motor pod main section and rudder.
        I have been putting it in and out of the rudder post.
        Why not get the first coat of paint on it.

        It looks so much better.
        Like building a boat and finally getting that first primer coat on it.
        Looks almost finished.

        Comment

        • Ralph --- SSBN 598
          Junior Member
          • Oct 2012
          • 1417

          #19
          December 2nd =================================================

          So much small stuff to work on.
          I will work on several different parts today.

          I worked on the deck house.
          I had to glue 1 corner on the main deck house.
          I sanded all the corners to flatten the over extended wood panels.

          I started on the hull.
          I sanded the glazing and the 2 stern side spacers.
          I ran in to some glaze that did not harden at all.
          I ended up digging it out the best I could and filled the void with epoxy, hoping to get a solid finished stern extension.

          Moved on to assembling the motor pod.

          I cut the recess for the cup seal.

          Drilled 3 holes in the front and 3 holes in the back of the motor body.
          Bolts will hold the front and back of the pod on.

          The back part is made up of 2 pieces made from plastic.
          The back part has a recess cut in to it for the shaft seal.
          There are 3 bolts inside the pod to join the 2 back parts.


          I got all the hole drilled and tapped.
          I used the bolts for tapping.

          The holes I drilled for the bolt to thread in to is 1/16".

          I have to assemble the parts to the pod to make sure the propeller shaft is straight and turns freely.
          I can not do that until the epoxy in a hole I drilled in the wrong place, cures.

          Looked through my supply of paint, I can can not believe I do not have white.
          But, I build submarines and there is no white on any of them.

          There is more to do, I just don't know what I will work on until I look over what is non the bench.

          I know this barge will be followed by the Gato.
          There are a lot of loose parts on the bench that need to be assembled.
          -----------------
          This afternoon, I did a little more.

          Here the electronics tray is set in place so I could measure the pulley location.
          The rudder post pulley is also installed.
          I made a 1/16" brass rod clip to hold the pulley on the rudder post.

          The motor pod can be seen.
          The nose and back have been fitted along with drilling the holes for the bolts.
          Stuck the propeller on it's shaft in to see the look.

          The shroud is not attached.


          Looking down in to the hull at the pulleys.
          This was needed to measure for the deck house.


          Set the deck on to check level from main deck to stern extension.
          The electronics tray is adjustable by 1/4" to tension the pulley cables.

          The deck will be cut to to the deck house inside measurements.
          The deck will lift off without touching the servo pulley.

          I can see the 2 back closed cleats will need to be moved.
          The deck house will hit them and the closed cleats should be at the stern edge of the hull.
          Not a problem.
          The Exacto knife popped them right off.


          The deck house and engine cover in the process of being built, looks good sitting on the deck.
          I do think I may add a small wheel house on top the main deck house.

          The engine house needed to be turned 90 degrees. (Not done in this photo)
          Cut 1 a side off and moved it to the short side.

          The roof is not glued in place.
          I can remove it to see where to draw the lines to cut the deck so the house sits on the deck and the deck comes all the way to the inside walls.

          Comment

          • Ralph --- SSBN 598
            Junior Member
            • Oct 2012
            • 1417

            #20
            December 3rd =================================================

            I was gone most of the day.
            Got a few minutes in the shop.
            Sanded the stern glaze from yesterday.
            Too cold in the shop at night so I will be bringing the hull inside tonight to cure.

            After sanding, I used a straight edge to check my work.
            Never a good thing.
            I can see the lower spots needing more glaze.
            Both side where I put the shim to bring the wood out to thehull sides and the top of the stern block at the joint between the wooden block and the hull edge.

            Got a long piece of sheet plastic.
            Checked it straight on a piece of sand paper.
            Spread the glaze from the hull edge to the middle of the wooden block.
            It is not much but the deck was not flat.
            Now that I type this, I think I need to check the hull to wooden block to see if I need to glaze that so there is no line.

            Or I might paint the stern from the hull to the back edge primer red as part of the safety edge of the barge.

            I will know better tomorrow after I sand today's glazing.

            This morning, before leaving I was in the shop to start making a bigger engine cover.
            Mostly taller for the 3 wires to the motor down the rudder post.
            I made the parts wider to see if it looked better when taller.
            I think I added a 1/2" in width.
            Don't remember.
            I just cut plastic parts and glue then to double the thickness.

            While out and about, I stopped by the hobby shop to get a 1/8" stainless rod which I hope will work for my bow sub catcher idea.

            I still have not ordered batteries.
            I put a note here next to the keyboard to check on that in the morning.

            I will also look for the silicone high temp motor wire I have some where in a parts box.
            If I wire the motor I can close up the motor pod and paint it.

            Got to find some flat black hull paint.
            The gloss black did not have the look I wanted.
            Maybe semi gloss.
            Last time I looked at the hardware store they had no flat black and 1 can of gloss.
            I brought that can home.

            Comment

            • Ralph --- SSBN 598
              Junior Member
              • Oct 2012
              • 1417

              #21
              December 4th =================================================

              I got the hull glaze sanded.
              Still a couple of very small blemishes.
              Glazed them.

              Measured the location for the deck house to cover the servo pulley.
              Cut the deck opening.
              The pulley is above the deck.
              In the photo, the servo is all the way back.
              There is 1/4" to move forward for adjustment.

              Between the pulleys is a gap in the deck.
              The deck is removable but the cross piece has to be fixed in place on the hull to get the deck over the pulley.
              I cut a piece from the removed deck piece and it has been glued in place.
              Currently with weights holding it down while it cures.


              Set the deck house in it's location.
              There will be a cut in the back wall of the deck house for the steering cables and main motor power wires to go through.


              Set the engine cover on.
              This cover is not the one I will be putting on the barge.
              It is to low in height.
              I am making a new one.

              Comment

              • Ralph --- SSBN 598
                Junior Member
                • Oct 2012
                • 1417

                #22
                December 5th =================================================

                Sanded the stern block again.
                Need a little more sanding and glaze on the deck part I glued in.
                One side is a little high and can be seem easily.
                Sanding done and glaze applied.

                The glaze on the deck house has been sanded.
                I took a steel square to the deck house and it was not square by about 1/16" on one end.

                To the table saw.
                See the saw to cut at one end of the house but not the other.
                I slowly moved the house in to the saw with each pass.
                The first couple of passes did not cut the complete side.
                When I could see the side being completely cut, I stopped and set the square in place to check.

                The house is square all the way around now.
                Back in to the shop.

                Yesterday, I made a new engine cover.
                This one is in plastic.

                I sanded the sides and back to true up the corners.
                Then the top.

                Set the engine cover against the deck house and marked the inside edge lines.
                This is where I will cut the deck house for the steering cables and motor wires.

                Made the cut and filed it to finish.

                Drilled some dimples down the edges where the engine cover will be glues to the deck hose.
                I wanted more grip for the glue.

                Got what I wanted and applied epoxy to the 3 edges and clamped the two parts together.

                Trying to decide if I want a wheel house on top of the deck house.
                This would mean making railings on top of the deck house.
                A couple of ladders as well.

                I am thinking this could be done later

                As soon as the deck house/engine cover have cured, I can start on the pieces that go in the deck to hold the deck house on.
                On sailboats it is called the hatch lip.
                A 3/8" tall piece to keep water from running in to the hatch opening.
                The deck house drops down over it and it held in place by some sort of mechanical devise.

                I the past I used rubber bands and springs.
                Today I see magnets being used.

                I though I might make a couple of fire extinguishers and through pins.
                Not there yet.
                -------------------
                Back out to the shop.
                Sanded the glaze on the stern extension.

                With steel square in hand, I checked the stern extension to the hull.
                The stern block is higher at the back of the block than at the front where it meets the hull.

                This causes the deck house to not sit level on the deck.
                The deck house is on the main deck but the engine cover is on the stern block and holds the deck house back up off the deck.
                I put the belt sander in my outside big vise.
                I spent 15 to 20 minutes sanding down the stern block a little at a time.
                Checking it with the square after every 2 or 3 passes on the sander.
                Also had the deck house out there to use for checking.

                I think I got it.
                I did sand a little to much off the right side.
                The fix it to glaze it using a long straight edge to apply the glaze.

                More sanding to come, tomorrow.

                The far side is where I had to raise the stern block up to meet the deck panel.

                The near side was to fill a small gap between the stern block and the hull.
                (probably would not have been noticed after paint)


                I hope I am where I can do a little sanding cleanup and then start priming the hull bare wood parts.

                The deck house need more work.
                The roof is not fixed in place and there are details that need to be glued on after I make them.

                Comment

                • Ralph --- SSBN 598
                  Junior Member
                  • Oct 2012
                  • 1417

                  #23
                  December 6th =================================================

                  Sanded the stern hull extension.
                  Bad news.
                  I made a small change to the extension and there is more glazing and sanding in my future.
                  The change was caused by the engine cover.
                  It can be fixed.

                  I have not decided whether to attach the deck house to the deck or make it removable.

                  I have to do some measuring to determine the size of a transportation box.
                  Thought, I did think of just making a stand and carrying the boat without a transportation box.
                  But, one of the reasons for the transportation box is to protect the boats here at home from damage while being stored.

                  Cut sheet plastic to make a new roof.
                  It looks funny to me with no overhang.
                  So the new roof will have overhang.
                  It is 2 layers thick so there was bonding involved.
                  It is currently clamped to the work bench to make a pressure bond.

                  I made 2 engine exhaust pipes and cut plastic to make 2 heat shields to go on top of the engine cover.
                  That big box behind the deck house looks so bare.

                  Here are the 2 exhaust pipes.
                  Diameter of tubing is 1 size smaller than 1/4".


                  Continuing today.

                  Shaped the heat shields.
                  Drilled for the exhaust pipe.
                  Glues the exhaust pipe in the heat shield.
                  Glued the 2 exhaust systems to the engine cover.


                  Second view.

                  Comment

                  • Ralph --- SSBN 598
                    Junior Member
                    • Oct 2012
                    • 1417

                    #24
                    December 7th =================================================

                    It is a bit cold outside.

                    I am getting ready to go in to town.
                    But I was putting a couple of wrenches back in the shop so I did a little sanding.
                    It wasn't much but the wooden stern extension glazing is done.
                    If it warms up, maybe this afternoon I can get a primer coat on the wood.
                    I figure 3 or 4 coats to cover and seal for paint will do.

                    I got a list of items needed while in town.
                    3 hard wood 1/2"x1/2"x3' strips.
                    Flat black paint.
                    Some stainless steel bolts and nuts.

                    I hope to get more done and report later today.
                    -----------------------
                    Yep, it's later in the day.

                    I turned on the heater in the shop.
                    Got it up to 65F so I was able to get 2 coats of primer on the wooden stern block and 1 coat on the hull side where the lettering goes.
                    Tomorrow I may not be around to work on the barge.
                    More VA appointments.

                    All is good but work on the barge is about to slow down a little. (I am guessing until I see the doctors tomorrow)

                    Comment

                    • Ralph --- SSBN 598
                      Junior Member
                      • Oct 2012
                      • 1417

                      #25
                      December 8th =================================================

                      Ready to go early.
                      15 or so minutes in the shop.

                      Sanded yesterday's primer coats on the hull.
                      Sprayed another coat on the hull.
                      Taking care so if this is the last coat needed, I do not have to clean it up.

                      Sanded the deck house.
                      Looks good.
                      Will start painting the deck house.
                      Taped off the engine cover roof. (different color and is plastic. No need for primer coat)
                      Got a light tack coat on the deck house.
                      Just trying to seal the wood grain.

                      Just enough time to type a few words here.
                      Off I go.

                      Comment

                      • Ralph --- SSBN 598
                        Junior Member
                        • Oct 2012
                        • 1417

                        #26
                        December 9th =================================================

                        Yesterday, I did some touch up gray painting.
                        Today, I found out that the paint I used yesterday doe not match the paint I used originally.

                        So today, I removed all the parts from the deck 8 bollards and 2 closed cleats.
                        Sand the deck down with a palm sander and repainted the deck.

                        The back 2" of the deck was repainted yesterday but today I ended up repainting it all.

                        After it dries completely, I will need to put the red detail line back on the deck.
                        That line needs to continue back on to the stern extension.
                        I will tape it all off to paint it all at once.

                        Painted a second coat of white on the deck house.
                        It's going to take more.

                        After painting, I cut plastic sheet and I am building the wheel house that goes on top of the deck house.
                        Got 3 sides on the bench with square blocks holding it in place while the glue cures.
                        The front will go on last.
                        It is scored and bent forward for the top half to look like the windows that lean forward.

                        Tonight, I will apply the letters to the sides of the hull, again.
                        After that, I will if I feel up to it, tape off the deck and stern block for the red lines.

                        After removing the bollards and close cleats, I cleaned off the glue from the bottom of all of them.
                        They are ready to be reinstalled once the painting of the deck is completed.

                        Batteries should be here Friday or Monday.
                        Then I can start on wiring the motor pod.

                        Comment

                        • Ralph --- SSBN 598
                          Junior Member
                          • Oct 2012
                          • 1417

                          #27
                          December 10th =================================================

                          Letters were applied.

                          Using masking tape, I taped the deck edge lines and bollard stations.
                          Masked off the hull stern block to match the deck. ( hope)

                          I got 2 coats of the red primer on both the hull and deck.
                          Later in the day, I looked at the parts and I see problems.
                          The new paint cracked over the gray.
                          I think I have said I do not like painting.

                          I lightly sanded and I used a stainless brush to get down in the bottom of the cracks.

                          I have painted a third coat or red primer.
                          I will let that sit over night.

                          While in the shop, I thought I would trim the excess plastic sheet off the front wall of the wheel house.
                          That was so exciting.
                          I was about half way through removing/trimming the plastic sheeting, when the wheel house decided to explode in to 4 individual parts.
                          Well now.
                          That should not have happened.

                          Okay.
                          I setup my wooden blocks to keep the house walls straight and square.
                          I re applied bonding cement.
                          Put it all together again.
                          I will let this sit over night.

                          Before I continue the trimming, I think I will run a line of CA down each corner on the inside of the wheel house.
                          -----------------------------
                          Came in the house and there were 2 messages that the package (batteries) is sitting at the post office.
                          Problem, I was there this morning.
                          Called and talked to someone at the post office.
                          They went and looked in my PO box.
                          They said there was a package in my box.
                          Great. I will go again tomorrow and pickup.

                          The problem with living in the desert, I have a PO box and the county gave me a street address.
                          That is a box out on the highway.

                          Problem is the street name.
                          There are 2 street with names that are close to being the same.
                          Cabrillo St and Camarillo St.
                          My stuff has been delivered to the other box several times over the years.

                          I usually get my stuff about a month later.
                          The other address is for a house that burnt down over 10 years ago.
                          --------------------------
                          I was in the big town a couple of days ago.
                          I stopped at Lowes and got some 1/2"x1/2" poplar wood strips.
                          To use under the deck for stiffing and to make the 2 push bars at the front of the hull.

                          I put another coat of white on the deck house.
                          I am not liking the way it looks.
                          The wood gain is swelling and becoming a visual problem.

                          Tomorrow I think I will have time in the shop to assess the problem and maybe cut some plastic sheet and build a new deck house.

                          Reason for thinking this way.
                          On the back of the deck house is mounted the engine cover which is plastic.
                          The paint on it looks really good.
                          Nice an smooth.

                          Cutting plastic panels to build the deck house will take about 10 minutes.
                          Gluing will not take much longer because I have wooden block to hold it together. . . after the wheel house is done.

                          Comment

                          • Ralph --- SSBN 598
                            Junior Member
                            • Oct 2012
                            • 1417

                            #28
                            December 11th =================================================

                            This morning, I cut plastic sheet to make the walls of the new deck house.
                            Each wall is made of 2 layers of 1/16" sheet plastic.
                            Clamped the 4 walls in the vise to cure under pressure.

                            Went to town and picked up batteries from post office.
                            Two 1500 mah Rx and two 1800 mah boat batteries.

                            Back in the shop.
                            Removed the deck house walls from the vise and started sanding the edges down to size.
                            Using a steel square to make sure I get the corners all 90 degrees.

                            Started gluing a side wall to the front wall then a side wall to the back wall.
                            Tomorrow, I will join the two assemblies to make the deck house.

                            Finished making the wheel house which will go on top of the deck house.
                            It is a small wheel house so it is only 1 layer of plastic sheet for the walls.
                            I did put a couple of plastic pieces inside to stiffen it up some.

                            Deck and hull stern painting.
                            I still have a paint problem.
                            The red primers spider veins on the gray paint.

                            I sanded the stripes down and then I washed with paint thinner.
                            Let dry. ( I worked on the deck house)

                            I turned on the heater in the shop and got it up to 70F in hopes that the paint will dry quicker.

                            I looked at it all before leaving the shop.
                            It looks okay.
                            (I was thinking if it spider cracks show up again, I might try some rusting of the barge edge to cover it up)

                            Planning for tomorrow.
                            Lots to do.

                            Comment

                            • Ralph --- SSBN 598
                              Junior Member
                              • Oct 2012
                              • 1417

                              #29
                              December 12th =================================================

                              In the shop, late.
                              It is so windy, there will be no painting today.
                              Before going in to the shop, I had to chase down a couple of metal trash cans that have been trying to escape.
                              They just haven't learned how to jump the 4' fence, yet.

                              Looking at the deck paint, I think I will leave it as it is.

                              The paint on the stern block, not so good.
                              Sanded it down and wire brushed it, again.
                              Got a quick coat of red primer on it without going outside.

                              So it is back to all the plastic parts I have been making for the deck house and wheel house.
                              Wheel house is top center.
                              The deck house is all the other parts.
                              Yesterday, I got the engine cover mounted to the back deck house wall.
                              I cut the engine cover free from the original wooden deck house.
                              Sanded the edge clean.


                              Glued the back wall of the deck house to the walls.
                              Set the roof and wheel house on for a look.

                              Front.


                              Side.


                              Back.


                              It is coming together.

                              Cut 2 plastic pieces to make the roof of the wheel house.
                              Sanded to size and glued them together.
                              Currently in the vise to cure.

                              Looked for 1/16" brass rod for the hand rails.
                              Yea, I do not have enough.
                              Will pick some up next week when I am down in the big city.

                              The rail will be on the top of the deck house.
                              Need to think about 2 ladders and how to make doors and windows without cutting them in.
                              Maybe tape them out when I paint the white and leave them black.
                              Brush some streaks of light blue on the black to look like sky.
                              Not sure about the doors.
                              Need 4 to look right. 2 in wheel house and 2 in deck house.
                              I will look for some thin plastic, like used for packaging.
                              Glue it on and leave the raised look.

                              As soon as I get the paint on the stern block to look right, I will paint the hull black again.
                              Once the black is done, I can start work on the wiring of the pod through the rudder post.

                              Things to do but compared to submarines, this is going very fast.

                              Monday will be 30 days working on it. Off and On.

                              Comment

                              • Ralph --- SSBN 598
                                Junior Member
                                • Oct 2012
                                • 1417

                                #30
                                December 13th =================================================

                                No wind today.
                                Painting will be something I try to do today.

                                Masked off the top of the hull so that I can paint just the 1/8" rail all the way around the hull without getting paint on the inside of the hull.

                                Got 2 coats on the rail.
                                Let it dry about 45 minutes to an hour between coats.
                                Got that done.

                                Turned the hull over to paint the outside.
                                1st coat was very light tack coat.
                                2nd coat was another light coat that just barely covered.
                                3rd coat was a little heavier to get a good solid coat.
                                Waited an hour and an half for the 4th coat.
                                Good a good coverage coat on the complete outside hull.
                                Let dry about 45 minutes before bring the hull inside.
                                Still no wind.

                                Between coats on the hull, I worked on the deck, the deck house and the wheel house.
                                The deck got it's bollards and close cleat back.

                                The deck house and wheel house got sanding and more glazing done.
                                I still have some small spots I am working on.

                                The vinyl letters are still on the sides of the hull.
                                I will pull them off in a day or two.

                                The blue tape on the deck house and wheel house at the windows and windows in the doors.
                                The doors will be outlined scribed after the painting is done.

                                I set the deck house and wheel house on the deck which is on the hull.
                                Here are 3 photos.


                                Comment

                                Working...
                                X