Jeff Porteous's Repair Yard

Collapse
X
 
  • Time
  • Show
Clear All
new posts
  • jefftytoo
    SubCommittee Member
    • Mar 2003
    • 942

    #181
    Re: Jeff Porteous's Repair Yard

    Guys,

    After numerous domestic distractions over the last several weekends (heck, months!), you'll be glad to know I'm finally back to work on Harder.

    Taking advantage of a rare day off from work today, plus a honey-do-free day at home, the Porteous Boat Yard is suddenly back in business. I even dragged out and cranked up the ol' '40s music CD collections while I worked—how can one expect to make like Rosie the Riveter building a WWII-era American submersible without the appropriate caterwauling in the background? Yes, no one was sitting under apple tree but Harder and me.

    Actually, that's not quite true]Gato[/i] superstructure. Why do I need it? Well, I don't need it yet, but the real Harder's teak deck actually extended all the way forward and all the way aft, so I intend my conversion/build-up to eventually have the exact same look. (Those owning this same kit will note that a good portion of its generically reproduced deck represents metal; the #PS-33 offering from Plastruct thus might be of use to many of you building or planning to build specific boats out of this popular model.)

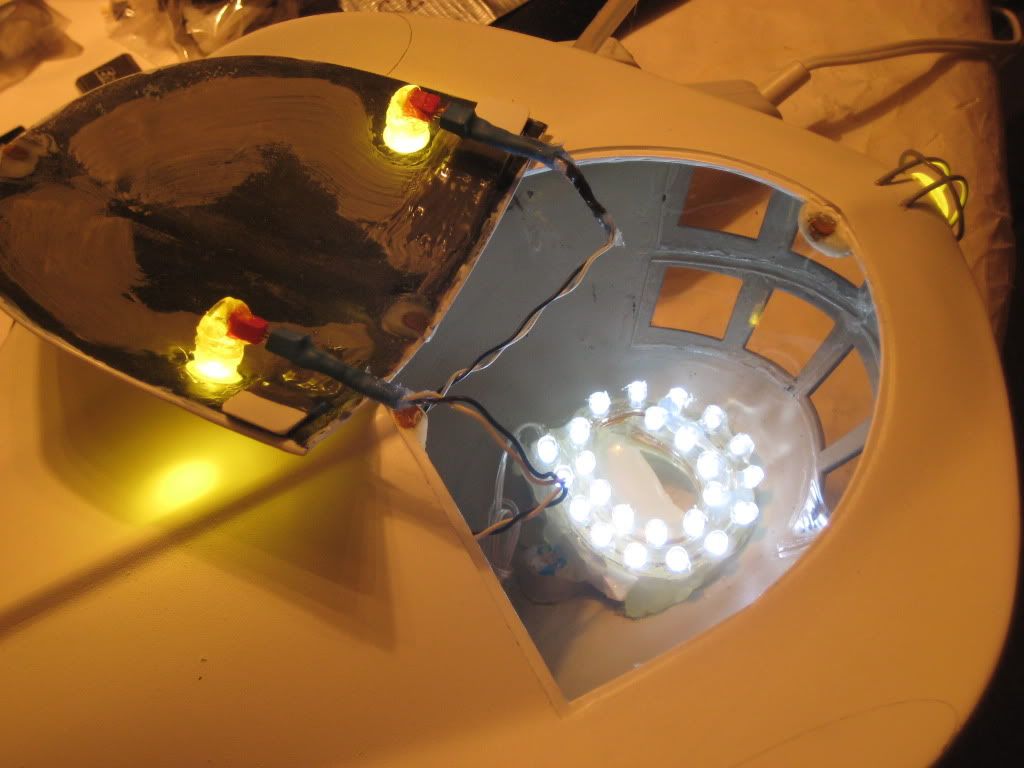
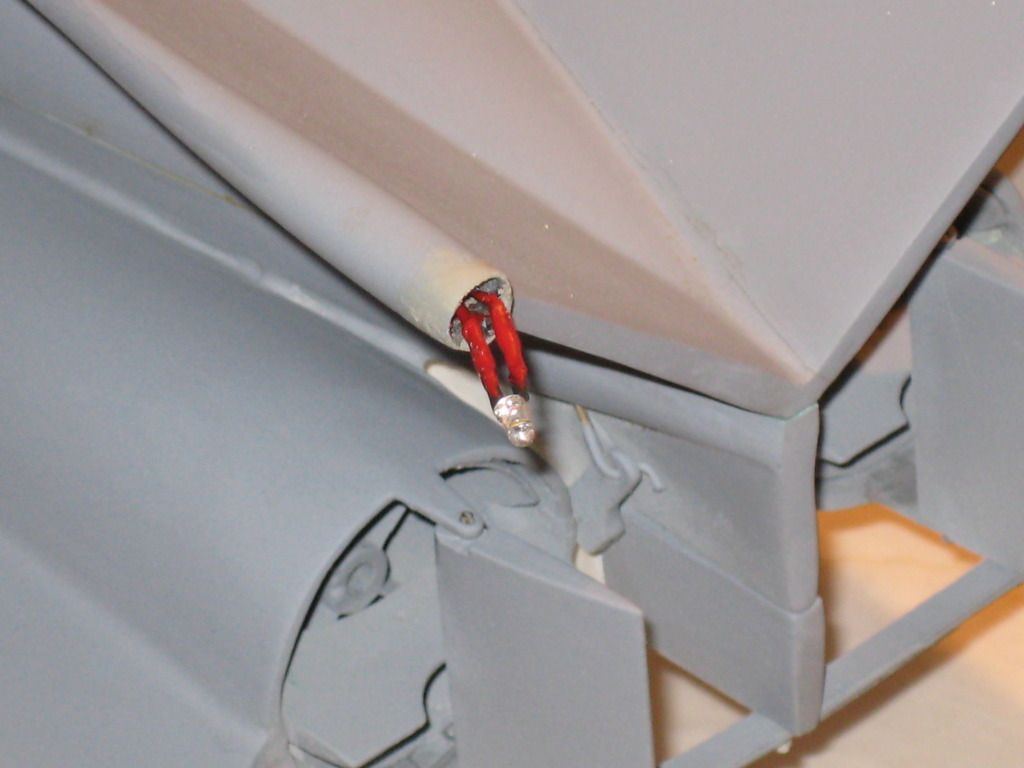
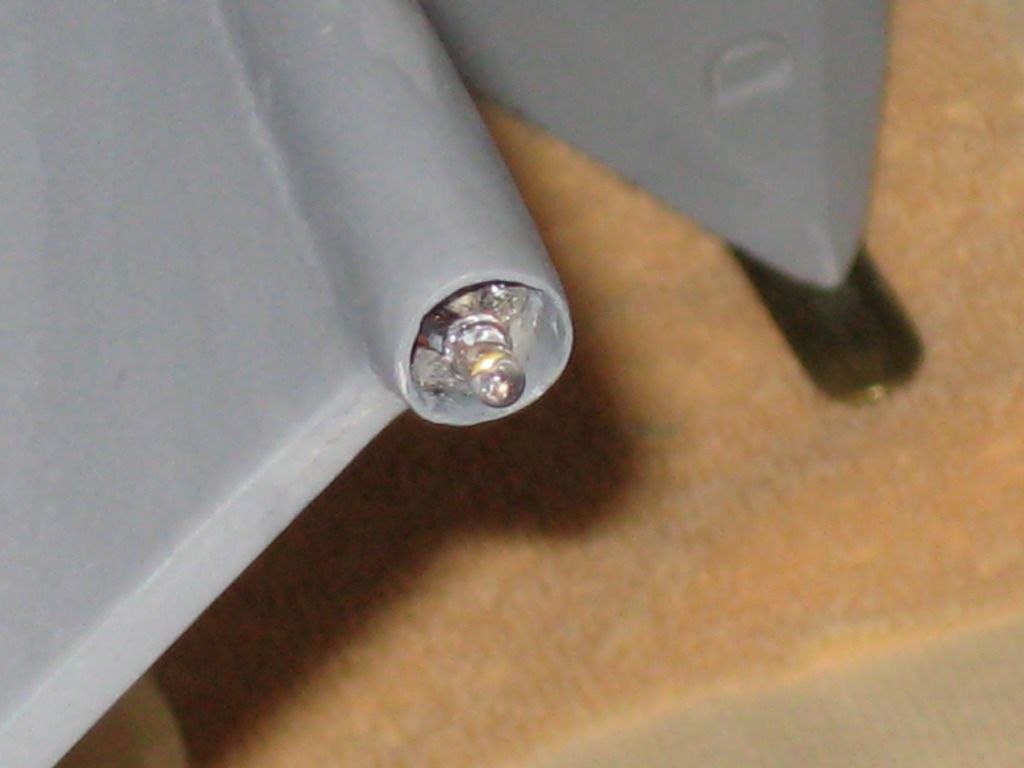
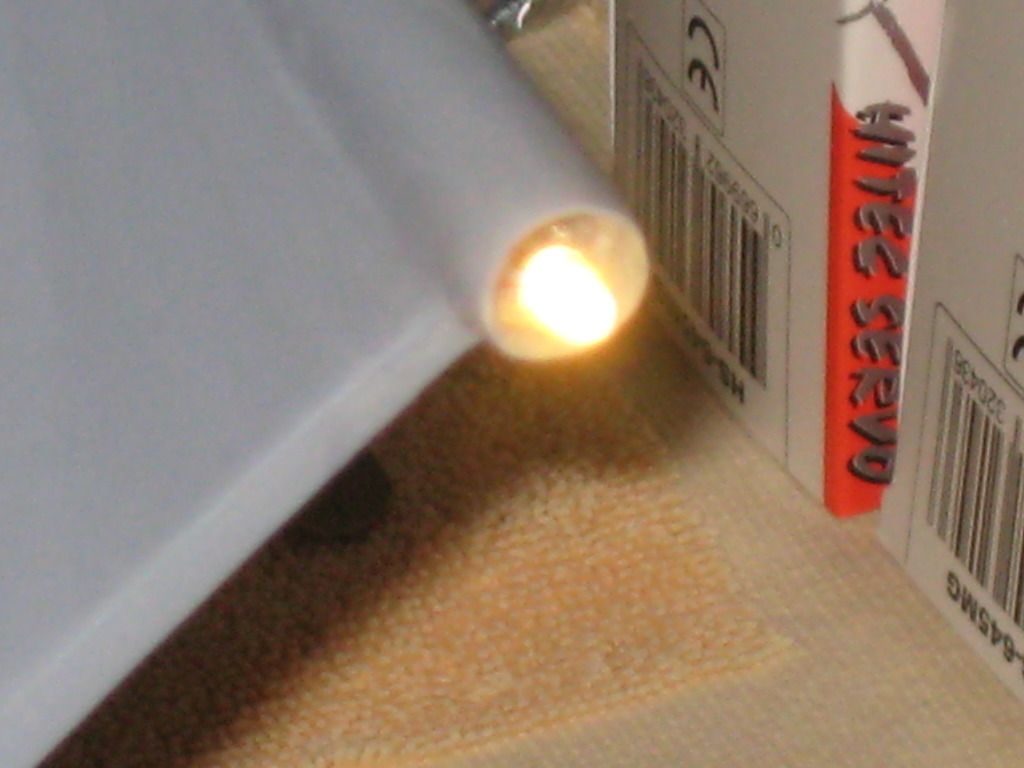
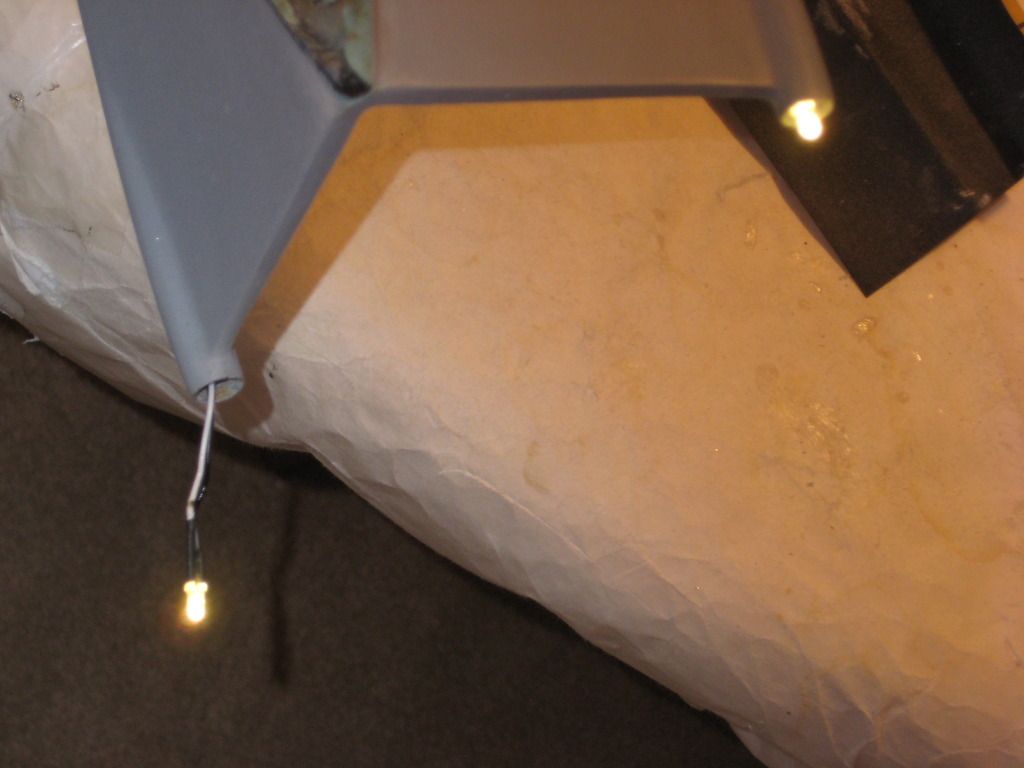
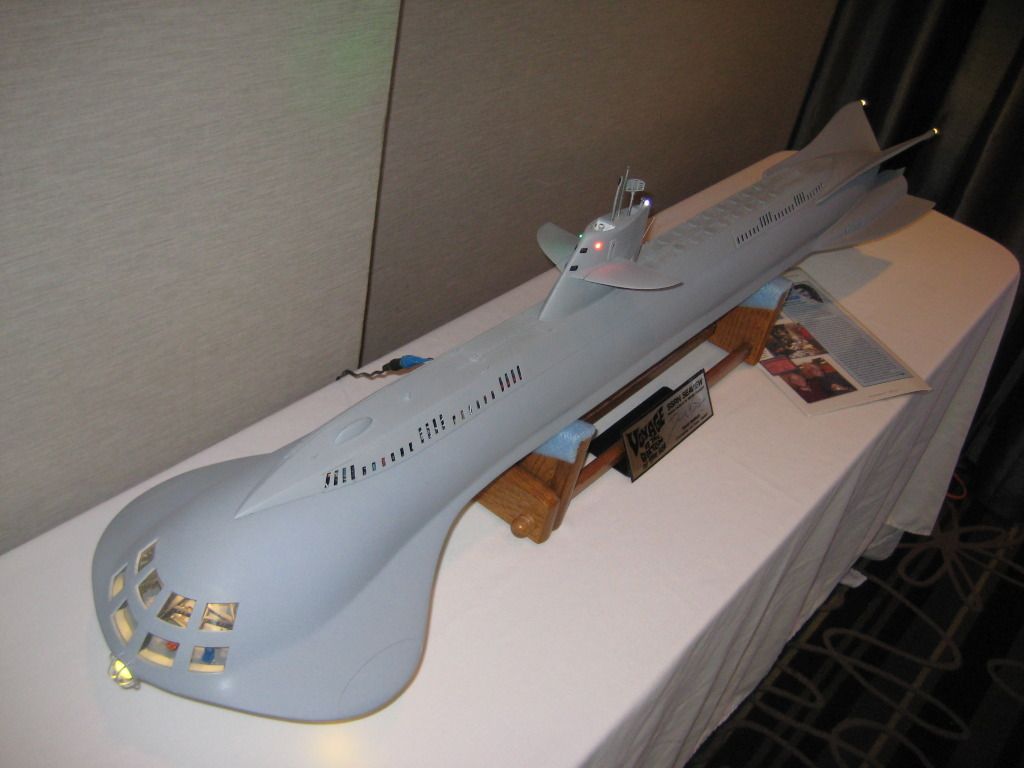
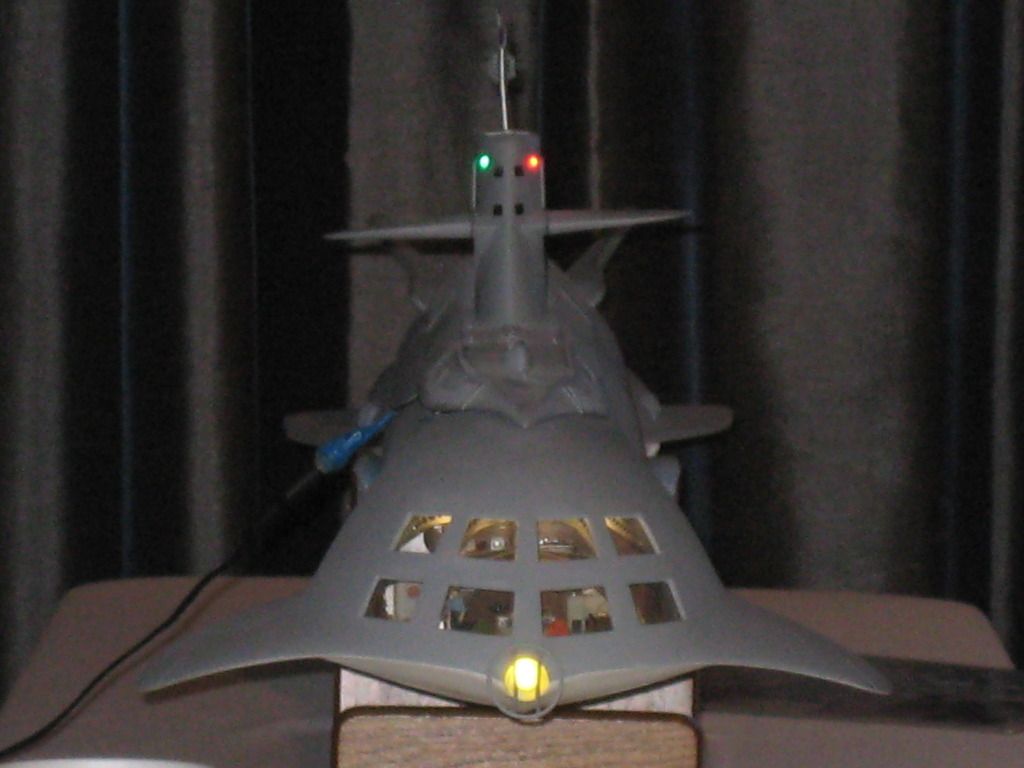
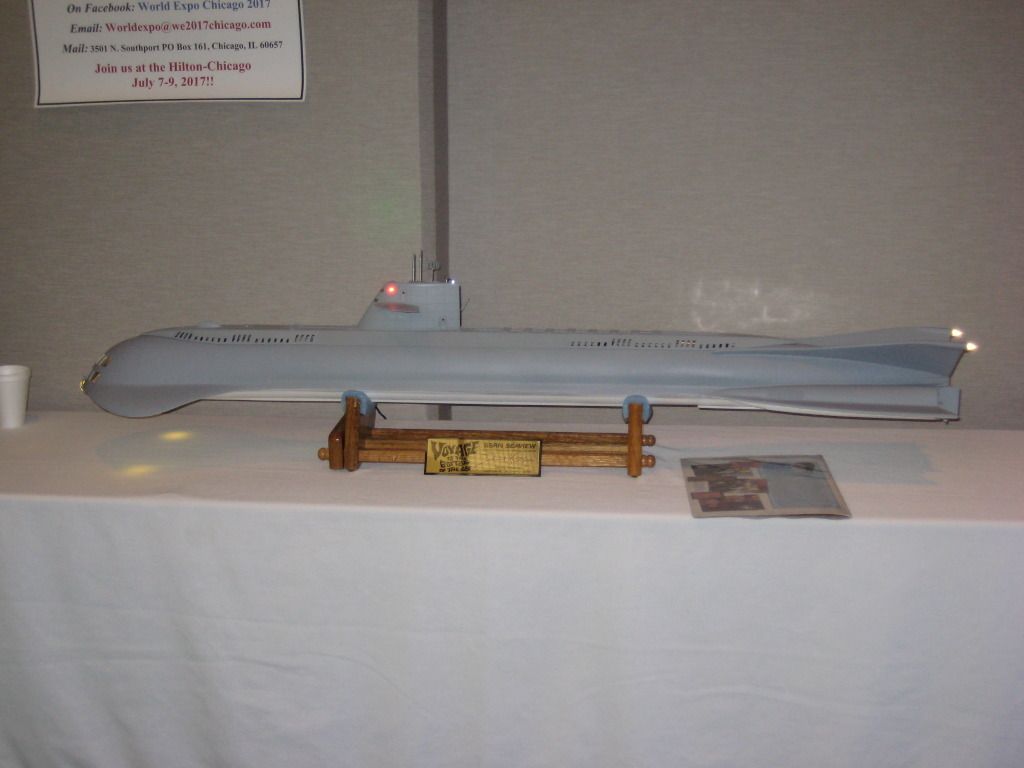
    Also, for anyone who cares, I finally got my little Blueback's lighting reinstall finished and touch-ups completed. After pretty much of a do-over (difficult!) the last time I tackled it, her whole sail now lights up properly again. No, she's not as pretty as she used to be, but she's had a lifetime of tough patrols and involved refits, so she's earned her less glamorous looks. Last time I ran her she still ran well, and that's what counts. So anyway, back up on the shelf she finally went, clearing the workbench so I can concentrate on Harder once again.

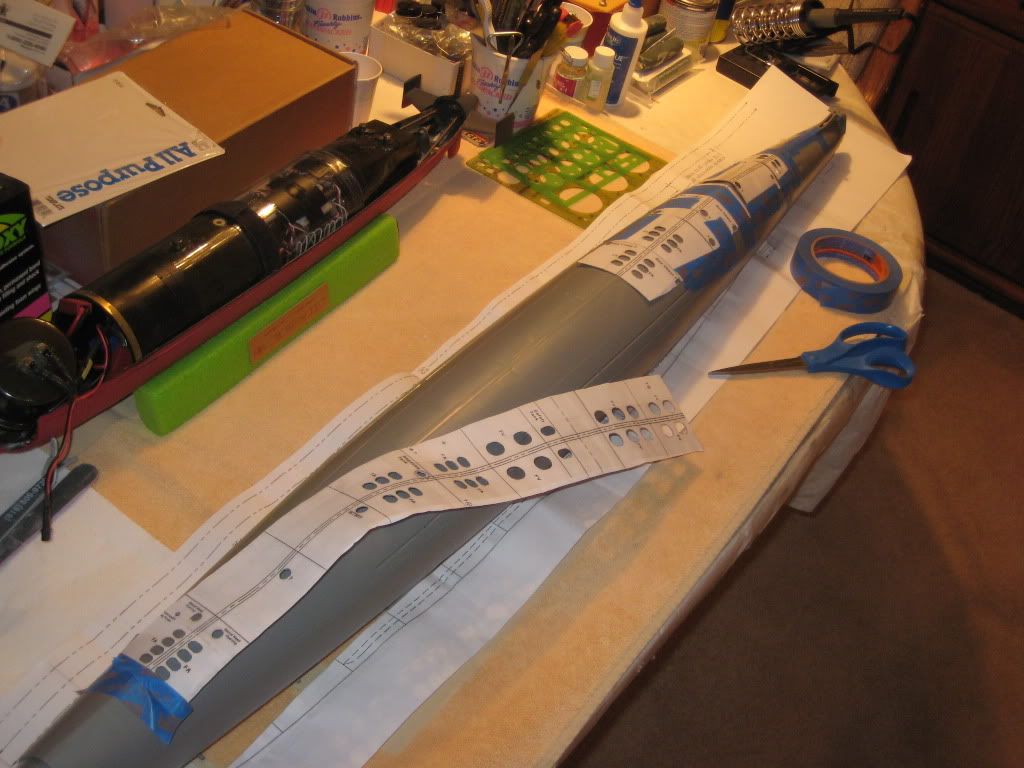
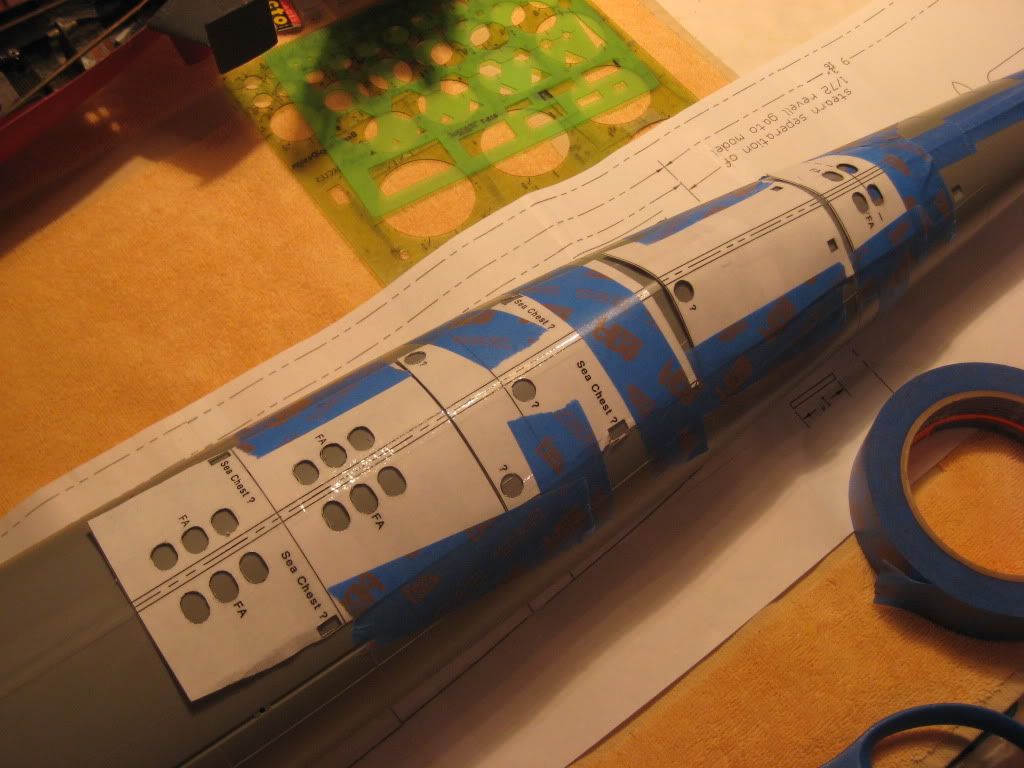
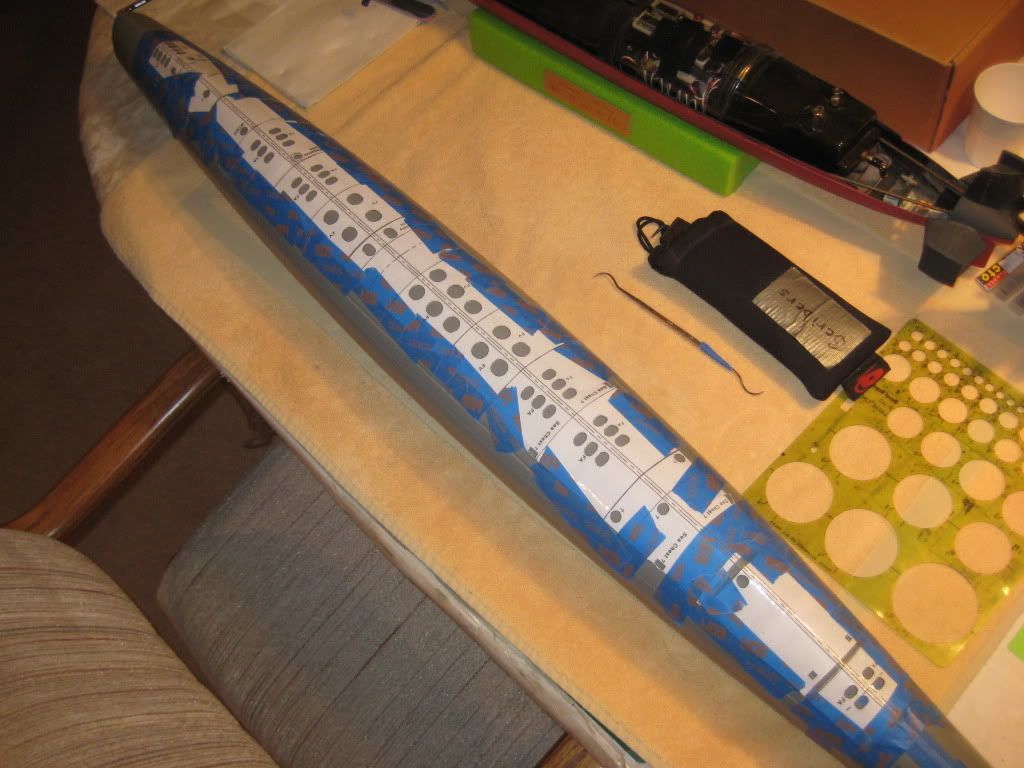
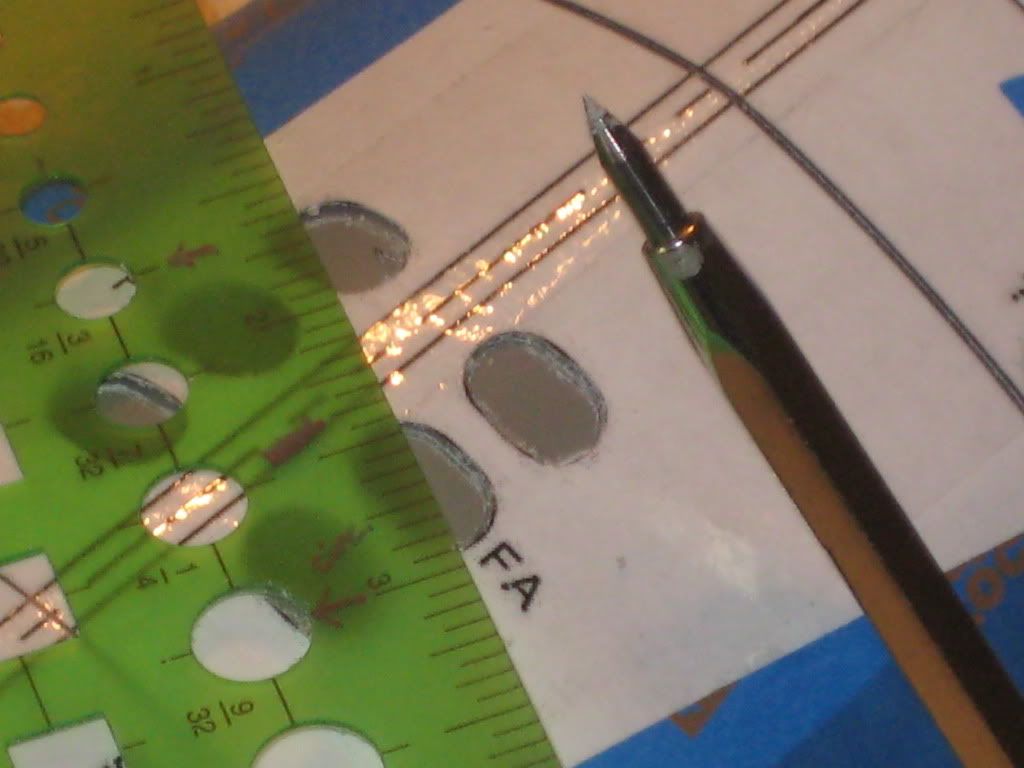
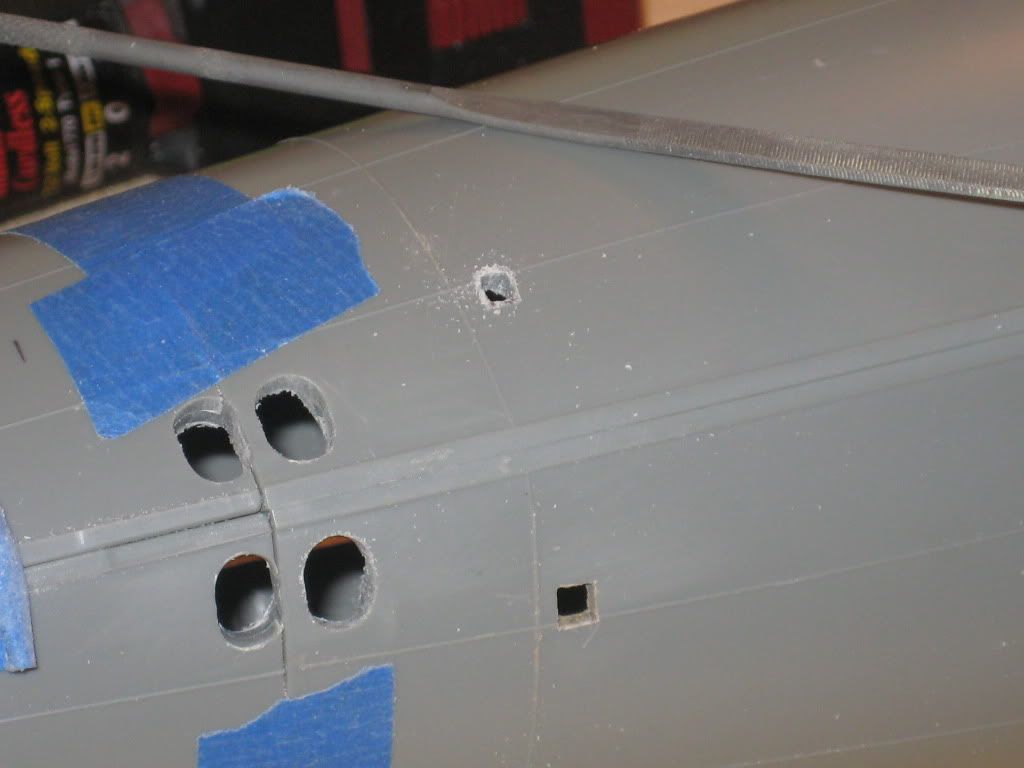
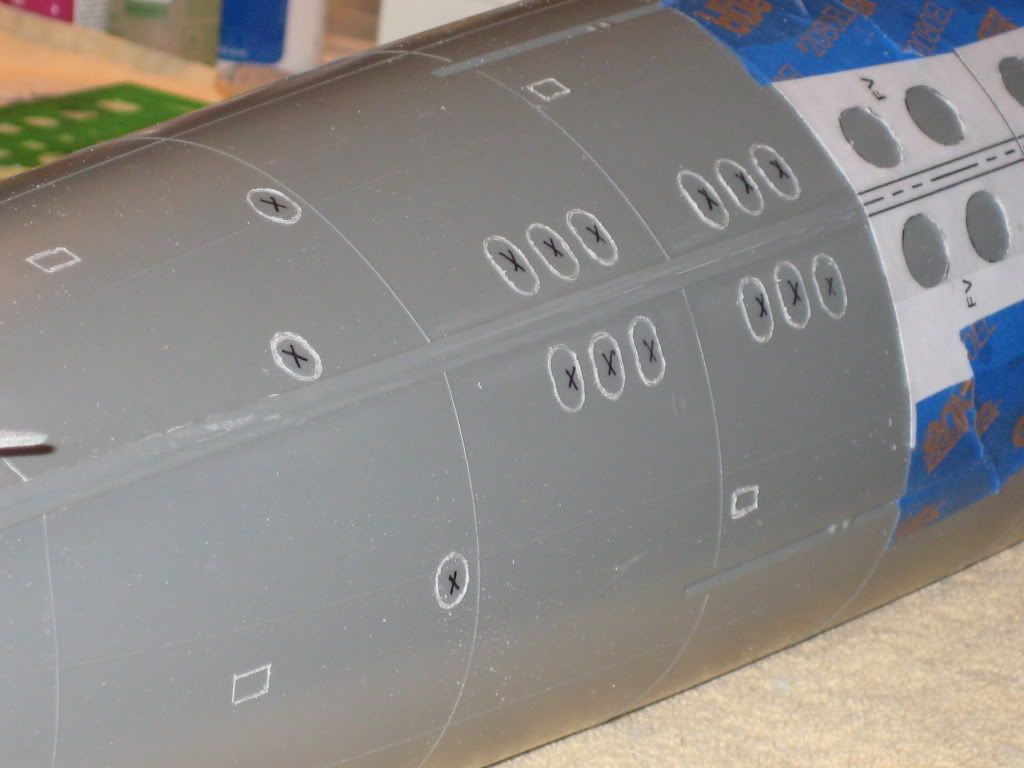
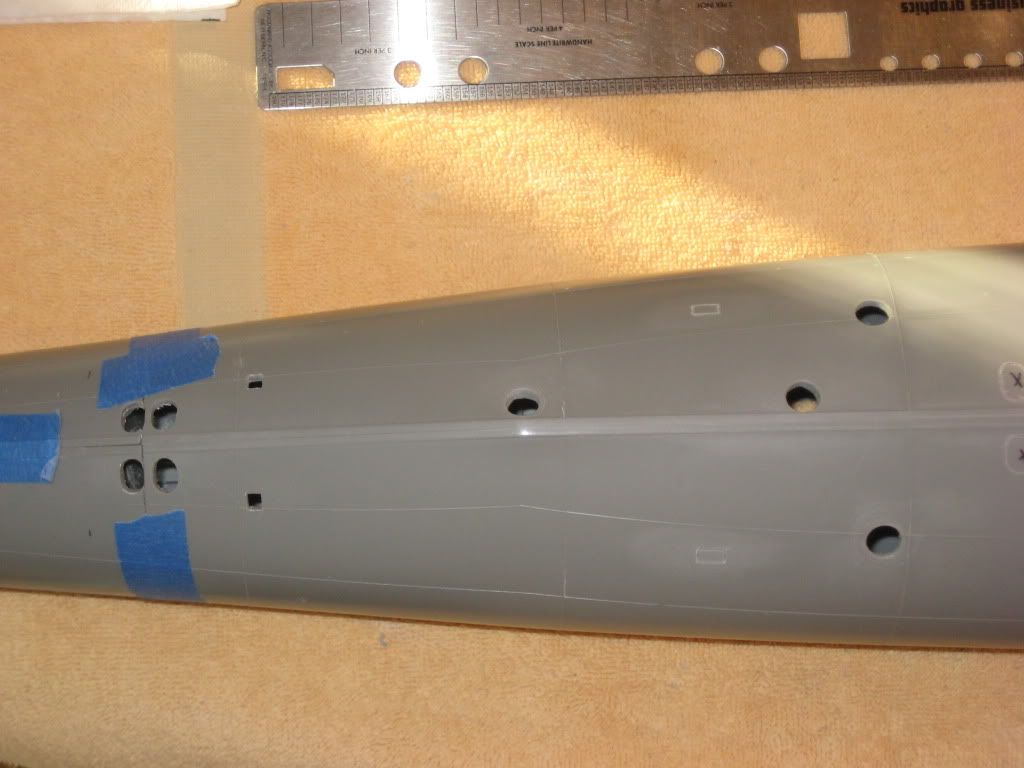
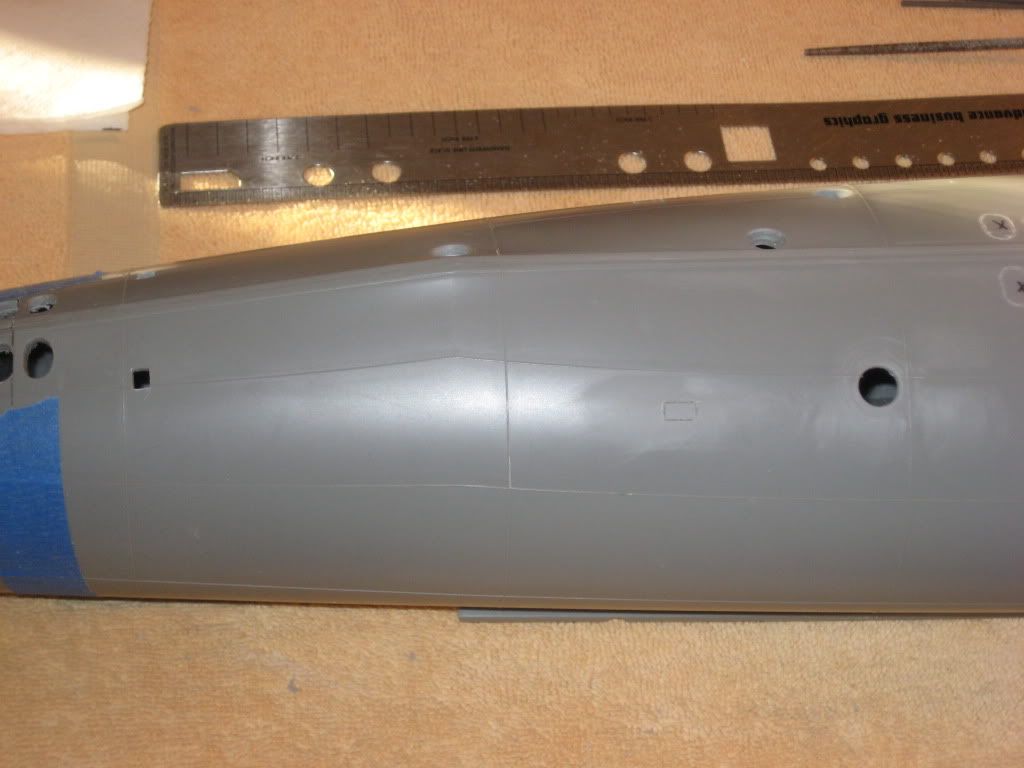
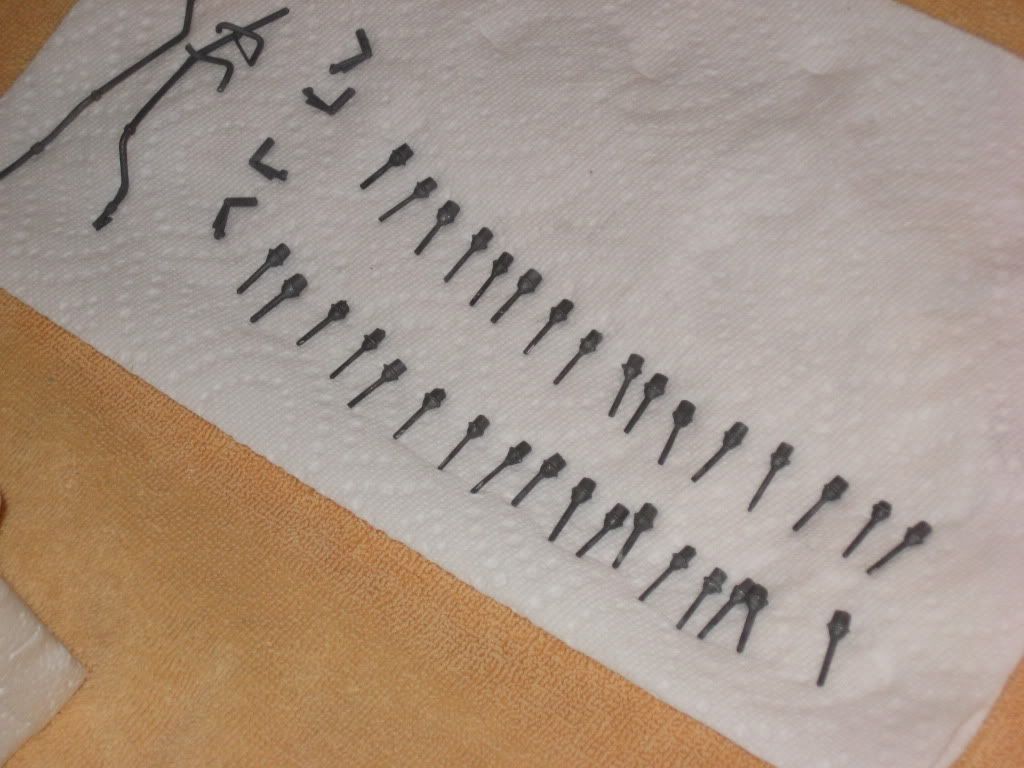
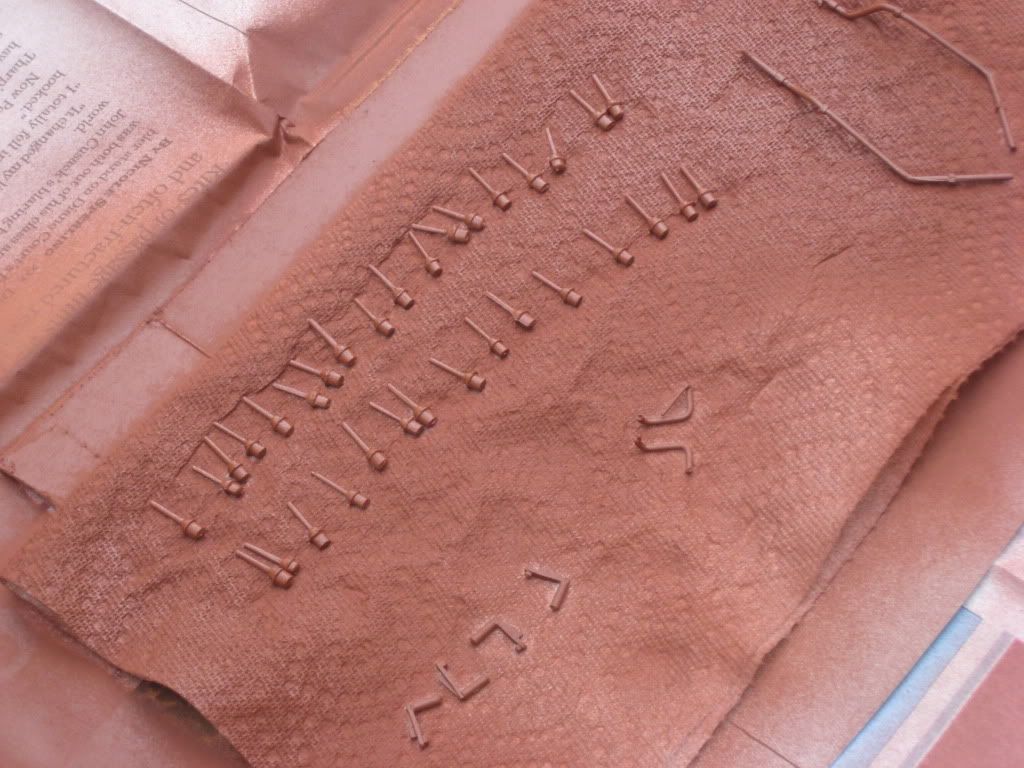
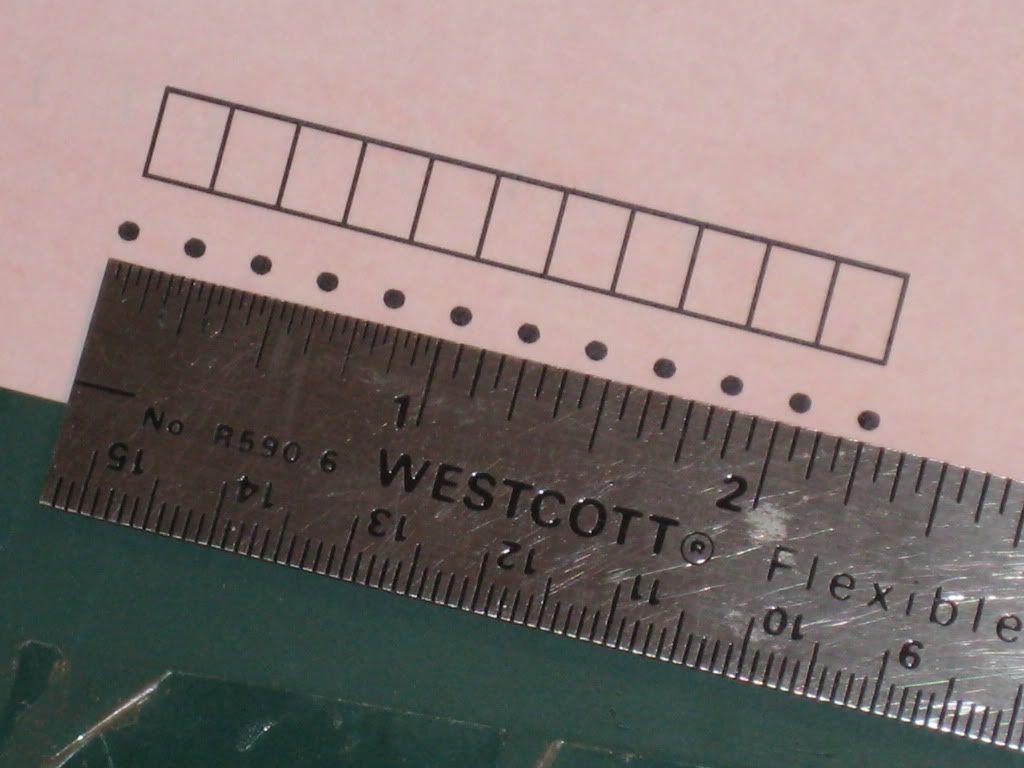
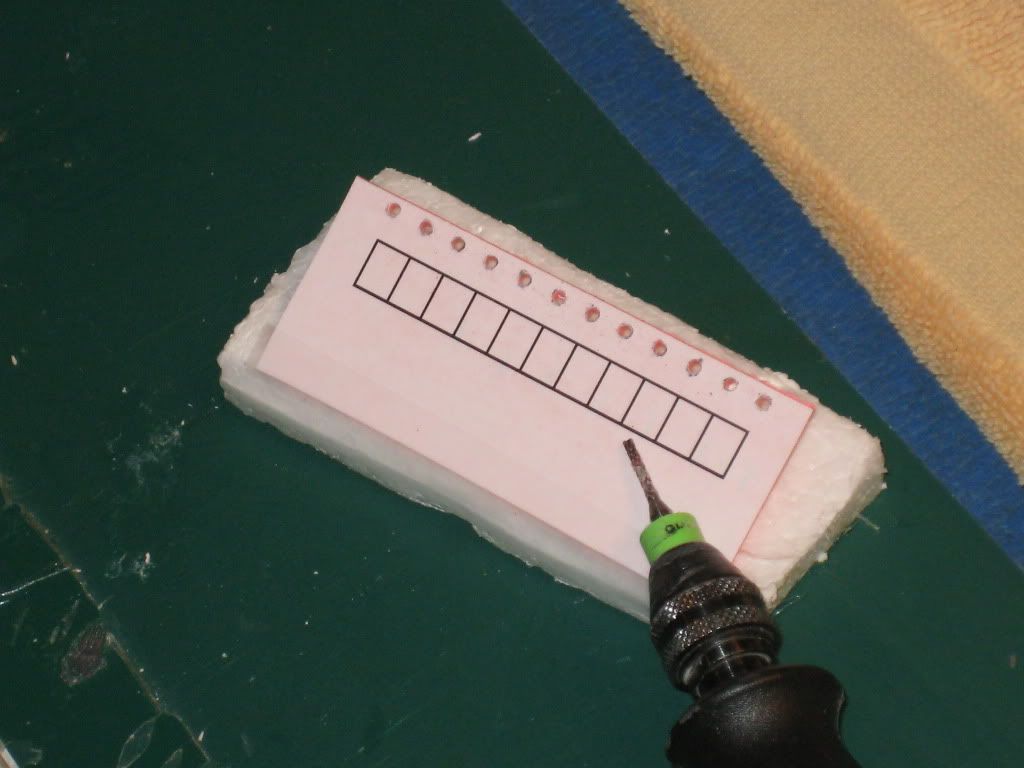
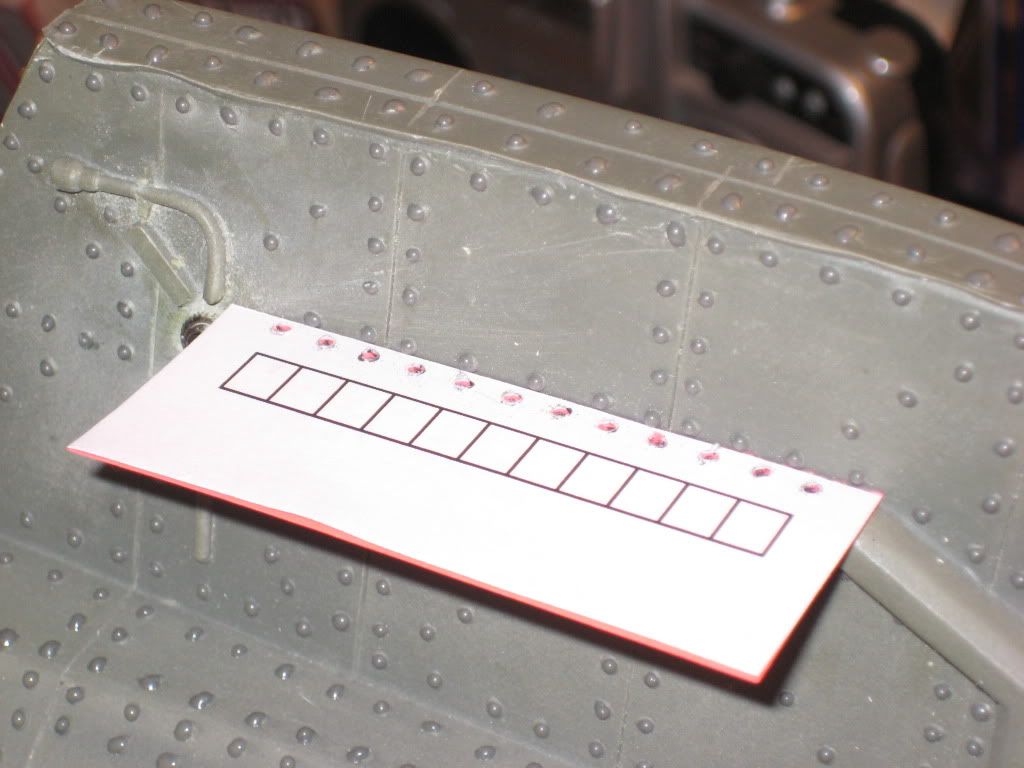
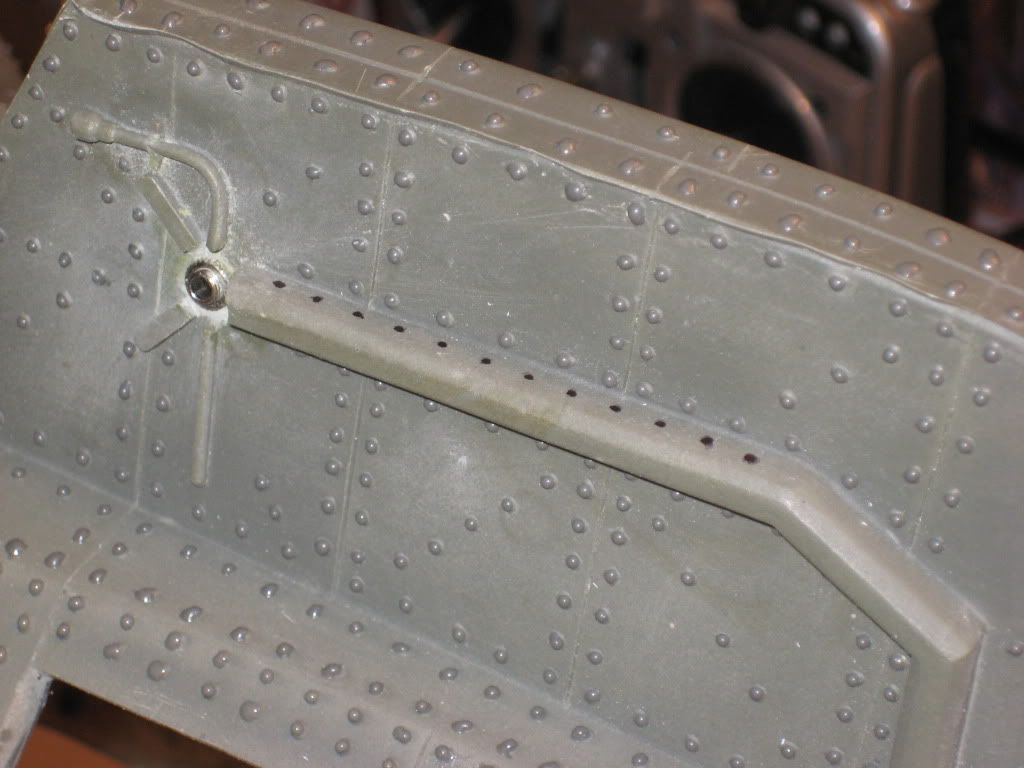
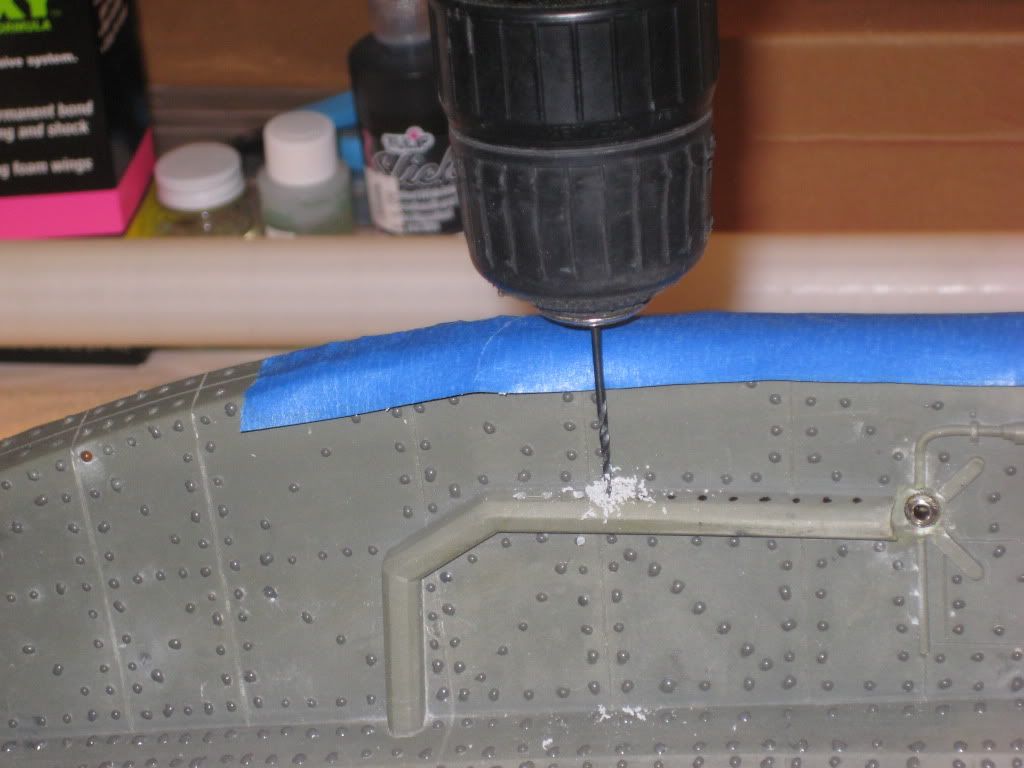
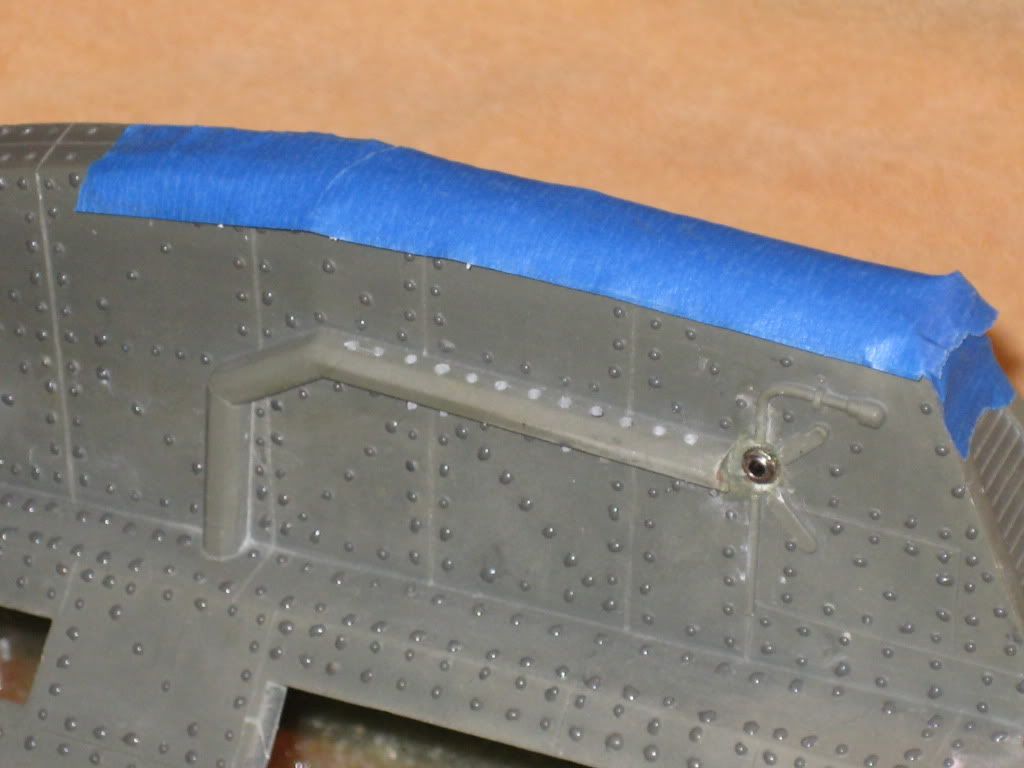
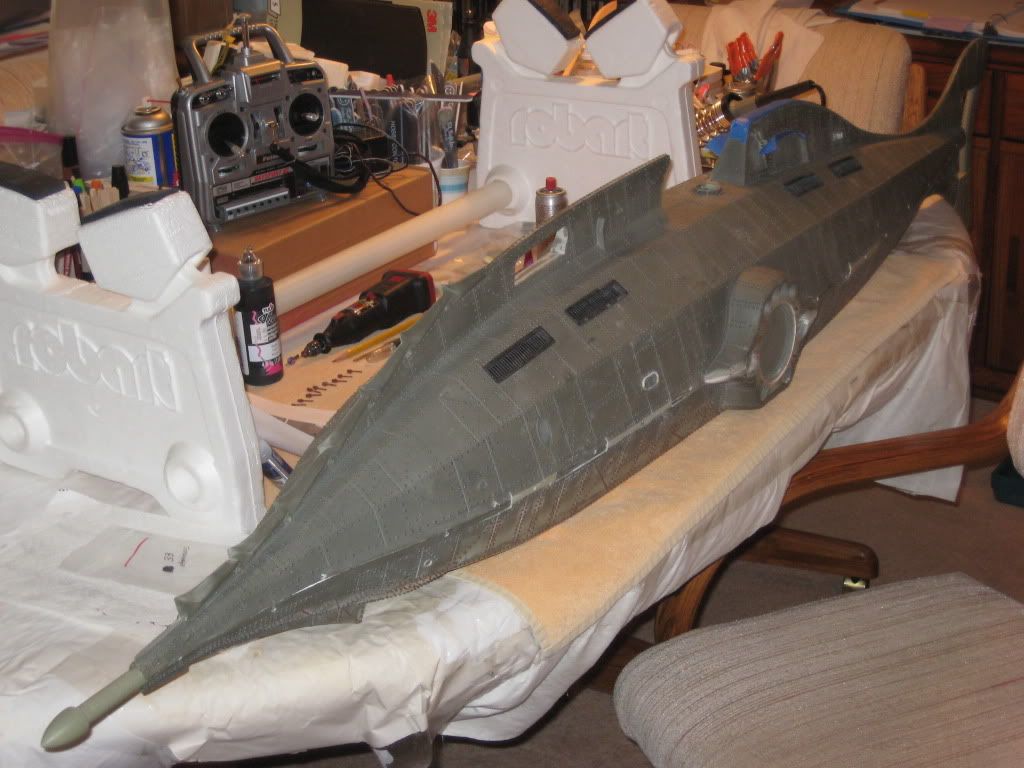
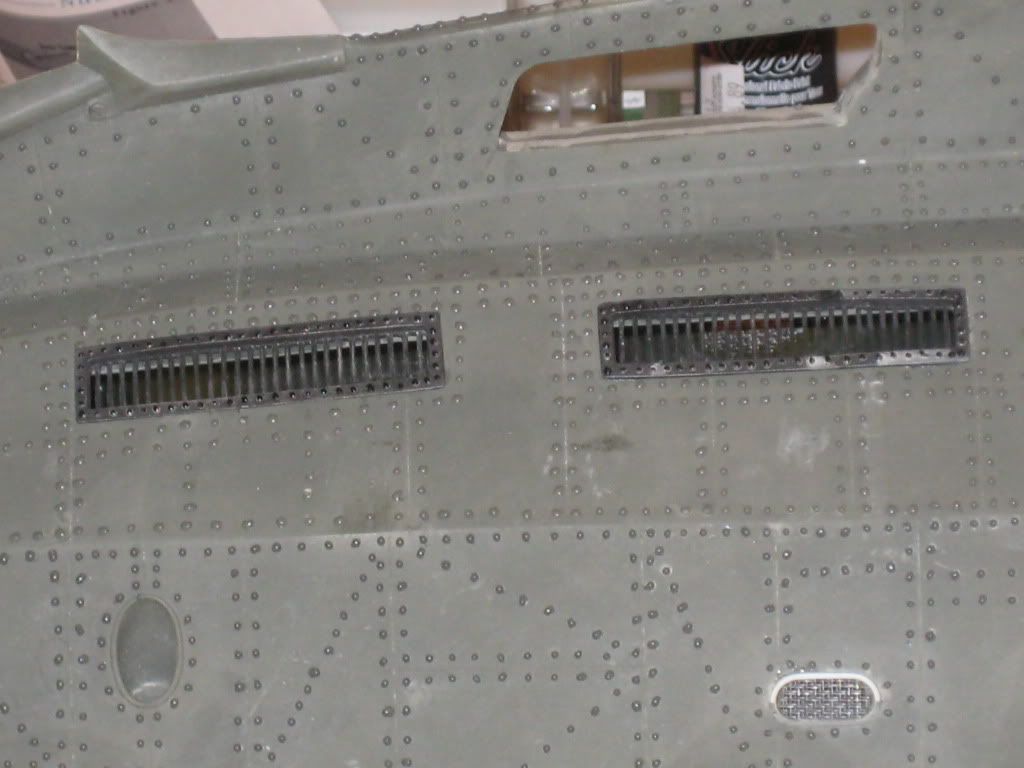
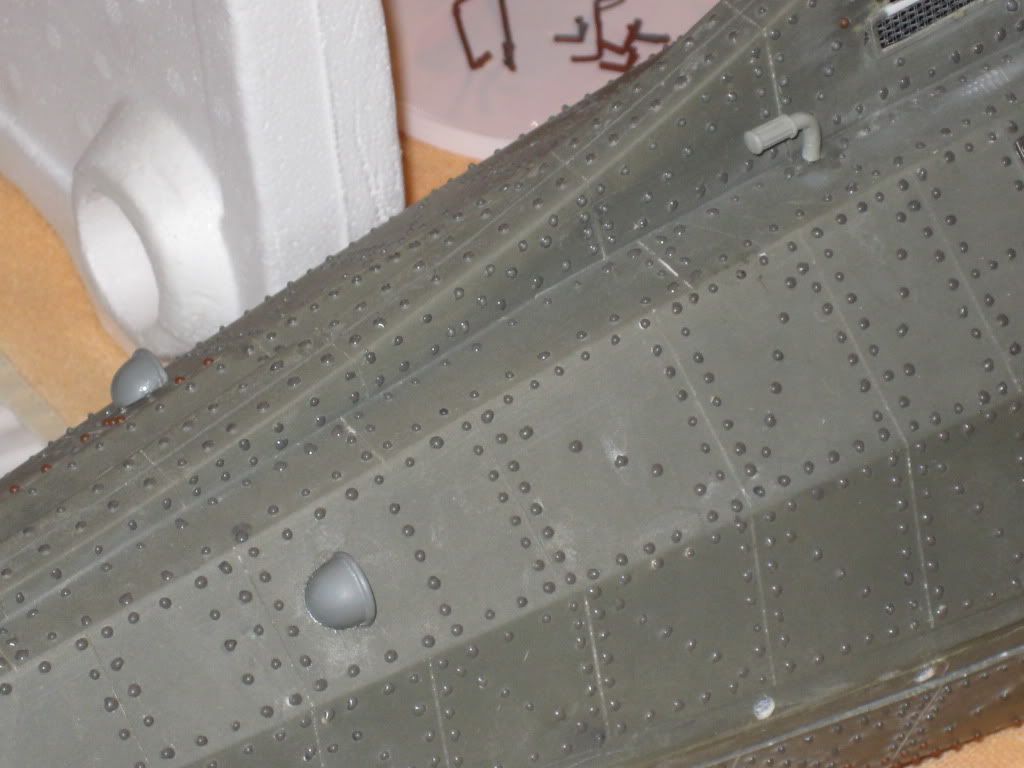
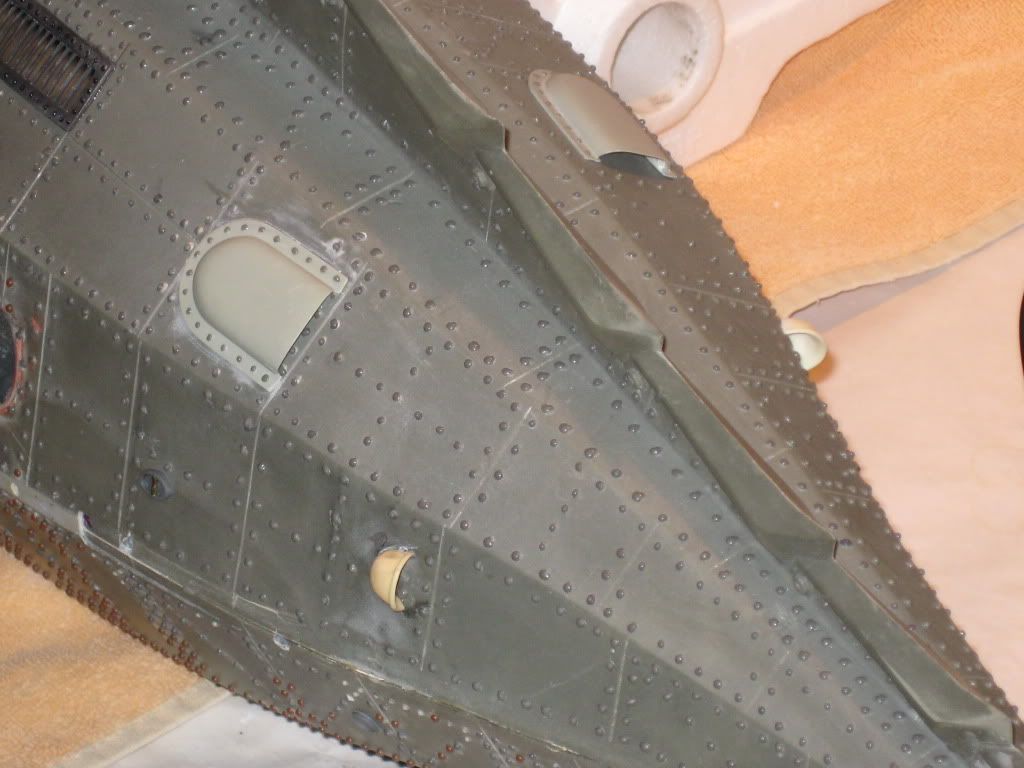
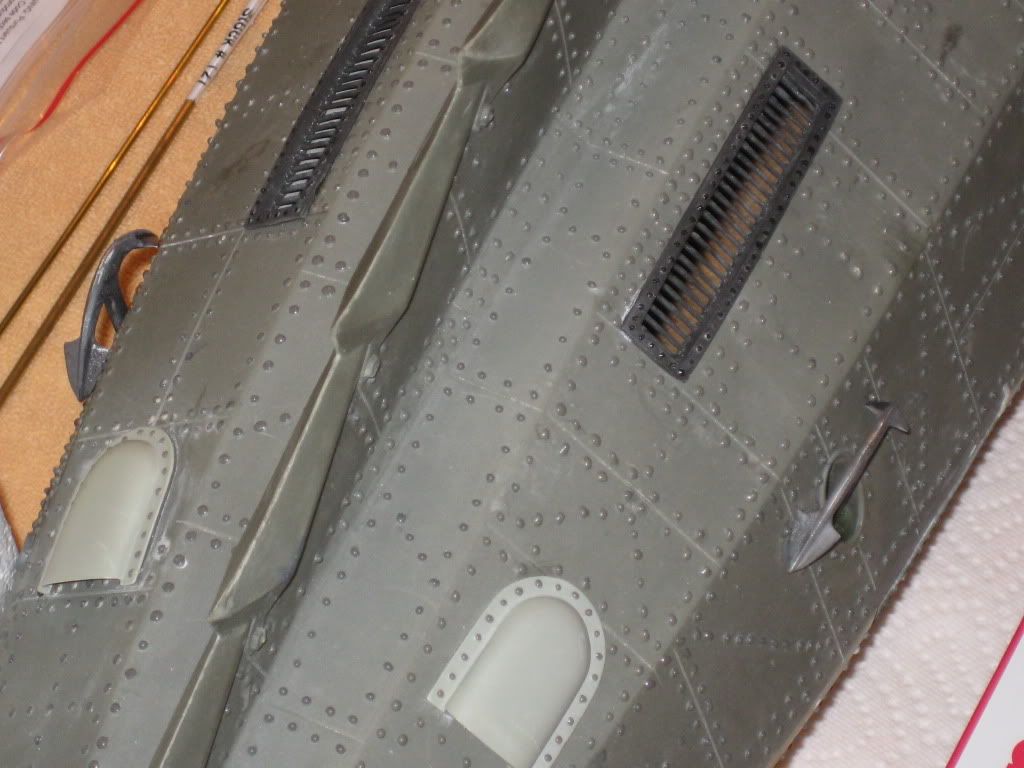
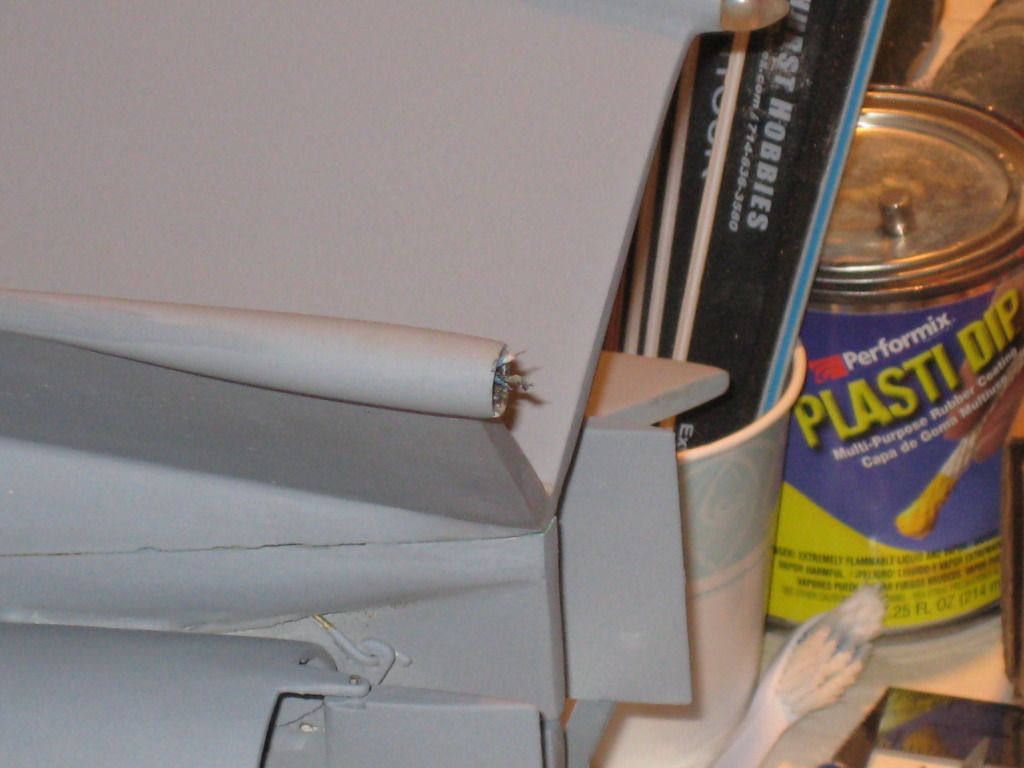
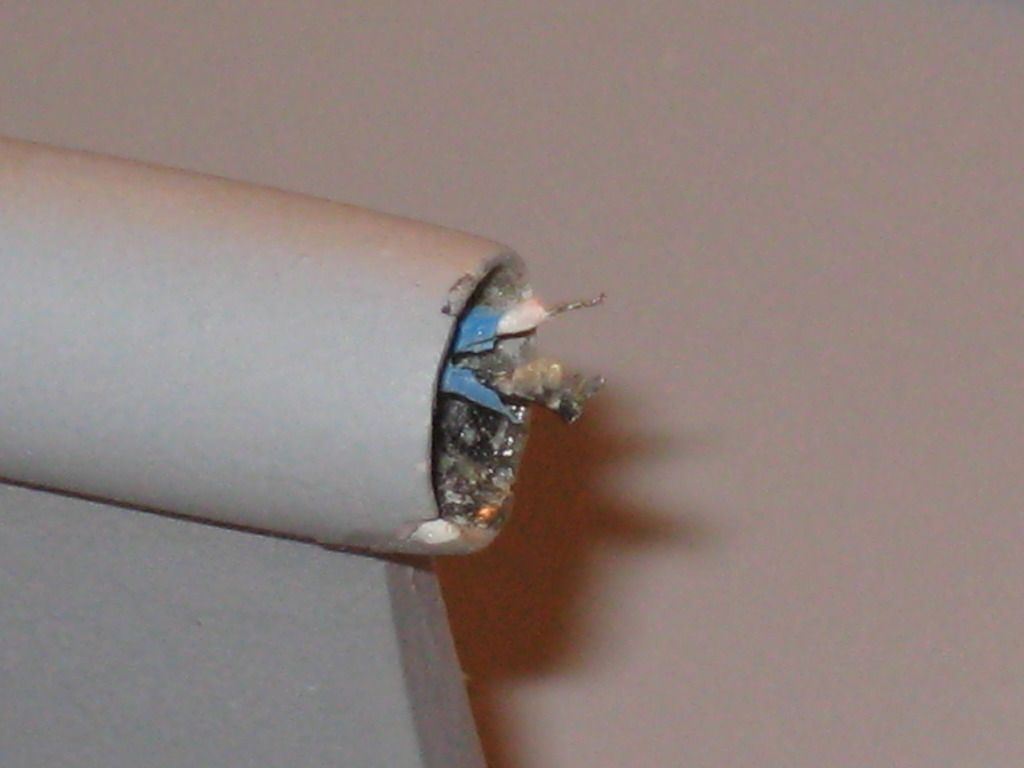
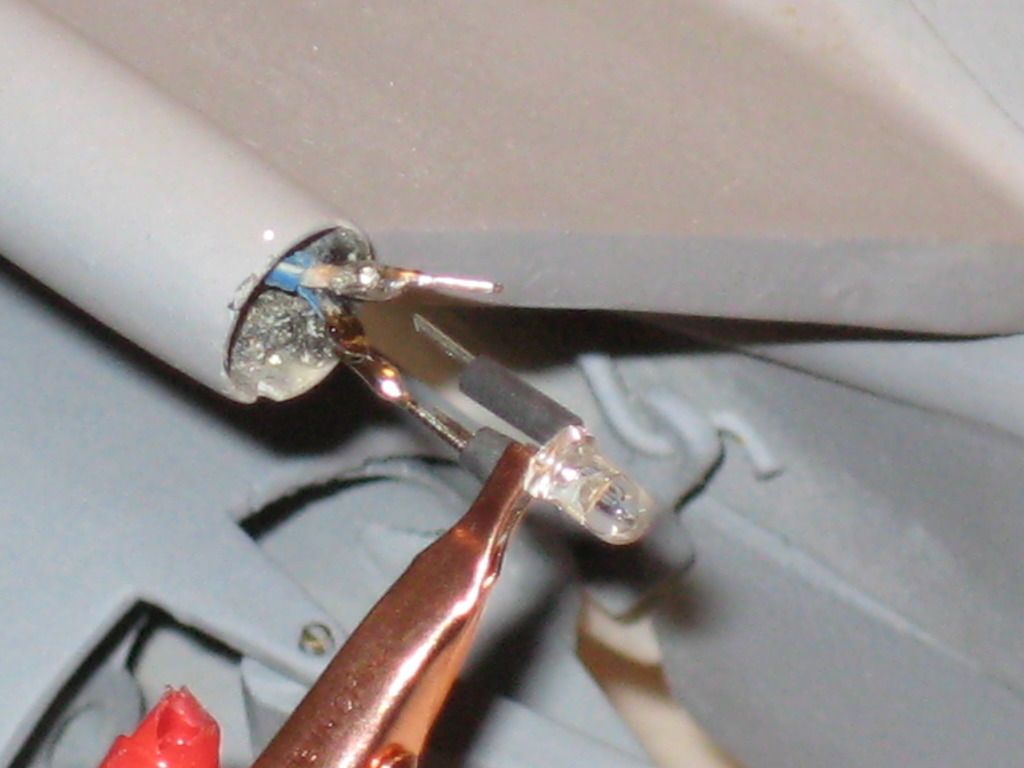
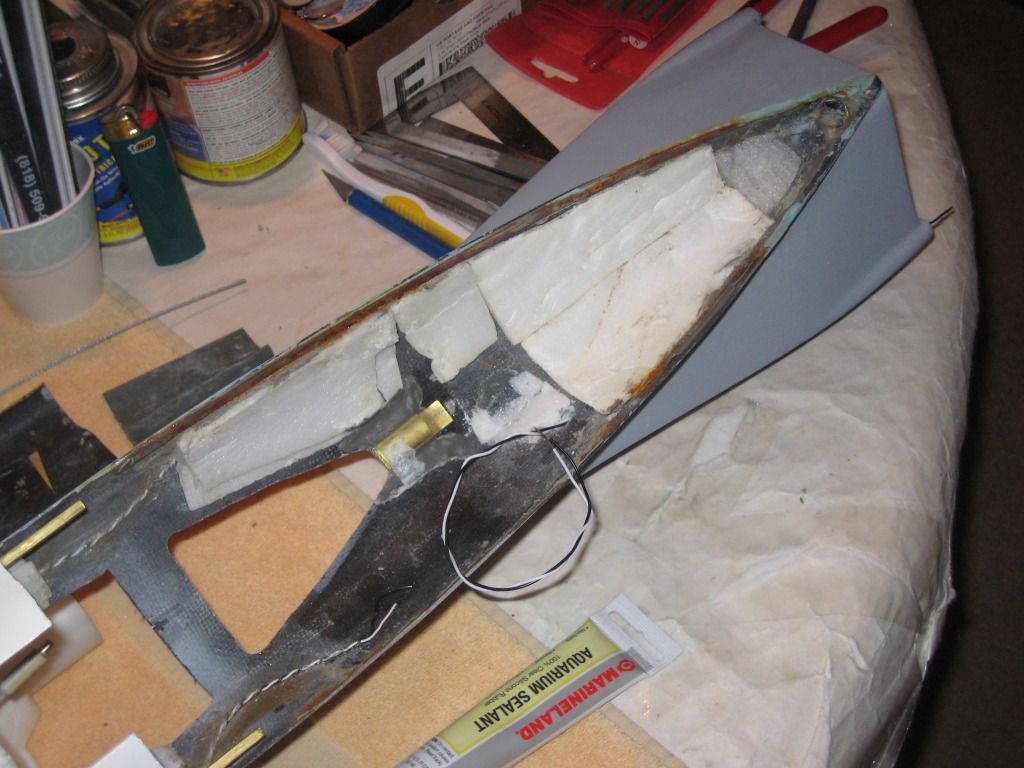
    Today's labor on Harder was a continuation of the attack on her keel flood holes. The photos below tell the story]Blueback[/i] and got her out of the way. Then I chose to actually start drilling out a few keel holes to see how they would look.

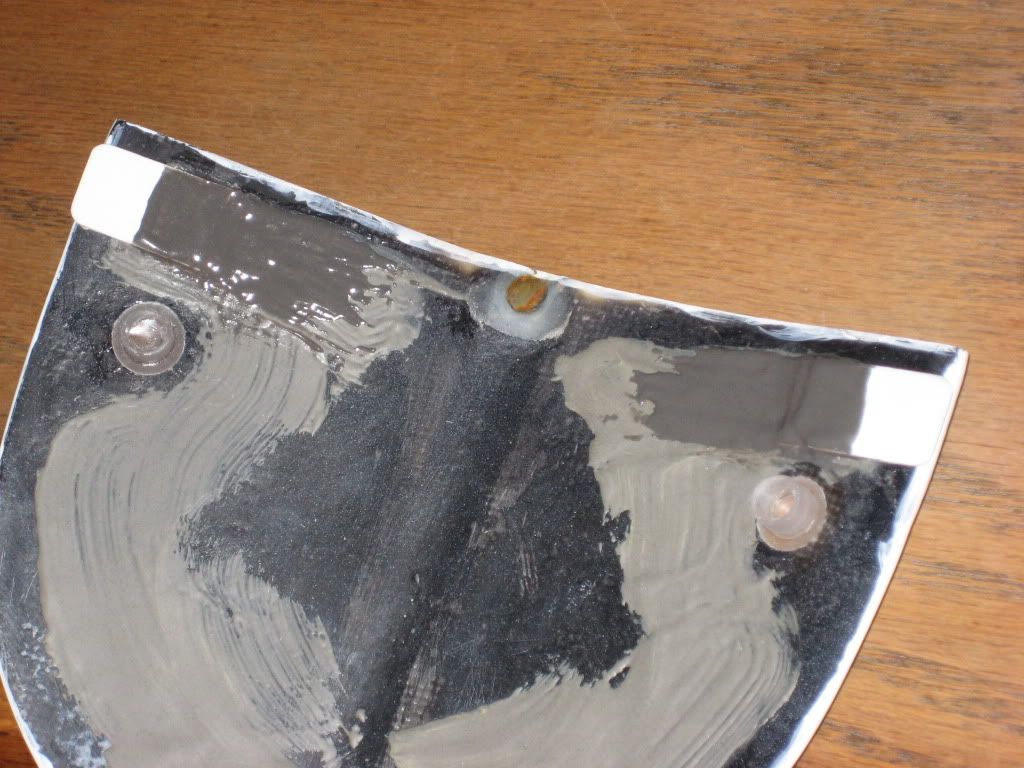
    I found that working with styrene is more difficult than I'd anticipated. It's softer than a fiberglass hull, yes, but not as forgiving, easier to make permanent mistakes. Each hole also takes a very long time with assorted files and sandpaper.

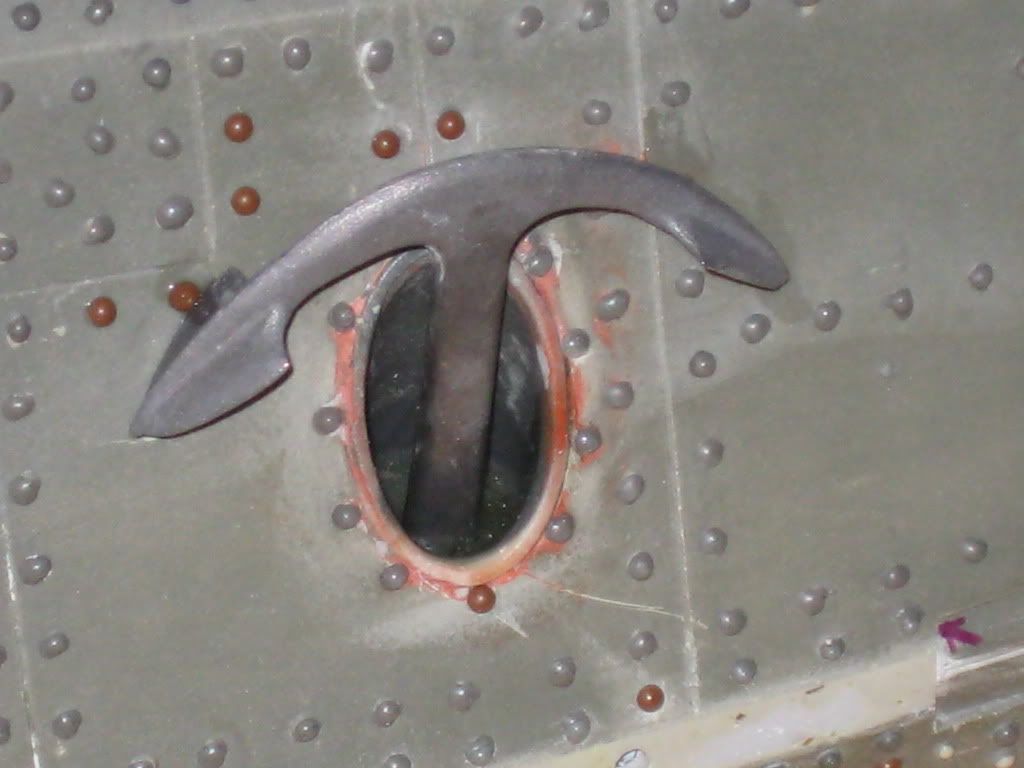
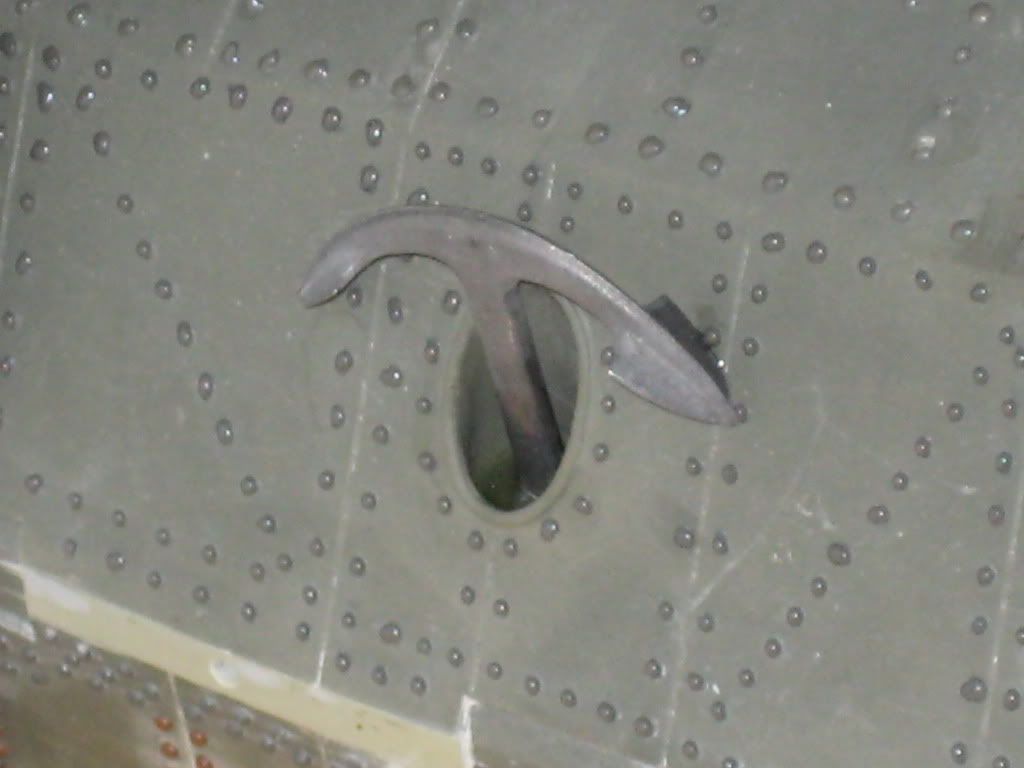
    My first two attempted oval holes didn't turn out all that well, but were certainly adequate. The circular ones were a little easier and turned out better. I certainly hope to improve overall with practice—there are plenty of holes left to go!

    Hope to get back to it next weekend.


    Till next time,
    Jeff P

    Comment

    • raalst
      Senior Member
      • Feb 2003
      • 1229

      #182
      Re: Jeff Porteous's Repair Yard

      You might know it already, but just to be sure :
      If you want to file a SQUARE hole, use a TRIANGULAR file.

      I learned that one from old metal workers, and it works. a square
      file requires you to keep it's angle exactly in place, which is impossible.
      with a triangular shaped file you can work one side of the hole at a time without
      mauling other sides.

      Comment

      • boomerfunker
        SubCommittee Member
        • Mar 2003
        • 225

        #183
        Re: Jeff Porteous's Repair Yard

        Looking nice Jeffty, congrats on getting in some bench time.

        Say, here's an idea on those ovals I picked up from the illustrious Dave M himself. He uses brass tubing. He scores the end of an appropriately sized tube with a X-acto blade, burring it up, and effectively making a hand powered circular saw from the thing. You could cut the two end circles of the ovals that way then carve out the middle. It's pretty easy to control once you've made the primary score, like scribing a panel line. Just an idea.


        Ahem.... and not to complain or anything but technically this isn't a "repair" it's a "build" and there is a delightful ongoing thread over in the build area that needs some love.

        Of course I'm a fine one to talk. To much distraction with the nice weather!

        TomK

        Comment

        • jefftytoo
          SubCommittee Member
          • Mar 2003
          • 942

          #184
          Re: Jeff Porteous's Repair Yard

          Tom,

          You're right, of course. I forgot all about our original Gato build forum. Will try to post there henceforth, maybe even re-post a few of these shots first. Thanks!

          JeffP

          Comment

          • jefftytoo
            SubCommittee Member
            • Mar 2003
            • 942

            #185
            Re: Jeff Porteous's Repair Yard

            Oh, and Ronald, you're quite right too: using a triangle file is great advice...which I just happened to find out by myself through trial and error!

            JeffP

            Comment

            • jefftytoo
              SubCommittee Member
              • Mar 2003
              • 942

              #186
              Re: Jeff Porteous's Repair Yard

              I've got a Whale of a Tale to tell ya, lads. Yes, that's right, I've temporarily set Harder aside to put a couple of days into my too-long-ignored Custom Replicas Disney Nautilus. It was indeed fun to take a break and work on something different! Here are pix]http://i1143.photobucket.com/albums/n637/jefftytoo/IMG_5204.jpg[/img]

              Likewise for "atomizers".


              "Atomizers" get primed on one side—the side that goes toward the hull and thus will be difficult to hit with primer later.


              I have a t-shirt which reads]Voila![/i] And you said no practical good would ever come of my checkered advertising career...


              Making openings on the template.


              Positioning the template.


              Spots are now marked.


              Carefully drilling out.


              Pretty nice 'n' even.


              Working with the Big Girl.


              Grates go in.


              "Scoops" go on. All these scoops are not just CA'd, but affixed with tiny segments of brass rod too. Don't want them popping off around that 19,000th league.


              Gentlemen, we have "atomizers". Note nice removable part covering the electrical jack seen in previous shots.


              More scoops aft. Plus an aft "vent".


              Other details with the scoops—tethers—if you look closely. Note how the scoops are actually scooped out. A super idea from Paul Crozier.


              More next time,
              JeffP

              Comment

              • JWLaRue
                Managing Editor, SubCommittee Report
                • Aug 1994
                • 4281

                #187
                Re: Jeff Porteous's Repair Yard

                For the life of me I couldn't figure out how to numerically crunch 2.25 inches into the twelve equidistant spaces I needed to properly position the "atomizers".
                JeffP, I hope you don't mind my providing this...

                Since most of us don't have the nifty layout tool that JeffP uses, here's a quick and easy method that requires no math][/url]

                -JeffL

                p.s. For those who prefer the math: space-between-parts = overall-desired-length / (number-of-spaces - 1)
                Rohr 1.....Los!

                Comment

                • jefftytoo
                  SubCommittee Member
                  • Mar 2003
                  • 942

                  #188
                  Re: Jeff Porteous's Repair Yard

                  JeffL:

                  Ingenius! Touché!

                  JeffP

                  Comment

                  • jefftytoo
                    SubCommittee Member
                    • Mar 2003
                    • 942

                    #189
                    Re: Jeff Porteous's Repair Yard

                    Speed screw, pumps and piping installed. Plenty of CA, plus brass pins for the speed screw.

                    JeffP


                    Comment

                    • jefftytoo
                      SubCommittee Member
                      • Mar 2003
                      • 942

                      #190
                      Re: Jeff Porteous's Repair Yard

                      Hi guys,

                      Have in recent days managed to spend a little more time with Nautilus.

                      Anchors epoxied in:


                      Keel diver's hatch mounted]http://i1143.photobucket.com/albums/n637/jefftytoo/IMG_5655.jpg[/img]

                      "Atomizer" drill-through holes filled in with Milliput]http://i1143.photobucket.com/albums/n637/jefftytoo/IMG_5666.jpg[/img]

                      Later,
                      JeffP

                      Comment

                      • jefftytoo
                        SubCommittee Member
                        • Mar 2003
                        • 942

                        #191
                        Re: Jeff Porteous's Repair Yard

                        For anyone interested, Seaview here undergoes a refit to be ready for her annual appearance at the West Coast Fall Fun Run in San Francisco in a few weeks.

                        I've moved the bow access panel's clip-on tabs a little outboard and JB Welded them on more robustly. These clips will really keep the piece from falling off now. (I tested it!)


                        This strip of waterproof automotive LED lights has been epoxied together to form a circle (thank you, John Wayne) to concentrate its illumination. It's now a successful replacement for each of my failed earlier Observation Room overhead lighting systems]http://i1143.photobucket.com/albums/n637/jefftytoo/IMG_5684.jpg[/img]

                        The bright "warm white" LEDs used for the twin manta (under keel) lights kept coming out of their friction-fit sockets and/or breaking their wire connections. So here I've soldered the LEDs directly to Dean's mini-connectors, covered their connections with epoxy to waterproof them and, in the shot after this one, hot-glued them into their sockets. They're not coming out of there now! And they're not gonna break either!


                        Voilá—my bow lights are working again!


                        More later,
                        Jeff

                        Comment

                        • jefftytoo
                          SubCommittee Member
                          • Mar 2003
                          • 942

                          #192
                          Re: Jeff Porteous's Repair Yard

                          Since my Nautilus build has moved over to the SubRonLA section (and I'll continue her occasional updates there), I thought I might keep general boat repair concerns here (that IS the title of THIS thread, after all) in Paul C.'s SubRon hangout, just for old time's sake.

                          I was invited by a new friend to display my Teskey Seaview at a local model show last weekend, but since one of her taillight LEDs had just gone out recently, I knew some fast repair work was in order before putting her in front of any adoring fans...

                          Once I'd removed the clear acrylic bullet fairing and pulled out the dead LED, I could see there wasn't much to work with here. (I'd hoped there'd be significant slack in the wiring, but no dice.)


                          Nevertheless, I did manage to get a replacement soldered on...


                          A little tool dip works wonders...as does some repair putty.


                          Now in position. (And with some touch-up paint.)


                          Lit up.


                          Okay, with the port side light now replaced and working, I could see that the cool white LED still functioning on the starboard fin was now mismatched with the new warm white version to port. So now it too had to be replaced, and it was MUCH less cooperative, necessitating taking the boat all apart and feeding all new wiring through the caddie fin, which took several difficult, frustrating attempts. In this shot, the new wire is shown finally in place.


                          Now we're talkin'!


                          Over the years my custom-shaped acrylic light fairings had acquired a spidery network of cracks inside. Acrylic adhesive applied to the cracks did help some of them to disappear. Not the total cure I'd hoped for, but at least an improvement.


                          And here she is at a Southern California model show last weekend, all lit up again...


                          TIll next time,
                          JeffP

                          Comment

                          • PaulC
                            Administrator
                            • Feb 2003
                            • 1542

                            #193
                            Re: Jeff Porteous's Repair Yard

                            The warm white bulbs are very nice!
                            Warm regards,

                            Paul Crozier
                            <><

                            Comment

                            Working...
                            X