Attention all registered users. The new forum upgrade requires you to reset your password as you logon for the first time.
To reset your password choose this option that is displayed when you attempted to login with your username: "Forgotten your password? Click here!"
You will be sent an e-mail to the address that is associated with your forum account. Follow the simple directions to reset your password.
If this is your first visit, be sure to
check out the FAQ by clicking the
link above. You may have to register
before you can post: click the register link above to proceed. To start viewing messages,
select the forum that you want to visit from the selection below.
Use cabosil thickened epoxy for filler, not bondo. This is a VERY common problem with autobody type fillers laden with talc. The problem is the bondo filler is not 100% sealed from moisture. The other issue is the that polyester hulls usually need some sort of internal structure to keep them from moving while the model traverses from hot sun to cool water. They tend to move quite a bit. Some more than others. Combined with the above it leads to constant cracking and ill fitting joints.
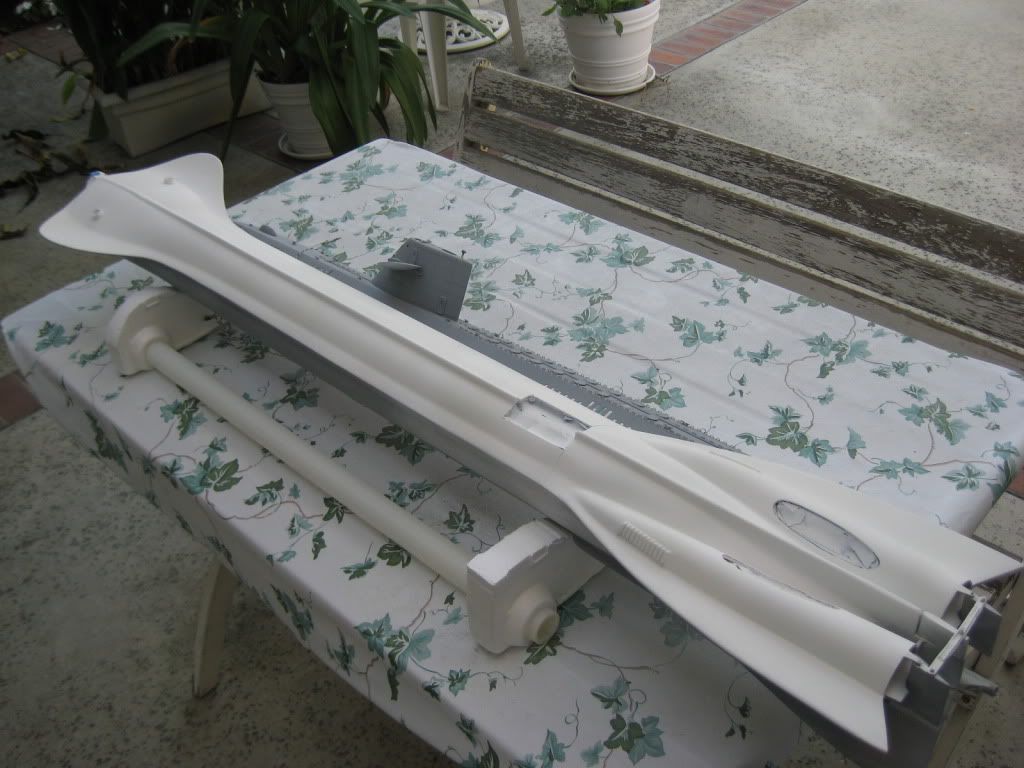
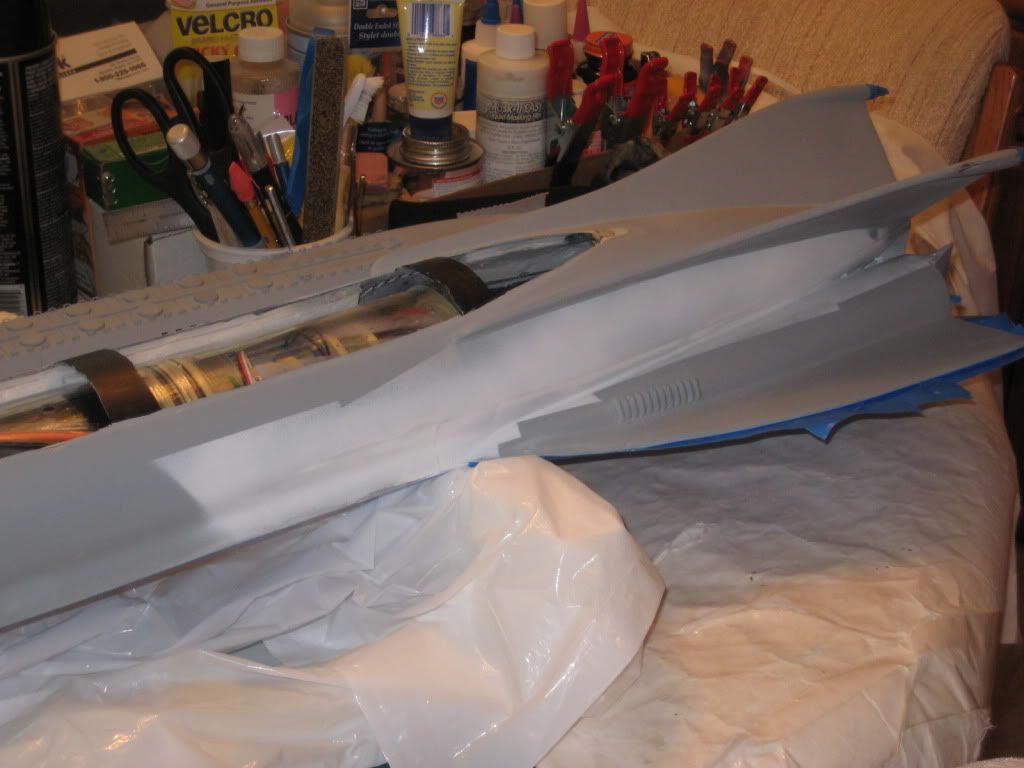
The Refit continues. Spent around eight hours on the effort Sunday, and another ten or so hours today, Labor Day. Some progress to report, but not much. Not only is the boat being stubborn and the work difficult, but I found myself often sidetracked by peripheral projects such as specially cutting down and reshaping a Robart styrofoam stand to snugly fit Seaview's oddball contours. A necessity, especially for extended hull work and car travel, but it took significant time I'd planned to use otherwise.
Anyway, here's the latest report and pics]http://i1143.photobucket.com/albums/n637/jefftytoo/IMG_3885.jpg[/img]
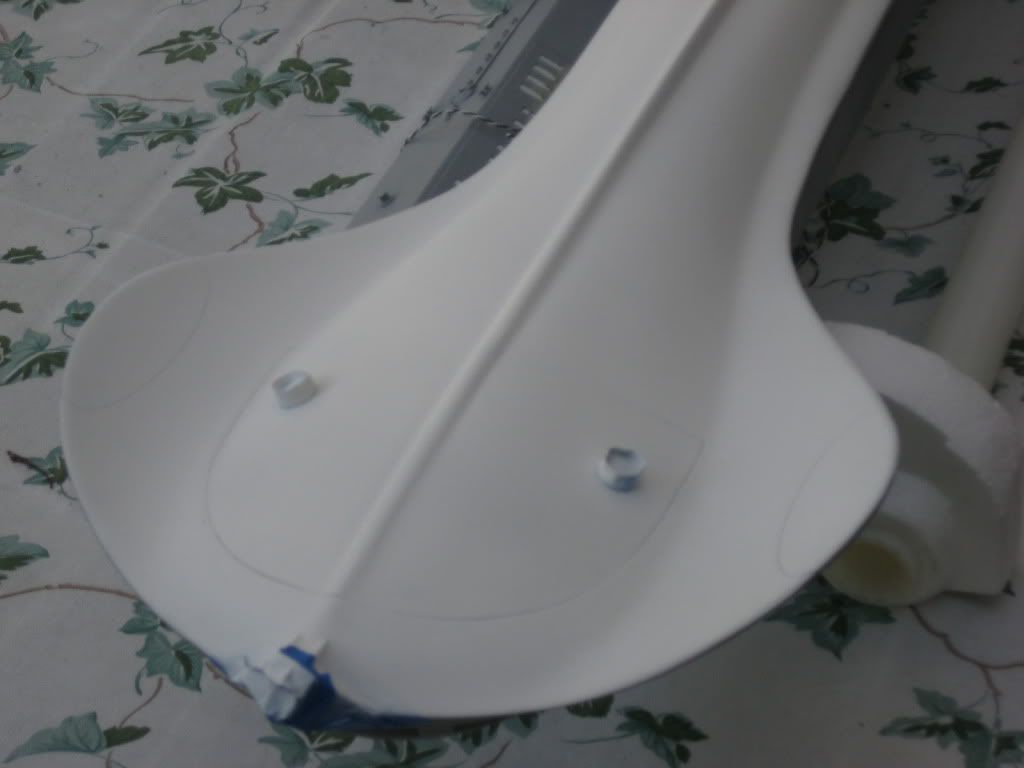
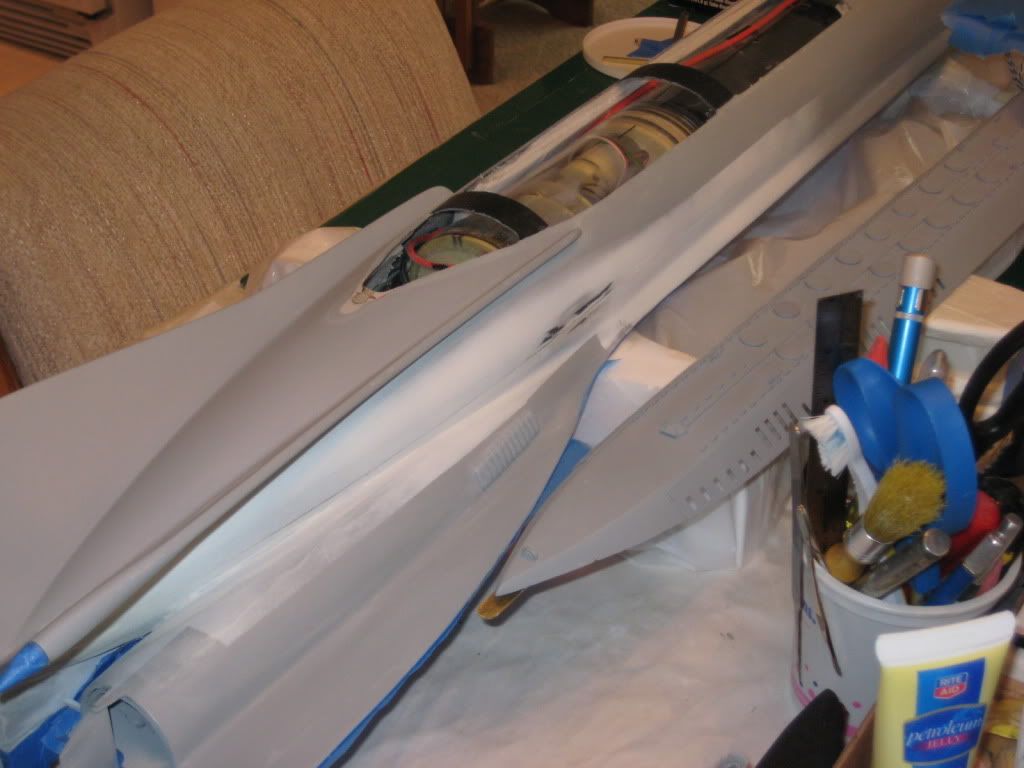
Initially loved Steve Neill's nifty twin (actually quadruple) magnet system to snugly hold down the superstructure to the hull. But as it turned out, the aft magnet setup was recessed too far into the hull for easy clearance by the WTC when installing or removing it. In fact, the lower magnet was accidentally torn completely out during one of those evolutions in Carmel. Hated to do it, but the aft magnet design simply had to go. Here you see where I've removed the mating magnet in the aft end of the superstructure, and am about to fill the hole left in the upper hull by the loss of the other. For expediency, I just used CA and baking powder; this hole will be covered by the far aft point of the main deck anyway.
Here's my replacement solution]Seaview[/i].
Here's the groove piece JB-Welded in place.
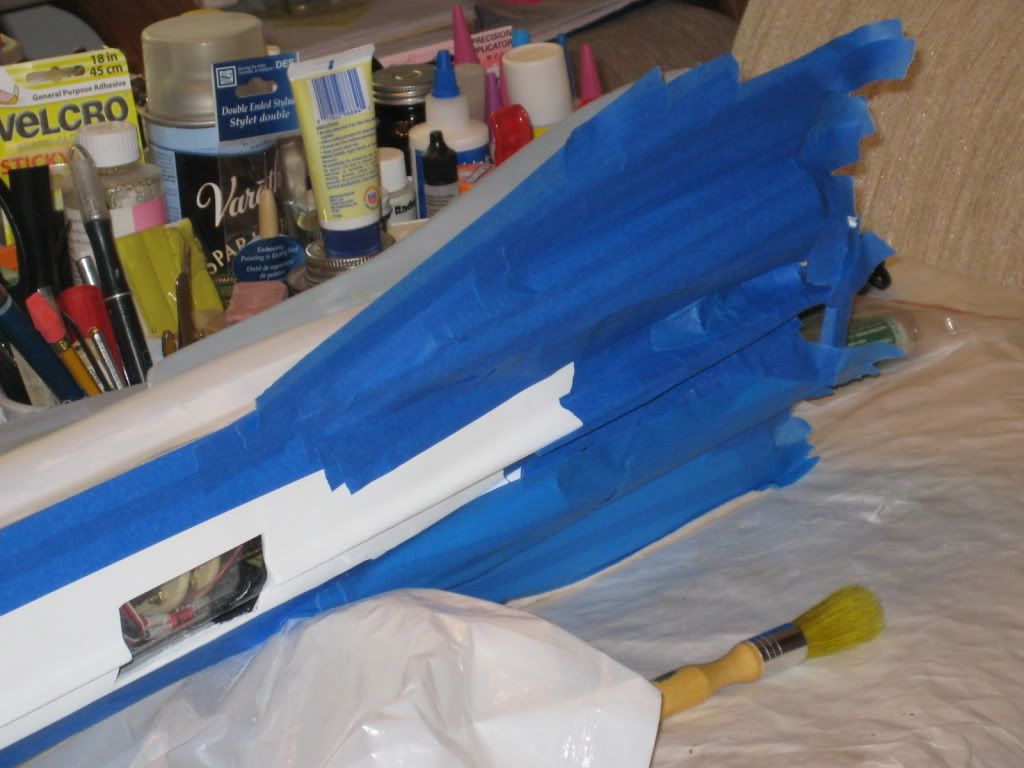
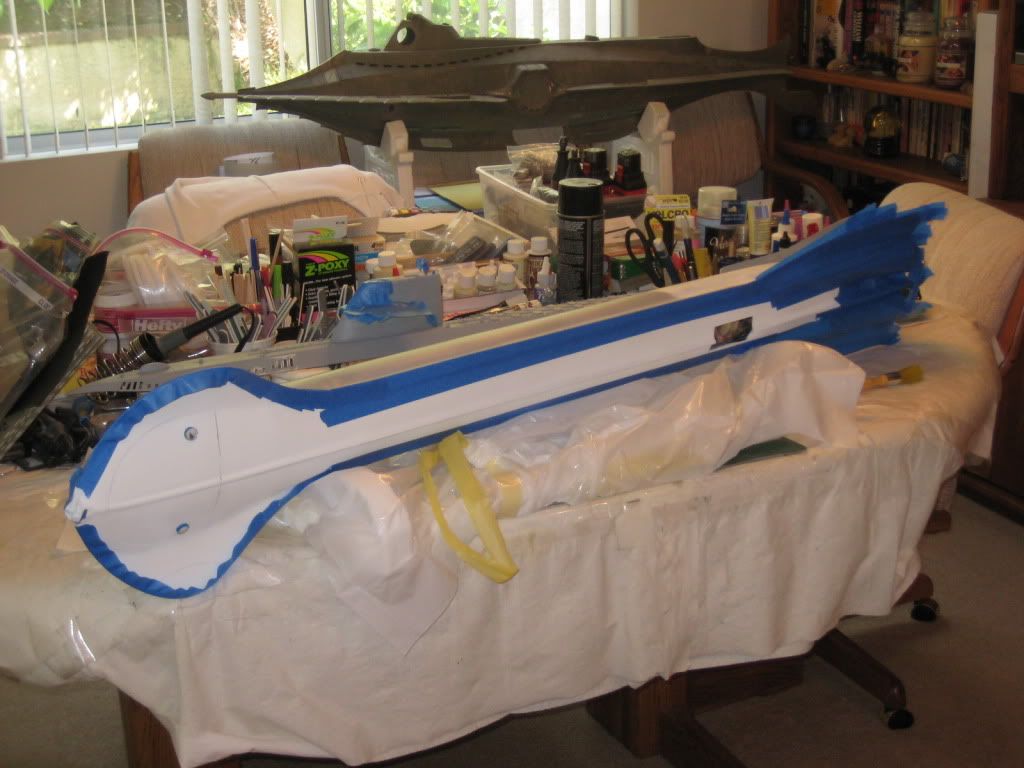
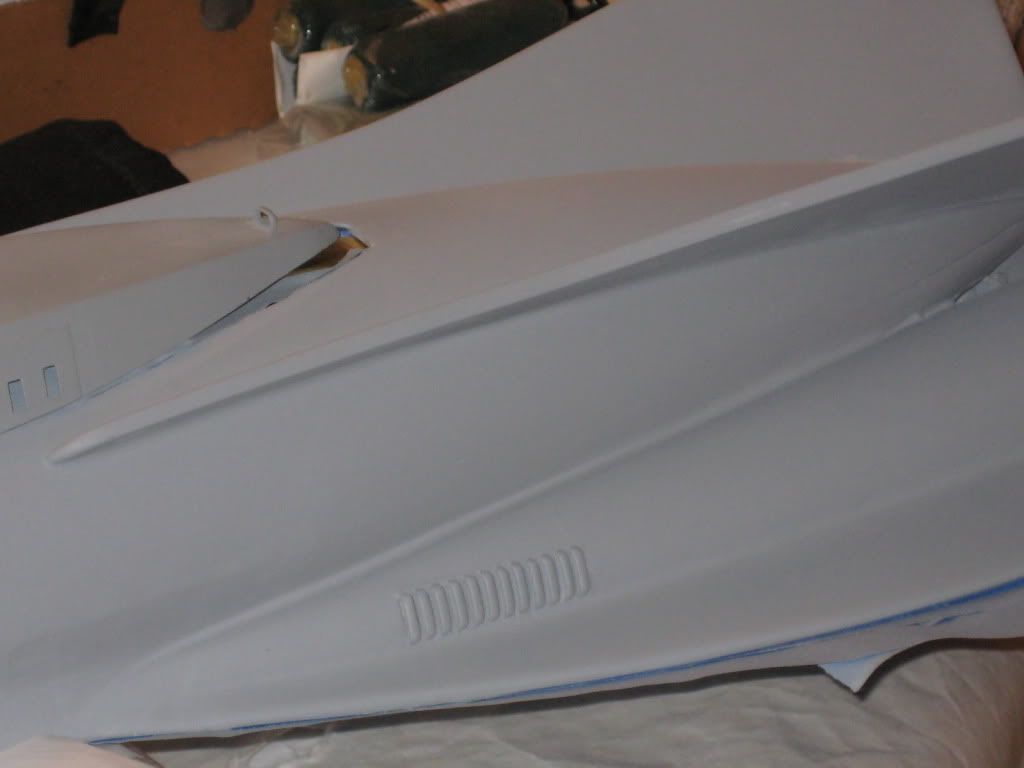
Also worked on but not shown: more effort toward a better fit of the Observation Room access panel (still in progress), reworking the sail's trailing edge LED installation for a better fit, removal of some extraneous inner hull junk (one of the unneeded "bridges" across the top of the hull), and more.
More next weekend, I hope. Then it's off to the annual Sun'n'Fun Fun Run in Houston with SubRon5 gang the weekend after that.
Many more hours and much more work put in today, but no time for pics. Sorry, kids. More hull work—filling, puttying, sanding—more LED lighting finessing, just more this 'n' that. Some stuff actually crossed off the to-do list though, like the tongue-and-groove for the afterdeck mentioned last time. It's done and the JB Weld is curing as I type. However, overall it's looking less and less likely the boat'll be ready to run in SanFran on Oct. 1st, and I'm pretty bummed about it. Won't feel much like bringing her along to show off if she can't go in the water and she's not looking her best. We'll see.
Once again this thread is long overdue for updating. Sorry about that, guys. Those following along from above may be interested to know that I did indeed get Seaview ready in time to take with me to the West Coast Fall Fun Run in San Francisco back on that first weekend of October. She wasn't fully finished, and therefore not at her best, but she was in good enough shape to run and did put forth an encouraging performance. She still has significant trim and sail plane linkage issues—plus assorted other miscellany requiring attention—but I did successfully get her to run, turn, dive, surface and come back, all while looking great and turning heads. Look for my photo-heavy coverage of the whole SanFran Fun Run event in the forthcoming December issue of the SCR. That same issue will also feature the first in a series of build articles detailing my specific approach to this boat for any interested in seeing how it got started. Now I'm eager to get back to work on her of course, but the holiday season and some very involving upcoming home remodeling work will no doubt keep me away from her till sometime early in the New Year. Till then, I figure I can at least present below the additional refit work which permitted her to patrol those Golden Gate Park waters. So here we go....
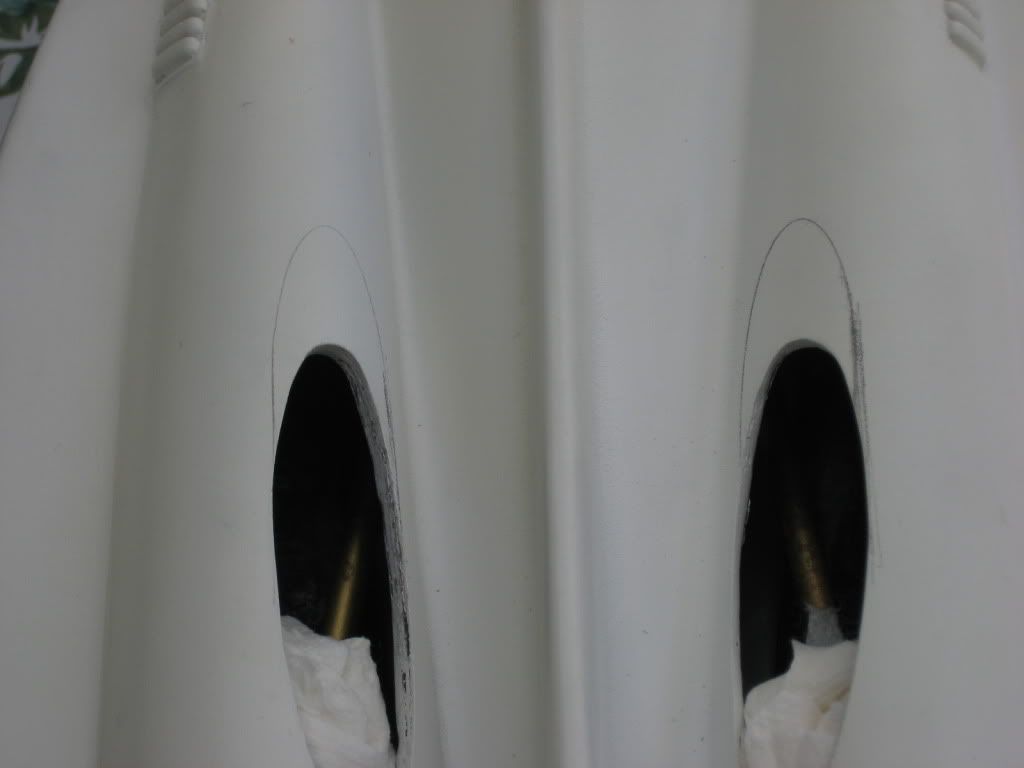
We start here by marking the pumpjet water intake openings for enlargement. I found out in Carmel that the boat was significantly underpowered; more water for the pumpjets should equal better propulsion.
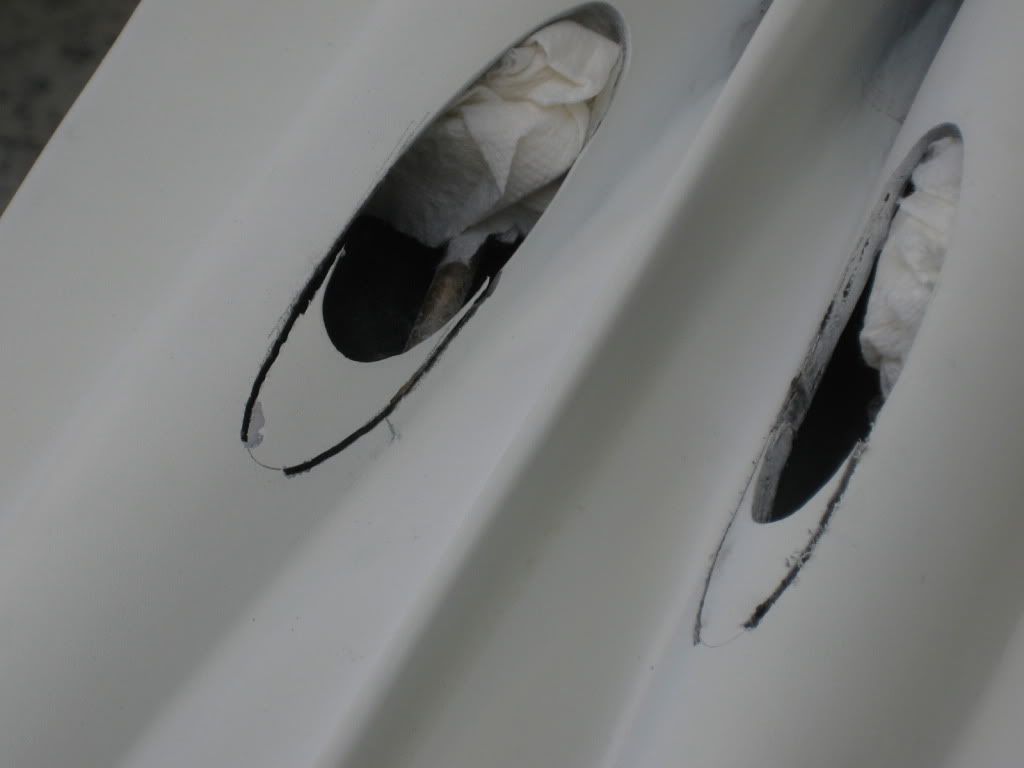
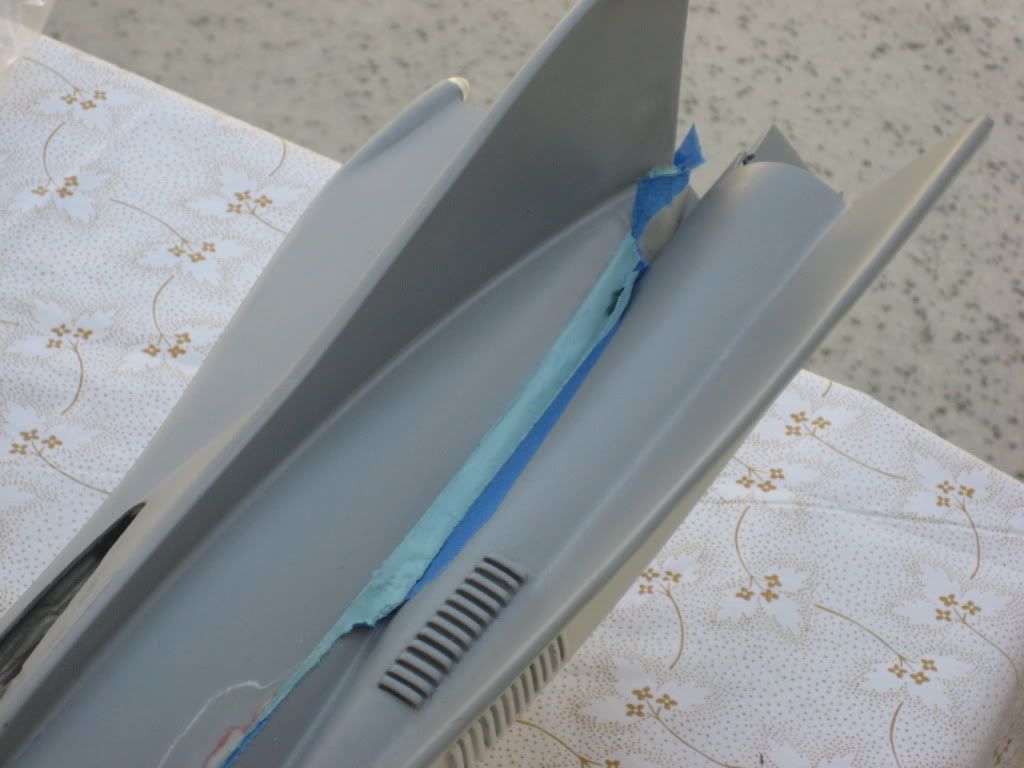
Setting her up to enlarge the holes. Note also I once again attacked the joint between the hull and the aft engine assembly. That gap was bothering me, requiring more filler work.
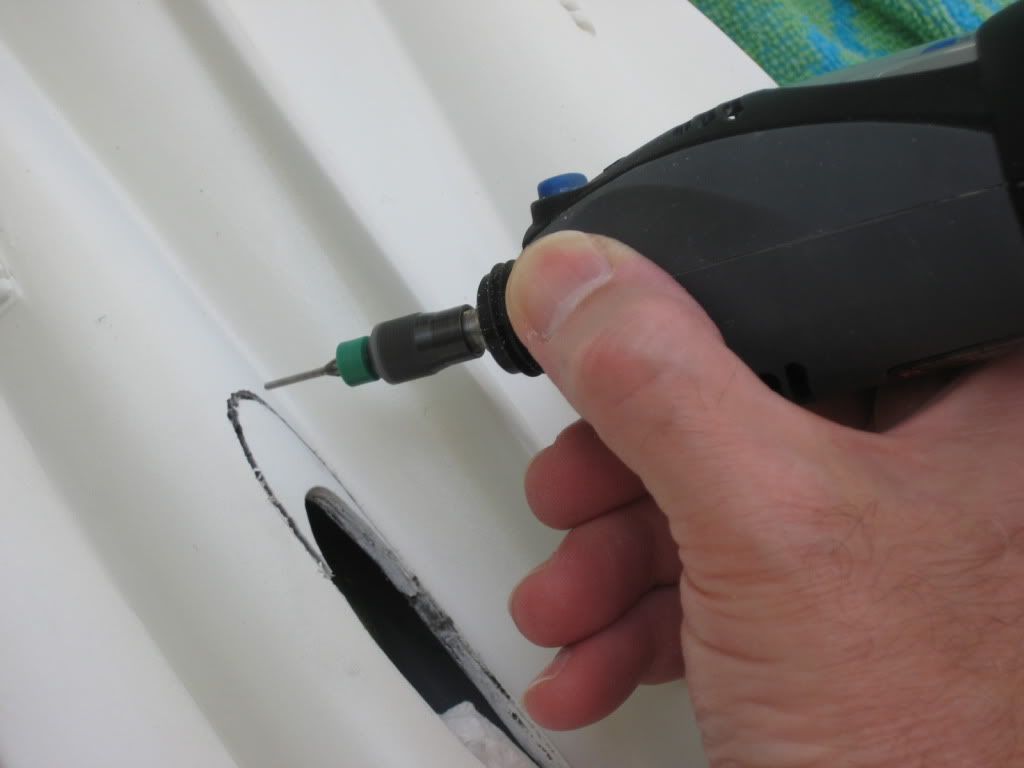
Cutting out the holes, first with a reciprocating saw, then shaping the final cut with a small grinder on a Dremel.
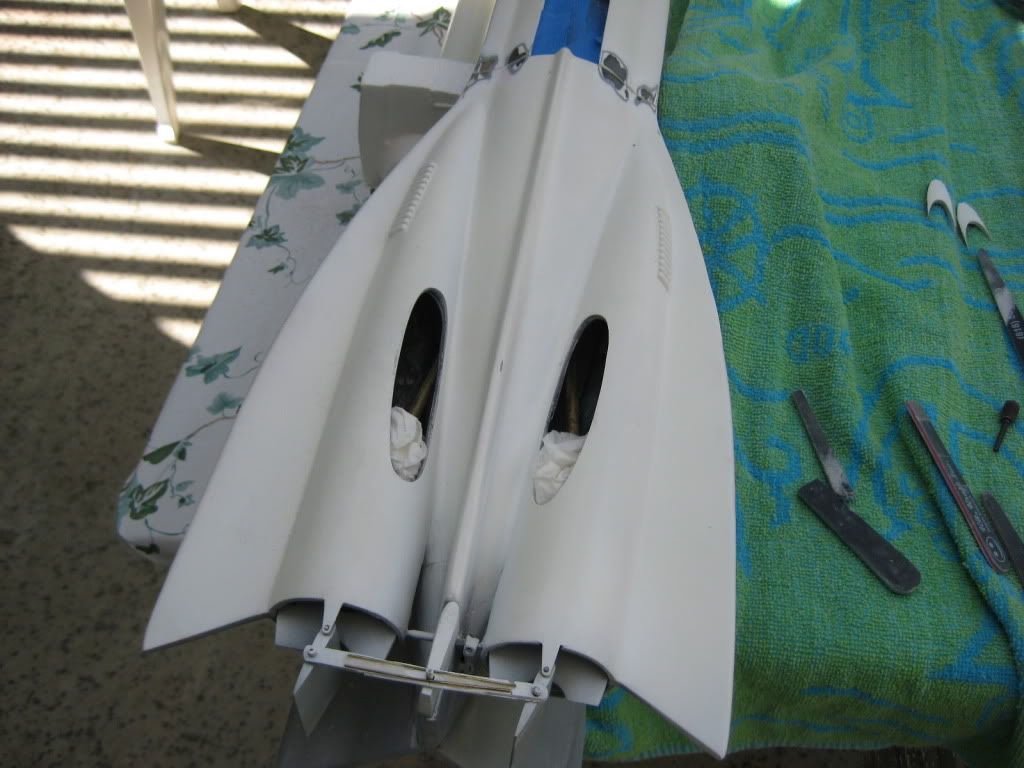
Here they are, successfully enlarged. A little sanding to further smooth the edges, then on to the next task.
Her white keel now gets repainted.
Now to mask in prep for priming the areas where all the hull split repair and joint reworking had been done.
Primer's now applied to the specific target areas.
Some filler resanding done here.
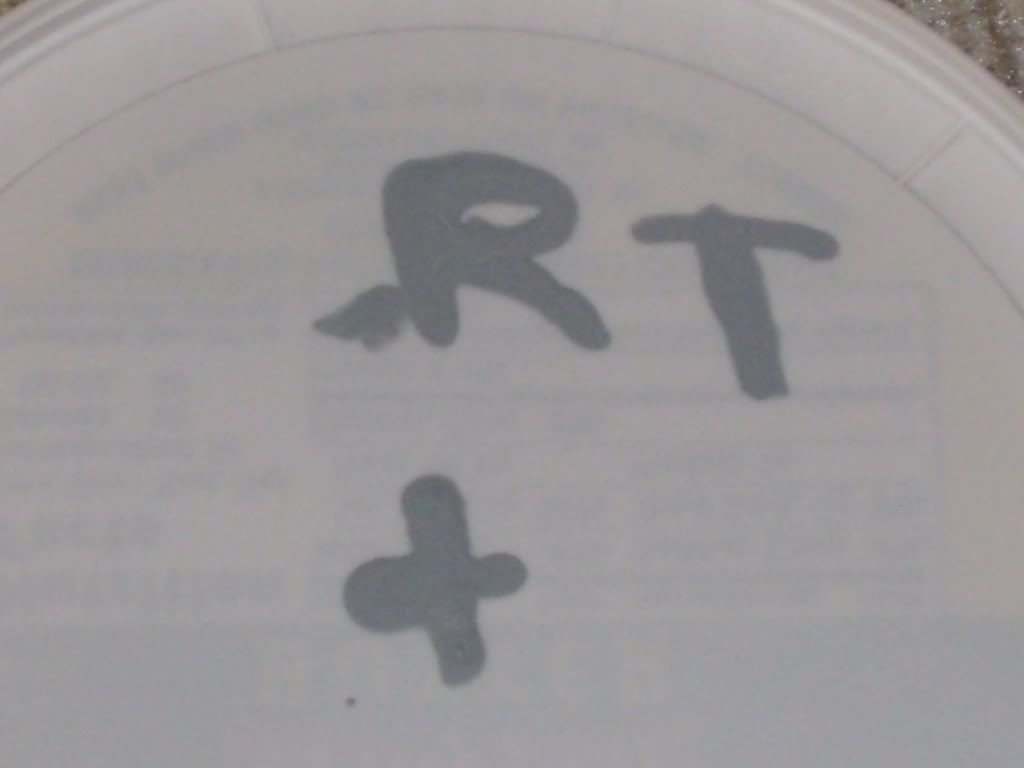
Repainting the primered portions of the hull with what was left of the custom-mixed Seaview medium grey color I'd acquired from Steve Neill once he'd finished the build.
But of course I ran out, so had to mix up a batch of my own using Steve's very specific recipe of Model Master acrylic paints. The "R" here is for the Real paint. The "T" is for my Test color. After much experimentation and mixing, I'd really gotten it darned close. The "plus" sign truly tells it]really[/i] didn't want t have to repaint the entire boat from scratch!
JB Weld-ing the former sail plane pushrod's magnets onto a Dubros linkage cable as a replacement. I installed this replacement cable later, but had trouble getting the length accurate and its resulting throw correct and workable. More toil ahead in this arena, obviously, and I'll be looking to my SC buddies for their specific help.
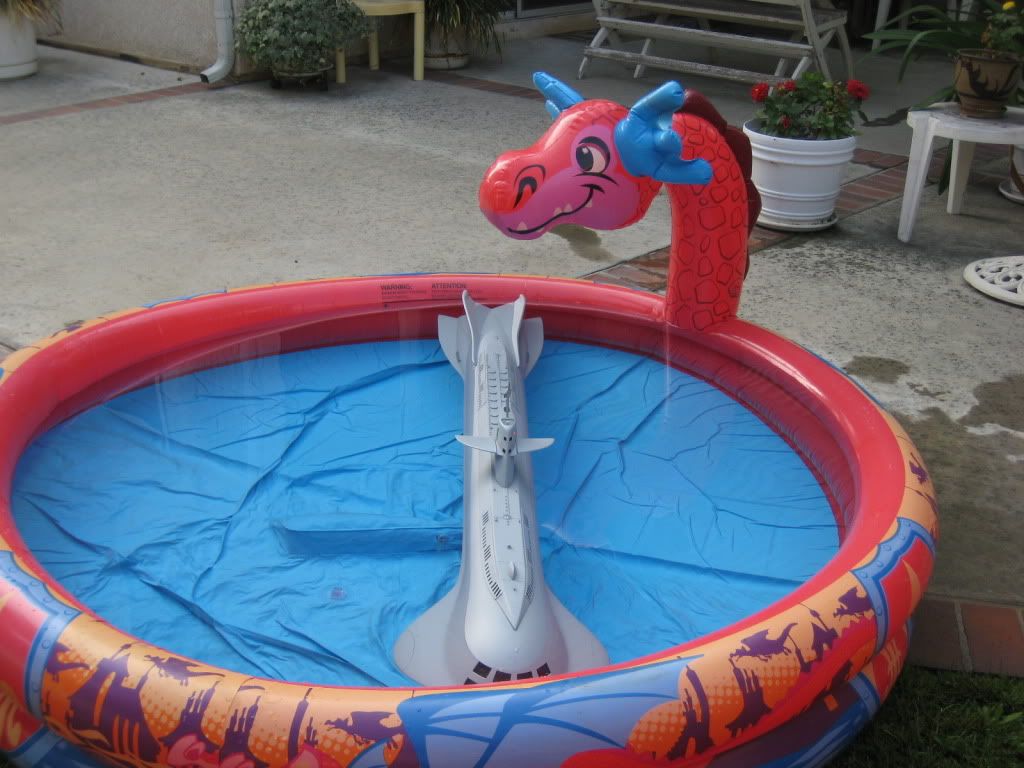
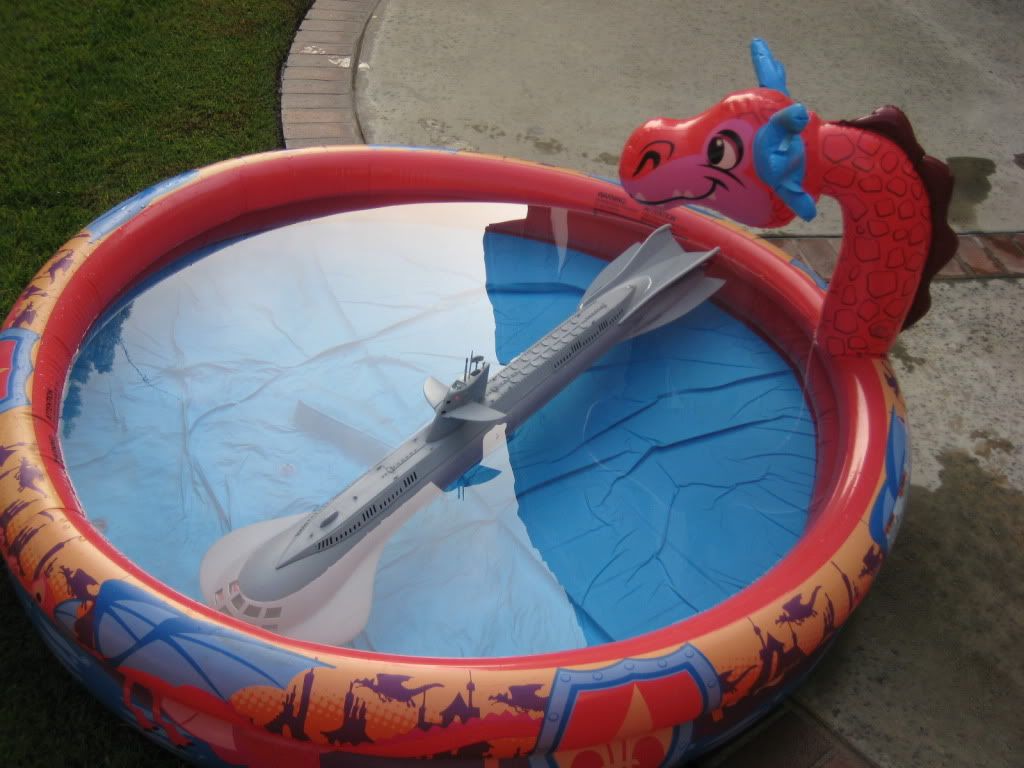
Trimming Seaview in the backyard kiddie pool happily donated to the cause by Houston buddy Paul Crozier. This brief effort occurred literally minutes before loading her in the car (still dripping wet) and hopping on the 5 Fwy. north toward San Francisco, Friday morning, September 30th.
Honestly, don'tcha just love this trim tank though? It's the perfect "Voyage" adventure—Seaview takes on the giant (happy!) dragon, and with no means of escape!
Thanks to one and all for your interest and for following along. I'll get back to updating this thread with—I hope—"finishing up" work sometime after the holidays. I further strongly hope to get back to building my 66" Disney Nautilus not long thereafter. Till then, Happy New Year!
Long, LONG overdue to update this thread. I'm currently in the throes of Seaview's latest update/repair/remod/refit to prep her for the annual West Coast Fun Run in San Francisco coming up in a few short weeks. I'm counting on a much better performance there this year. There's still lots to accomplish, but here's a start from the last several days...
Reworking the LED connection points to the access panel for the under-keel manta fin lights. The brushed-on JB Weld (yes, I admit I'm hooked on the stuff) is to strengthen the panel overall and help it retain its shape—which tends to warp/flatten out over time. (The piece was bound into shape with rubber bands while the JB Weld cured, if you must know.)
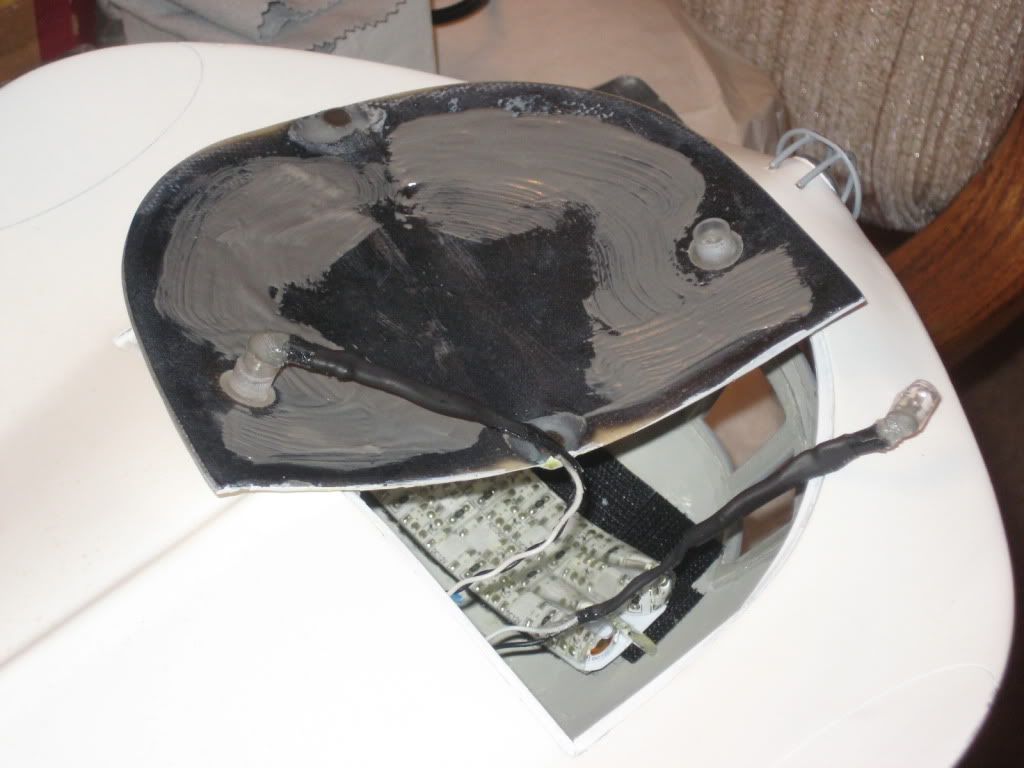
Installing new multi-LED strip lighting to more fully illuminate the Observation Room.
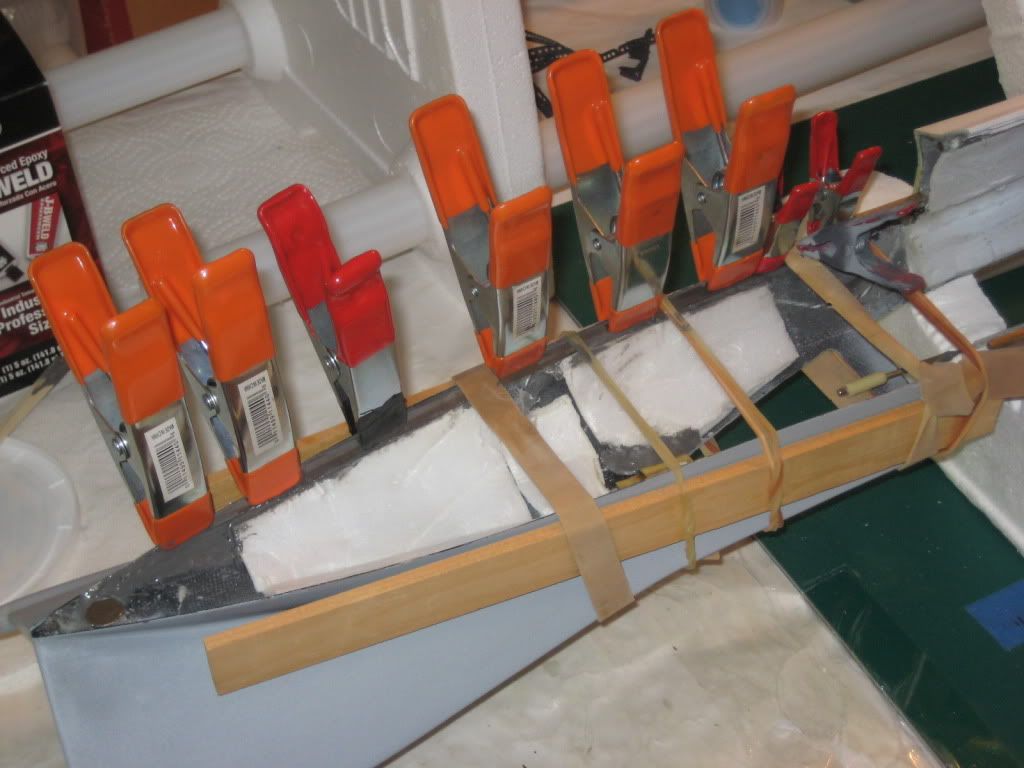
First step in reworking the aft hull joint seam. Metal strips are being JB Welded to the edges of the top hull half to reinforce the thin GRP there, strengthening it, helping it to better stand up to being seriously scraped and gouged during installations of the RCABS tube and, I hope, also helping it to better retain its original curved shape—which has been mysteriously warping outward, compromising the seam and ruining the look of the aft end of the boat. Starboard side goes in first.
Source for the metal strip]http://i1143.photobucket.com/albums/n637/jefftytoo/IMG_4484.jpg[/img]
Now the port side metal strip goes in. Actual reworking/filling/sanding/priming/painting of the seam comes soon.
All watertight door portholes in the sail have been darkened to simulate the "hollow" emptiness inside. Tiny clear disks will be installed over these spots soon to look like porthole glass.
Thin styrene clamps are JB Welded to the bottom of the O.R. access panel to help hold it snug up against the lower hull opening's lip. It's been found that the fore and aft magnets alone on this piece weren't doing the job. I want a tight-looking seam and no chance of this panel sliding off while at sea!
Custom-shaped fresh pieces of buoyancy foam are created and temporarily installed in the forward end of the boat. These pieces are modular to aid in the boat's overall re-trimming, coming soon. This shot shows them with the O.R. also in place (you can see its flat underside forward).
Here's a better shot of the foam pieces in question, lovingly shaped to fit a tight, rounded space. (The O.R. has been removed.) This block of foam is larger than the one Steve Neill originally installed, which is what it is meant to replace. This is because the O.R., formerly a huge but leaky bubble in the bow, is now to be free-flooding, so much more forward buoyancy will be needed. How this will actually work out when final trimming is attempted later remains to be seen.
My first step in car transportation protective packaging. Inside the bags are "bricks" of that crushable, light green styrofoam-like stuff normally used in vases for anchoring fake flower arrangements. Slots have been cut in these bricks to accommodate and protect—in this case—the sail's dive planes during transport. I'll be making more custom cutout blocks of this stuff for the boat's nose and delicate rudder assembly back aft. The great thing about this green styro-material is that it really gives—no impact force transferred to the boat if it happens to accidentally slide around or get bumped inside the car. (The bags are because the green foam disintegrates to the touch and really makes a mess!)
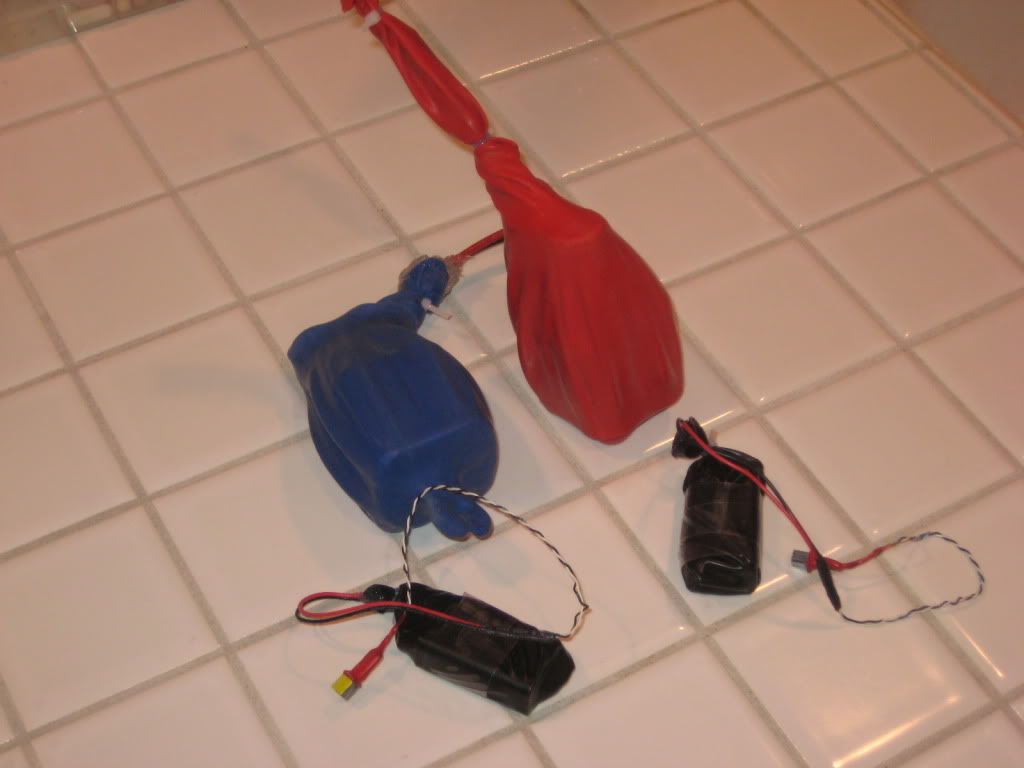
Freshly reworked and/or rewired—plus re-waterproofed—separate propulsion and lighting batteries. Unfortunately on this boat, these power sources must reside in the wet space.
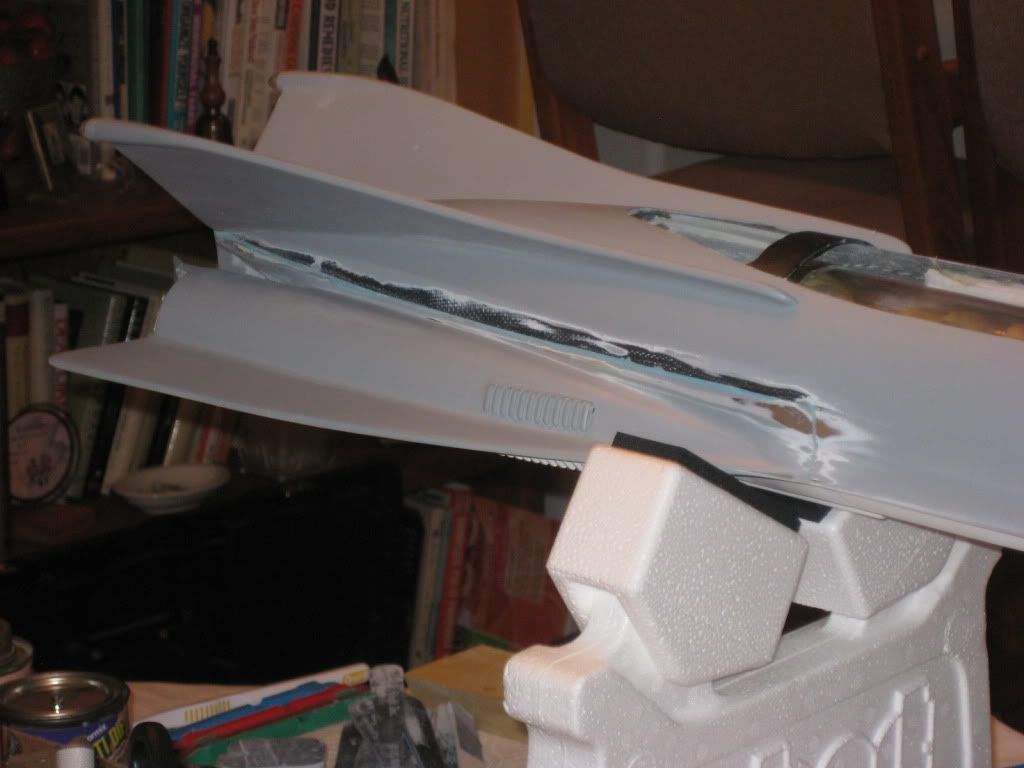
Here the strap that holds the aft end of the RCABS tube firmly in place within the hull has just had its sharp edge filed down to be fairly rounded. This strap has wreaked havoc with the after cosmetic hull joint during removal or installation of the tube assembly (see repair work started on that above). No more. This smoother shape, plus some lube, should help it all go together much more safely in the future.
Sorry, Wayne. I'd like nothing better, believe me, but last year's big Midwest Experiment proved she doesn't fly well. (The airlines pretty much trashed her, despite the military grade carry case and all that foam—not to mention several hundred dollars of unexpected extra freight costs! And it took ages to make repairs once I got her home.) No, from now on Seaview only makes driving trips. But stick around]Blueback[/i], who's recently had her lights redone so she'll be ready for this year's Saturday Night Run. Can't wait!


Comment