Attention all registered users. The new forum upgrade requires you to reset your password as you logon for the first time.
To reset your password choose this option that is displayed when you attempted to login with your username: "Forgotten your password? Click here!"
You will be sent an e-mail to the address that is associated with your forum account. Follow the simple directions to reset your password.
If this is your first visit, be sure to
check out the FAQ by clicking the
link above. You may have to register
before you can post: click the register link above to proceed. To start viewing messages,
select the forum that you want to visit from the selection below.
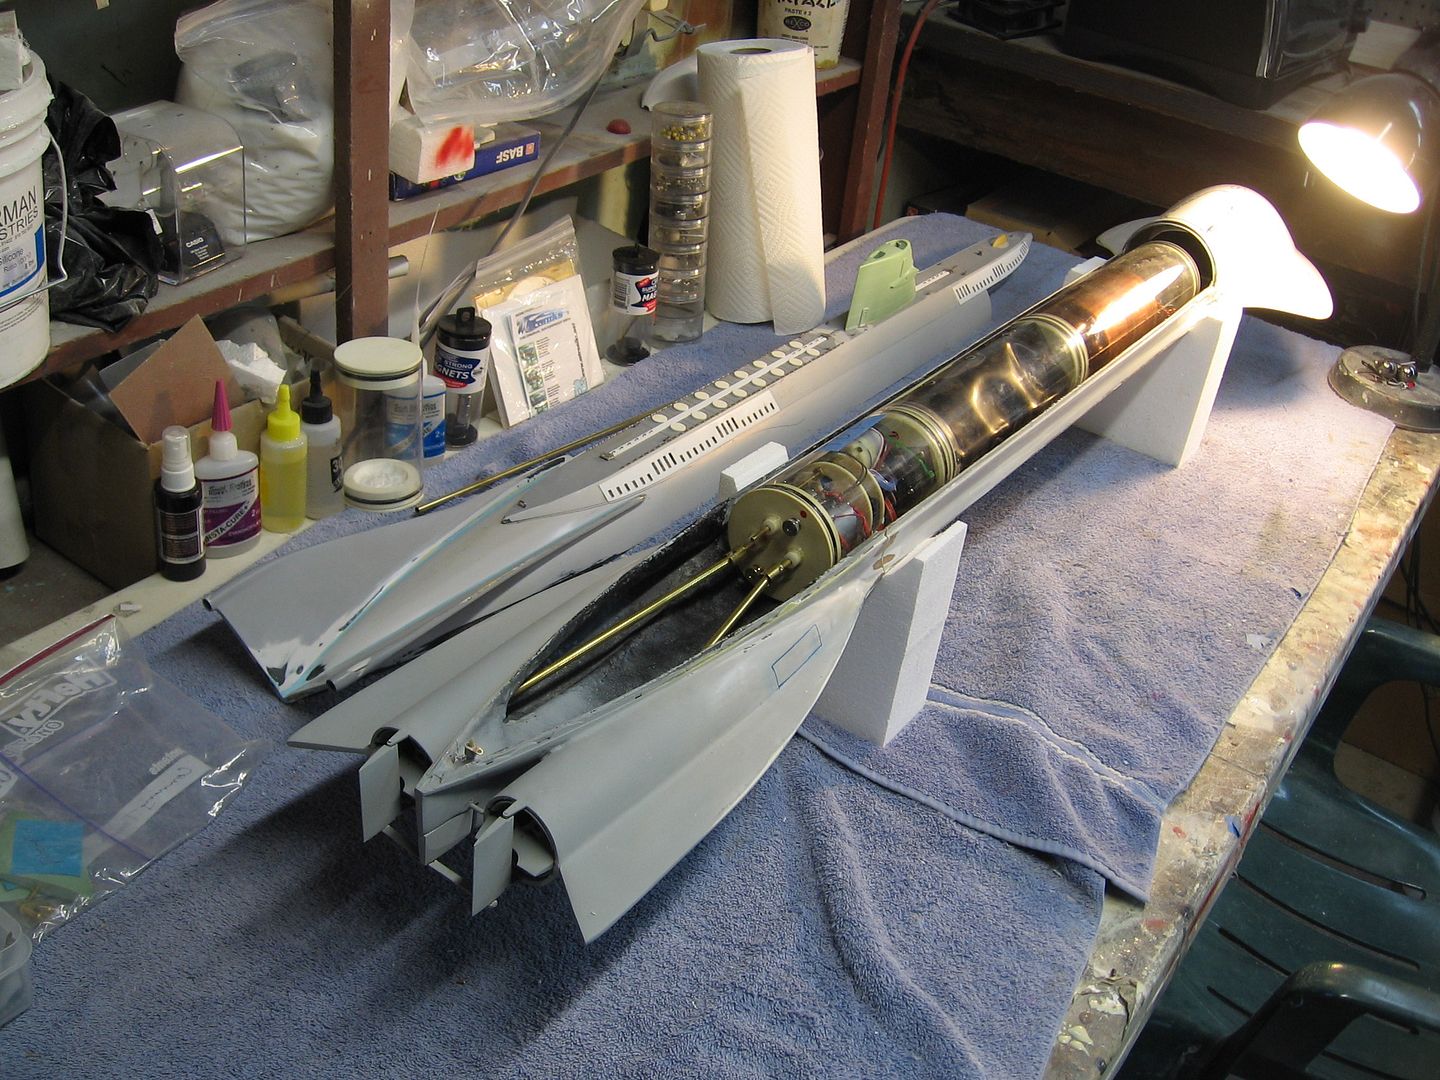
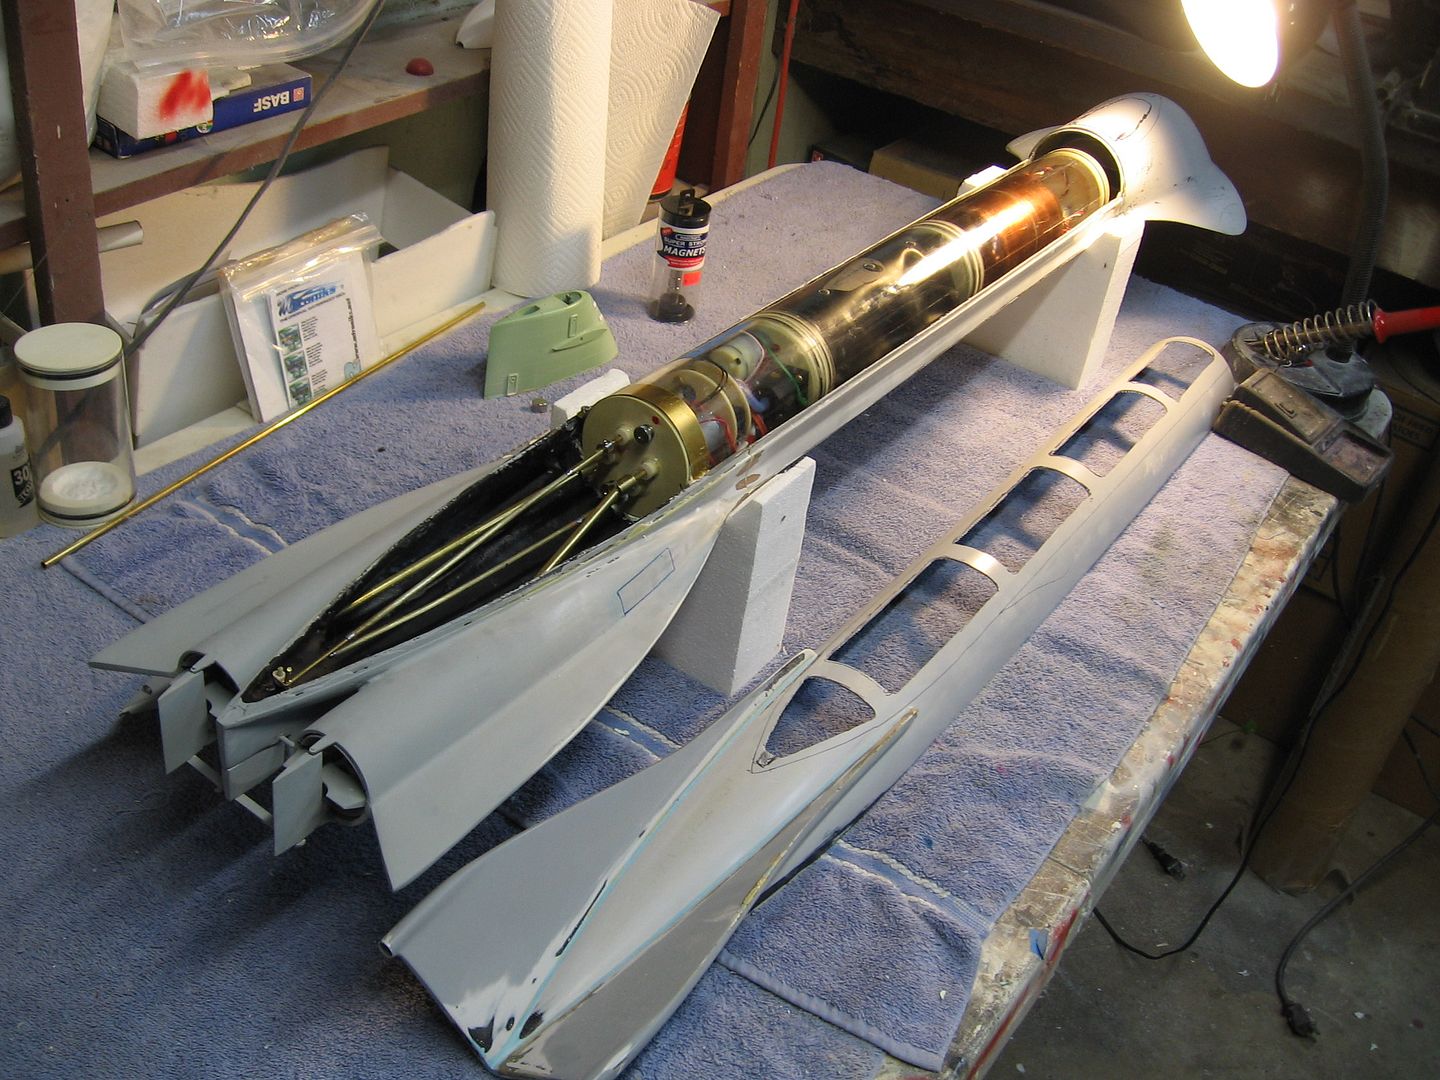
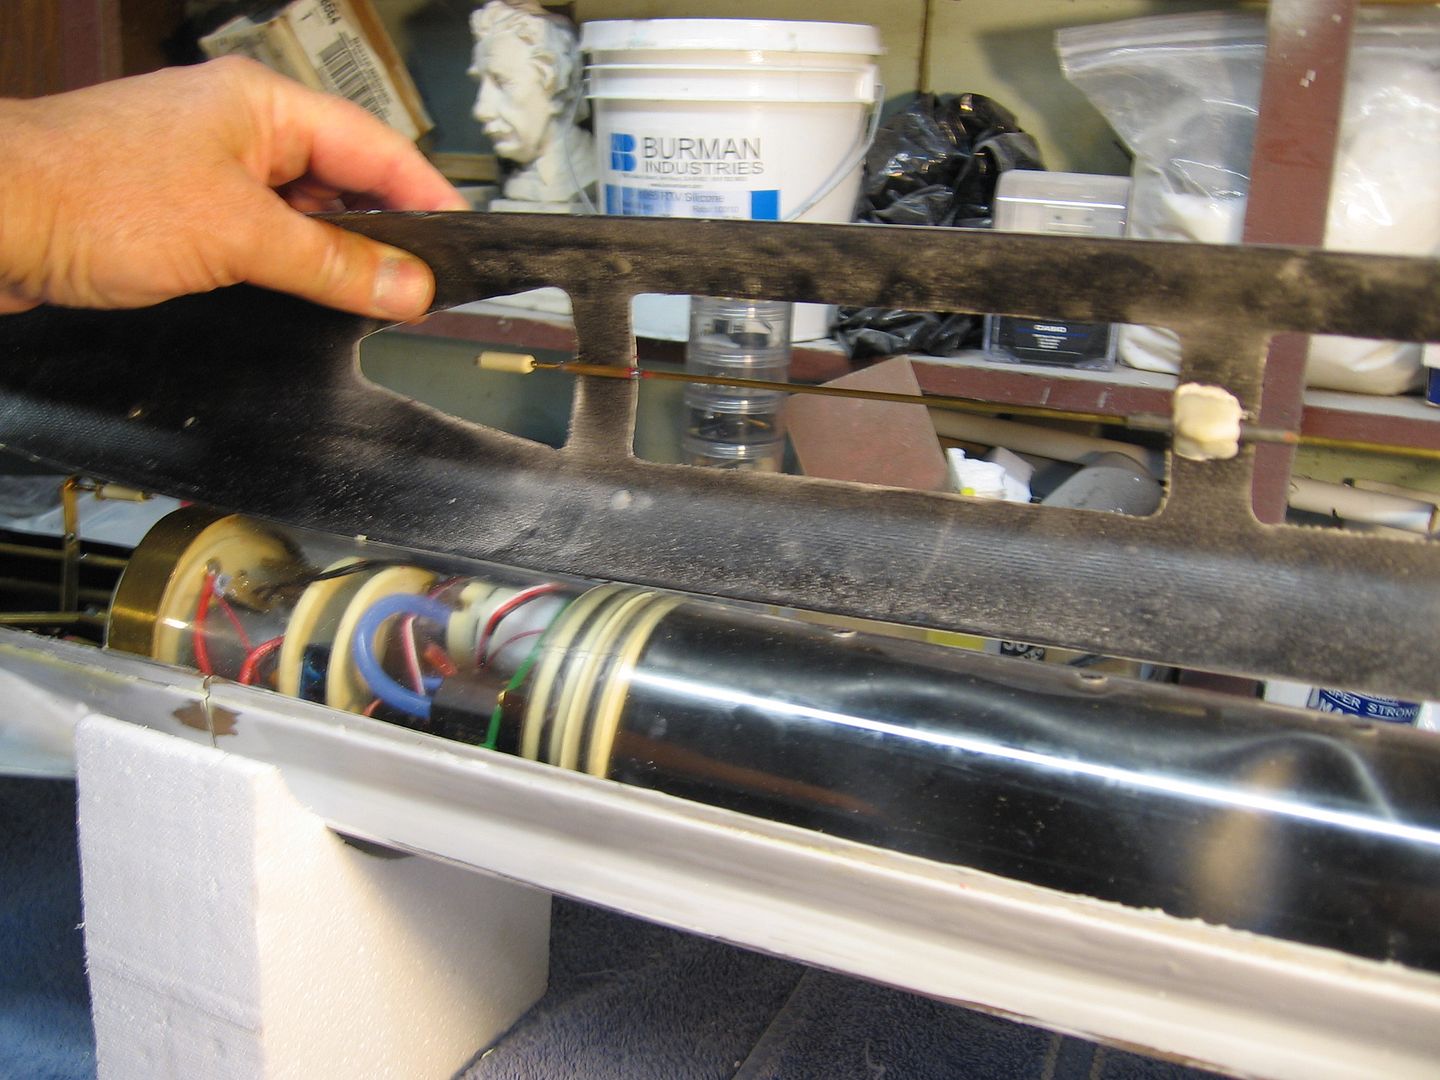
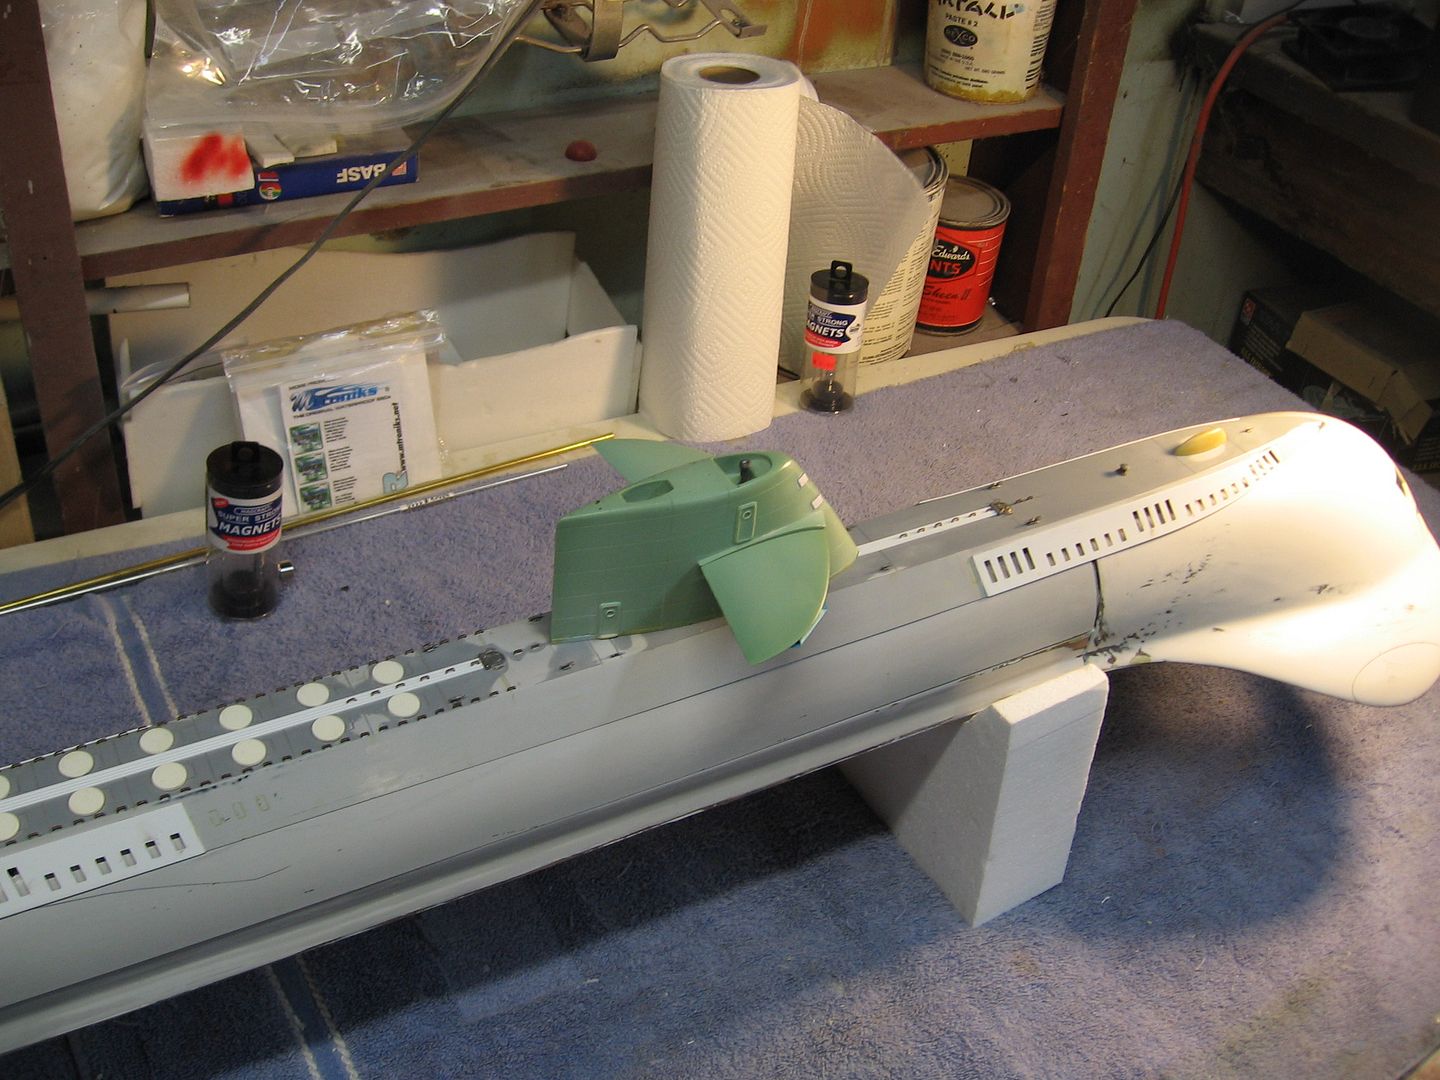
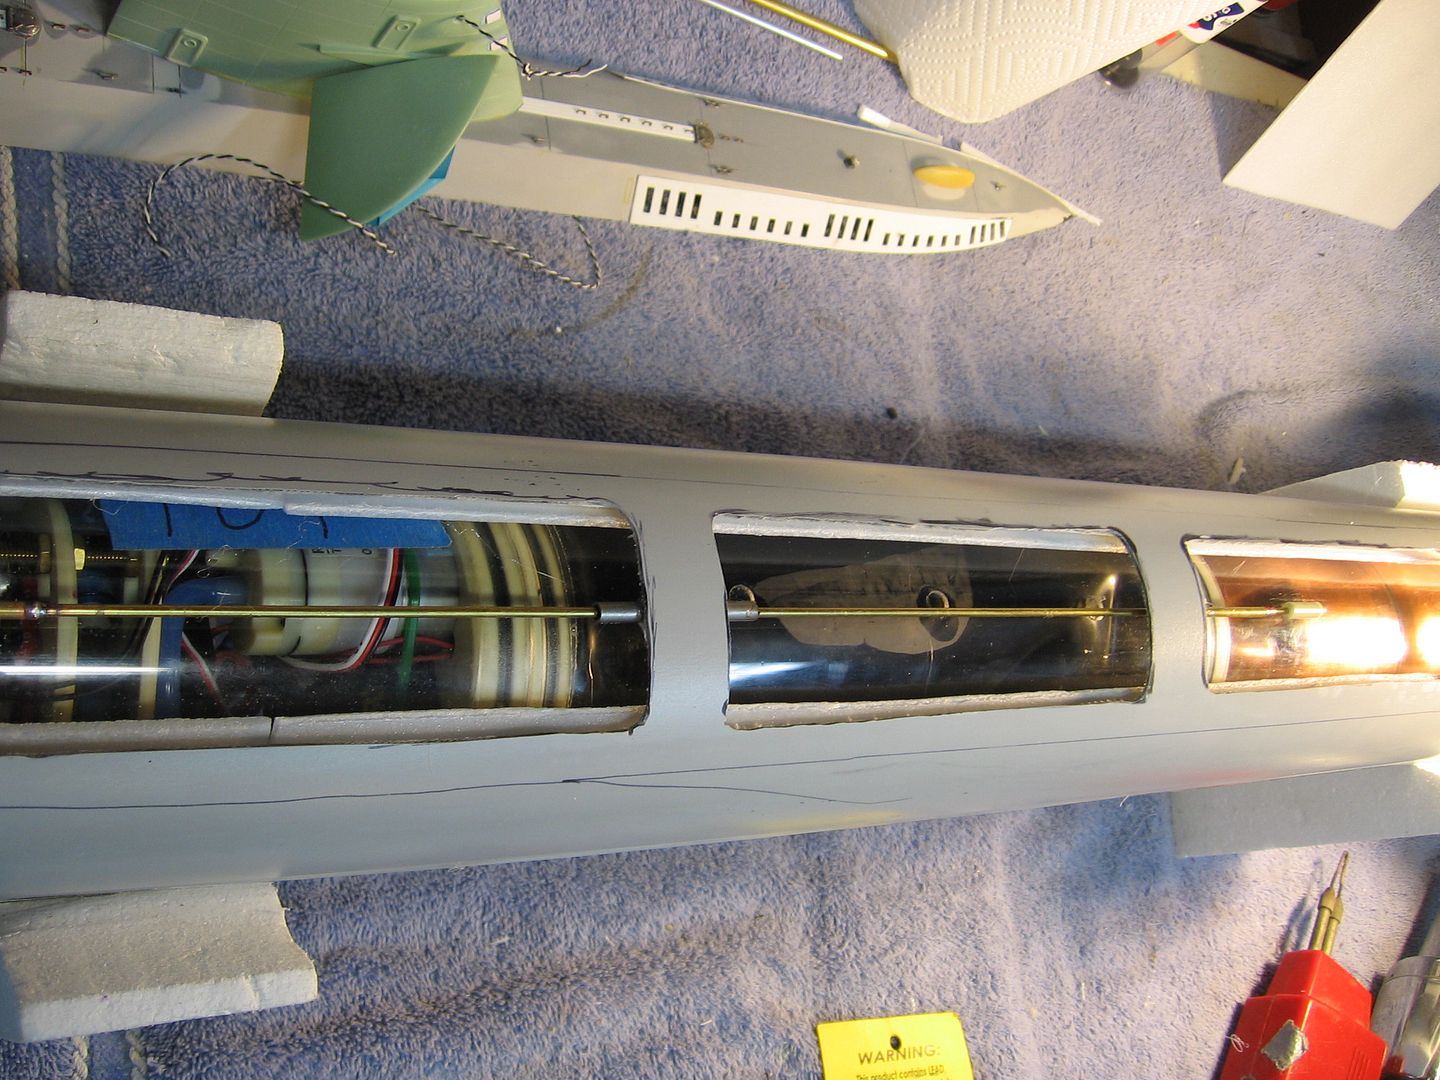
It may not look like much but the entire business end of this boat is done. That is to say the rudders, elevators and pump jets are all operational.
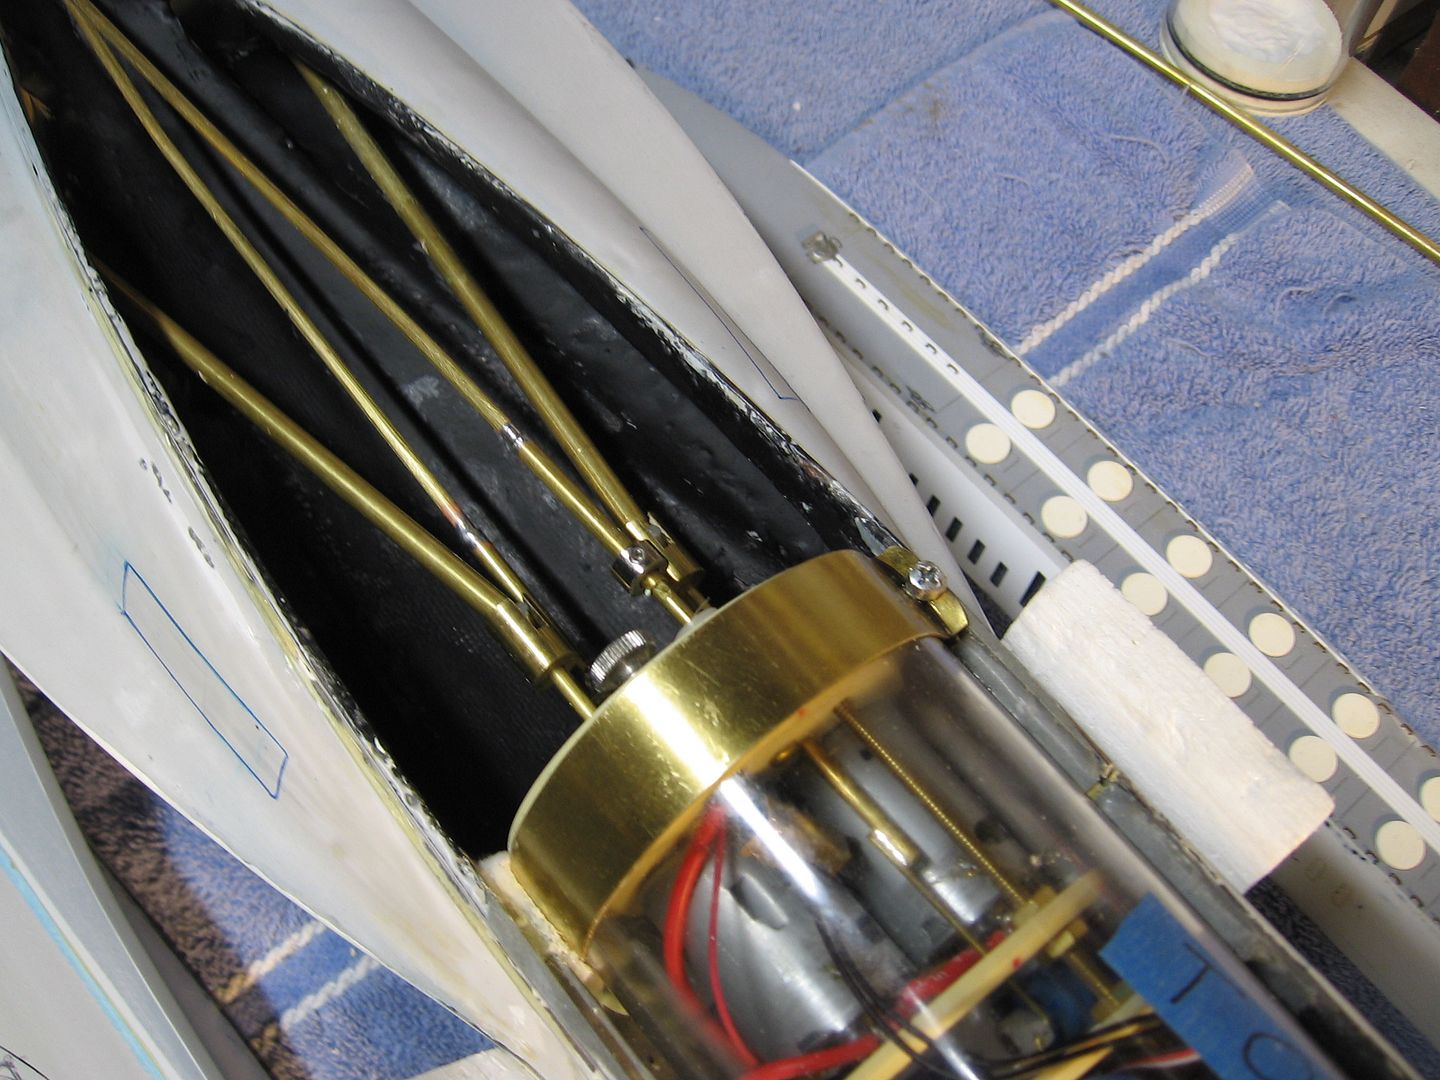
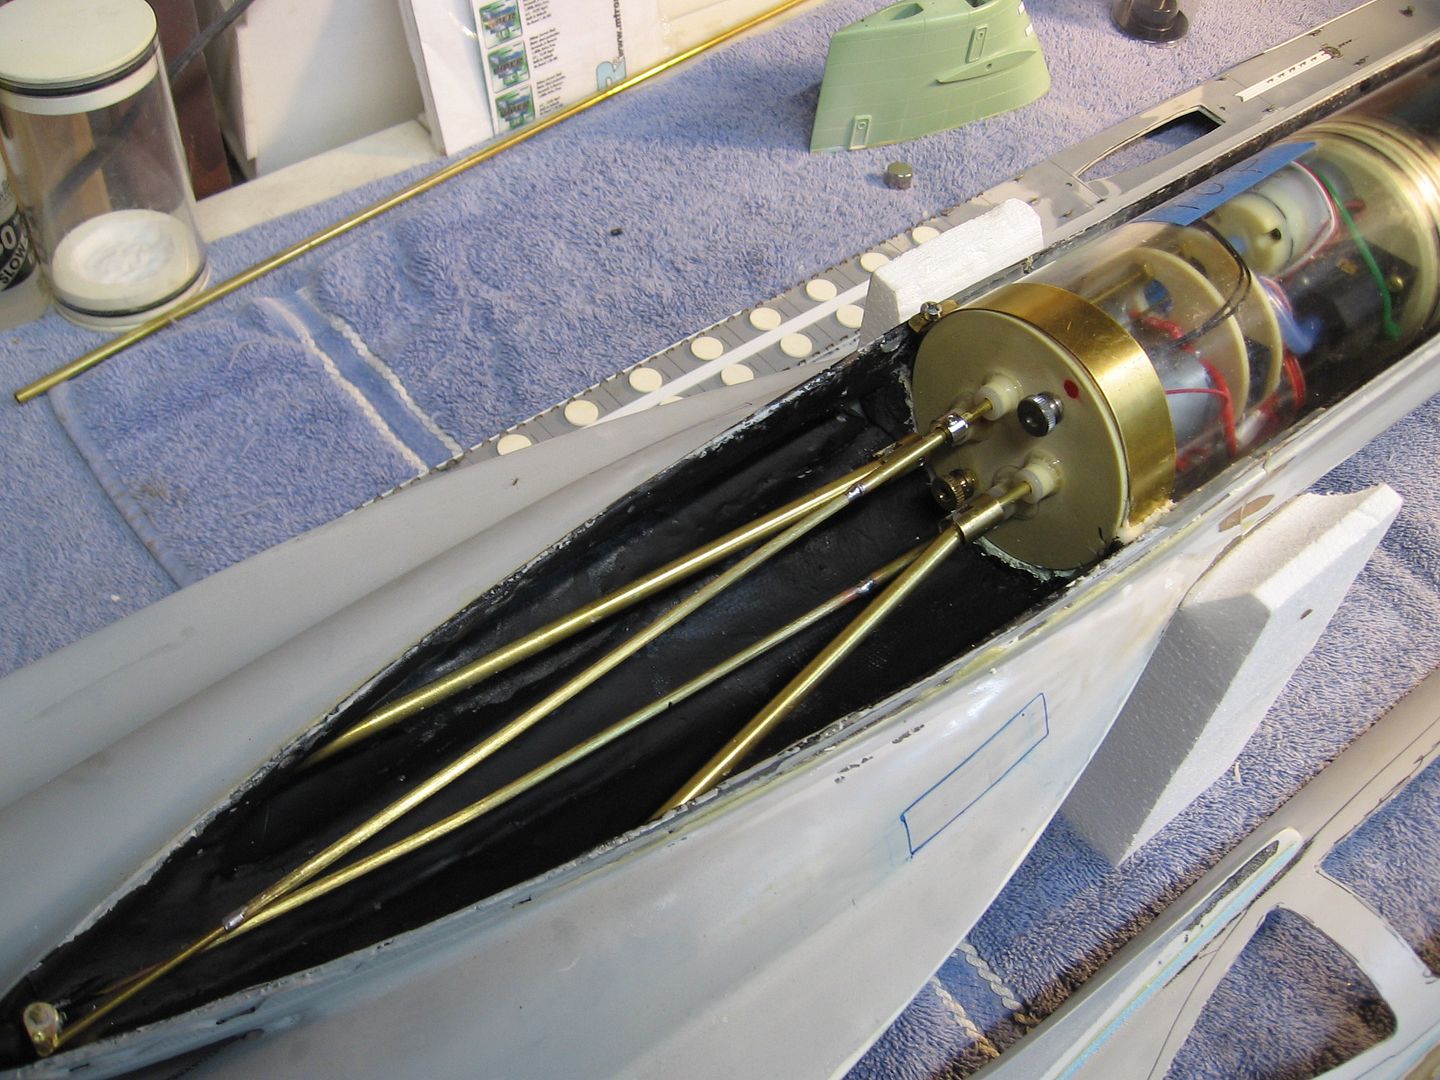
Next up is to secure the WTC to the aft section and hook up the planes controls. Just a matter of attaching the push rods. Dog bones are extended and ready to roll. The shaft couplers in place.
“Not look like much� She’s lookin’ great—and I'm thrilled. Thanks for the nightly goosebumps, Steve!
Paul, the plan is for my O.R. to be dry, but not sure if my approach will work. Cross your fingers. The good news is that Steve tells me the extra bow buoyancy from that big O.R. bubble will, based on trimming work he's done with previous Seaviews, actually help things out quite a bit. Go figure.
Question- why do you guys use a metal cylinder for the air reservoir for such low pressure pumps (lucky to make 20ps if that)? The plastic cylinder is more than upto the job. I've hydraulically tested plastic pop bottles beyond 100psi without failure, and the cylinder walls of the average WTC is a lot thicker. You would need a couple of rods to prevent the end caps popping off, but that is all.
Plastic is not the best choice for pressure application in gas service, even at 20 psi. Thin wall plastic containers creep and stretch and do not return to their original dimensional state after each pressure cycle. After a number of cycles it will fatigue and fail. They are fine for a few LP liquid cycles that they see in use in the beverage industry and in household use for a few cycles such as a 1 liter bottle of soda. These units are designed with a very finite service duty(number of service cyles). Each pressure cycle of a plastic pop bottle is reduced in magnitude as the partial pressure of CO2 diminishes as the fluid is consumed by the user. Beyond that they are not designed for continuous/intermittent use under compressed gas service. Fluidic service is different...if the bottle ruptures when full of a fluid you get squirted and maybe a bit wet. When the bottle is pressurized with a compressed gas the reaction of failure is quite different as the gas expands away from the point of failure. Energy release at failure can be quite violent. The same can be said of using thick walled PVC/abs pipe and fittings in compressed gas use. The failure mode here under gas pressure can be fragmented in nature. They are designed for incompressible fluid service only. There are very small diameter, semi ridged wall tubing that can be used safely in gas service, but that is an entirely different discussion. There are FRP containers that are specifically designed and manufactured for gas service if you really want to stay away from metal.
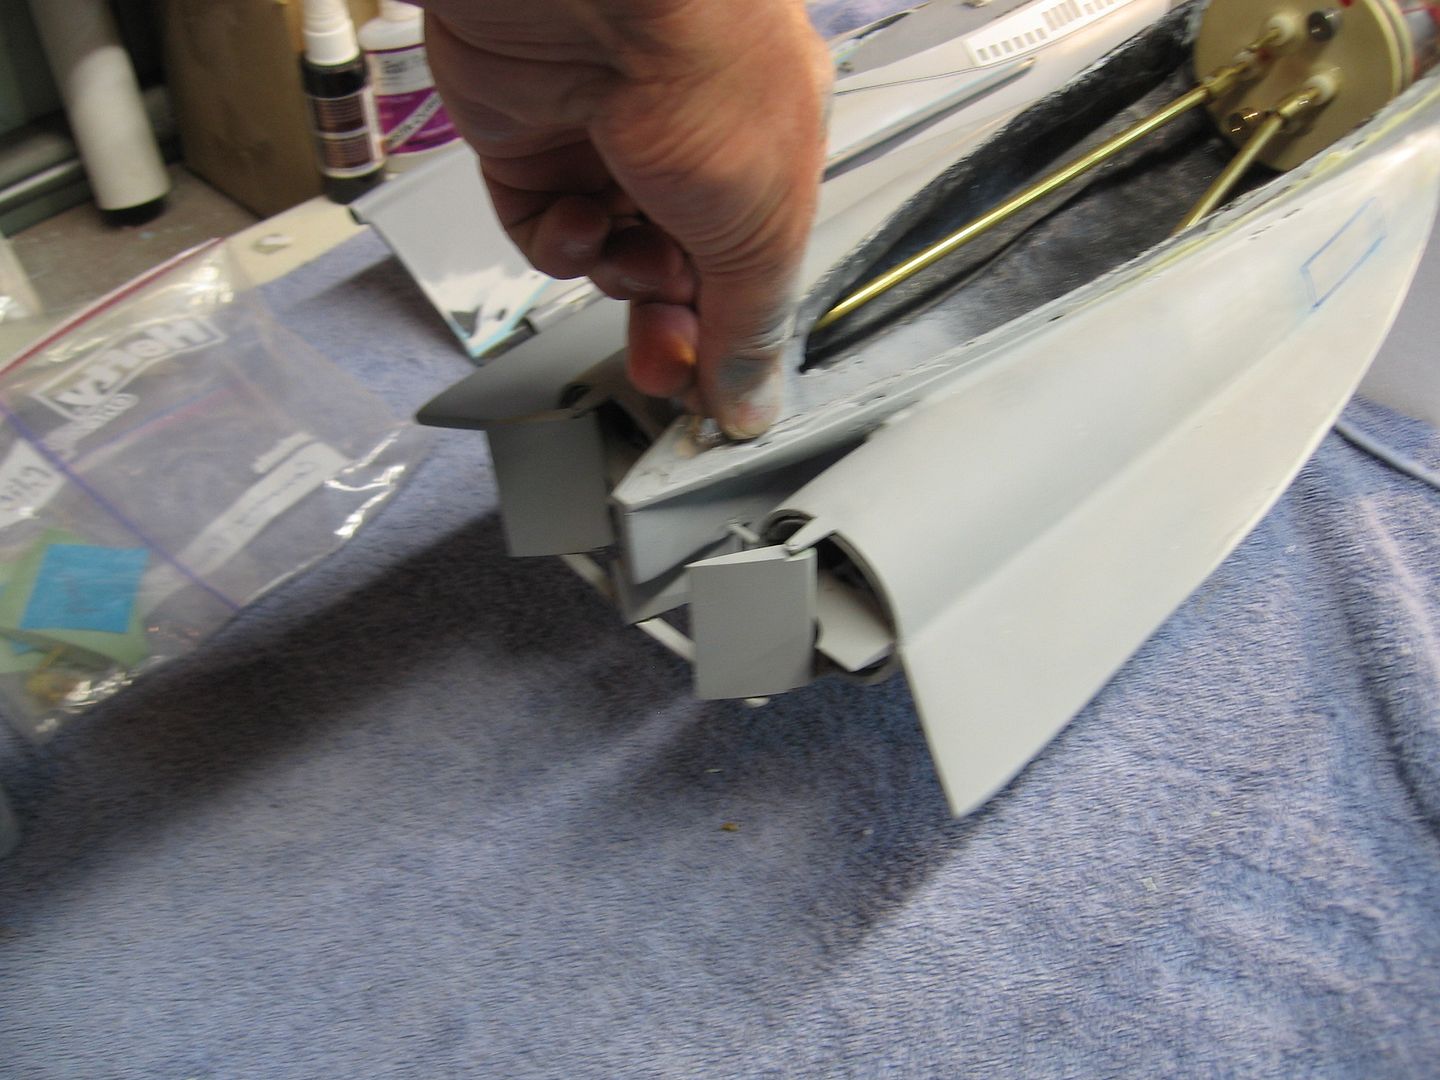
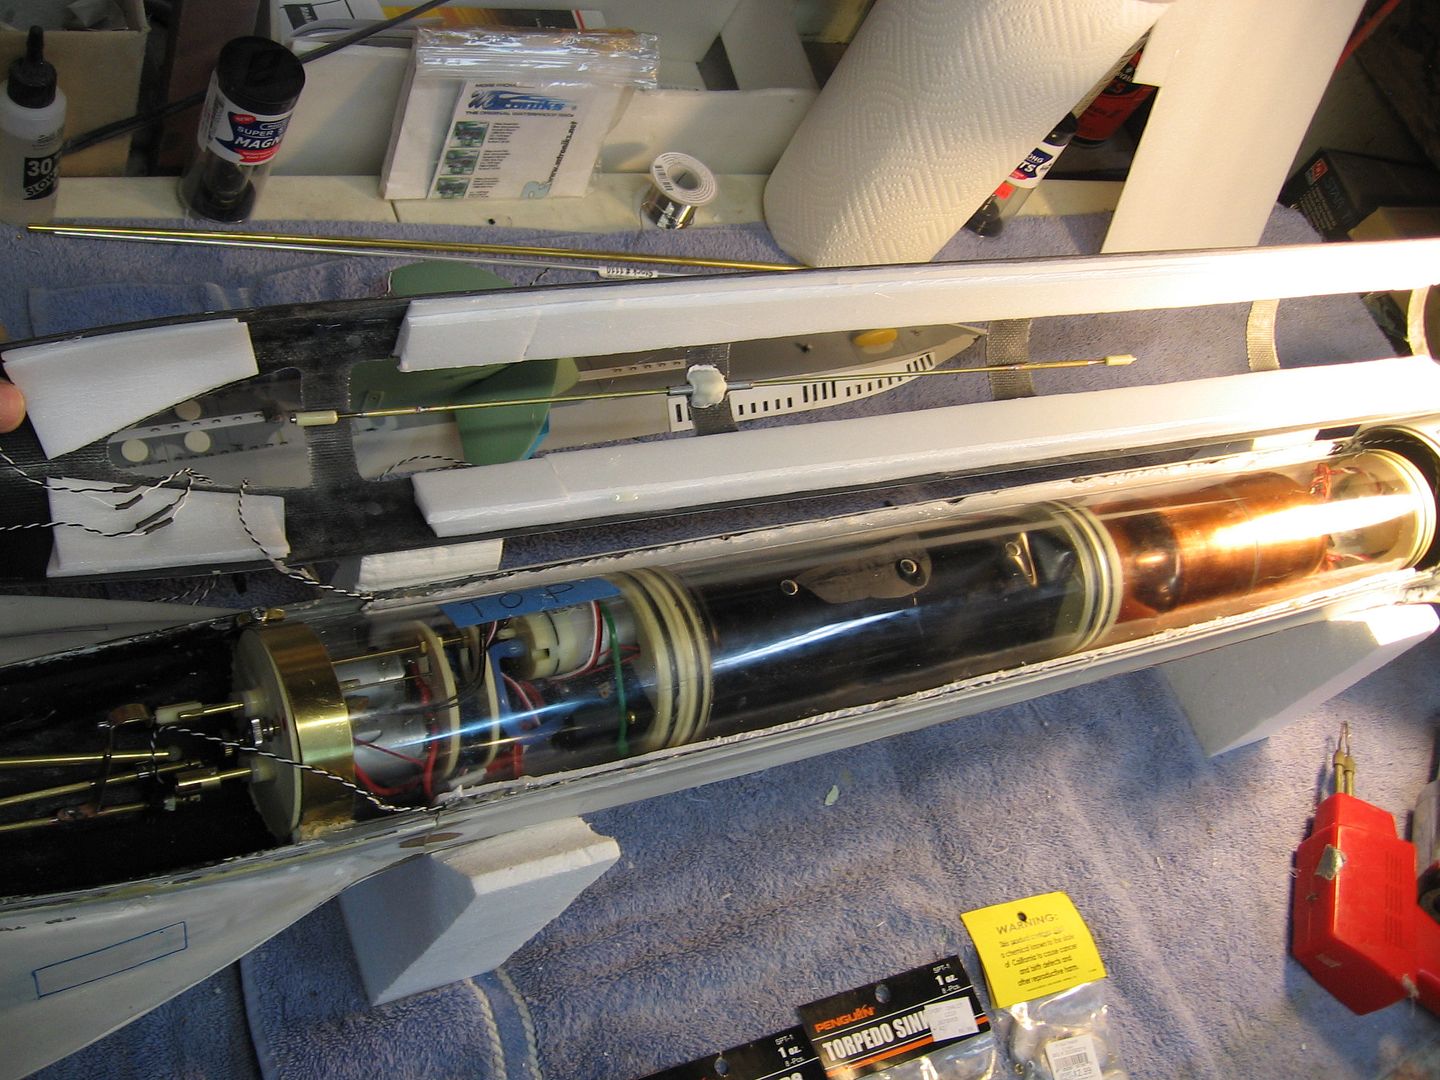
Today I finished off the stern section hook ups and the mounting of the WTC. Since the top of this boat will be closed and sealed for good the stern section lower half must be able to be fixed to the WTC so one can slide the WTC and the stern section into place. The holes under the deck are not large enough to allow for hook up.
I glued and tapered block to the bottom of the WTC and used mold release on the WTC. Then I used a bunch of Evercoat putty and placed the WTC into position on top of it. Once it set up I was able to remove it easily and it left a nice negative impression in the putty to capture the WTC. It can’t move side to side, back or forward.
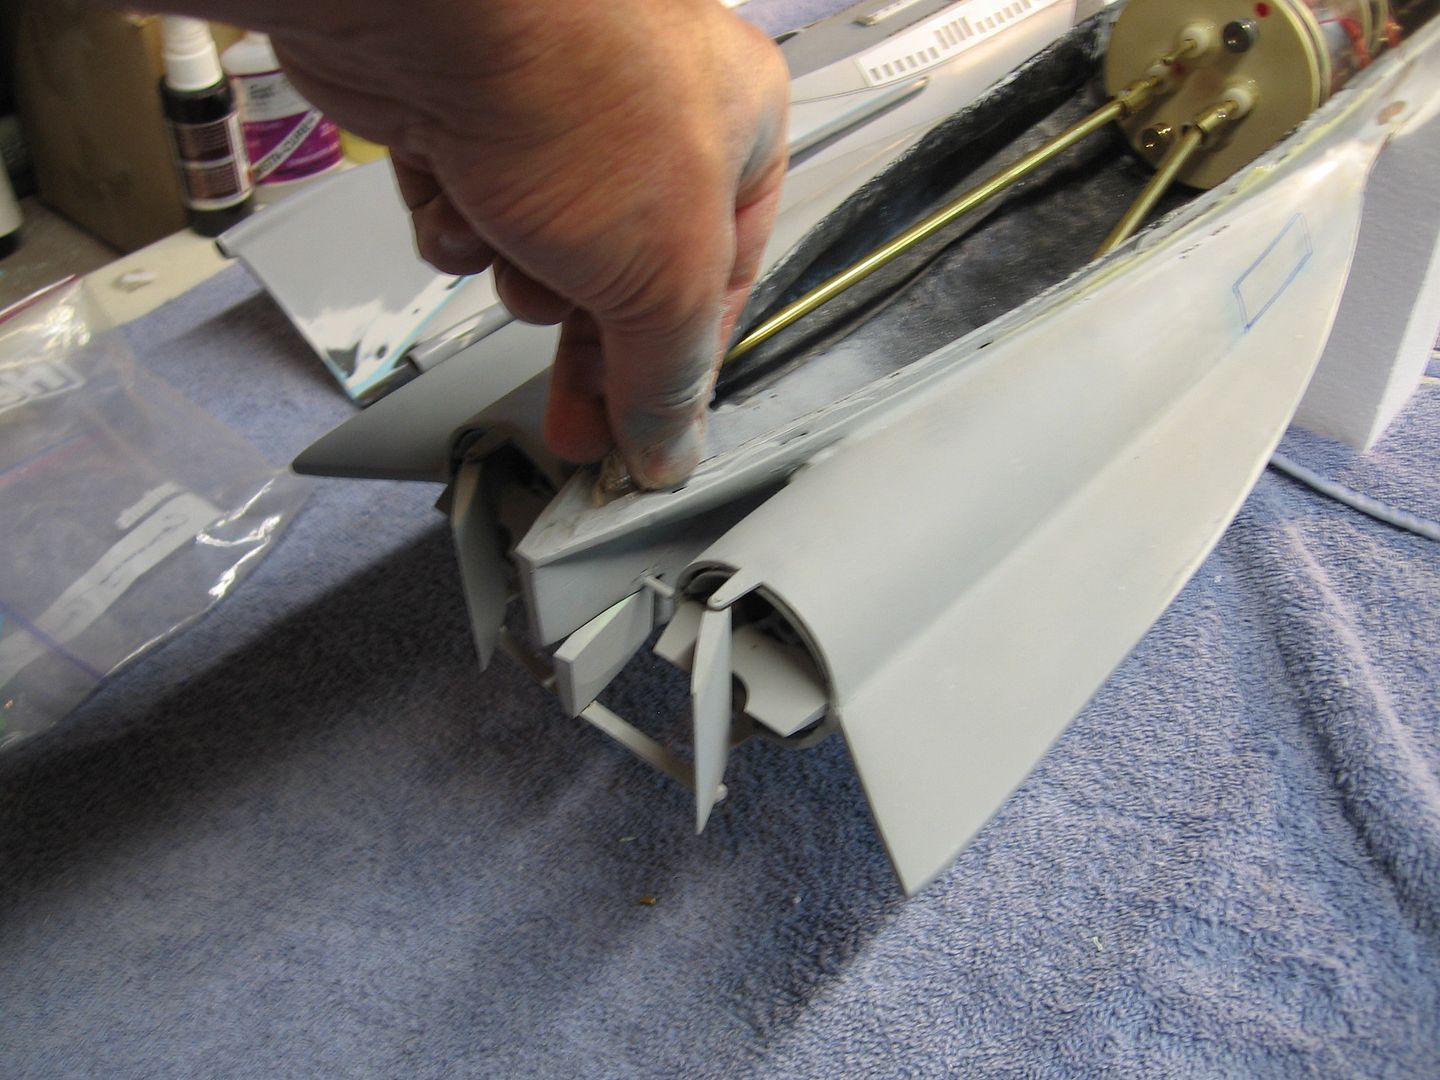
I then greased up the sides of the WTC and using white dental acrylic captured a brass strip. To the opposite side I added a block of dental acrylic. Punch a hole in the brass and tapped in a stainless steel bolt. This all hold in the WTC rather well and makes the stern part of the WTC so one can just slide it into the hull all hooked up and ready to go.
Next up I’m going to get the sail planes hooked up and working and close the top of the hull and blend it in. Somewhere in there I add the ballast foam, weight and the wiring to the fins and back up to the stern.
I spent time on and off during the last several days taking a lot of early episode Voyage Observation Room screen captures off the DVDs with my camera for use as reference. Below's a sample... Also spent a lot of time working up an elaborate O.R. sketch with many notes and callouts][/url]
Spent all of Sunday working on said Observation Room too. Mostly I tried to assemble a makeshift girder network, as you'll see below, which will be visible just behind the big bow windows. Here's the "first story" window girders][/url]
Of course, the eight-window early Seaview version I'm modeling also has a second story, so you'll see from the pics that I've attempted to create that too. Mr. Merriman's upgrade kit, as I've noted earlier, doesn't account for this design at all, so I've pretty much had to take multiple sets of his parts and start from scratch, including using Evergreen styrene I-beams of about the same scale as "risers" to lift those second story girders up to the level of the top row of windows.
This whole thing was intricate, messy, inexact, time-consuming work. Lots of cobbling together parts which were not meant to fit this way, cutting, clipping, filing, forcing, and the requisite buckets of CA. Nothing like making it up as I go! It's not pretty, and it's not truly scale, but it all holds together and the girders near the windows should ultimately be quite visible.
I even got some paint on it by the end of the day...
The saving grace of this particular assembly is that the truly poor quality work will be mostly invisible in the shadows at the back of the room. It'll serve its purpose however, and everything else I'm intending for the O.R.—mostly next weekend's work—should be gravy.
Worked on the spiral staircase a bit too. Here's how it came to me from Mr. Merriman many years ago][/url]
Beautiful, intricate, totally scale, but wrong for this early version. What's wrong is the handrail, which shouldn't be there. So I removed it. And did my best to recreate the spiraling vertical handrail which the DVDs show me should be there. Here are pics. Got some paint on it too.
Moving ahead now, starting to work on the room's walls. Here's my test attempt at a back wall. The watertight door's in the wrong place, and I obviously need different silver tape to simulate metal, but the walnut shelf paper and ancient graphic artist's tape for the floor molding looks like it'll work just fine (if I can get everything to stick). In front of it lies the floor of the O.R. and the front wall to which the girders connect. That semi-circular notch at the bottom is where the whole assembly will key into the back end of the bow searchlight lens.
Plastic is not the best choice for pressure application in gas service, even at 20 psi.
Sheerline system pump into a plastic pressure vessel (common PVC tubing), and to those pressures. Boats 20 years plus running around quite happily.
Lots of pumps these days use plastic cylinders, heck even the gas and water mains are plastic and they're running well beyond 20psi (I'll conceed the pipe is sometimes better specced and thicker). These cylinders are made from relatively thick walled lexan, I can't see any way on earth that shattering or fatigue would even be an issue. I'd understand the use of a metal pressure vessel if you were using a piston based pump capable of 100psi, but those little diaphragm pumps are lucky to make it beyond single figures.
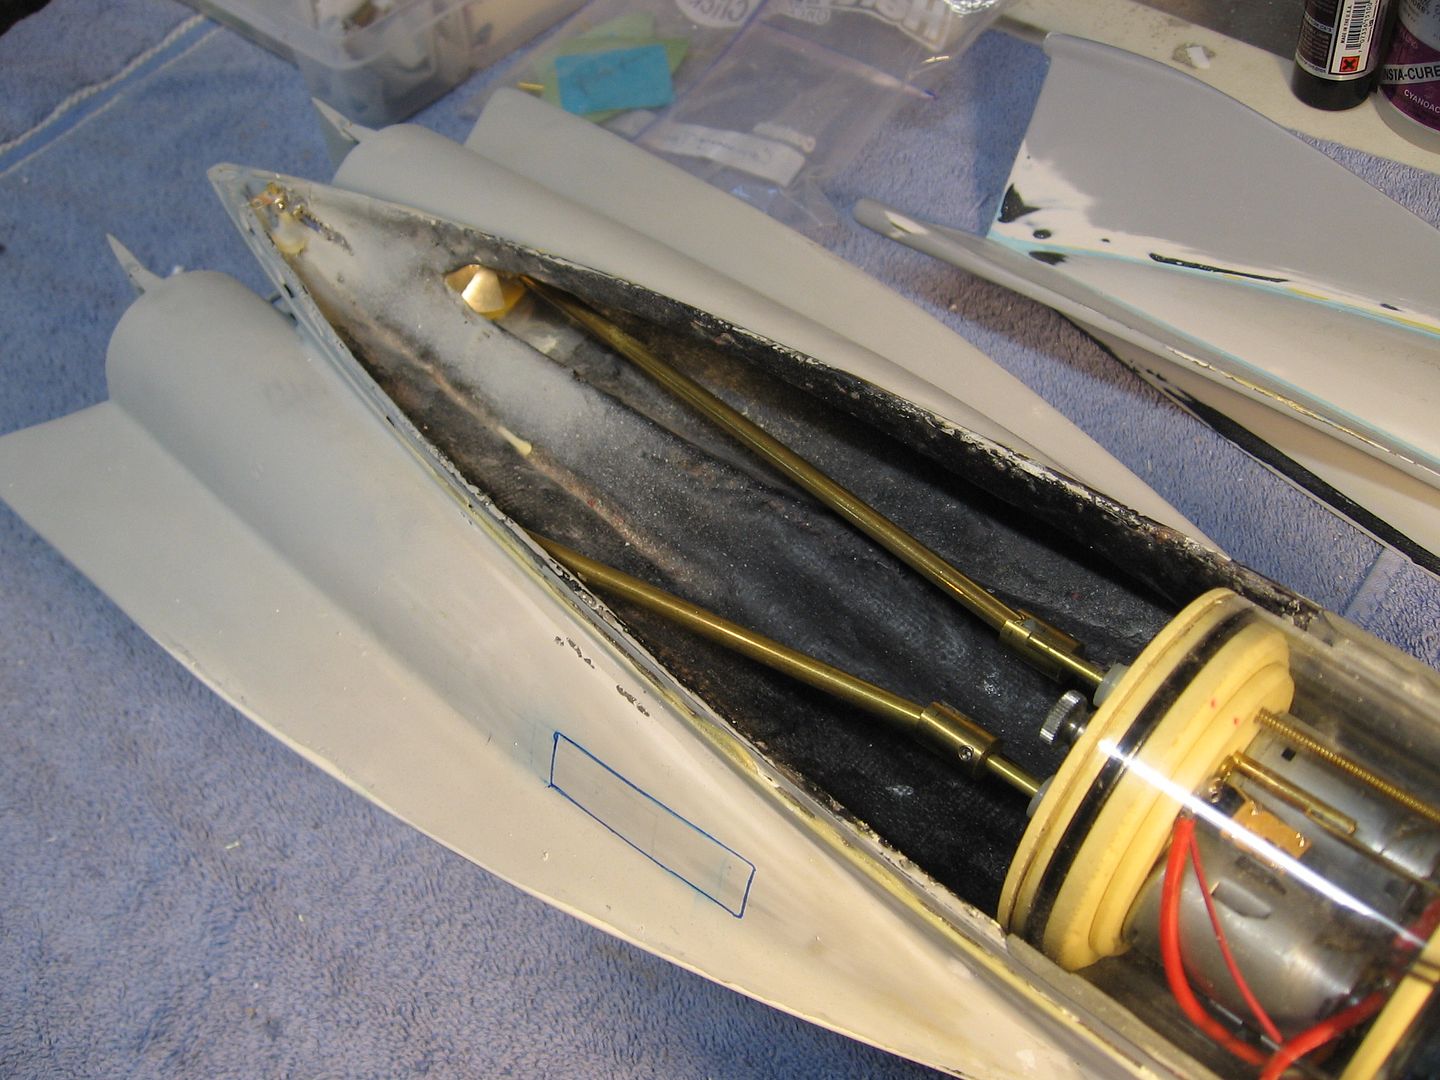
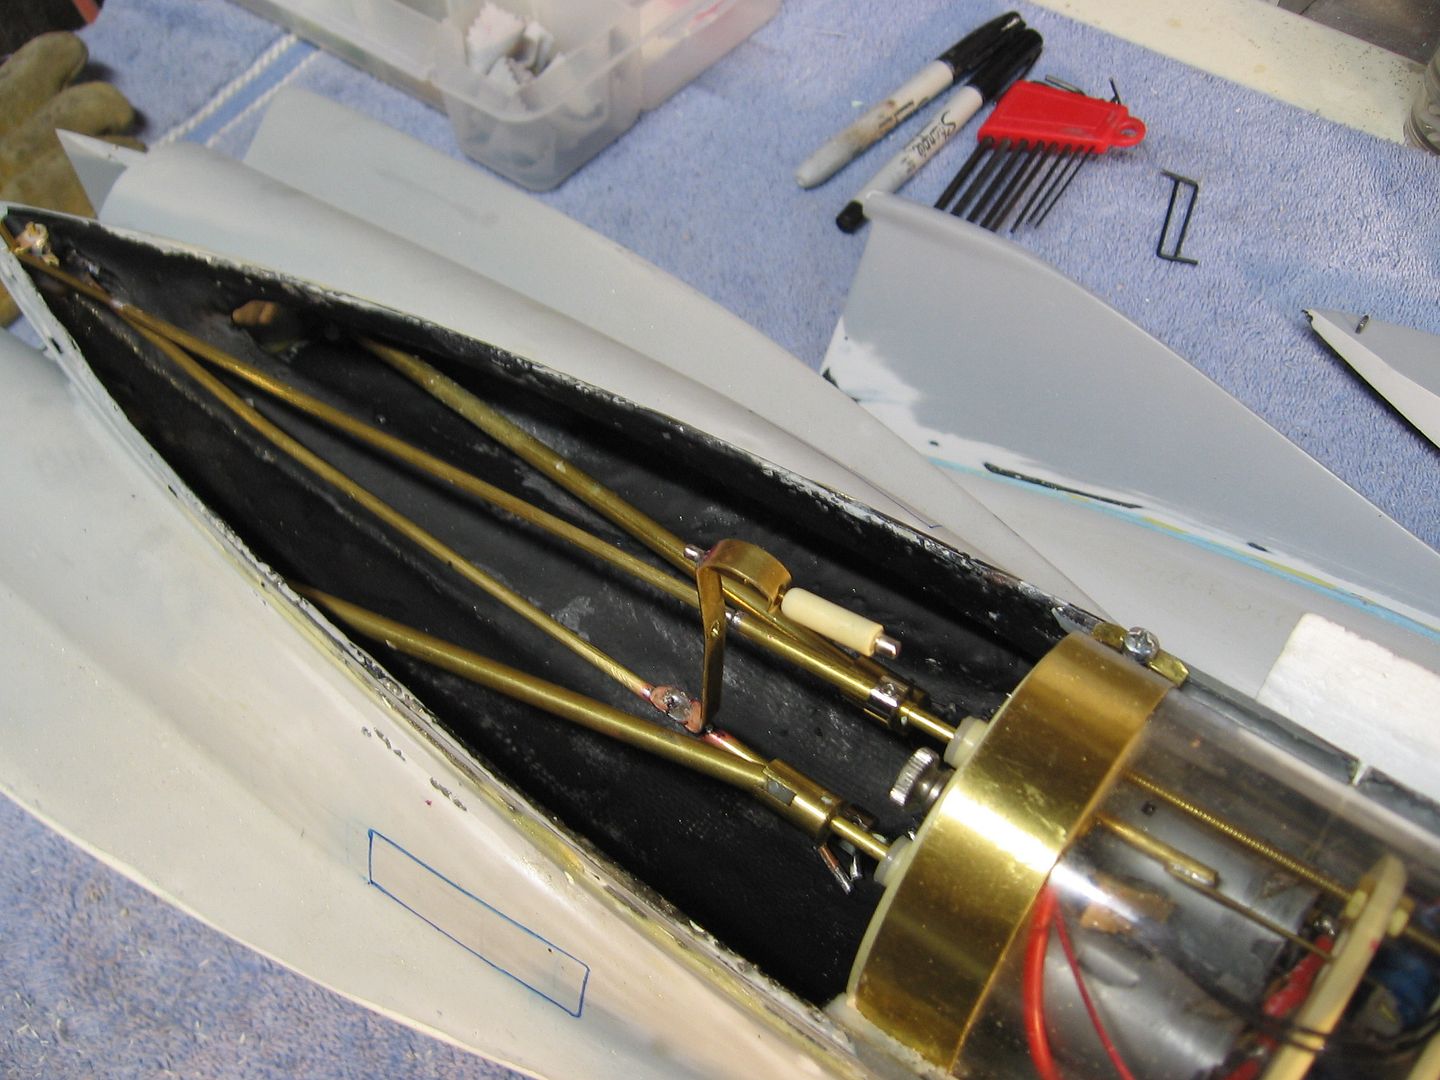
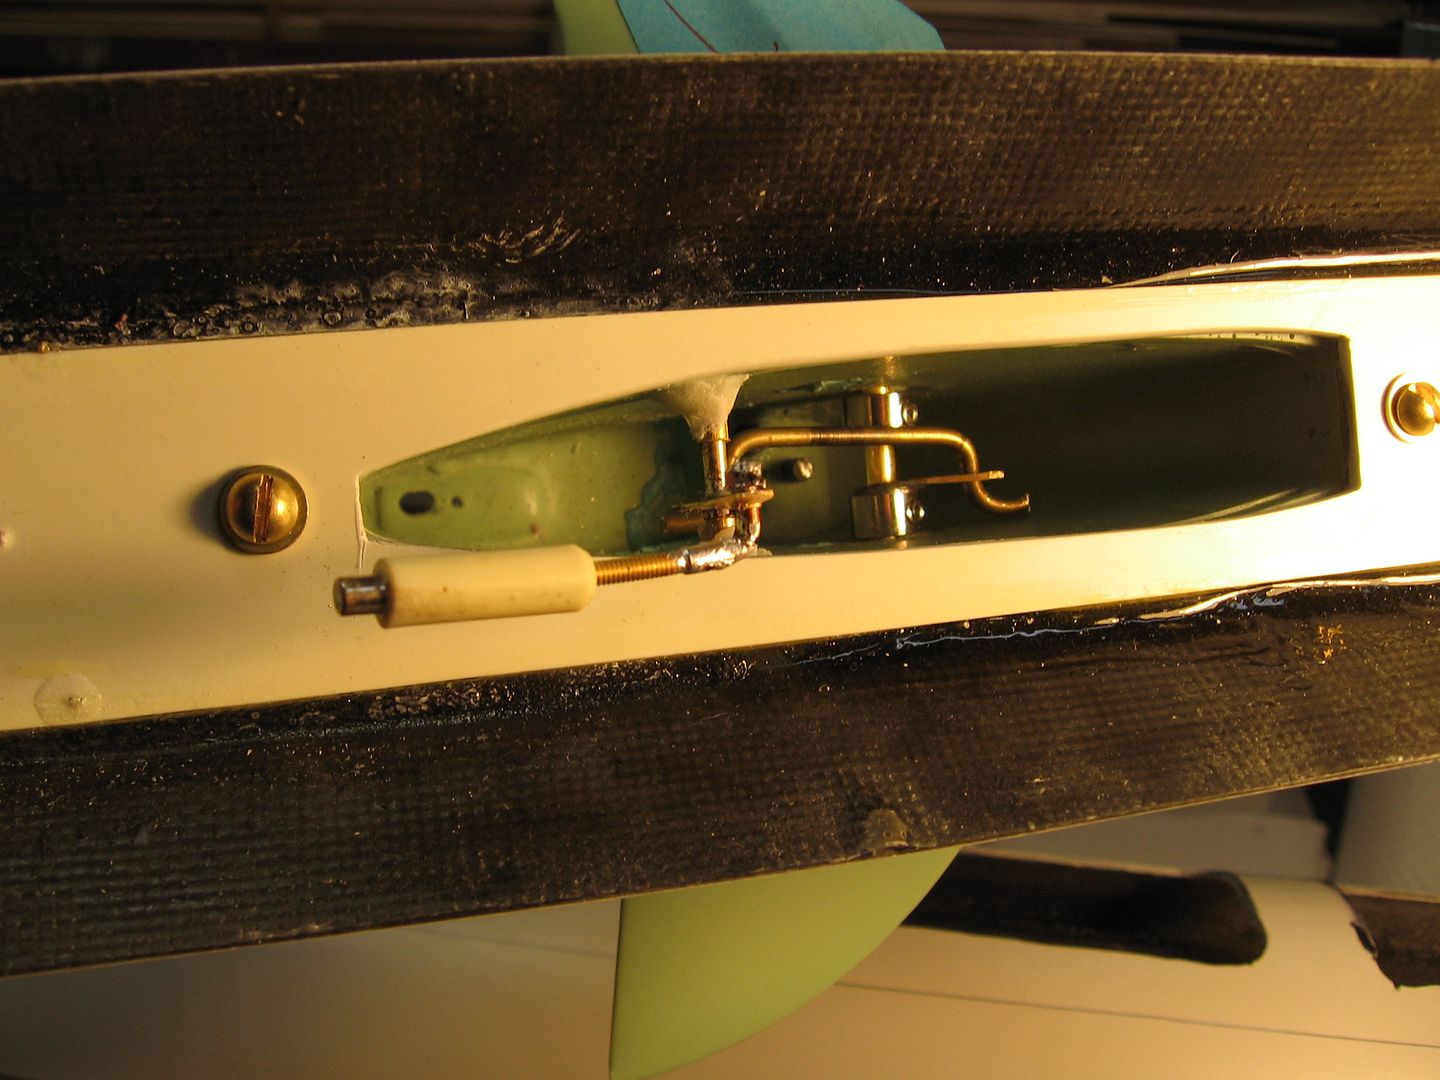
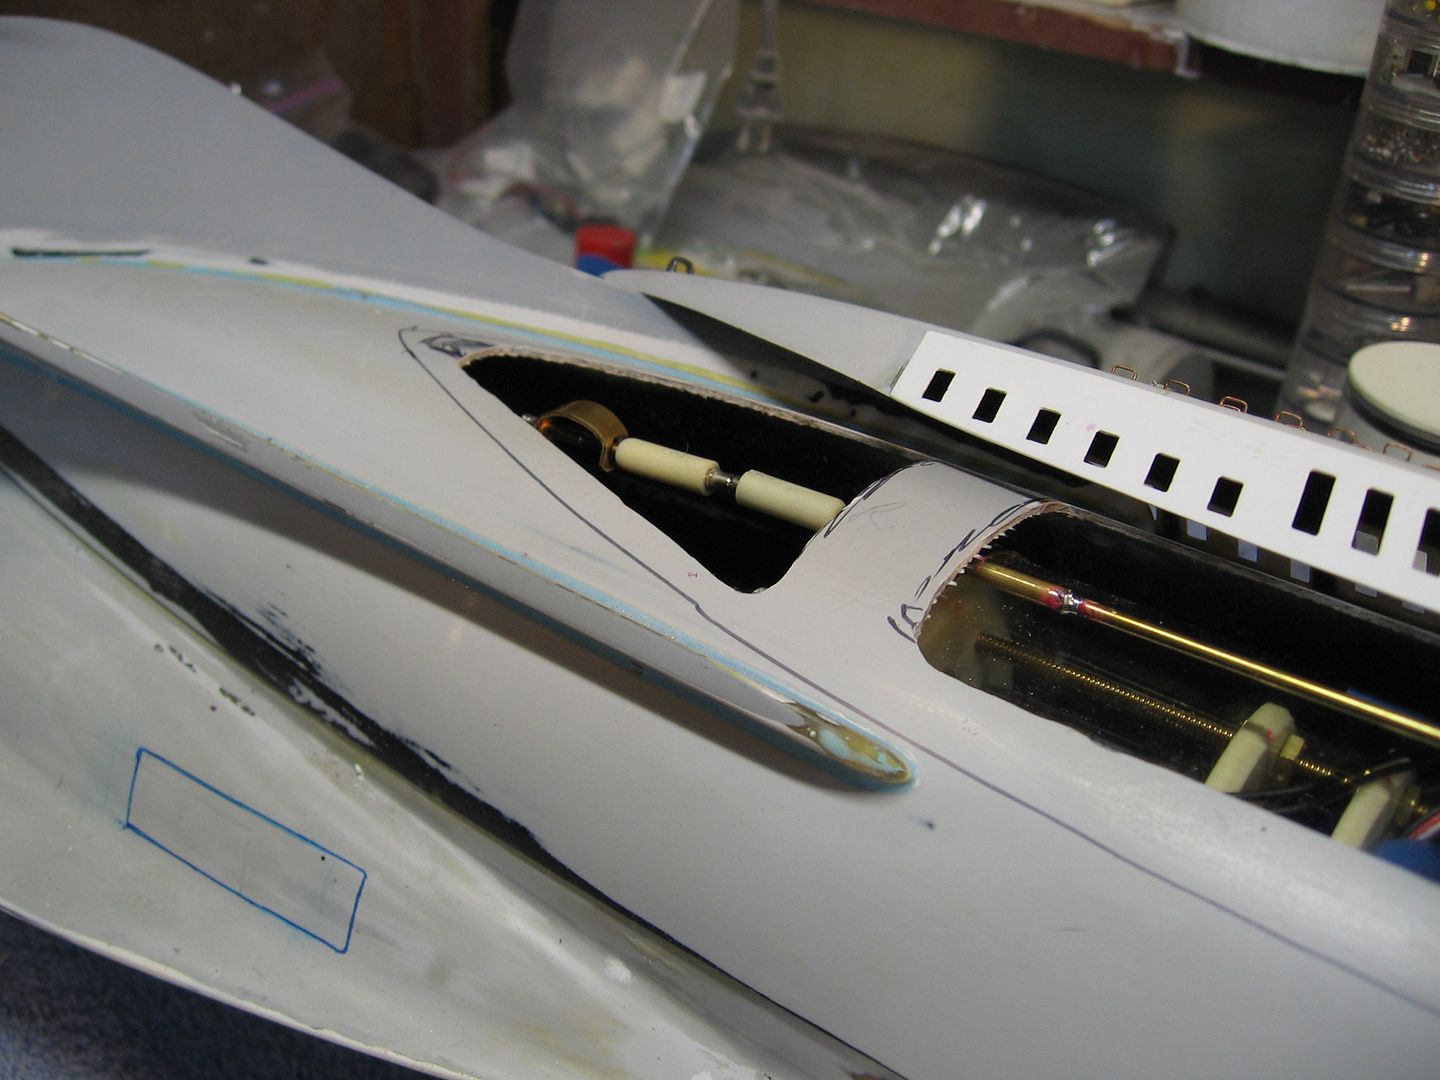
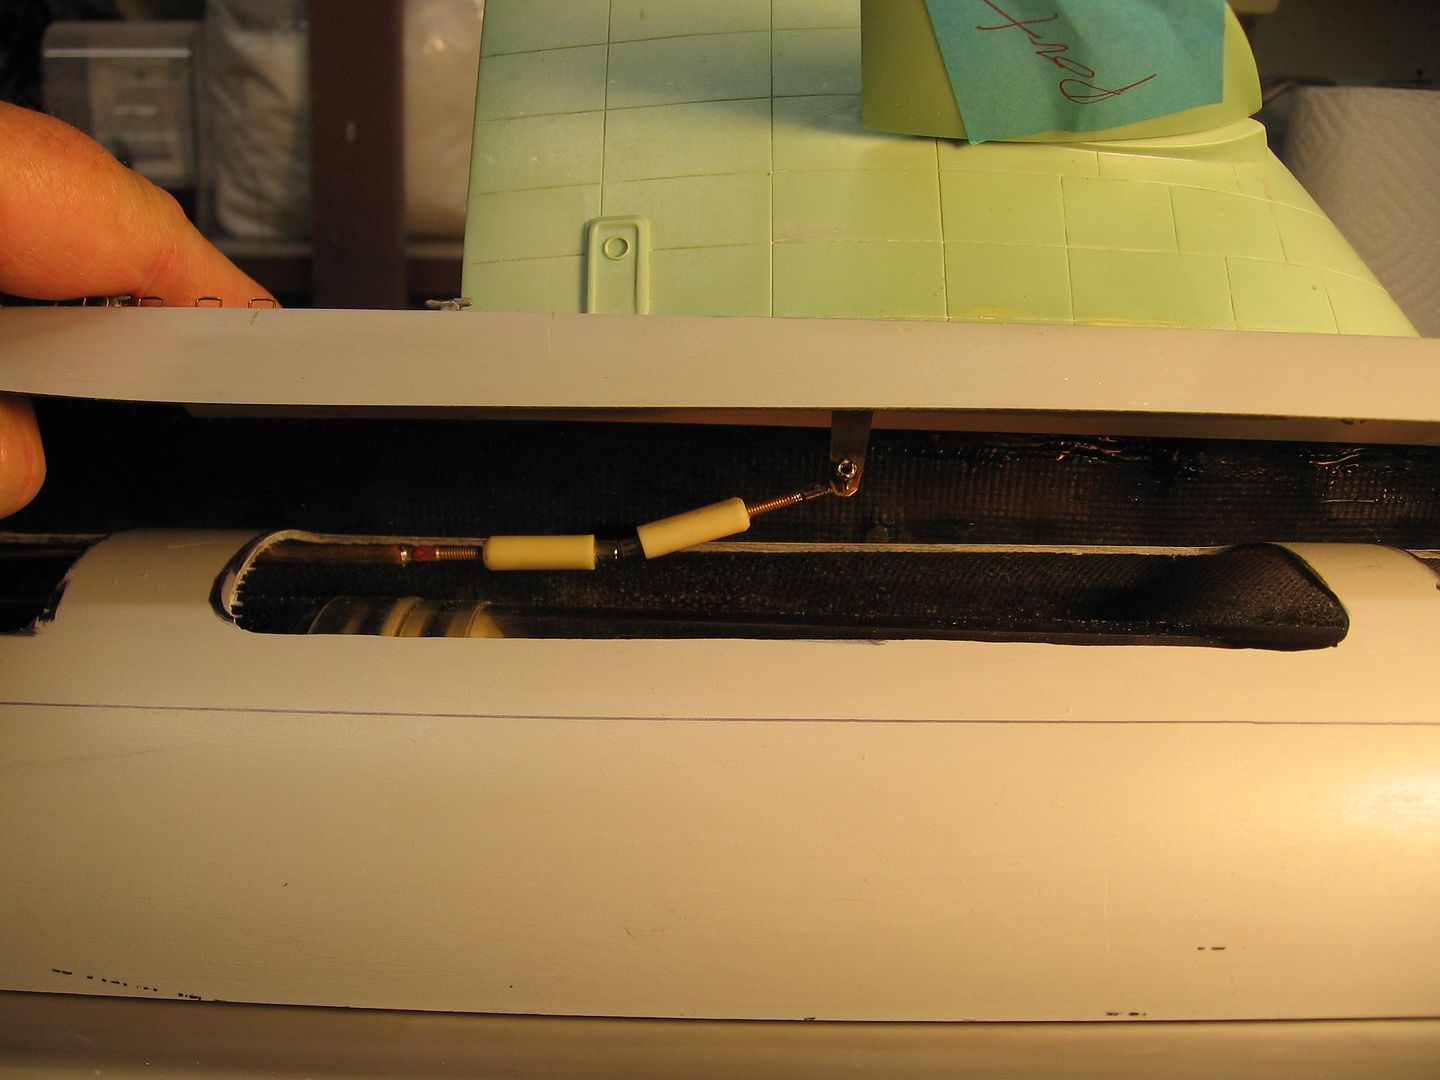
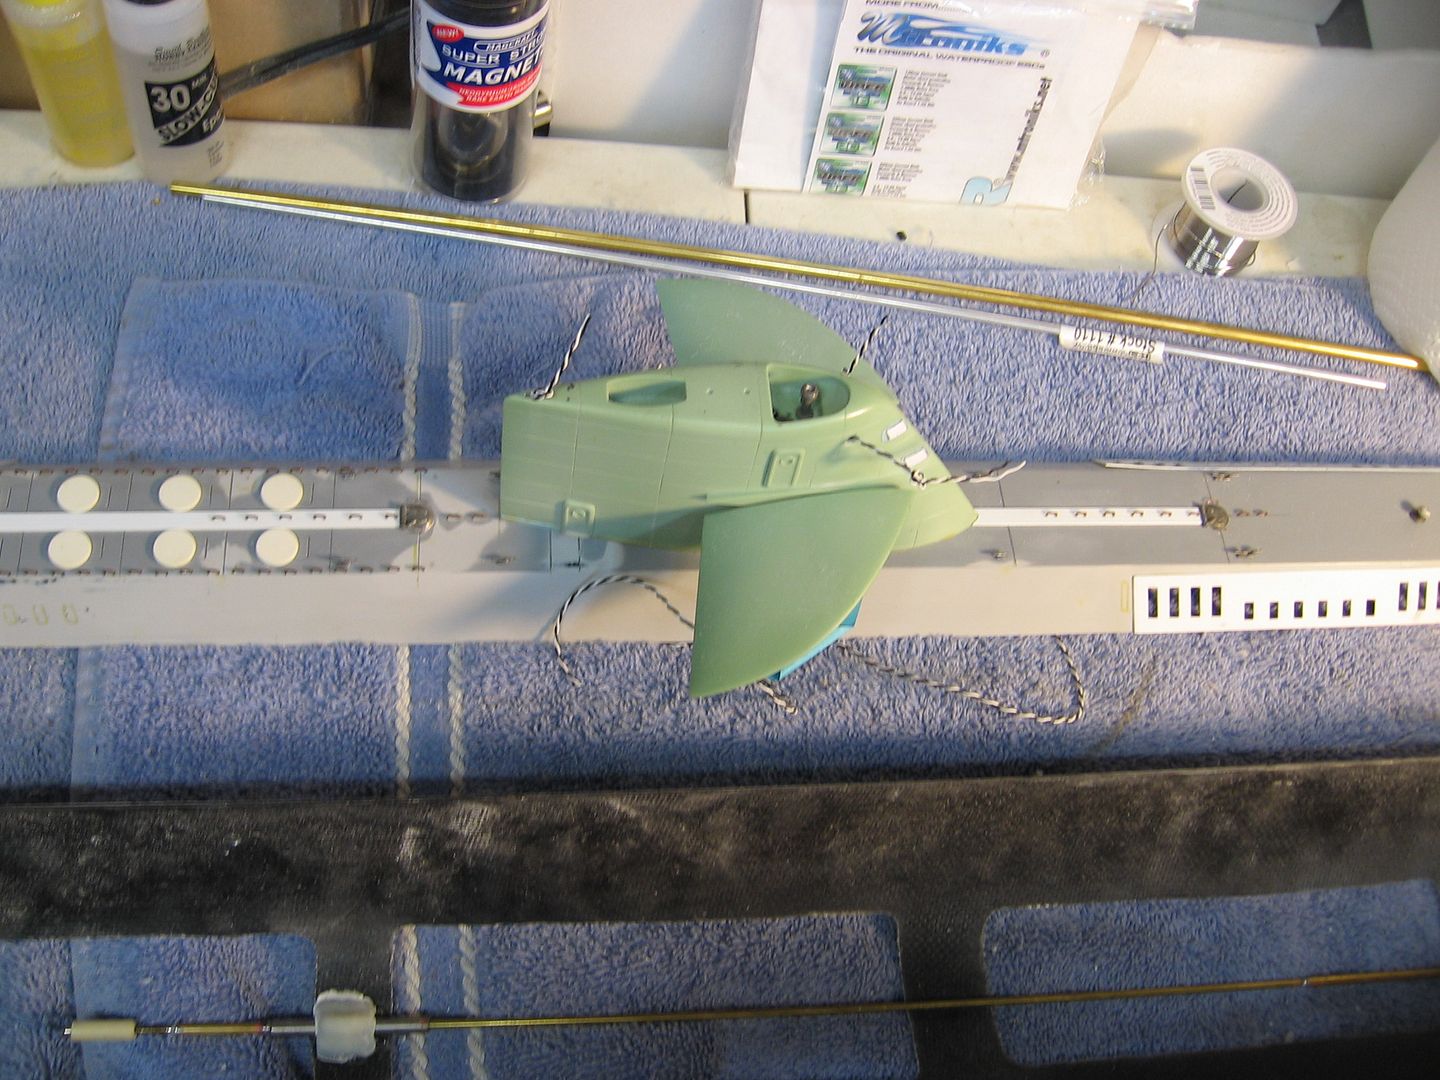
We now have functional sail planes. I made the usual mechanism for the sail. One arm directly attached to the plane shafts and from the pivot point with a Z bent brass control rod to teeter totter. This then connects to a magnetic coupler which connects to another attached to a long shaft that reaches to the stern and again with magnets to the dive plane control rod. This makes it easy to connect and flex in order to attach the deck with the sail. See…it’s simple.
Tomorrow wiring for the lights. Ballast and foam and gluing the top of the hull on and blend it in.
Question- why do you guys use a metal cylinder for the air reservoir for such low pressure pumps (lucky to make 20ps if that)? The plastic cylinder is more than upto the job. I've hydraulically tested plastic pop bottles beyond 100psi without failure, and the cylinder walls of the average WTC is a lot thicker. You would need a couple of rods to prevent the end caps popping off, but that is all.
Sorry guys!
Just saw this post.
I could answer what my mother used to tell me. "Because I said so and you will never find a better reason!"
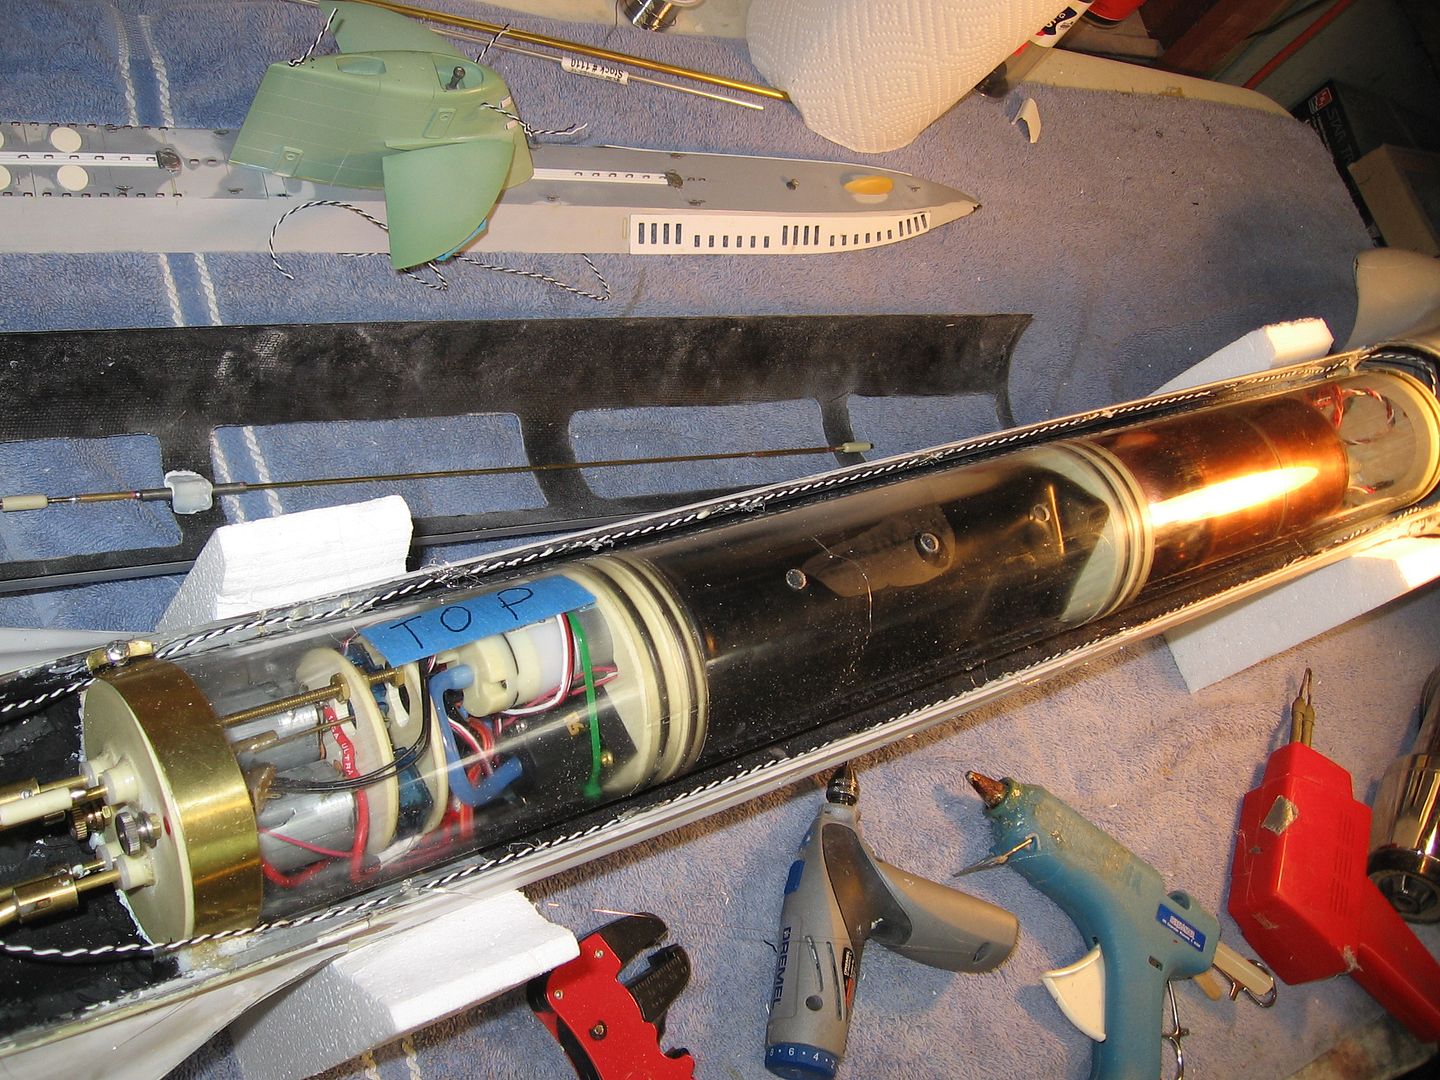
But actually it is more for the built in passthrough tube in the copper tank than it's pressure capacity.
Although I can rest well at night knowing that the pressure tank is more than up to the task of holding the 13PSI.
It is just the right shape and size for my cylinder design as well.
Plus I have seen first hand what a measly 13PSI can do to plastic end caps. Distorting them till they let go even when attached with bolts.
And I am not ashamed to say it scared the SHIP out of me!!!!!!!!!!!!!!!!!
But in a nutshell I use it because it works for me. (And you will never find a better reason.) BD.
sigpic"Eat your pudding Mr Land"
"I ain't sure it's pudden" 20K
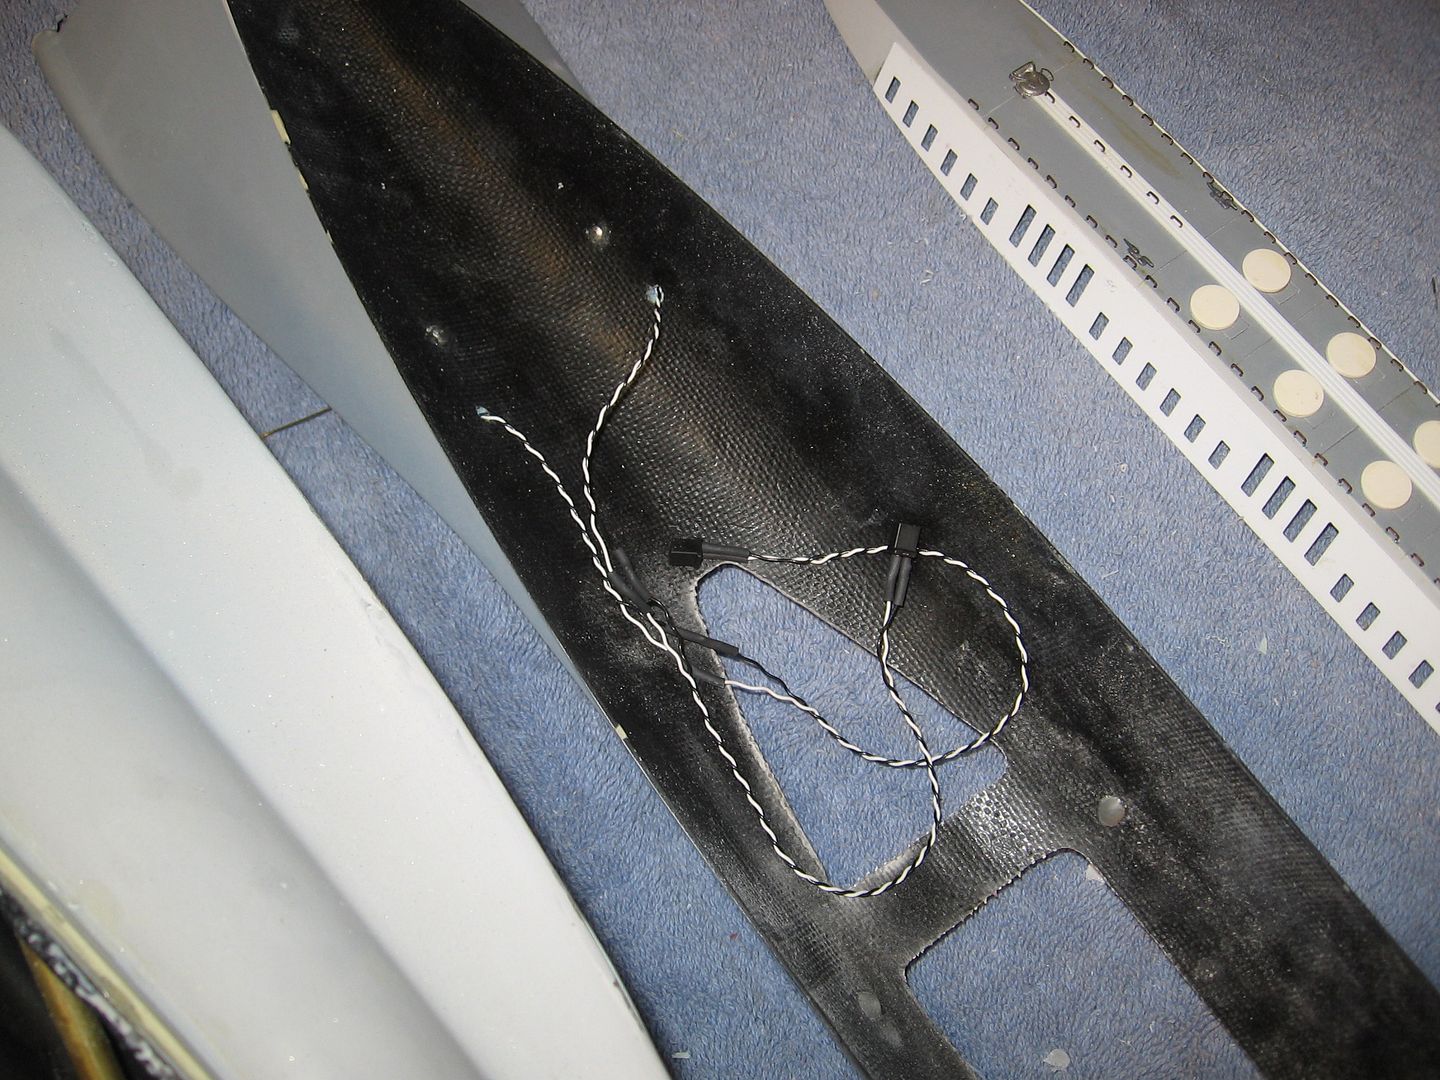
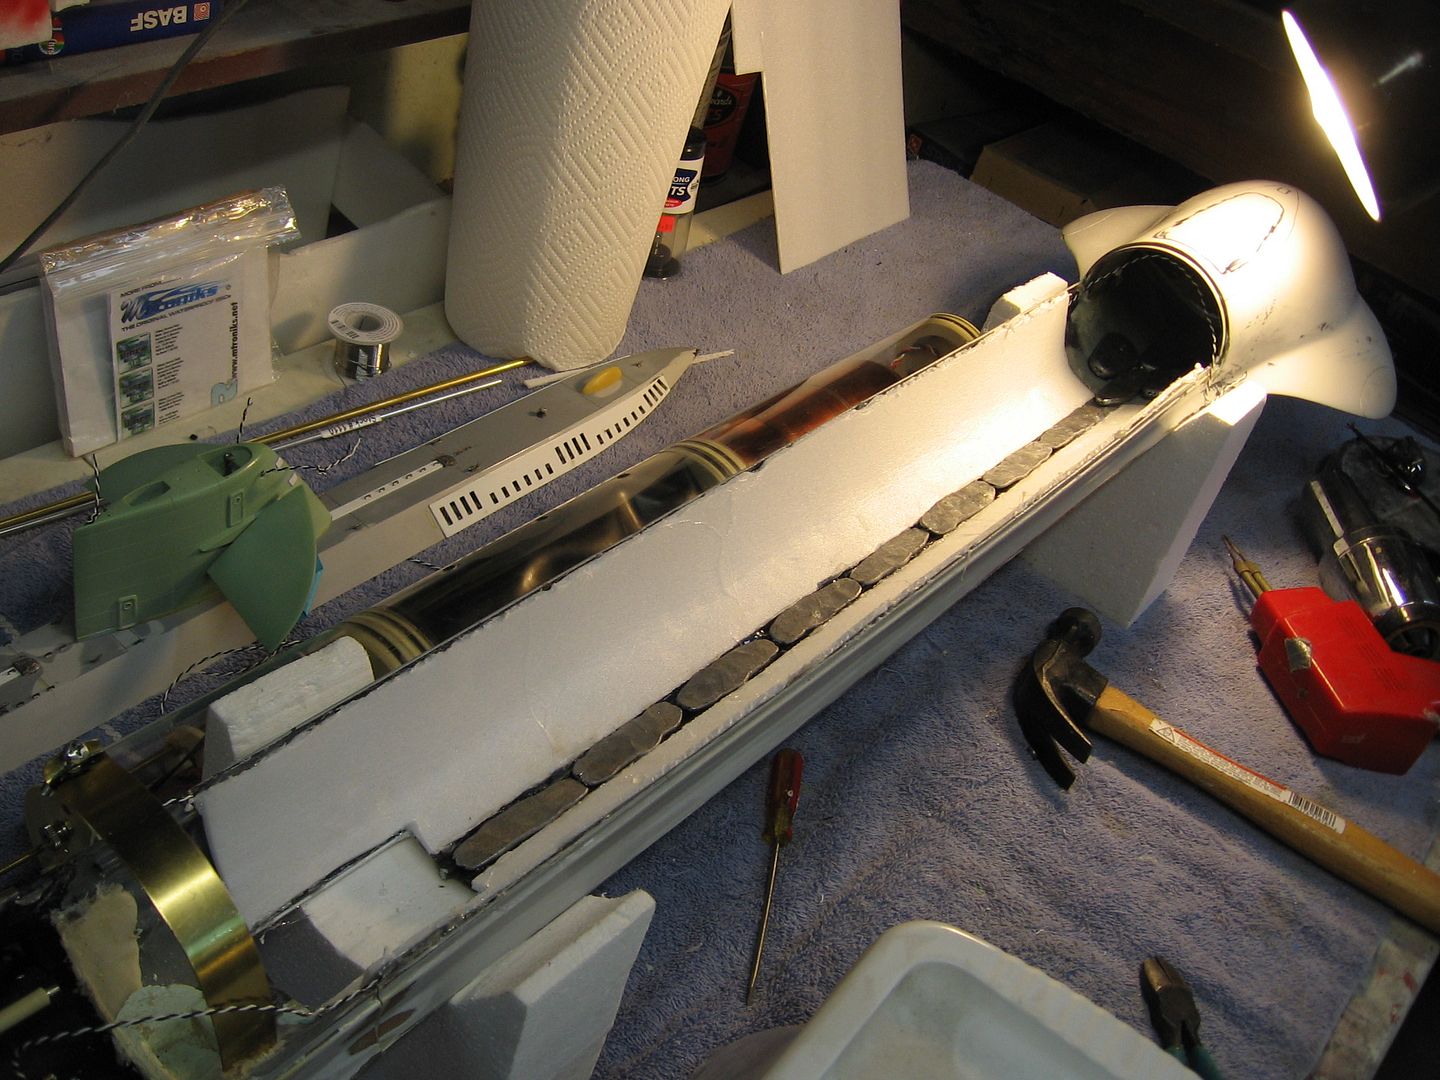
Today I installed the wiring for the fin lights and sail lights. Added Deans micro connectors to aid in taken the apart. Then I added the Depron cell foam a trick I learned from Dave Welch. All the Seaviews I have built to date small medium and large have used the same ballast and weight configuration with great success and all based on BigDave’s first Moebius Seaview he built a few years ago.
I added some lead in the keel. I used pounded out fishing weights.
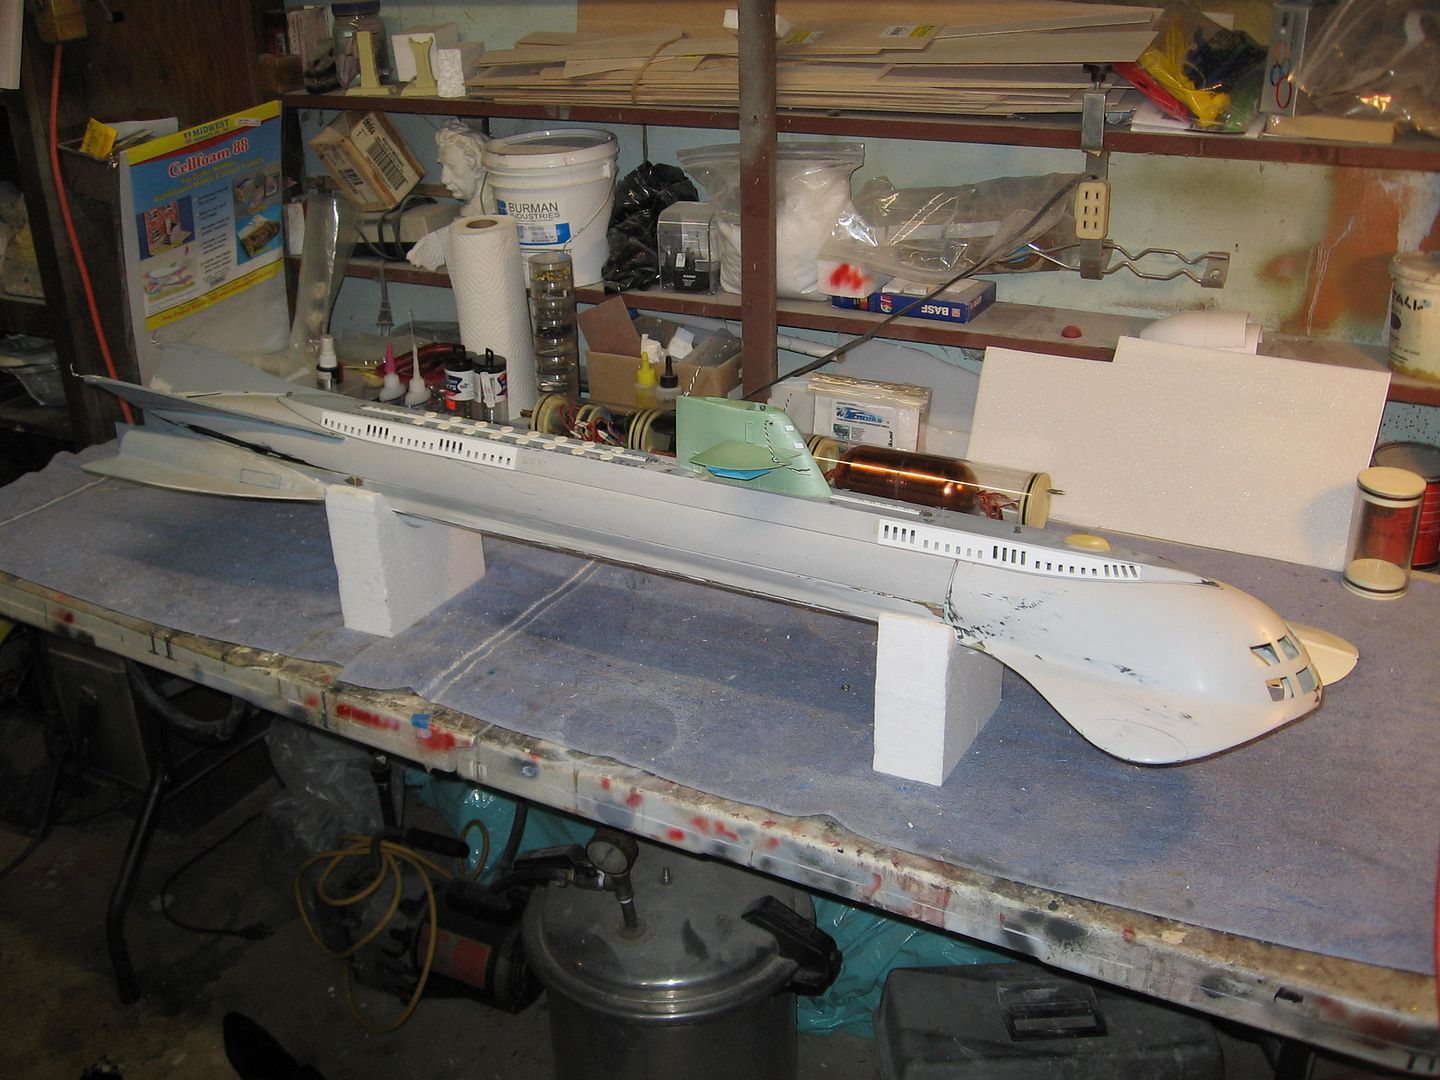
Next I mated the top section to the bottom. Tomorrow I’ll blend the seam away. Before I did that I made sure the WTC would pull out and go back as one pieced attached to the lower stern section. It worked.
Since Jeff wanted me to avoid using a screw if I could I used two rare earth magnets in the tip of the stern with great success. Look Mom no screws!
Tomorrow I’ll pin and magnet set the deck on, clean up the seams and primer the boat. I’ll also add those louvers. Then we are down to preening and cleaning the cosmetics. Lights should be here in a couple of days but they won’t take long to install as the wiring is all in place.
You make it look so easy Mr Neill Sir!!
You know one of these days I have to build that Russian gunboat you gave me.
I keep it under lock and key as there are many people out there that would love to have that kit.
I am like the dog in the commerical that is worried about someone stealing his bone. BD.
sigpic"Eat your pudding Mr Land"
"I ain't sure it's pudden" 20K
 [/url]
 [/url]


 [/url]


Comment