
Awesome! And you did all the printing with a filament printer? Outstanding!
-
-
Thank you for all the warm words!
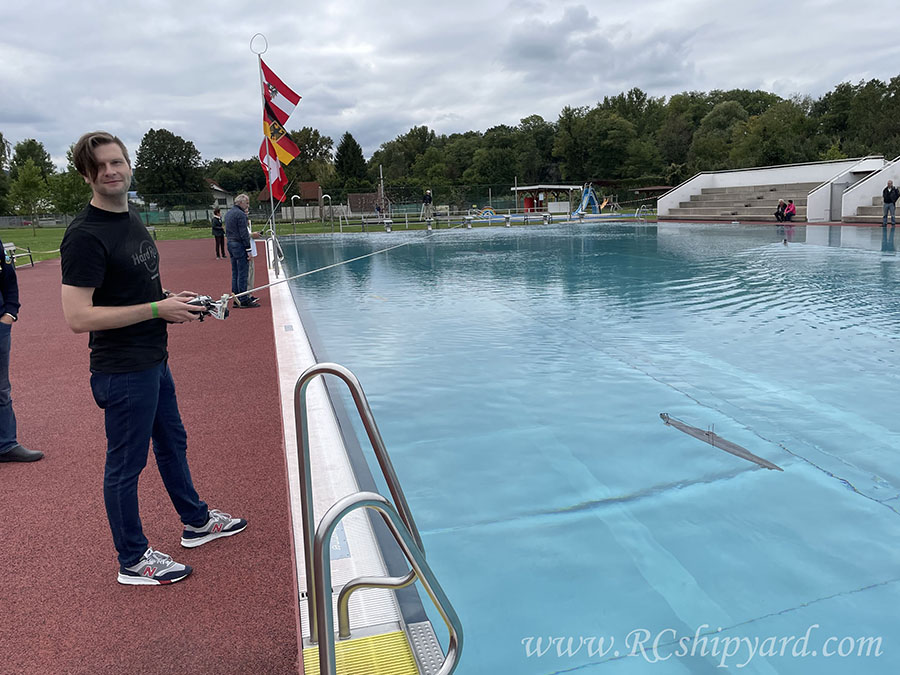
So it's time to officially finish this building log as the model had it maiden voyage on 18th of September at the Submarine Model Makers Meeting in Neulengbach - Austria.
I have finished the internal just before the meeting and there was no time to update this thread back then, so now it's time for an update:
As you can see there's not much space in the WTC as the vented ballast tank takes almost all of it.
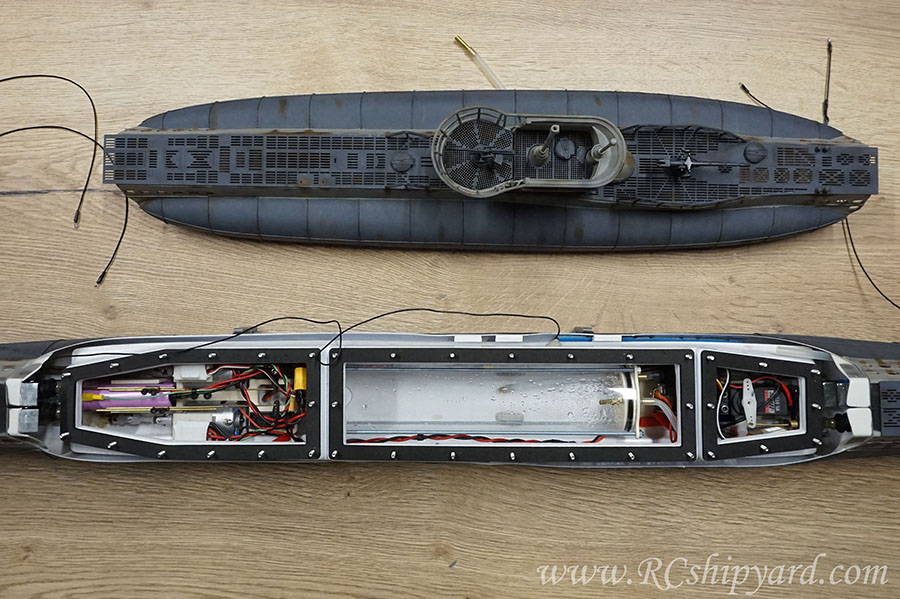
Stern of the WTC is the engineering section of the model housing crucial RC elements to run and control the Krick. Most of the place here is consumed by the motor block described earlier. My VIIB has two independently controlled brushed* electric motors - each with it's own ESC. Motors are connected with the shafts with a double cardan joints. Between the two cardan joints you can see the Li-Ion battery pack consisting of two Samsung 3500mAh 20A cells. These are excellent cells with technology allowing to charge them up to 4.2V per cell, instead of normal Li-Ion cells which have a voltage of 4.1V per cell (fully charged). Stern diving planes and rudders are controlled by two Corona micro servos.
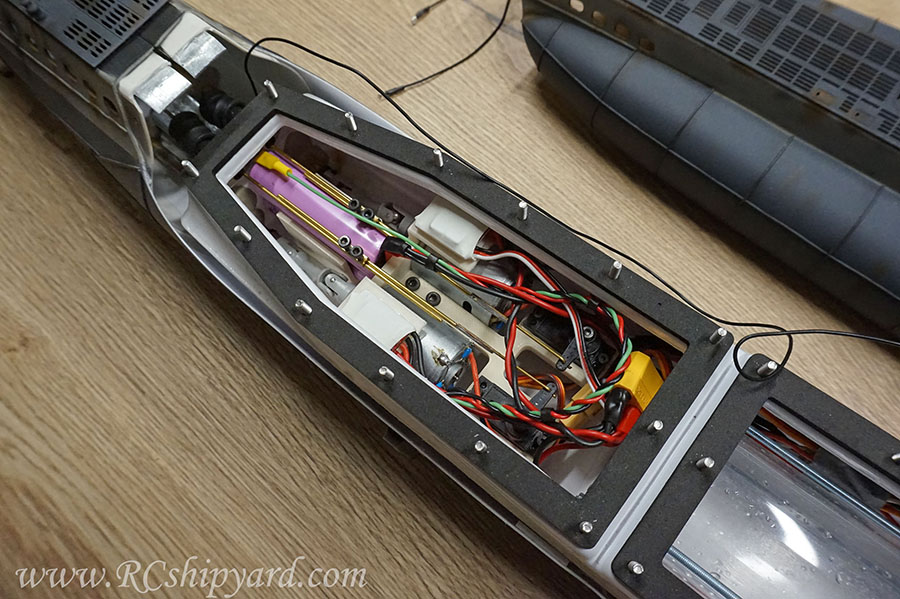
Middle section houses the enormous (in relative term to the size of the WTC) ballast tank (357 ml) and the RC receiver. I found this place as an optimal location for the receiver as it's the furthest location from the ESC, motors and the pump and as we all know - these are the biggest electronic noise generators in a model and they can cut your RC range significantly.

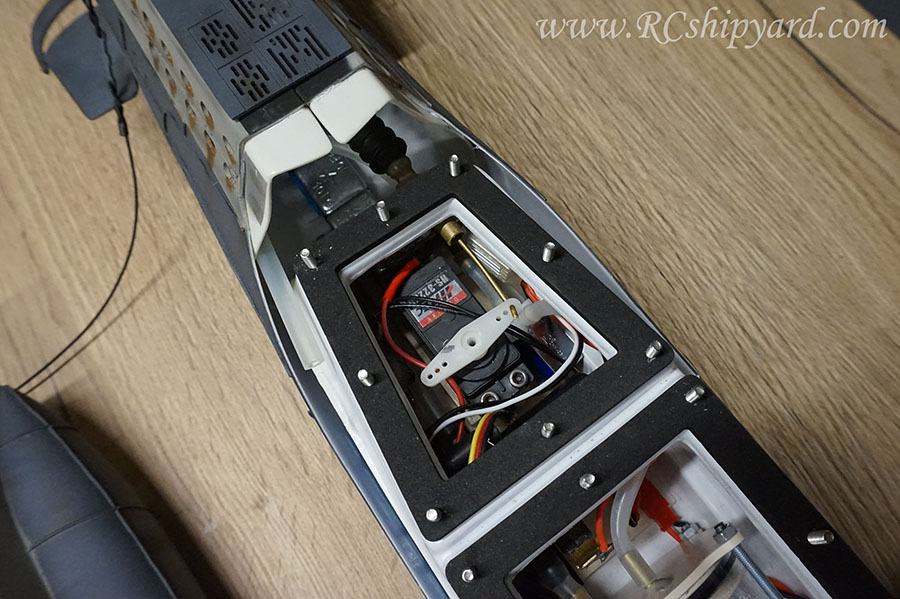
Bow section of the WTC hosing the bow dive planes servo, pump for the ballast tank, ESC for the ballast tank, electric solenoid and the Arduino controlling the solenoid. This things are barely visible here as the opening in the front is narrow and offers limited access. Using a standard servo was totally unnecessary and I consider it as an error as it only takes up precious space.
Maiden voyage
The trim which I have made in the tub earlier was not bad, I only had to redistribute about 5-10 grams of weight.
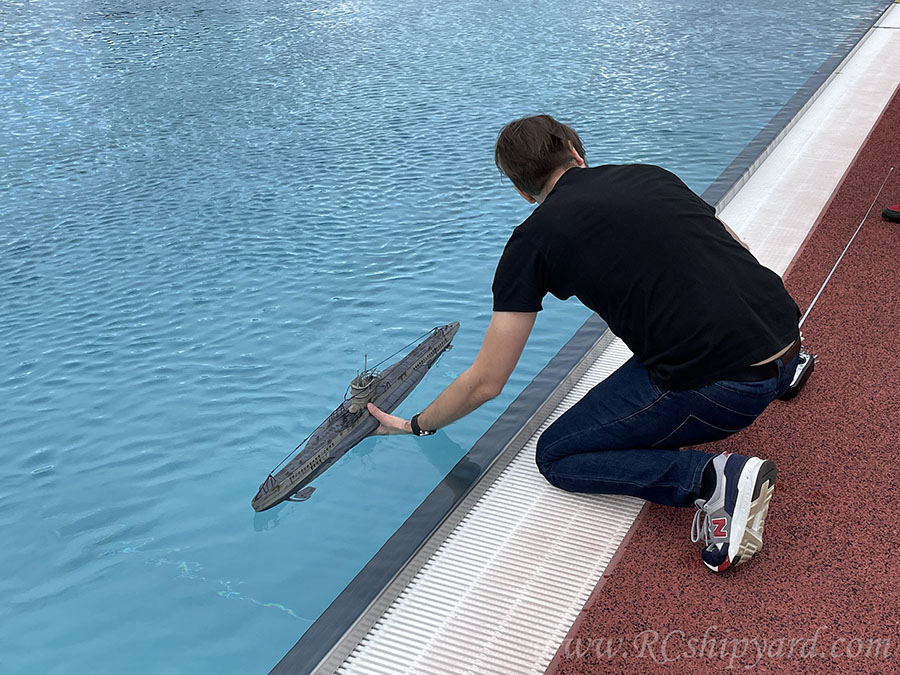
A quick surface run to check is the propulsion and steering working correctly...
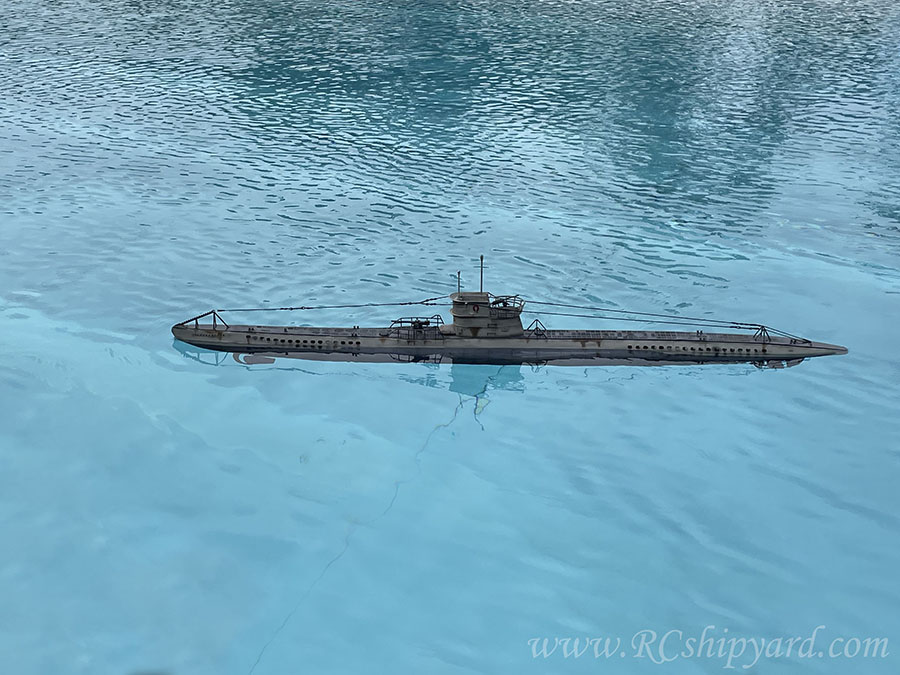
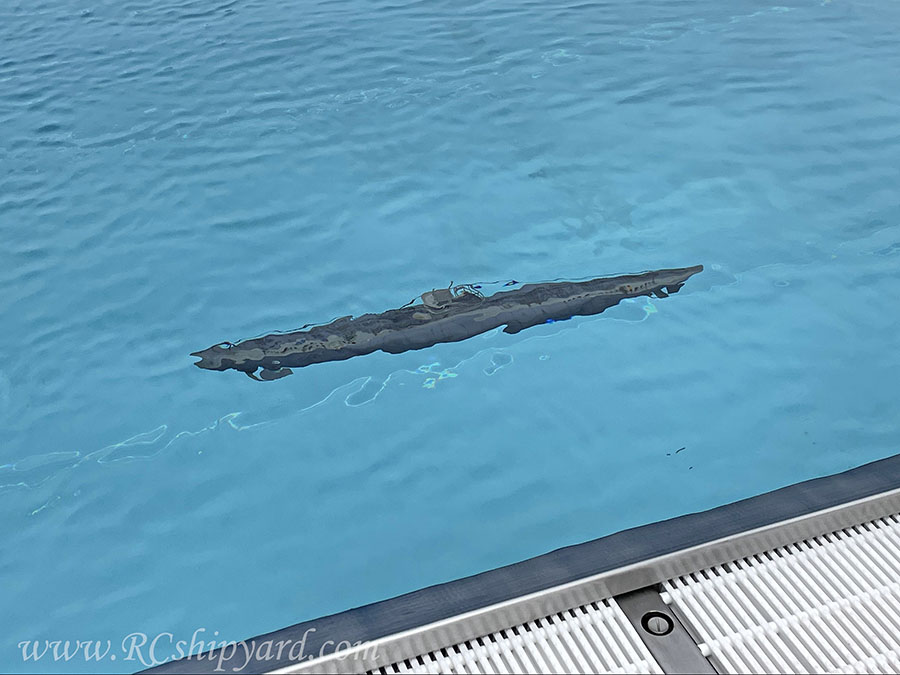
...and of course the first dive.
Due to a traffic jam I was forced to go below 1.5meter (about 6 feet) on a first run, but well - we all do it for that little chill!
Surfacing the boat on full stop:
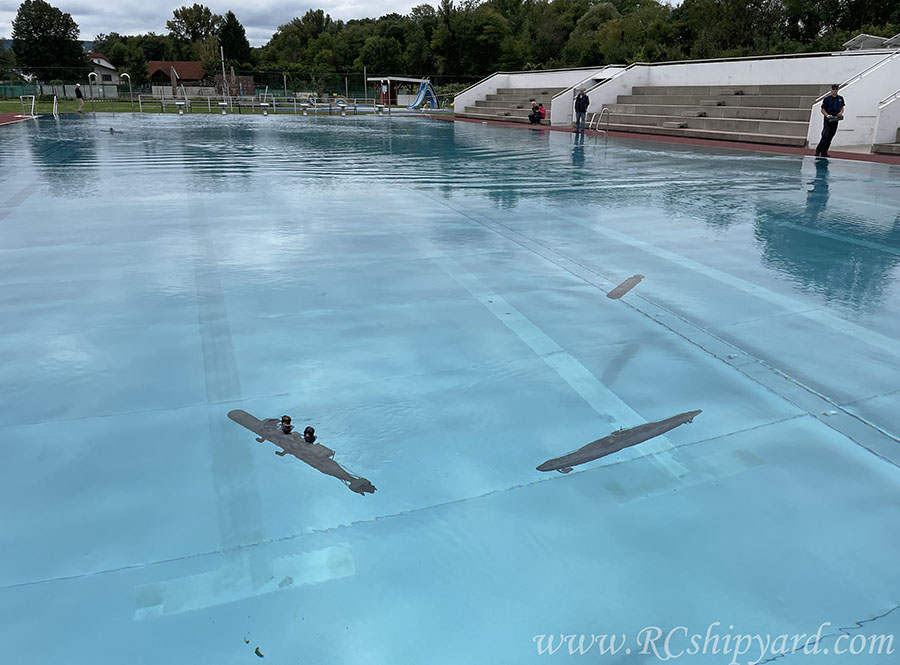
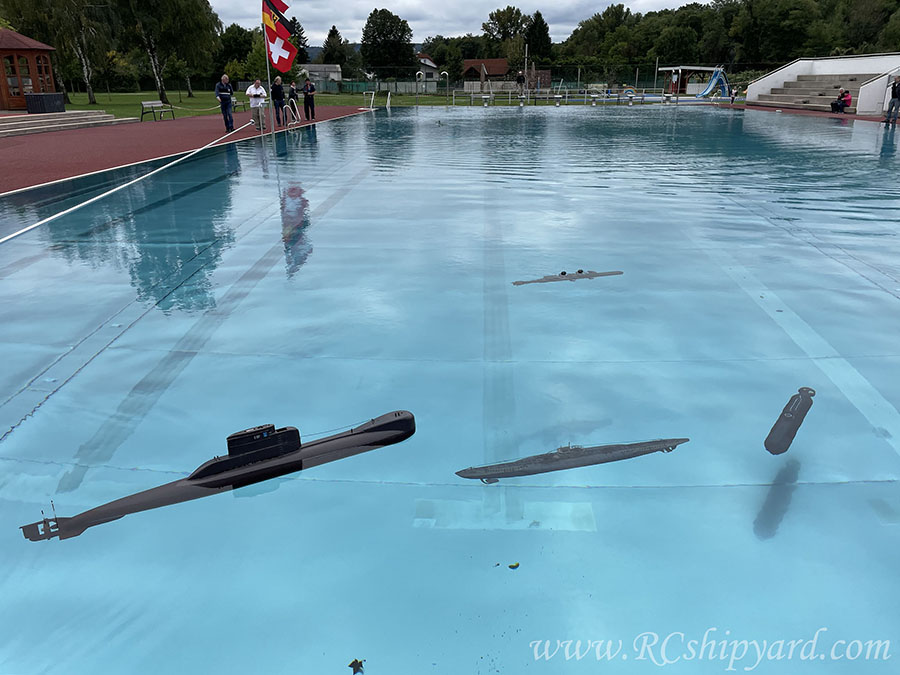
Only to get immediately attacked by the British!
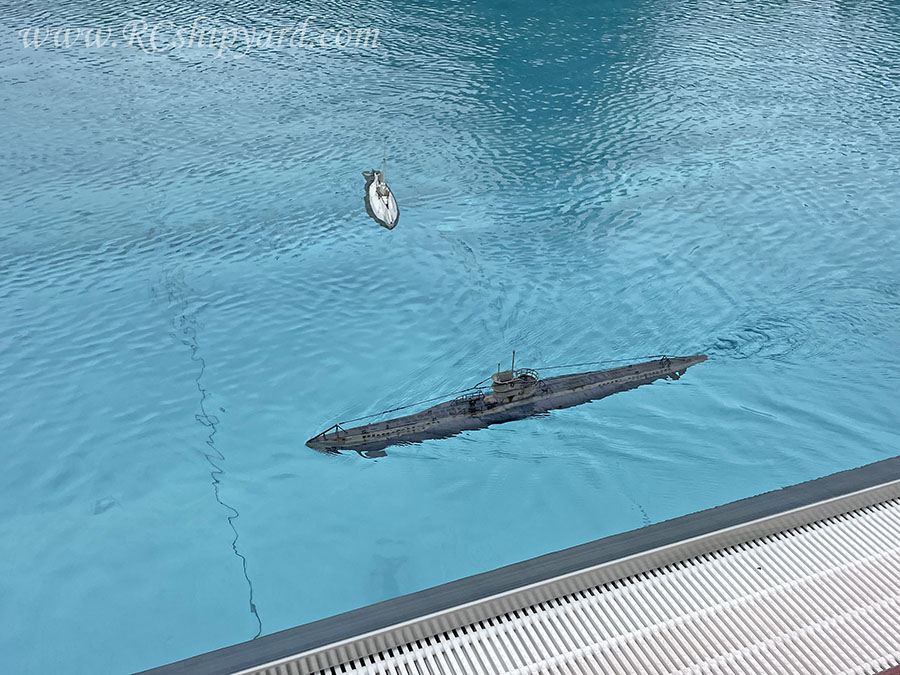
Luckily two props are better than one and the captain has successfully evaded the enemy with a swift surface maneuver!

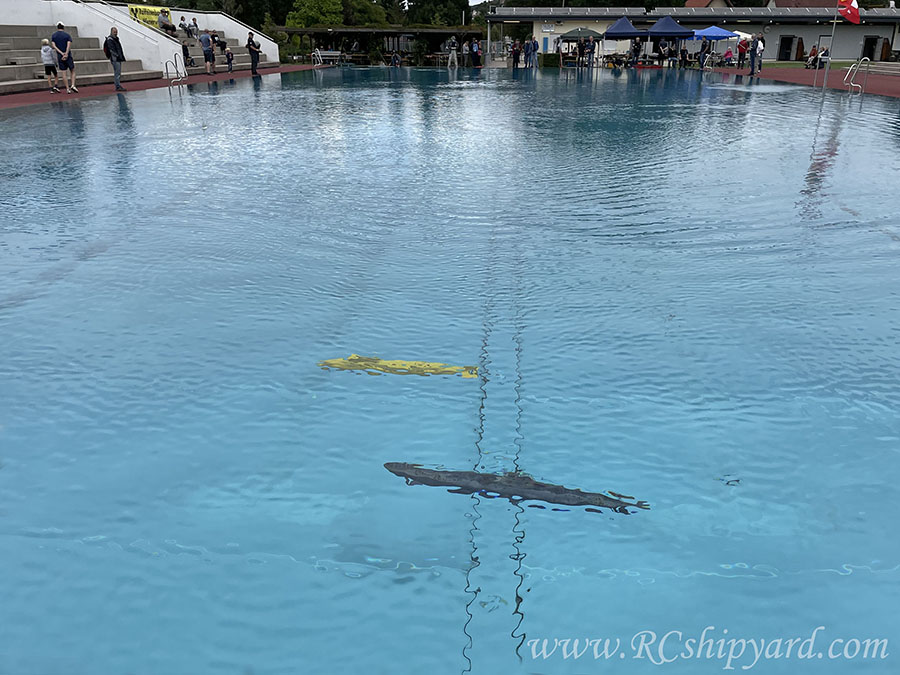
Of course underwater you will always find someone who is faster than you.
And a happy face of the captain says it all
 My knowledge base and blog:
www.RCshipyard.comComment
-
Very nice! Congrats...Comment
-
Excellent work my friend!If you can cut, drill, saw, hit things and swear a lot, you're well on the way to building a working model sub.Comment
-
Excellent work and presentation. Your whole thread is amazing. Pictures, engineering, constructing, printing, etc.Last edited by scott t; 10-13-2021, 11:53 AM.Comment
-
So I guess one last update:
I'm being asked about the STL files of the additional mechanisms which I have designed for the Krick's VIIB.
Question repeats a lot, so I have decided that the files will be available for free, under Creative Common Non Commercial license. I kindly ask not to put these files to services like Thingiverse etc.
The STL files are available for download from my webpage - directly from the Krick's VIIB building log:

Each zip file contains a TXT file with my recommendations how to print them for best effect.My knowledge base and blog:
www.RCshipyard.comComment
-
Jakub,
This is a fantastic build. Thank you for posting this. I really like your solution to the snorkel issue with gear driven pump systems. The use of a small solenoid valve in place of a mechanical valve is really a great idea. I've looked extensively for the valve in your video but have not been able to locate that unit or a similar valve other than much larger units on eBay. Would you have a link to a source where I could obtain one of those solenoids?
Thanks, and keep up the great work!Regards,
MattComment
-
Thanks and sure:Originally posted by thor View Post
I have ordered a ton of different ones from Aliexpress almost two years ago for tests and I can honestly recommend this 5V one:
Most solenoids on Ali are around 1-2Euro, but this one is more than 5Euro (for me at least as there are different taxes, shipping costs around the world) and believe me - there is a quality difference.My knowledge base and blog:
www.RCshipyard.comComment
-
Update!
Some of you know, that after a model makers meeting in Bratislava 2022 (video here), on a way back, we've been "brake tested" by a furious driver being very unhappy that I was not being able to drive faster while towing our caravan. The sudden sudden stop caused damage to some of my models.
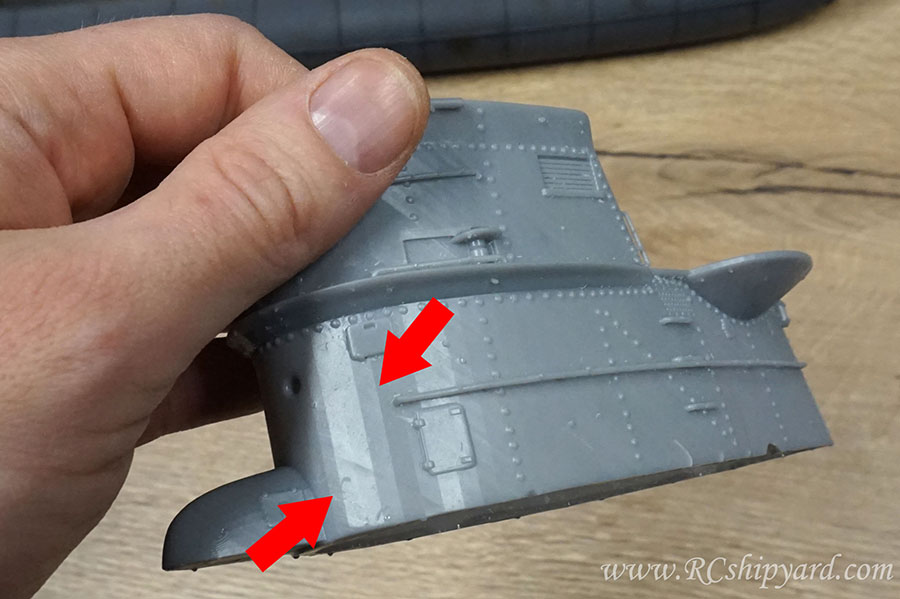
Some of the damage was dealt to the VIIB:
This is no serious damage of course, It's actually an occasion to fix some of the mistakes an make the model even better.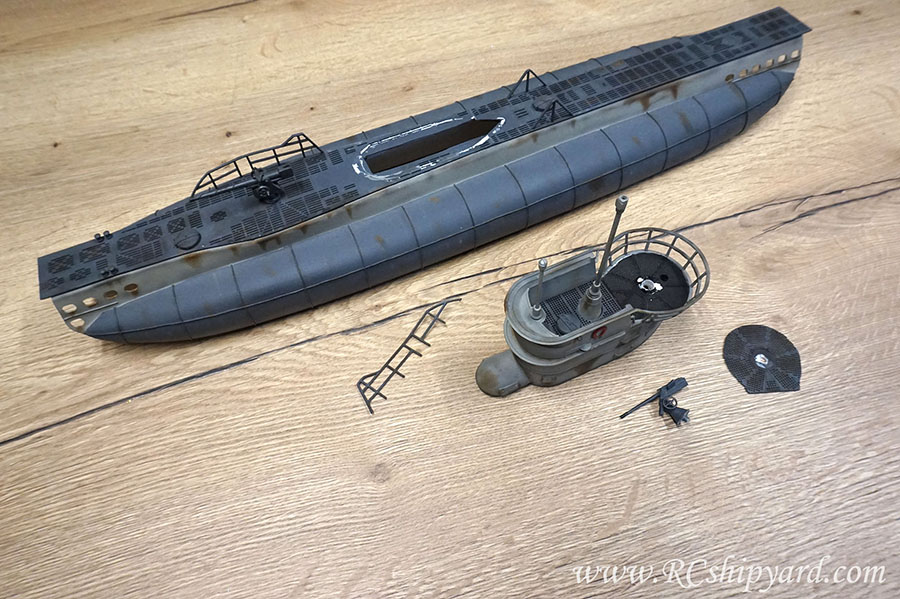
The conning tower of my VIIB is very primitive, I designed in a hurry and I based on some others guys project, sadly copying most of the errors with it. First of all I made the thing to thick...
...secondly the amount of venting/flooding holes beneath the floor is not enough. The gaps in the floor itself are to small to. A water tension often blocks the air trying to escape. Also on the surface, while turning at higher speeds, it seemed, that the tower is also a little to heavy. So it has to go!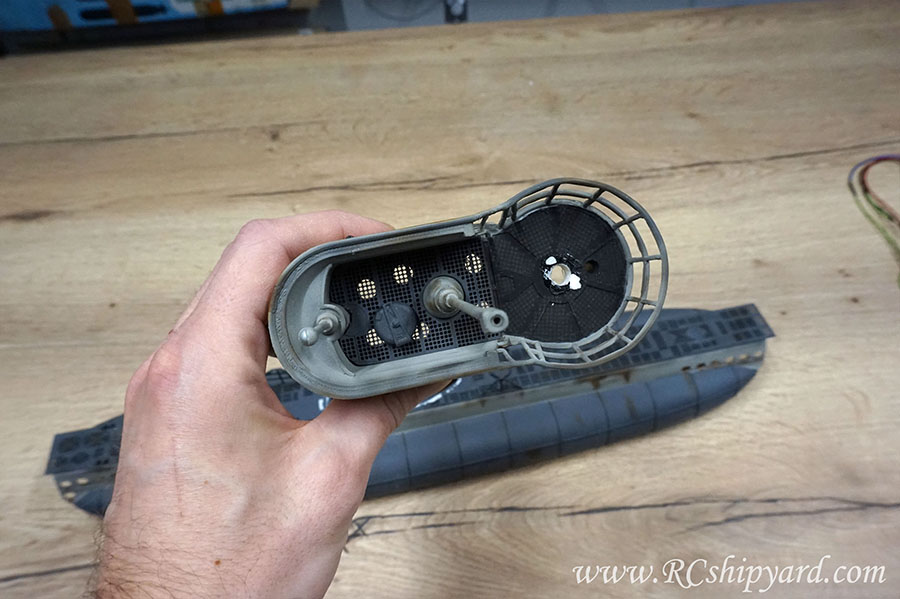
At first I thought about simply getting one of the internet, I did get a nice looking one, but designed for a VIIC, but since it had a large amount of details I thought I'll try it out, yet after importing it to the slicing software for a 3d printer I've noticed some problems with the floor, it simply shows up partially as solid in the slicing software:
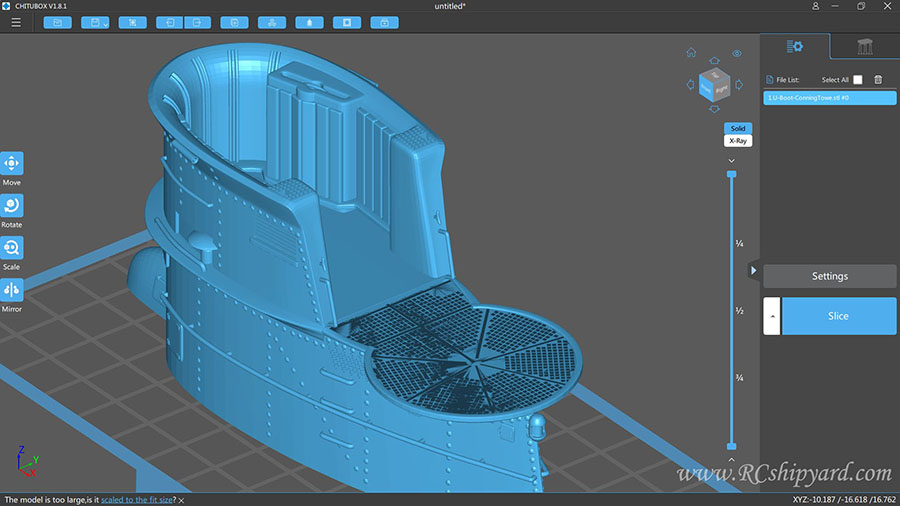
Further inspection and after running a test slicing of the model, I only confirmed my suspicions. The model has serious errors... The floor is there, but partially hidden under some unknown layers of "material":
At this time I decided to print the model anyway and check it, the idea was to simply remove the whole floor and fabricated a new one.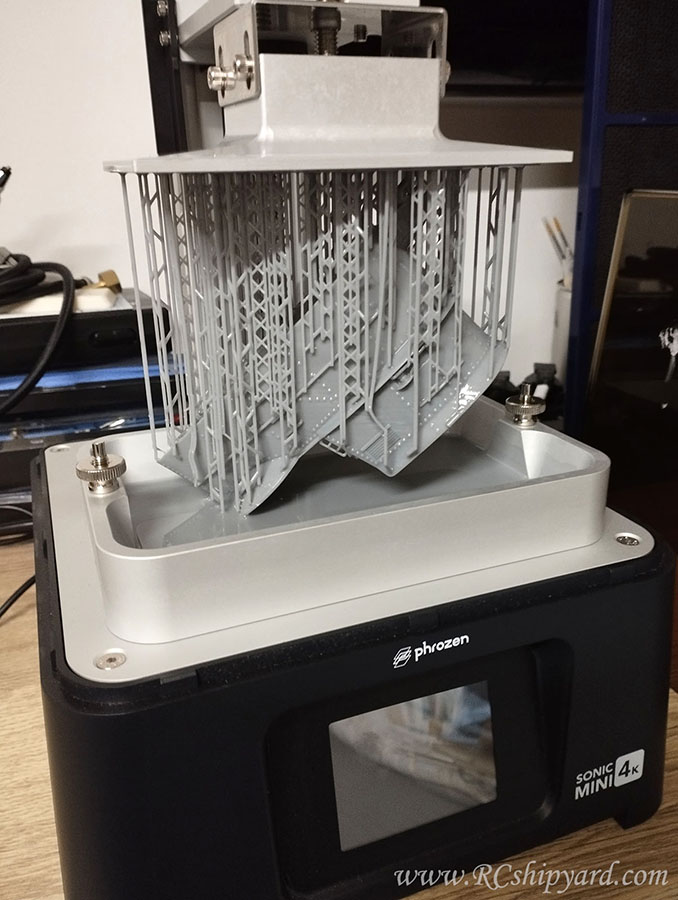
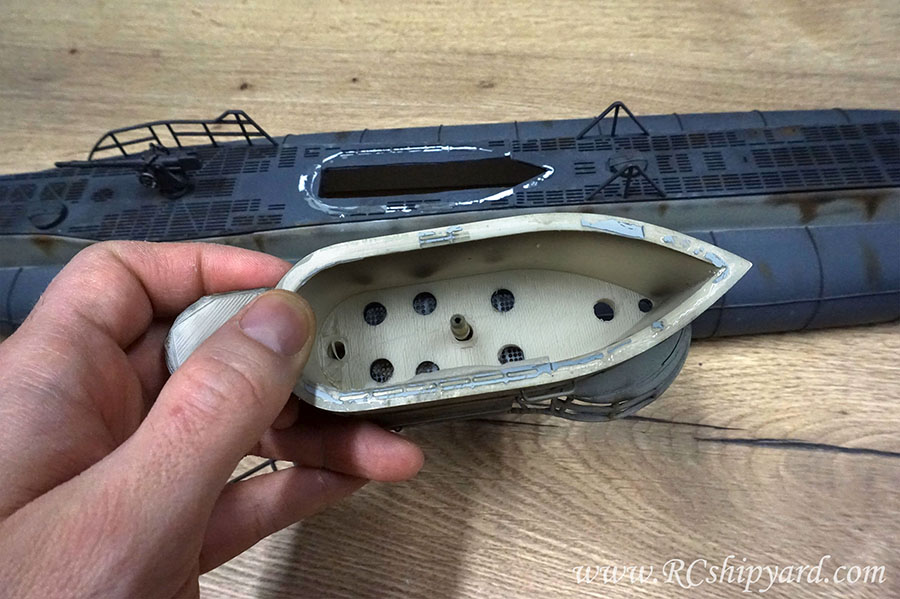
After removing the supports and cleaning the model I found something let's say decent looking.

Of course the model still needed modifications, like removing the floor or the bottom: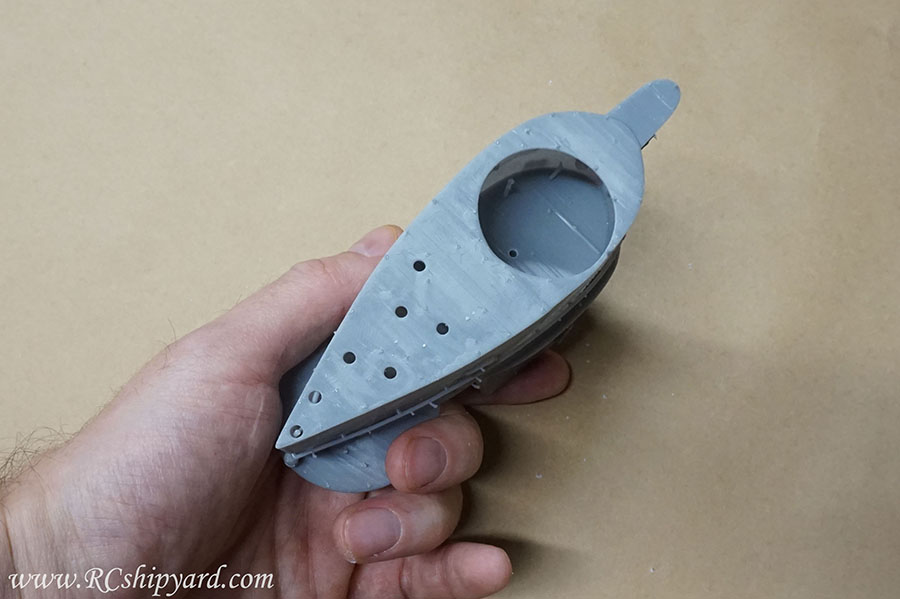
After cutting the floor out I've noticed that this thing is thick as stone, even after hollowing the model in the software. The problem is that this floor is not a single element, but layers of grids apart from themself. At this stage I was sure this was not a model intended for printing, but for a render.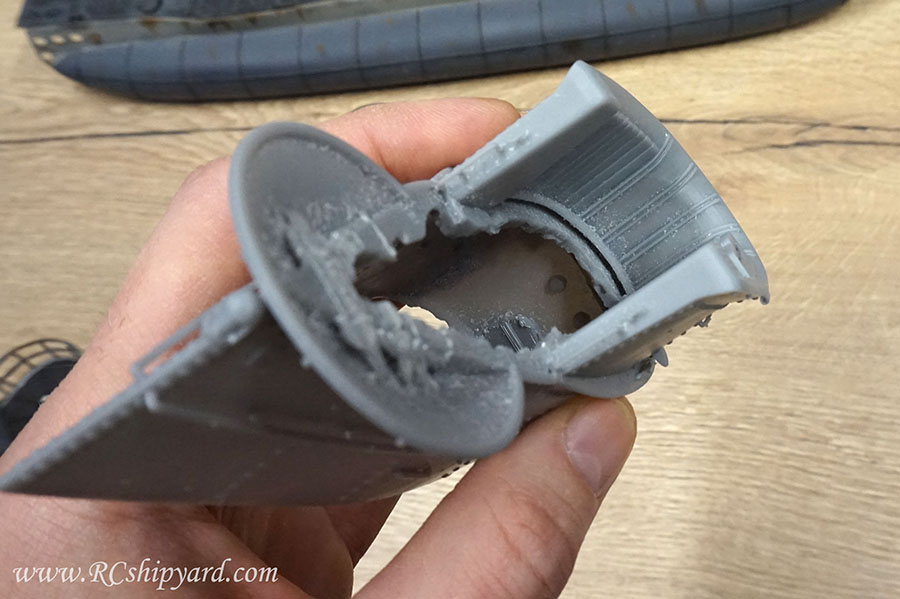
Lastly, after some angular movement under a light I noticed the vertical lines clearly showing that the file was converted to a STL by a person without even basic knowledge about 3d with a serious quality drop, hence the problems. At this time the decision was final about not using this crappy tower.
So what now?
As always.... I'll be designing and manufacturing a new element from scratch by my own, with a careful eye for detail this time. This will be a true VIIB conning tower... Here we go!
First the shape, then details. Of course a small preview of the work in progress: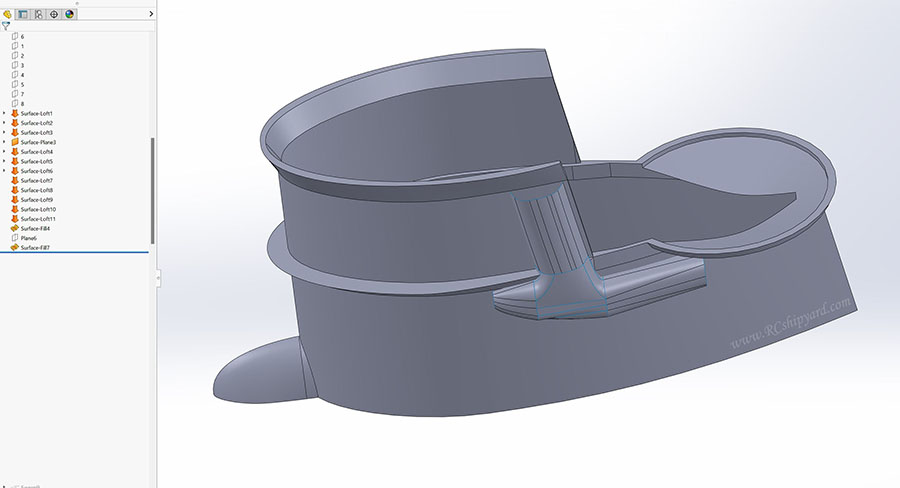
Last edited by Jakub; 01-18-2023, 05:23 PM.My knowledge base and blog:
www.RCshipyard.comComment
-
Jakub, impressed already! I am still working on learning 3D drawing, but you, sir, are making it look easy! Very sorry about the accident to your subs. Good things will come out of it!If you can cut, drill, saw, hit things and swear a lot, you're well on the way to building a working model sub.Comment
-
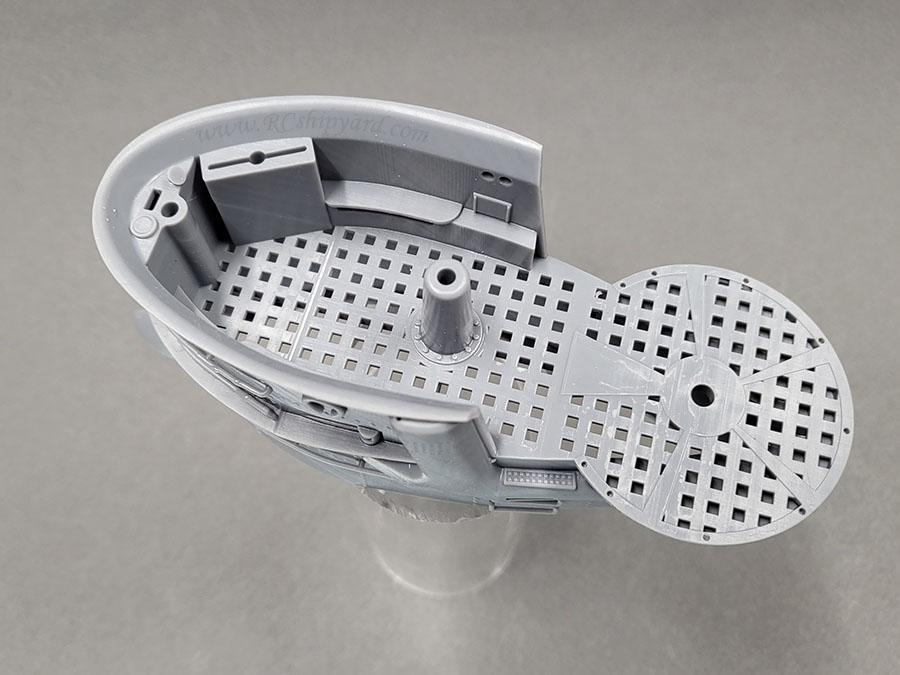
So the 3d design of the new Conning tower for my VIIB is finished. It’s a real VIIB tower, it has been designed using surface modelling with a very thin wall (0.8-1.2mm) to keep the weight and the volume as low as possible. Everything designed for a 4k resin printer.
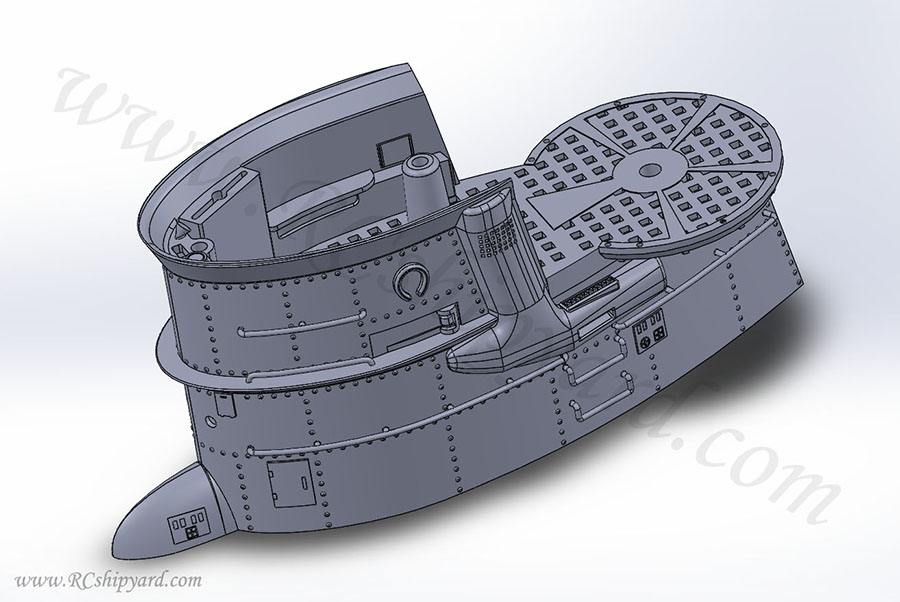
The square shaped grid in the floor is bigger and not to scale on purpose, because I don’t want to have any problems with surface tension and air bubbles getting floor under it. In this model, everything is optimized in such a way to allow an easy flooding/venting of the construction.
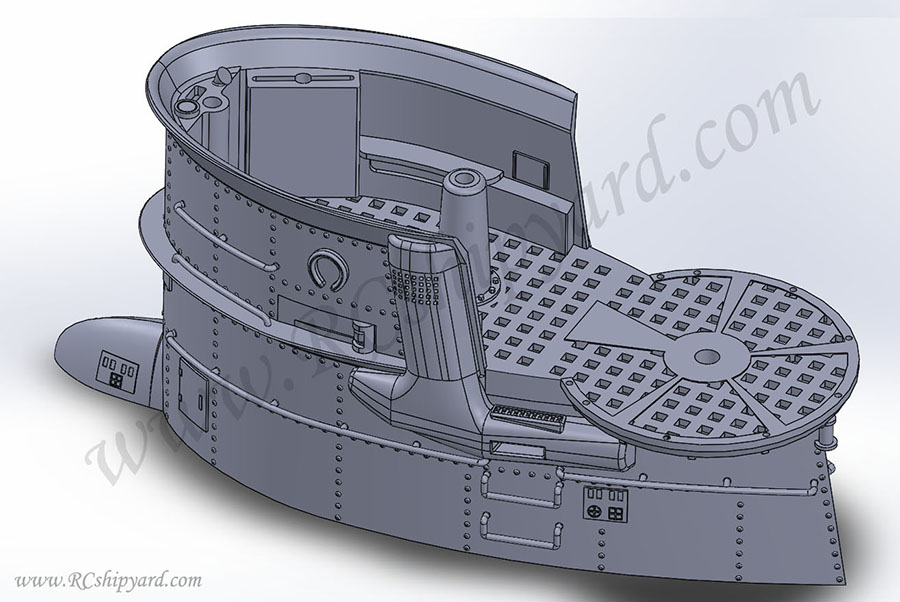
Here you can clearly see as everything is hollowed, additionally in the middle is a cross shaped main support beam. The models lower edge has been designed with a 3mm apron to allow easier gluing in the tower and additionally stiffens the whole construction. Next step will be creating an STL with supports for the resin printer and of course slicing the rascal.
 My knowledge base and blog:
www.RCshipyard.comComment
-
So from a self designed file to a 3d print:
The object is almost to big for my resin printer. It's worth to notice, that even after the print, the models end is partially dipped in the resin vat, because I had only 6mm of spare print height left... It's of course finished properly, but partially under the spare resin surface.

This is how the print looks before the cleaning and post final curing process:

After the cleaning and drying up the print it's time to remove the supports, it's an easy task if you have the right tools. Of course, sometimes after removing a support a small scar appears. Those can be easily repaired with some fresh resin, the slightly cured with a small UV pocket lamp:
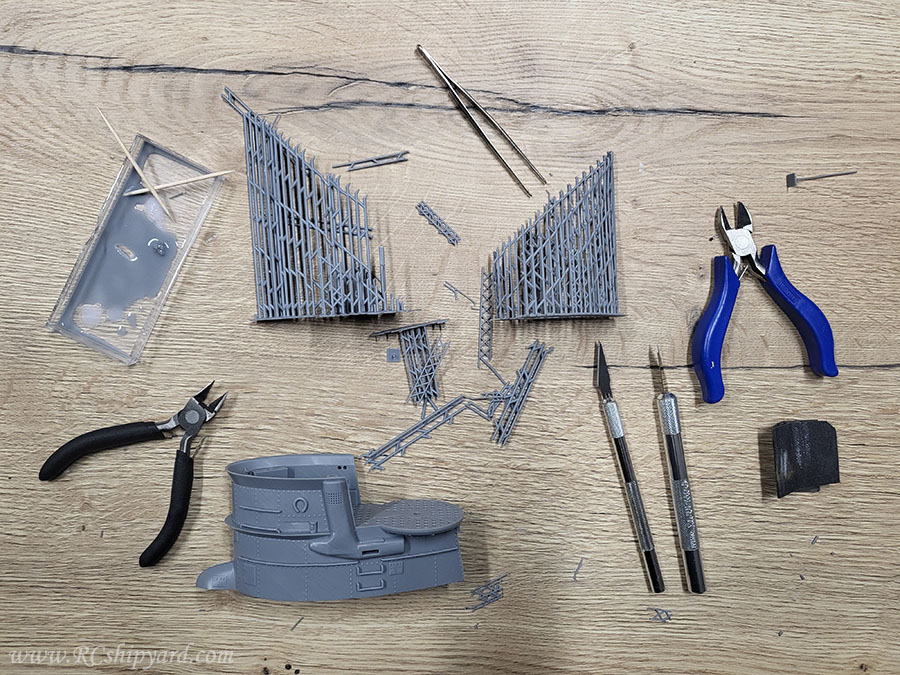
and the final effect after curing. It's nice that even the side vents with the size of 0.8mm (!) are not a problem to print. These can be done only for decoration however...

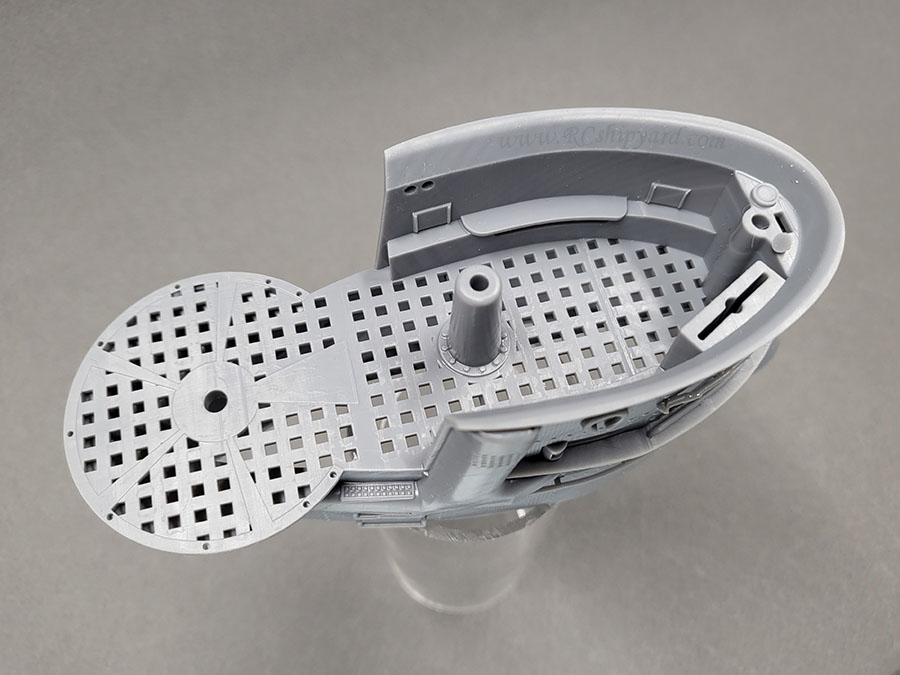
I allowed myself to design some simplified interior. What's worth to mention is the floor gird size. It's of course not in scale as even the upper picture shows it's not a problem to make a much smaller one. I made my much bigger cause I don;t want to have any air trapped inside cause of the water tension.
Other side:
Lastly I wanted to show the structural design inside. The model was designed to have as little volume and weight as possible. Every shape, except the structural supports (like the cross here) is hollow with a wall between 0.8 to 1.2mm. This thing is light as a feather.

Now I just need to design the railing. Flak gun and the deck gun have been already designed, yet they're still in the printing queue.
Thanks for reading!
My knowledge base and blog:
www.RCshipyard.comComment
-
Looks great! The railing may be better done with wire verses 3D printed, but I understand reasons to just print it.If you can cut, drill, saw, hit things and swear a lot, you're well on the way to building a working model sub.Comment
-
Cam out nicely......good job.Comment


Comment