
Re: USS Greenling (SSN-614) Scratchbuild
UPDATE 45
Hello Again Everybody!
I know it’s been a while since I have provided an update on this project, but that is because there hasn’t been anything to report. Since I don’t even have all of the parts yet, there has been no great rush to proceed. I am going to St. Louis the first of May and will bring them home with me then.
I still haven’t decided what detailing I am going to do to this first model, if any, but I decided that whatever I decide, it won’t hurt to get the basic hull squared away, so I took Tom D’s advice, abandoned the "Fast Cracking White Putty†and bought some Bondo Glazing Putty to fill the seams. Taking more of Tom D’s advice, I started by masking off the areas around the seams, including those around the sail, with masking tape.

I then applied the glazing putty using the thick end of a chop stick.
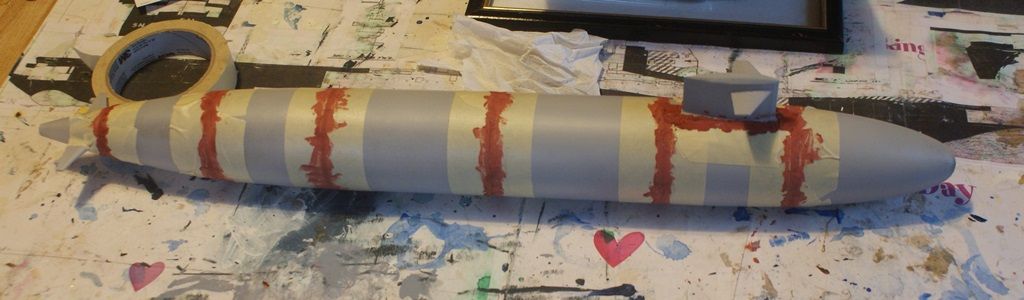
After letting it dry a day, I removed the masking tape.
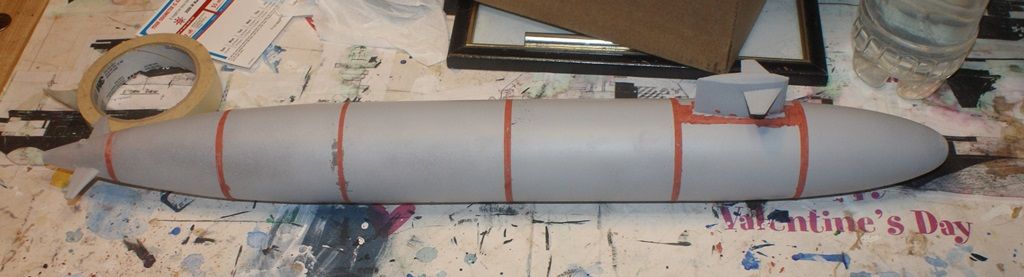
Tom used wet sanding on a 1/350 scale Chinese SSN model with 400, 600 & 1000 grade sand paper. I have never tried wet sanding and the only grades of sandpaper I have are 100, 150, and 220 , so over the next week I dry sanded it as time allowed.
The Tamiya light gray primer I had was not spraying properly, so I had to get more. Rather than go with Tamiya again, I decided to try something different, so I went to Lowes’ and bought a can of Rust-Oleum automobile primer. I applied one coat yesterday and another coat this afternoon. I must say that I really like the way the Rust-Oleum goes on, and in the future will use this over Tamiya every time.
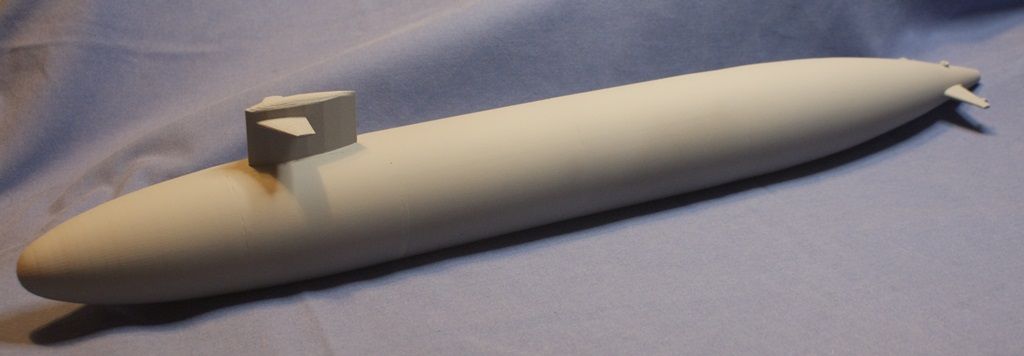
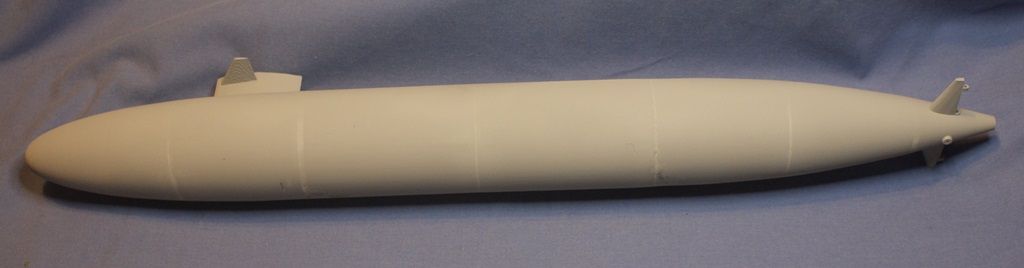
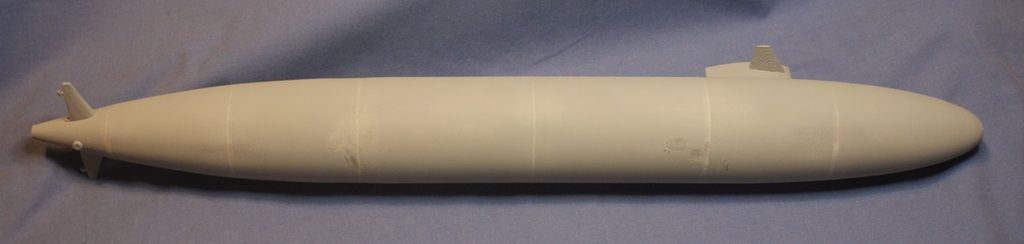
Parts of it look really good, but as you can see in some of the pictures below, I have more work to do, especially on the underside. I think that a little more putty, sanding and a couple more coats of primer will do the trick.

With regards to scribing, I was wondering if I could use thick tape, to define the lines I want to scribe, like the anti-skid line. I could then use steel templates that I still have from my undergraduate days when I was the only draftsman in the College of Engineering, using ink on Mylar to prepare various drawings for the faculty, to assist in scribing the lines with a sharp exacto blade.
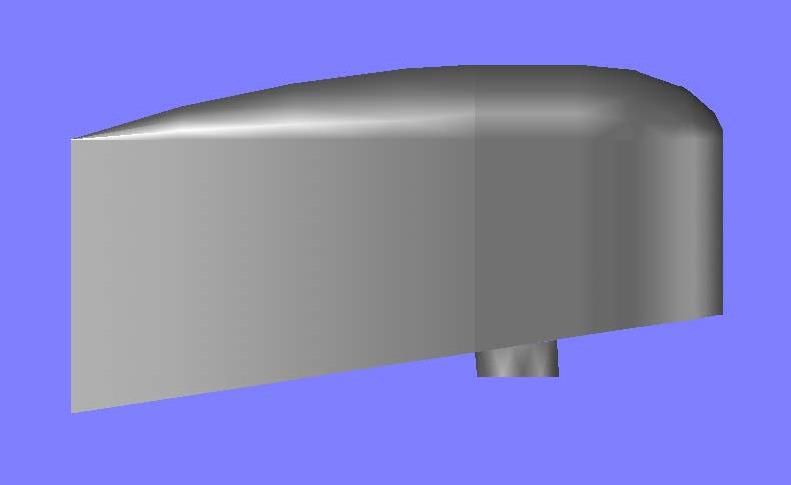
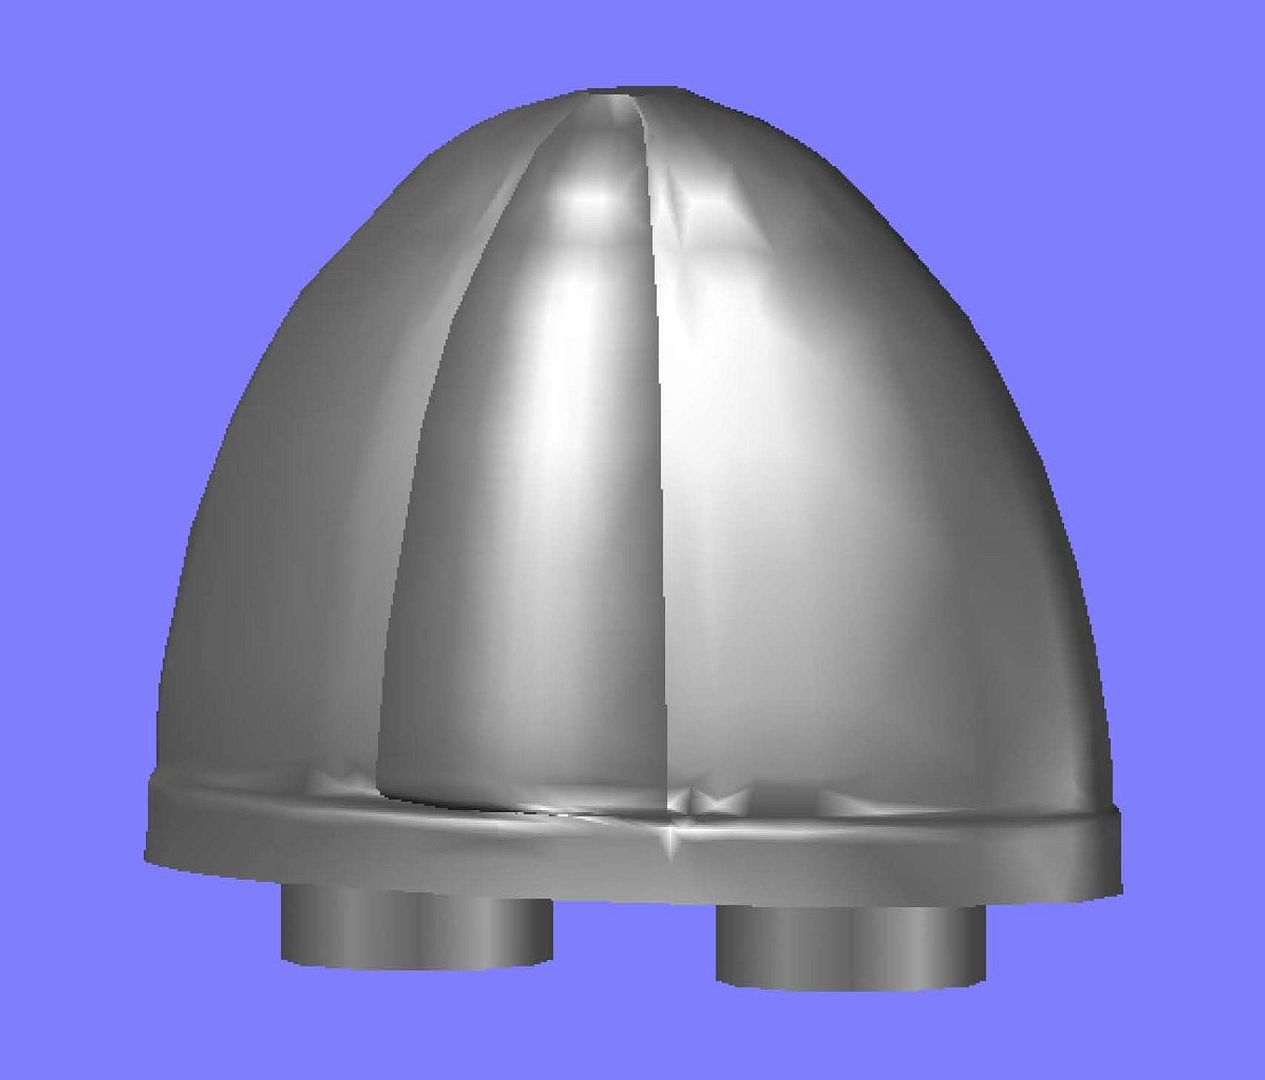
On another note, I decided to see if Shapeways can make the two fairings Greenling had, so I sliced them off of the detailed hull parts they were on and added posts. I haven’t had any luck yet with Shapeways, but these parts aren’t nearly as detailed, nor as small as the parts that I have tried to have them print before. You can select different materials and I chose “Frosted Ultra Detailâ€. If they can print them, it will cost $16.99 with shipping, which is a little high, but aren’t all models, model accessories and supplies these days.
I will let you know if they can print them, and keep you posted on any further progress. In the meantime, if anybody has suggestions on what colors and brands of paint I should use, I would appreciate hearing them. I would prefer to use rattle cans, but can brush it on if that’s the form that the best color choice comes in.
CHEERS!!!
UPDATE 45
Hello Again Everybody!
I know it’s been a while since I have provided an update on this project, but that is because there hasn’t been anything to report. Since I don’t even have all of the parts yet, there has been no great rush to proceed. I am going to St. Louis the first of May and will bring them home with me then.
I still haven’t decided what detailing I am going to do to this first model, if any, but I decided that whatever I decide, it won’t hurt to get the basic hull squared away, so I took Tom D’s advice, abandoned the "Fast Cracking White Putty†and bought some Bondo Glazing Putty to fill the seams. Taking more of Tom D’s advice, I started by masking off the areas around the seams, including those around the sail, with masking tape.

I then applied the glazing putty using the thick end of a chop stick.

After letting it dry a day, I removed the masking tape.

Tom used wet sanding on a 1/350 scale Chinese SSN model with 400, 600 & 1000 grade sand paper. I have never tried wet sanding and the only grades of sandpaper I have are 100, 150, and 220 , so over the next week I dry sanded it as time allowed.
The Tamiya light gray primer I had was not spraying properly, so I had to get more. Rather than go with Tamiya again, I decided to try something different, so I went to Lowes’ and bought a can of Rust-Oleum automobile primer. I applied one coat yesterday and another coat this afternoon. I must say that I really like the way the Rust-Oleum goes on, and in the future will use this over Tamiya every time.
Parts of it look really good, but as you can see in some of the pictures below, I have more work to do, especially on the underside. I think that a little more putty, sanding and a couple more coats of primer will do the trick.


With regards to scribing, I was wondering if I could use thick tape, to define the lines I want to scribe, like the anti-skid line. I could then use steel templates that I still have from my undergraduate days when I was the only draftsman in the College of Engineering, using ink on Mylar to prepare various drawings for the faculty, to assist in scribing the lines with a sharp exacto blade.
On another note, I decided to see if Shapeways can make the two fairings Greenling had, so I sliced them off of the detailed hull parts they were on and added posts. I haven’t had any luck yet with Shapeways, but these parts aren’t nearly as detailed, nor as small as the parts that I have tried to have them print before. You can select different materials and I chose “Frosted Ultra Detailâ€. If they can print them, it will cost $16.99 with shipping, which is a little high, but aren’t all models, model accessories and supplies these days.


I will let you know if they can print them, and keep you posted on any further progress. In the meantime, if anybody has suggestions on what colors and brands of paint I should use, I would appreciate hearing them. I would prefer to use rattle cans, but can brush it on if that’s the form that the best color choice comes in.
CHEERS!!!


Comment