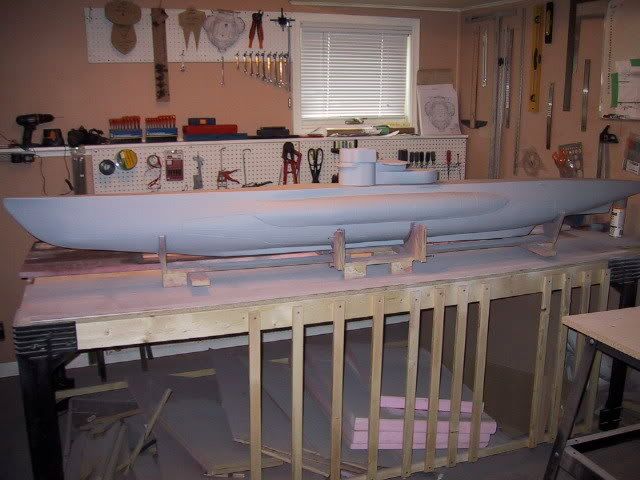
1/25 Type VIIC/41 Scratch Build.

Collapse
X
 
  • Time
  • Show
Clear All
new posts
  • himszy
    Junior Member
    • Nov 2004
    • 282

    #121
    Mylo,

    Great work and the running

    Mylo,

    Great work and the running total is interesting to see. Hope you don't mind me asking, but how much would you say this build has cost you so far?

    Michael
    Comment

    • mylo
      Junior Member
      • Aug 2005
      • 723

      #122
      Michael,

      I don't mind you

      Michael,

      I don't mind you asking at all. Good question.

      So far.....I have about $400 worth of materials ($100 of that is paint/primer. The fibreglass resin would be the next expensive...not to mention almost $100 in 1/16" masking tape) into the actual plug. $400 for the plans alone as well due to getting them professionally enlarged. I'd say I'm right around $1000 CDN to date. I should have kept better track of the expenses actually.

      The REAL expensive part is coming up which is the casting material. I can hardly wait

      Mylo

      Comment

      • mylo
        Junior Member
        • Aug 2005
        • 723

        #123
        Paul,

        I'm glad to hear

        Paul,

        I'm glad to hear that actually. I was beginning to wonder if I shouldn't check myself into a mental ward for even thinking about it

        ......what some people call a waste of time.

        ......others call attention to detail.

        Mylo.

        Comment

        • paul von braun
          Junior Member
          • Jun 2004
          • 242

          #124
          Mylo, some people dont just

          Mylo, some people dont just call it mental illness - they call it 'rivet counting'! The otw examole claims to have about 34000 rivet heads - but hey, what's 28000 rivets between friends?!!! I cant say I have ever counted them, just go on what Bob Dimmack says and I have no reason to doubt him. The difference is that the master for the otw was done in tinplate and the rivets 'punched' from the other side (if I remember correctly what Bob said).

          Paul.

          Comment

          • mylo
            Junior Member
            • Aug 2005
            • 723

            #125
            Paul,

            There is no question,

            Paul,

            There is no question, the OTW boat has exception detail. 34,000 - 10,000 - 102,000 ??....how ever many there are, the thing is awe enspiring. It truely was the inspiration behind me wanting to add rivets to my boat.

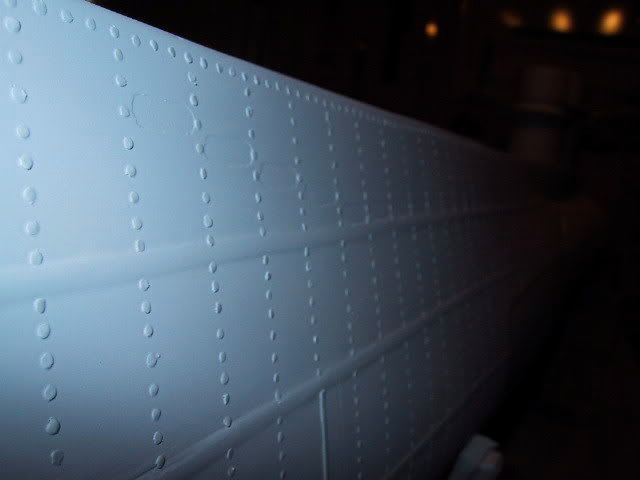
            I knew I had to come up with a reasonable compromise though. My "tooling" is a little more primitive. I came to my 1/16" diameter rivet due mainly to the fact that I simply couldn't punch out a rivet any smaller without them becoming very distorted, much less be able to physically handle them. My spacing is about 4mm, I just chose a distance that looked ok given the rivet size. All in all, I'm happy with the results given the 40 hour time investment. As it was, my neck and back were killing me from being hunched over the plug so long, I'm not sure I could have done anything any finer in detail.

            Just like there will always be a kid on the playground tougher than you, there will be a U-boat with more rivets. I still bow down to the OTW boat as being the master in that regard. As for the tough kid on the playground, I wouldn't mind running into him today.....for old time's sake.

            Mylo

            Comment

            • paul von braun
              Junior Member
              • Jun 2004
              • 242

              #126
              Mylo, I wasnt trying to

              Mylo, I wasnt trying to belittle your effort - Martin Hartshorn, the original owner &builder of the otw type vii was a professional model maker - this is your first try. You are truly an inspiration to all of us.

              Paul.

              Comment

              • mylo
                Junior Member
                • Aug 2005
                • 723

                #127
                Paul,

                Yes, I realize your

                Paul,

                Yes, I realize your intentions were simply to compliment my efforts. Thanks, really.

                I was just giving a little explanation as to why I did what I did.....in the event anybody was kind of wondering.

                I have never come across anybody here at Subcommittee that belittles anybody's efforts. .....we're all too "mature" for that. ......now get out of my way so I can play with my toy boat.

                Mylo

                Comment

                • shdwsoldier01
                  Junior Member
                  • Feb 2007
                  • 14

                  #128
                  That is a very nice

                  That is a very nice build You have inspired me to try and scratch build a 1/48 Los Angeles class boat, after I research anyway need plans/diagram.
                  Keep up the excellent work and I hope to see some new posts with pictures

                  Andrew

                  Comment

                  • Guest

                    #129
                    The OTW boat was detailed

                    The OTW boat was detailed with a stuff called litho plate, which is a very thin aluminium sheet used in the printing trade.

                    It responds well to be embossed, and can also be photoetched.

                    If you want to get some, a friendly word with a local printer will often secure a few sheets, which will probably have some damage that make them scrap to the printer but useful to the model builder.

                    Andy

                    Comment

                    • mylo
                      Junior Member
                      • Aug 2005
                      • 723

                      #130
                      No, I haven't fallen off

                      No, I haven't fallen off the face of the earth. A few other projects of priority have popped up. I hope to get back at the sub real soon.

                      I've been spending some time researching casting material. If anyone has brand names / web sites and what their experience was with it, I would appreciate it. I'm having a heck of a time finding any of this stuff locally, especially in containers any bigger than 12 oz. .....12 oz just isn't going to cut it. I'm thinking closer to 12 gal. Anyway, any info would be appreciated. I'm nearing that phase of construction.

                      Also, any links on builds showing this phase of making the master moulds would be a bonus.

                      Thanks to all,

                      Mylo

                      Comment

                      • mylo
                        Junior Member
                        • Aug 2005
                        • 723

                        #131
                        Andrew,

                        Thanks for the compliment.

                        Andrew,

                        Thanks for the compliment. Glad to have offered you some inspiration. Just so you know, I started out not knowing squat about how to scratch build a sub. I did a lot of reading, research, and asking questions to get me started,.....and then a lot of trial an error along the way once I finally got going on it. I've thrown a lot of material in the garbage from my "do overs". If you kind of factor that in from the start, it won't be such a disapointment when it happens. .....unless you're perfect of course.

                        I understand you are taking on a large scale boat. Do yourself a favour and take my tips to heart that I mention earlier on large scale boat production such as:

                        - Making sure you have adequate building space. You'll have to move that sucker around, make sure you can without tearing down a wall in your house.

                        - Making sure you take the time to build some decent stands.

                        - Making sure you can physically handle the thing without an old back or shoulder problem re appearing. My plug weighs about 40 lbs and is awkward to say the least to man handle, particularly given the odd reaching and lifting angles that seem to happen. If there is a difficult way to move it, guaranteed that's the way you'll have to do it.

                        - Make sure you are aware of the additional time / material investment.

                        If you have put some thought into those basics and still like the idea of the large scale boat, I encourage you to go for it. I have enjoyed the build of my 1:25 scale type VII/c 41 and if I could do it all over again, I'd pick the same scale.

                        That's my 2 cents of advice to anyone considering a large scale build.

                        Mylo

                        Comment

                        • mylo
                          Junior Member
                          • Aug 2005
                          • 723

                          #132
                          Step 57 ]


                          The tower

                          [b]Step 57 ]


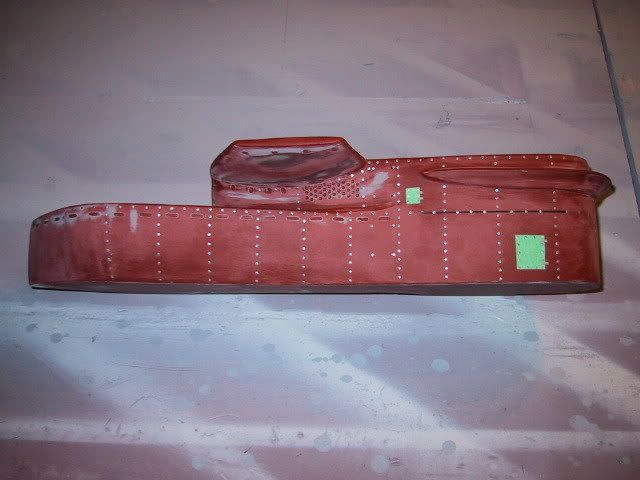
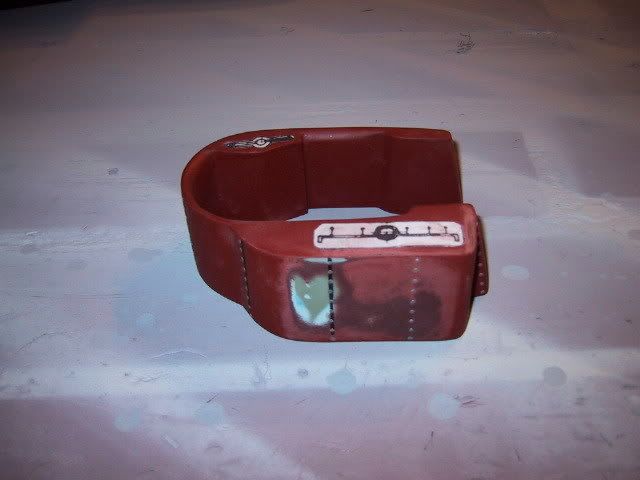
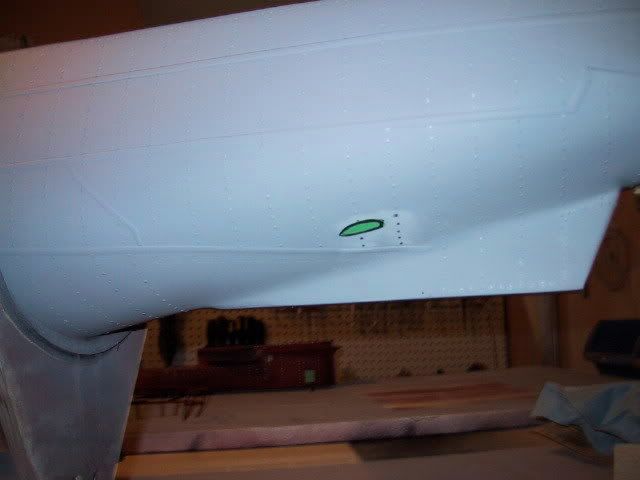
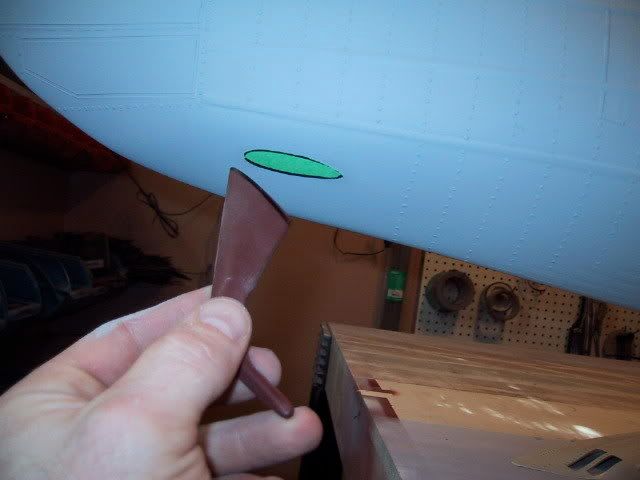
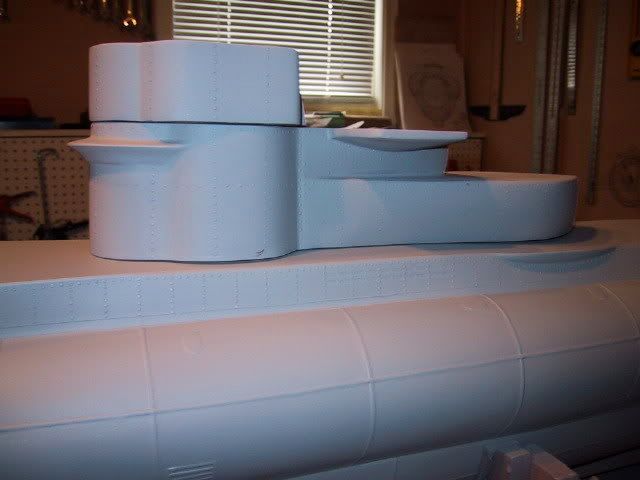
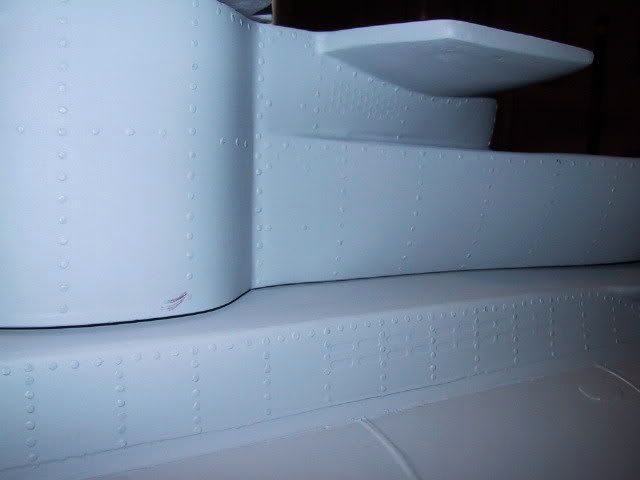
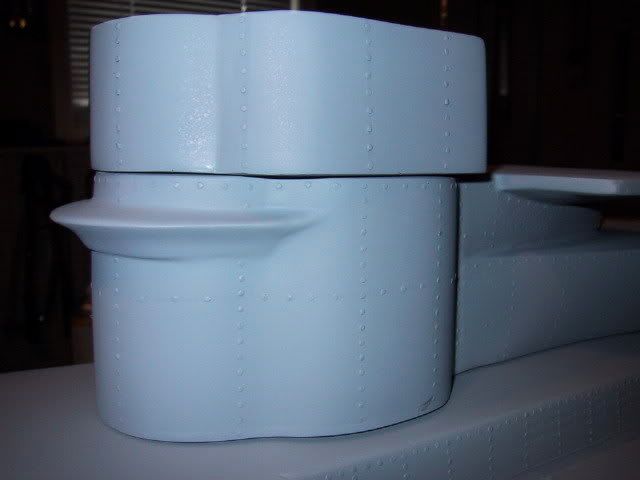
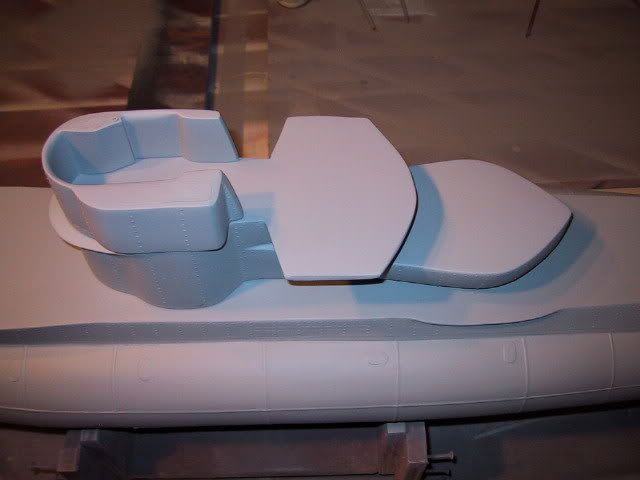
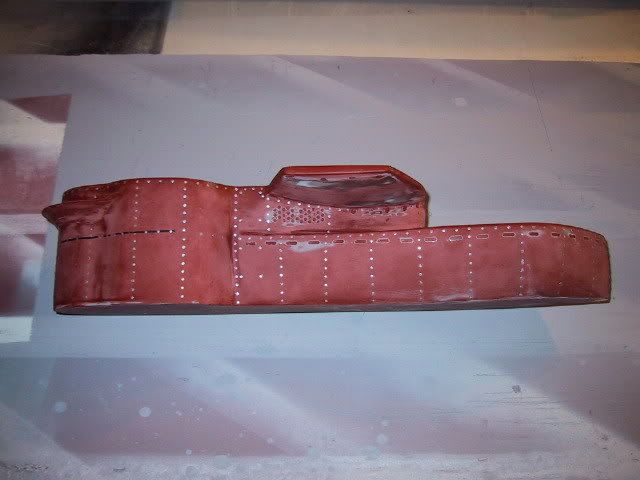
                          The tower detailing included the removal of the flood hole masking as well as adding the rivets. Again, for those interested, there are approx 500 rivets on the tower for a total of about, give or take, 6500 rivets on this boat. Time to move on from rivet counting. I made VERY good use of that simple little rivet punch and will add that thing to my inventory of tools. Making it out of steel proved very beneficial as this punch did not require any "tuning up" as a result of being hit too hard like the brass punches did. As part of the tower detailing, some access doors were included, simply made out of 3 layers of masking tape cut to square with rivets added to these "doors" as well as 1/16 mask hinges. Very simple but a nice detail to add to the tower. To round out the tower, reference points were added to the tower that will indicate where to drill out the holes for the grab iron steps. These reference points are made from the same size round tape as a rivet and should not be mistaken as such. When looking close at the tower, it's easy to see that these "rivets" are in fact where the grabs go and should not be confusing come time for assembly. To the upper tower enclosure, the openings for the two antanae were added for reference when it comes time to cut these openings out of the casted resin parts. It should be noted that the gap between the tower and the main tower enclosure will be filled as part of the assembly of the model. These two pieces are separate for better casting of the parts.


                          [b]Step 58 ]


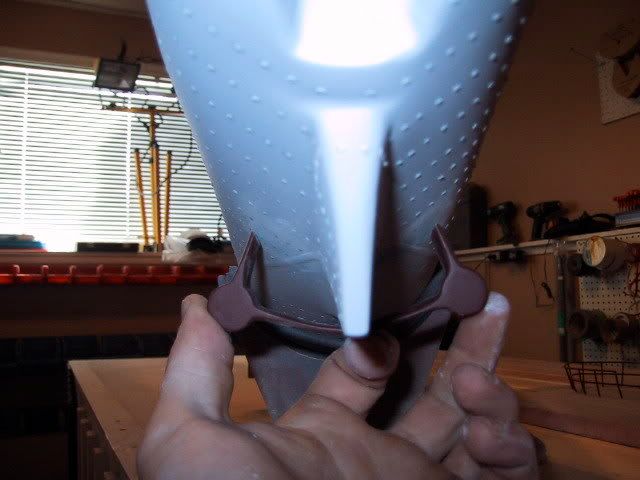
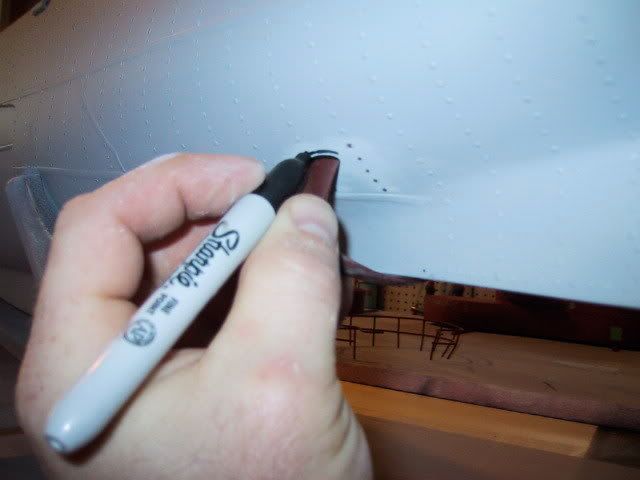
                          In order to make the assembly process of model as simple as possible, I included reference points on the hull where the appendages will go. Careful measurements were made using the master appendage with the footprint of these parts traced onto 3 layers of masking tape. The mask was then cut out and placed on the plug. Simple in theory, but complicated to get the placement of these reference points just right. In assembly of the model, it will likely be required to adjust the appendages accordingly, but the reference points will assist by taking all that precise measuring away from the assembly process.


                          [b]Step 59 ]


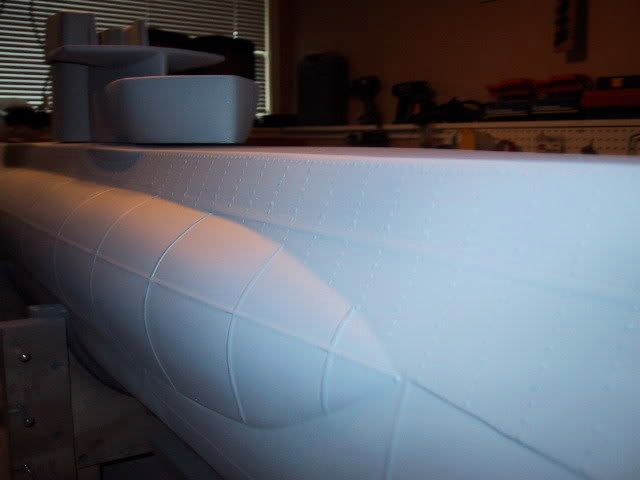
                          With all the work completed on the plug and masters, I wanted to "seal" everything, including all the rivet details, by adding several coats of primer to everything. I applied 10 coats of primer to the plug and tower master which provided the result I was looking for. The primer was not so thick that it filled in the recessed flood hold details, these details still being clearly visible. The primer coats did a nice job of filling in all the teeny tiny sanding scratches, miniscule flaws, as well as giving the rivet detailing a little better look. The coats were applied very thin so as to not distort the detail to the hull. Each coat was given 30 minutes to dry, which ensured a nice application with no risk of runs.


                          A small celebration being in order. 5 months to the day and 343 hours of labour later, I have all the masters completed. I could have shaved a month off of the build time given how little time I have been able to put into the sub in the last few weeks, but none the less, I feel this is a true indicator of the time investment required for such a projecct. In all, I'm very pleased with the results to date.

                          With the masters completed, I am going to be moving on to actually casting the parts using these masters. New chapter coming up.

                          Stay tuned


                          Mylo

                          Comment

                          • sam reichart
                            Past President
                            • Feb 2003
                            • 1325

                            #133
                            congratulations... it looks spectacular. if

                            congratulations... it looks spectacular. if you can reach around, pat yourself on the back a few times Mylo!

                            cheers,
                            Sam

                            Comment

                            • mylo
                              Junior Member
                              • Aug 2005
                              • 723

                              #134
                              Sam,

                              Thanks for the compliment.

                              Sam,

                              Thanks for the compliment.

                              Yes, I'm happy with how the masters turned out, I could literally assemble these masters, paint them up, and have a pretty reasonable looking static display model. However, until I get some fibreglass/resin parts made and in my grubby hands to build the actual model with, I'm not out of the woods. This next "chapter" is going to be preceeded by researching and reviewing all I can on how to do this whole casting parts thing. I see a few hours of reading in my near future and some more question asking. Thank God those who are in the know are patient and willing to share their expertise. This project would have been grounded to a halt months ago otherwise.

                              ........so far, .......so good though.

                              Mylo

                              Oh, by the way, I'm a non flexible type, there is no way I can pat myself on the back.

                              Comment

                              • mylo
                                Junior Member
                                • Aug 2005
                                • 723

                                #135
                                If you're doing a build

                                If you're doing a build and plan on casting parts from molds, don't be a putz like me and wait before researching the process more thoroughly. I didn't start really looking into how it's done until about a week ago or so, and now I find myself ready for the molding phase....without any materials....which I will likely have to order from far, far away and wait a long, long time. I looked everywhere for this stuff locally with no luck, which just wasted time....and now.....here I am with my thumb up my orafice.

                                As a result of my putz-dom, it'll likely be a while before I'm able to make any further progress.

                                ........I guess I do the bathroom renos in my house that I've been putting off forever. .....yeah....like THAT is fun. >

                                Mylo

                                Comment

                                Working...