Attention all registered users. The new forum upgrade requires you to reset your password as you logon for the first time.
To reset your password choose this option that is displayed when you attempted to login with your username: "Forgotten your password? Click here!"
You will be sent an e-mail to the address that is associated with your forum account. Follow the simple directions to reset your password.
If this is your first visit, be sure to
check out the FAQ by clicking the
link above. You may have to register
before you can post: click the register link above to proceed. To start viewing messages,
select the forum that you want to visit from the selection below.
I'm going with making rubber molds out of RTV so that I can capture all the detailing. As well I suspect that all those rivets would really give me trouble when it came time to remove the plug using a hard case.
I came across a leather punch last night and thought of all the rivet
masks you made. This might be a useful tool for making rivets, etc...
Is RTV the same as silicone calk??
Reason I ask is I found GE silicone calk at the renovation station (used
and slightly abused building material store). Thirty-five cents a tube.
Could it be used for molds??
I had this same question. The rubber part of the mold (RTV) which captures all the detail is supported by what is called a Mother Mold, which is a harder material (plaster / fiberglass etc). The Mother Mold is applied right over top of the rubber RTV in the mold making process and so conforms exactly to the rubber, providing support once the Mother Mold material cures/hardens. Once cured, the Mother Mold is removed from the RTV, and then the RTV rubber mold is removed from the plug. (which is easily done by literally peeling the rubber RTV away from the plug). Once the two are removed, the rubber RTV mold is placed back inside the Mother Mold. So, in fact, the final mold consists of the RTV rubber moldand the plaster/fibreglass Mother Mold. The reason the RTV is even used is to capture the plug details as well as be easily removed from the plug, due to it being make of silicone rubber. Yes, I've only recently got answers to these questions myself. This rubber RTV stuff is expensive, but I am looking for a method that will produce the best casted parts with the LEAST amount of problems. I'm willing to pay for that. Wayyyy too much time into this plug to screw it up now.
Scott,
I've got a leather punch exactly like that and experimented with it to make the rivets. It worked pretty good, but I found it slow and cumbersome compared to how I could produce rivets with my rivet punch. With the punch that I made, one quick "whack" of the hammer produced 7 rivets. "Whack, whack, whack, ...whack..." ...next thing you know, you've got several hundred rivets made. I found the rivet punch to work well. The making of the rivets was the quick and EASY part. Taking them from the mat and placing them on the plug using the tip of a hobby knife....that was the back / neck breaker. If a guy was making "round things" that were from thicker and harder material, I could see where the leather punch would be much better, but for these duct tape rivets, the rivet punch was the way to go. By all means, give'er a try, I think you'll see what I mean before too long. I appreciate your input all the same, really helps promote new/innovative/fresh tools and techniques. Please keep it up.
In response to your silicone caulk question. It could very well be the same type of stuff ....EXCEPT .... I would imagine you would have nothing but grief with it when trying to remove it from your plug due to it tearing/ripping/distorting, or otherwise ruining itself or the detail you are trying to get off your plug, not to mention what would happen to it when you start casting parts from it. Steve NEIL has a ton of experience doing molds and the like and words of advice from him are to not "cheap out" on RTV material for the exact reasons I mention. I can see being disappointed BIG TIME when a silicone caulk rubber mold turns into a big piece of ....garbage....
Just my thoughts but hey.....test it out, you could be onto something.
If you're going RTV for your molds and have struck out locally, you could mail order what you need from the place I got all my supplies from- Sculpture Supply Canada (www.sculpturesupply.com) They have a good stock on Smooth-On RTV products and are very knowledgeable about the products they carry. (You can even order toll-free!) The last time I needed casting resin I mail ordered it from them (yes, Smooth-On makes an Alumilite like product as well) and it was here only two days later.
hi Mylo,
Hey, this is all great stuff. I really didn't understand how the RTV worked as a mold until now, thanks alot for explaining it so we can all get a clear picture of how exactly this works..!
Is the RTV you are going to use a the blue colored 2 part type ? I wanted to try this out on some small details but really didnt' know where to get it, and have only seen it in photos, I think Steve used it on his details for the type 17. Thanks alot. Jeff Jones
Too old to Rock- n- Roll, too young to die ! Subs are just my speed......
Jeff, here is a very recent conversation I had with Steve Neil about making RTV molds.
Mylo
Steve, can you let me know if I'm on the right track here.
The first thing I need to do is make a parting board for my plug. Since I'm going to be casting my hull halves in a port / starboard configuration, this parting board needs to run down the longitudinal axis of the plug in the center, essentially just exposing each half of the plug according to which hull half mold is being made. This parting board is cut as close as possible to the contours of the plug, with the gaps being filled with the sulphur free clay. By the looks of it, it's wise to expose juuuuust a little bit more than 1/2 the plug so that when the mold is made, is has a bit of excess which can be trimmed/sanded for a perfect fit. The parting board is supported by a box that the other 1/2 of the plug will fit into.
Steve
Perfect. Make sure you use some chart tape or thin tape to mark that line of seperation. This way when you flat sand you sand right to it and a bit inside. Thsi work perfect for my 212. Once glued togehter I sanded down the tape line.
Mylo
The GI 1000 RTV is then brushed onto the exposed 1/2 of the plug with just a regular paint brush. This stuff captures all the details of the plug and is made of silicone rubber. The GI 1000 has to be continually brushed on to allow it to set up, which can take a while. Since the GI 1000 is a silicone rubber, it will NOT stick to the plug and NO parting agent is required. I'm unsure exactly how thick to build the GI 1000 up. ....around 1" maybe ??, I'm guessing. Keys that will ensure that the GI 1000 and the mother mold are aligned perfectly are required in the GI 1000, although I'm not sure what these keys are made up of.
Steve
Again perfect. You can make the keys out of a small ice cube tray first. Then when the RTV is setting up place them around the base flat area. Although the mother mold for the most part will be self keying. Do spray on a little silicone spray release agent. It helps break and suction. Helps but not needed.
Mylo
Once the applied GI 1000 is cured, the plaster mother mold is applied directly over top of the GI 1000 with everything still on the plug, which is the only thing at this point maintaining the shape of the GI 1000. The plaster mother mold is applied with strips of canvas/burlap in order to give it strength. This plaster is just.....plaster, nothing special. This plaster mother mold is built up to about 1" thickness or so and it is what gives the GI 1000 it's rigidity as a mold, because the GI 1000 is just rubber and would be "bendy" and "floppy" if it weren't for the mother mold. It is a good idea to make sure the mother mold has some sort of stand or "feet" so that it will stay upright and not roll all over the place when doing the casting of the actual part.
Steve
Also spot on. But you can do a polyester mother mold the same way. Lighter, and easier to handle. Stronger too.
For that sized boat the mother mold will be nearly 100 pounds per side. It can break and warp too if your not careful. Check out the 212 thread of mine on www.subpirates.com You'll see what I mean there. BTW I own the forum.
Mylo
Once the plaster has hardened, it is removed from the GI 1000 by just lifing it off, as the GI 1000 will not stick to it either, as the GI 1000 doesn't stick to ANYTHING except itself. Once the plaster is lifted off, the GI 1000 is just peeled back off the plug as it is highly flexible rubber and not stuck to the plug. Once the GI 1000 "glove" is peeled off, it is placed back into the mother mold using the mentioned keys to ensure that it is aligned in the mother mold exact.
Steve
Right on.
Mylo
....and there you go, a mold for one hull half. The process is then repeated for the other half by removing the clay that was used to fill the parting board, removing the parting board, and then aligning it with the other half in the exact same way as it was done for the first half.
Am I basically on the right track ?
My questions I guess are ]Steve[/b]
Your fine with 1/2 inch to an inch.
Mylo
Does anything go between the RTV and the plaster mother mold ?
Steve
No.
Mylo
What is used to key the RTV with the mother mold since nothing will stick to this stuff ?
Steve
As I said before. As long as the mold is flat to the table the RTV will stay put in the mother mold.
Mylo
How is the plaster mother mold separated from the GI 1000 RTV ? ...will it just "pop off", or better yet, lift off without any problems ?
Steve
A little compressed air and out she comes. Plaster or glass.
Mylo
How much GI 1000 RTV will I need ? You mentioned 5 gal I think before.
Steve
Well when we do a case mold we take the clay, bunch it up and you know exactly. It took a gallon to do the same mold your talking about with my type 17. Your boat is about 4 times larger. Because you are doing side and the hull is pretty smooth you'll have little problem with it staying put. Brush up time will take place over and hour and then it will stop moving.
I'd say five gallons. Once you do the first half you'll have a good idae if you need more. Lets hope not.
END
I was getting confused on the whole RTV vs. Hard Case methods. I've got my head around it now.
Further to your question, I'm still working on finding a supplier of RTV. Kevin has given me some info, as you can see from his post, on where to get this stuff here in Canada. It's not the GI 1000 that I mention, but some other brand. He used it on his Oscar II with good results. If you saw "blue stuff" being used by Steve, chances are it's that GI 1000, maybe he could clarify for you. The stuff Kevin used was orange. ....just different tints I would imagine.....or maybe one is blueberry flavoured, and the other orange tasting...not sure.
Mylo,
As with so many other people I am in awe of the model you are building. It's a little scary seeing the hours you rack up to the project. And that does not count the hours you spend just thinking about it.
You are an inspiration. Give me patience and skill so my next sub can be half as good as your first!
Yes, the hours are a little intimidating, but....they are a real indication of the scope of such a project. LOTS of those hours are due to inexperience and learning new techniques along the way. If I was to build this exact sub over again, I'll bet I could reduce that time quite a bit. I think that a lot of projects end up not finished due to the builder simply losing interest/motivation in their project because......it's taking so dang long. It's one of the main reasons why I have kept the build log, so that guys can see how long some of this stuff can take. If they know going in that it's going to take several hundred hours to complete, there will likely be a greater chance of them seeing their project through to completion. I haven't pulled any punches with that log....I still find it AMAZING how long it took me to do even the simplest of things. I'd go into my shop thinking, "Well, this shouldn't take me much longer than a couple hours." ....then...a couple DAYS later I'm still not done. It just seems to work that way when you really aren't too sure what you're doing. What that log DOESN'T refect, and I keep mentioning it, is all my screw ups that I threw in the garbage and had to start over. For sure, if I added all the time that I spent thinking about how I'm going to do something on the sub, or the time I spent doing research on it,......you could double that hour total pretty quickly. I do it because I enjoy it, so the time I dump into this project is irrelevant to me, as it's all time well spent. ....the alternative is to do housework or something, or prepare your taxes........ see what I mean.
I like to keep pointing out the fact that I had no idea how to do this when I started. Lots of reading. Lots of asking questions. Lots of screwing up. Most importantly, just get started and actually do something. I'm just "a guy" with a little drive to create something kinda cool.
If I've inspired..........it's all bonus. I'm very happy to contribute to the sub community and appreciate everyone's comments.
STILL waiting on casting / molding supplies. A bunch of the stuff was backordered. I think more actually had to be manufactured, I had to order quite a bit.
.....funny.....there wasn't any delay in billing my Credit Card.
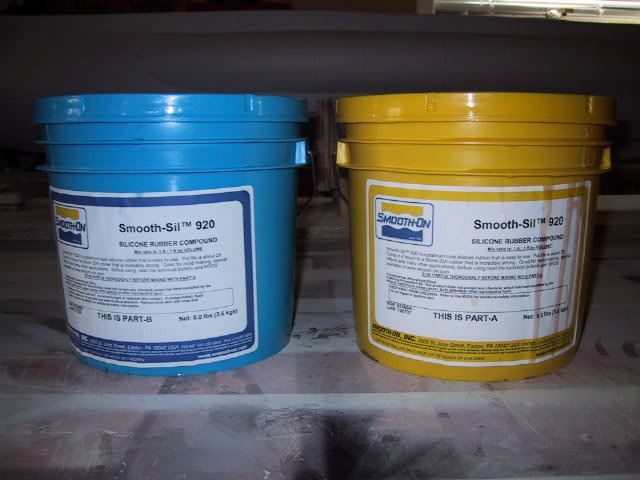
The best way to look at my first attempt at making rubber RTV molds is to say that tuition for my self taught class, with me as the only student, cost me $225, which is the cost of 2 gal of Smooth Sil 920 RTV. I wasted a ton of material trying to get the "art" of mold making figured out as well as many hours "in class".
Those of you familiar with Kevin McLeod's Oscar II build will instantly recognize the following techniques.....I stole them directly from him. This post is meant to try and further clarify the process and describe some of the things I screwed up on. It is only with the help of Kevin and Steve Neil that I was even able to attempt this process. I tried to do as much research as I possibly could before attempting to make the molds as the materials involved are VERY expensive and the time to actually do it being quite considerable. Having said that, it was only until I got up to my elbows in RTV and got into it, that the real learning began.....much like anything else.
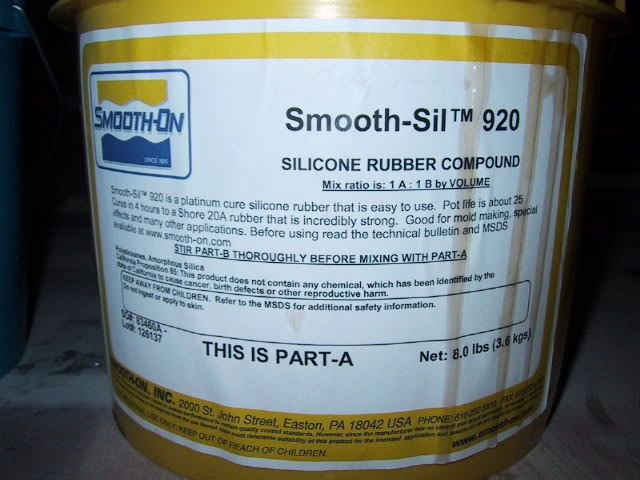
The materials that I used are the Smooth Sil products from Canadian Sculpture Supply. I have been very happy with these products as well as the "deliver to my door" phone in ordering from Sculpture Supply. Unfortunately, the Smooth Sil 920 was initially backordered, causing a delay. Walter at Canadian Sculpture Supply has been most helpful. The nice thing about Smooth Sil 920 is it's 1:1 mix ratio. Pour equal amounts of product from each bucket, stir, pour, ....that's it. Very easy to actually use the material....if only the same could be said for prepping.
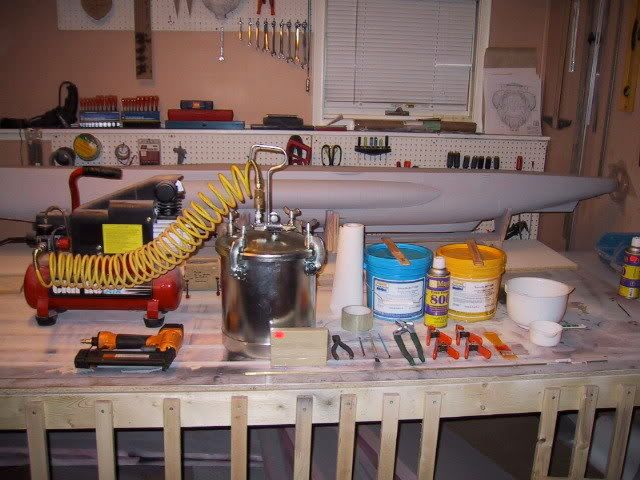
The following are the tools/supplies that I used to make my molds.
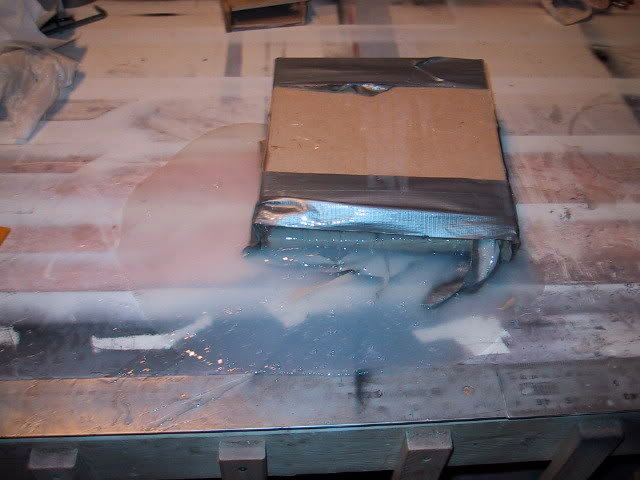
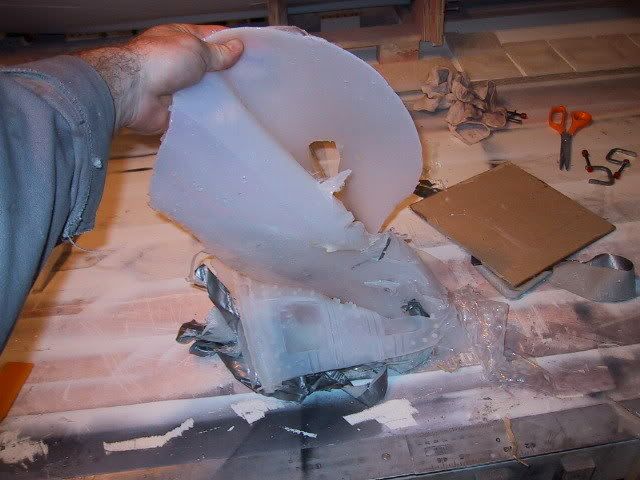
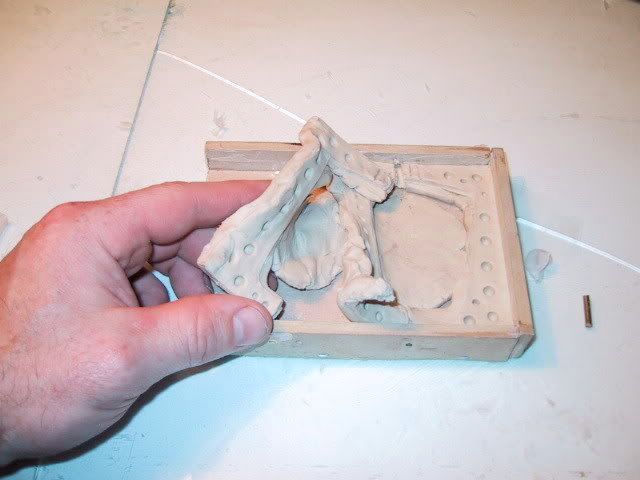
The building of the mold boxes is where I made my first mistake. I failed to realized the importance of quality built boxes, and instead, I kinda' just rushed through this process, quickly throwing the boxes together. This mistake was realized when I began pouring RTV into the mold box...and the box began to leak. There is NOTHING you can do to stop an RTV leak. Once that stuff starts seeping out, ....she's game over. In my failing attempt to stop the leak (you will notice the duct tape), my crap built box fell apart. ....I'll let the picture tell the rest of the story. Another thing I did learn from this is that the best way to clean up RTV is to let it set, and then peel it up. If you try to wipe it up while it's "wet", you have a hell of a mess on your hands.
After this little experience, I spent much more time and care constructing my mold boxes.
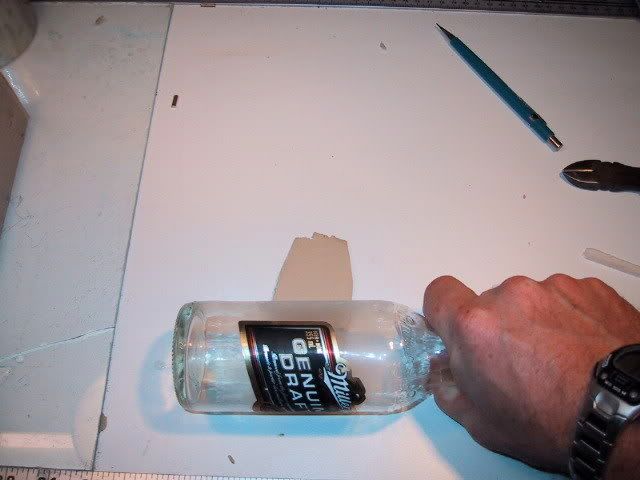
The process is to fill the mold box 1/2 way with clay (I use Klean Clay) and then press your masters 1/2 way into the clay. A very handy tool to have is a rolling pin. If you don't have one, you "might" have a similar tool that I used.
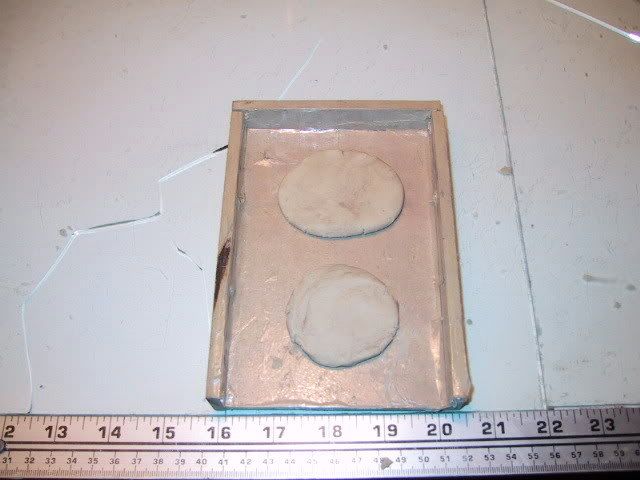
I found that I was not able to press some of the parts with large surface areas (rudders, dive planes) into the clay because it was too stiff. What I did was place a little ball of clay into the box, and then press the parts into this, squishing the ball until the part was the proper depth in the box. I then just filled the clay in around the part up to the part's centre line. Once the clay was in place, I put in brass rod where I would be injecting the casting material into the mold as well as where the air trapped in the mold would be vented out. Then divits were pushed into the clay with the end of a paint brush to create the registration "bumps" in the final mold. These bumps ensure that the mold is properly lined up when the two rubber halves are put together.
It can be seen that I put some vents out the bottom of the mold. DON'T DO THIS. Make your vents come all the way back up to the top to the same side that you will pour. The vents at the bottom caused me all kinds of grief with the casting material seeping, resulting in a partially casted final part. I had to redo all my molds to have proper vents. In addition to this, make sure you build your mold boxes big enough to allow for proper venting channels. Some may argue the need for venting channels. I feel that when the molds are being constructed, it takes very little extra effort to include the vents. The vents are extra insurance that your final casted part is not going to have air bubbles. You decide if you need that insurance.
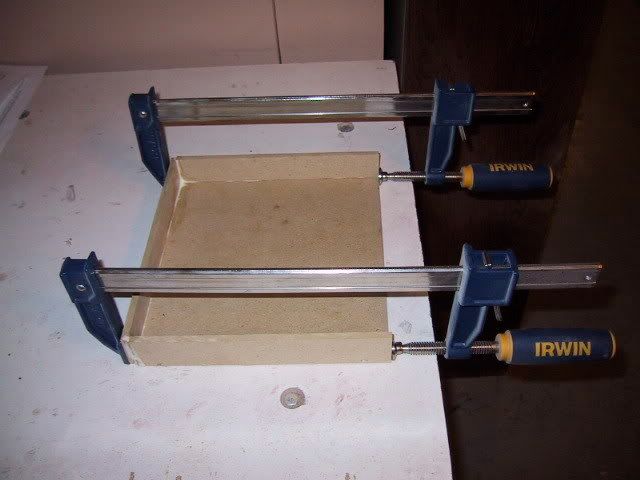
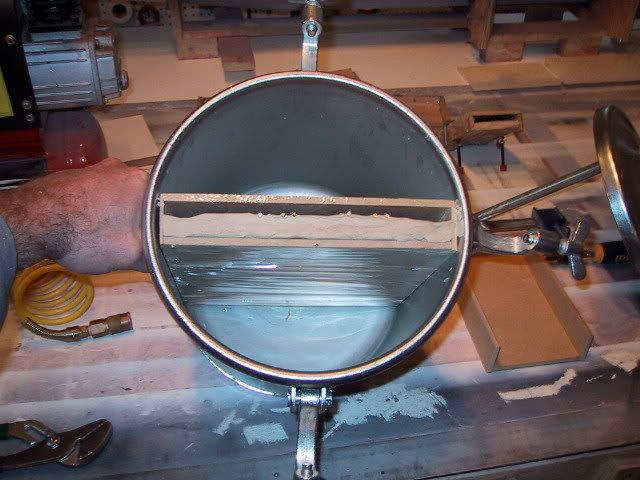
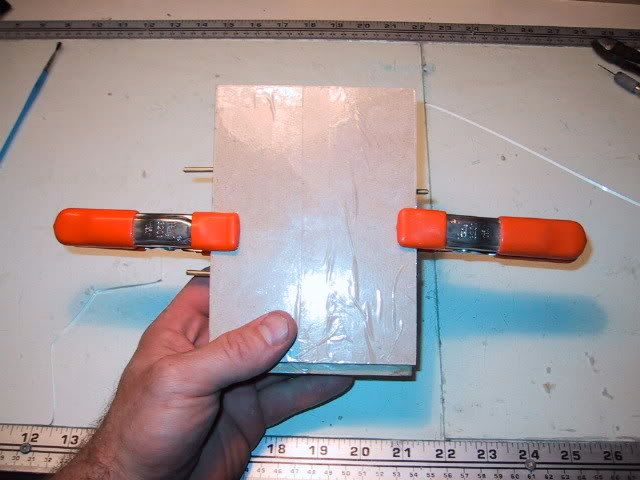
Initially, I clamped the lids on. I later discovered that I could get more mold boxes into the pot if I taped the lids on, and taped the boxes together. MAKE SURE your mold box is completely sealed when the lid is on. If there are small crack openings, seal them up with clay, and tape over. Do whatever it takes to makes sure that box is not going to leak. As mentioned, once it starts....you're hooped. The box is now ready for the first half of the mold. Pour the Smooth Sil 920 into the mold box (being careful to pour slow enough to allow the material to actually get into the opening. If you pour too fast, the RTV will get all over the place...except in the opening.....yep...learned that one too). Once the RTV is poured, place the box into the pressure pot. I set the pressure on my pot to 75 psi and let it set for 8 hours. Ensure that your pot lid is tightly clamped so that the pressure doesn't go down. The pressure pot ensures no bubbles in your final mold. The pot works very well. The largest mold box I could get in the pot is very close to 9" x 9" x 2 1/2 ".
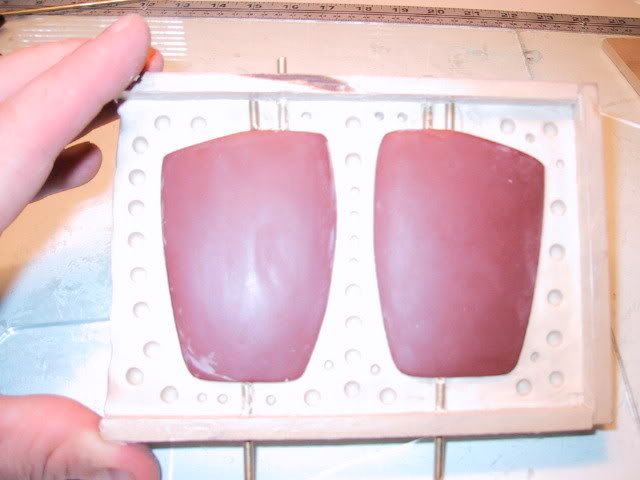
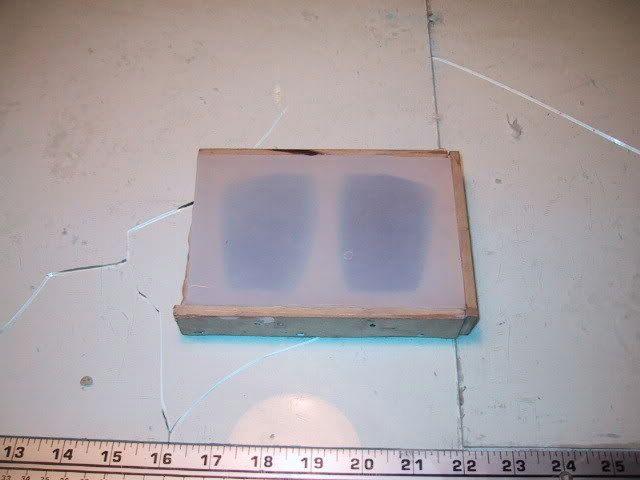
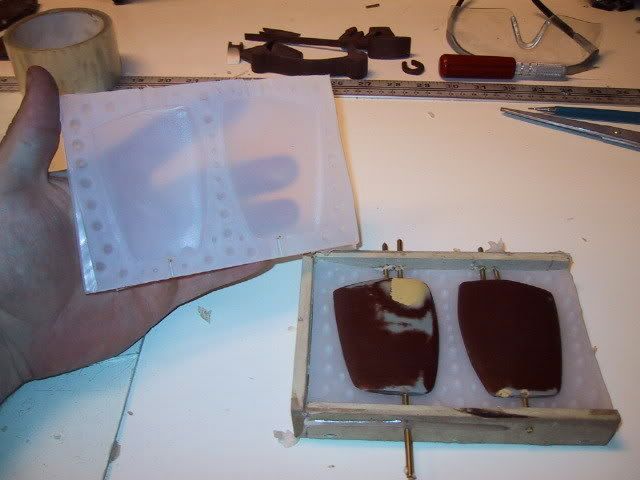
After the 8 hour setting period, the lid is removed. This may take a little prying, but it will peel off nicely once started. The Smooth Sil is slightly transparent so you can see the masters through the rubber. Then, this half of the rubber mold is peeled back and removed. The RTV removes easily without the need for a release agent. With the first half removed, the masters are removed from the clay, and then the clay from the box.
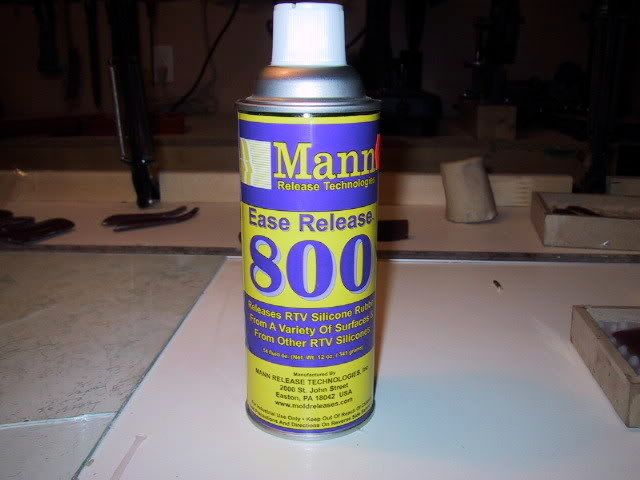
With the box now empty, the first half of the rubber mold is placed in. Then, I sprayed release agent over the entire rubber mold. I really like this spray on release agent for the convenience alone. A can of this cost me $10.00
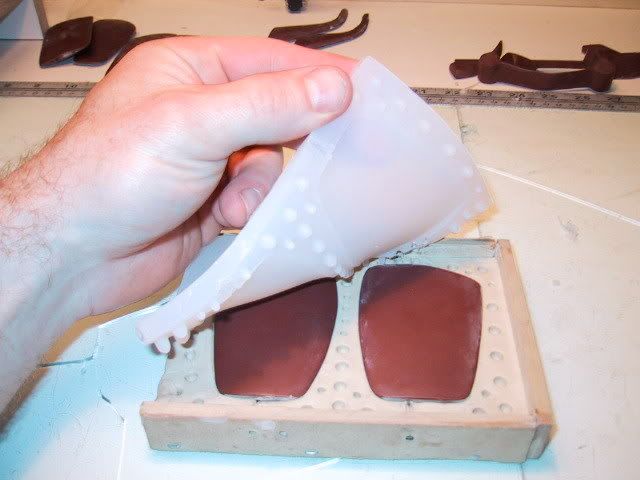
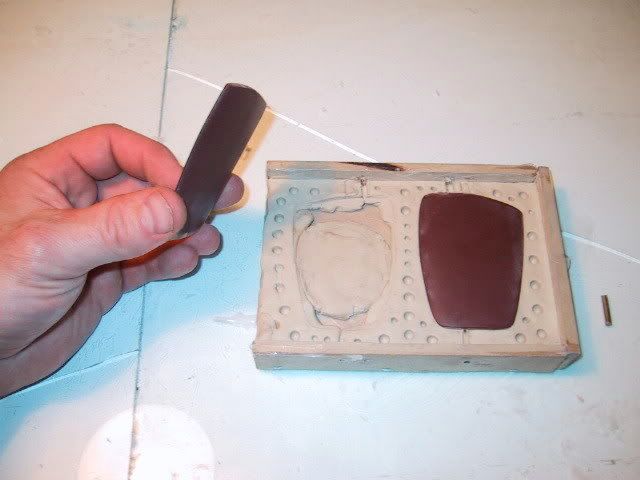
The masters were then placed back into their respective places with the OTHER side now being molded. Make sure you mark the masters so that it is known which side has been molded. The reason that I put the release agent on the mold before putting the masters back in is because IF some RTV seeps under the master in molding the second half, it can be peeled out later. YOU NEED RELEASE AGENT when you mold the second half of the mold. There is a misconception that RTV will not stick to ANYTHING. It WILL stick to itself. If you do not apply release agent, you will have a block of rubber with masters inside. Ask how I know this. The second half of the mold is now done in the same manner as the first. There you go, your mold.
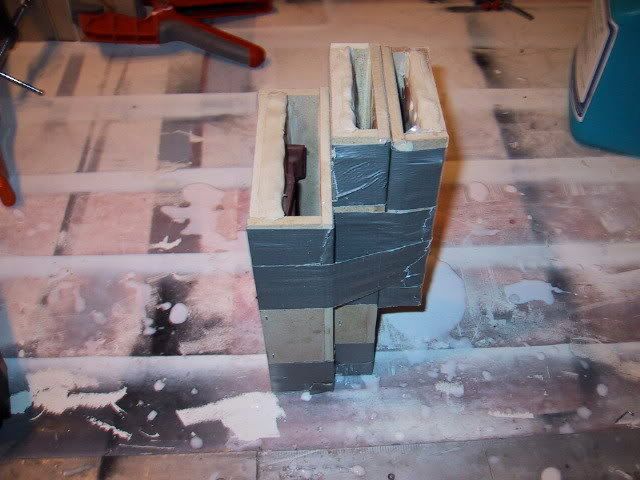
I had quite a few parts that required molding. You will want to group your parts as per the depth of the mold mox you will require. If your mold box isn't deep enough, your final mold will be too thin. I initially tried to shave and cut as many corners as I could to make my mold boxes as small as possible, which would mean the least amount of RTV. This is ANOTHER mistake. The boxes need to be big enough....don't shave TOO many corners or you'll end up just redoing, which doesn't save a whole lot of that very pricey RTV.
This photo does not reflect my final molds. I ended up molding fewer parts per box.
In summation, some key points :
- Build good mold boxes that are big enough, and deep enough.
- Pour your RTV slowly into the opening.
- Use release agent when pouring your SECOND half of your mold. Be quite generous with the stuff to avoid having a rubber block instead of two nice rubber halves.
- Let the RTV set before cleaning it up.
- Use a sulphur free clay, such as Klean Clay. RTV will stick to sulphur clays.
- Run air vent channels to the same side as the pour channels.
This should get anyone new to making molds a good start. Jump in, do it, and learn ....as anyone who has done it has had to. This will hopefully prevent those new to it from making the same COSTLY and TIME CONSUMING mistakes that I made.


Comment