Hi guys,
Some of you have kindly followed my long-aborning 66" Disney Nautilus build occasionally documented over in the "Jeff Porteous' Repair Yard" thread of the SubRon5 chapter forum. Now that SubRonLA is official and has its own presence here, I thought I'd move the continuation of that thread over to this locale.
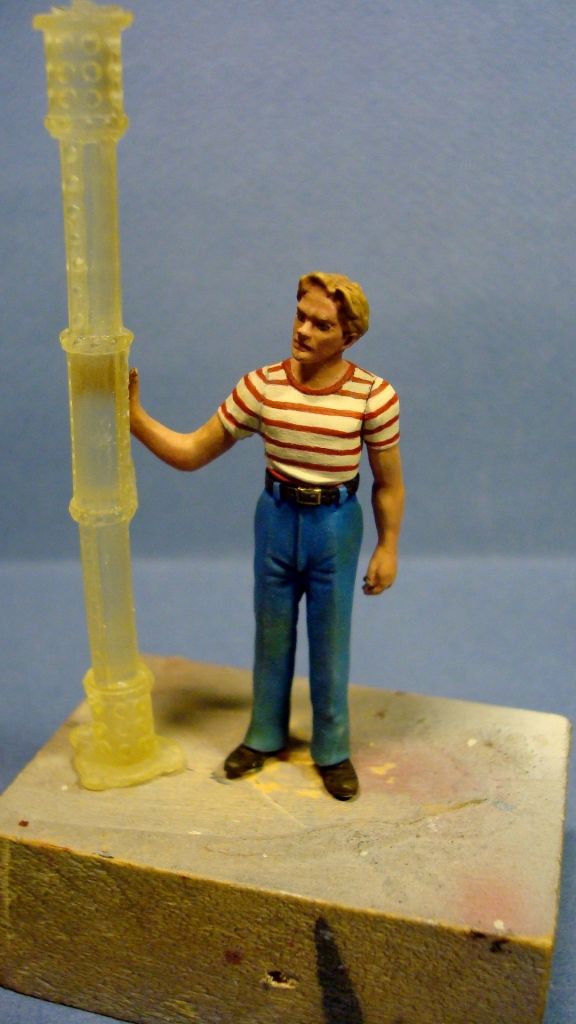
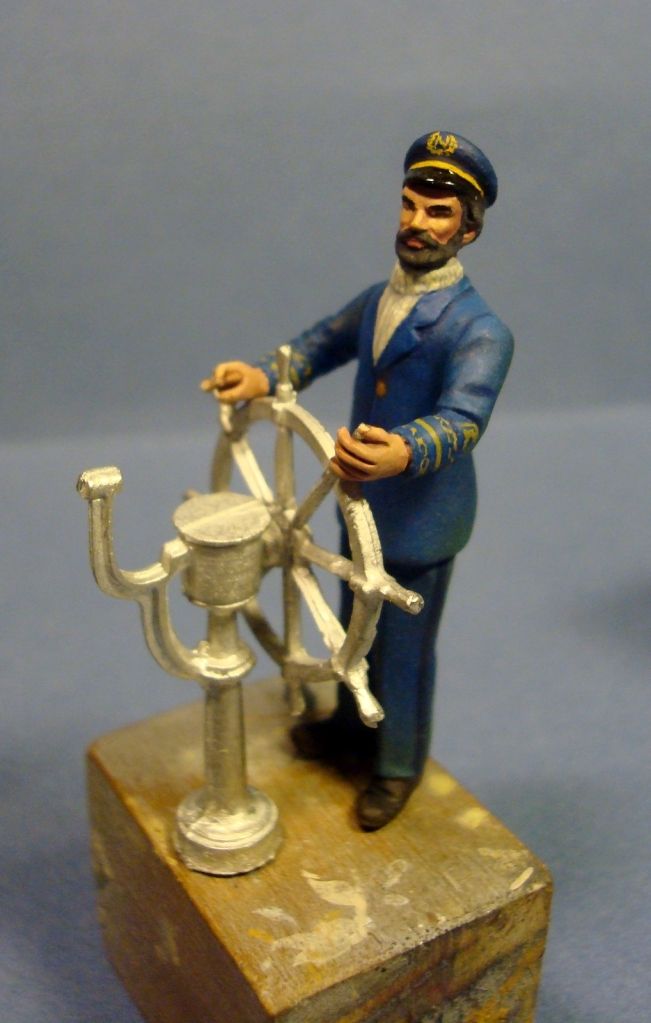
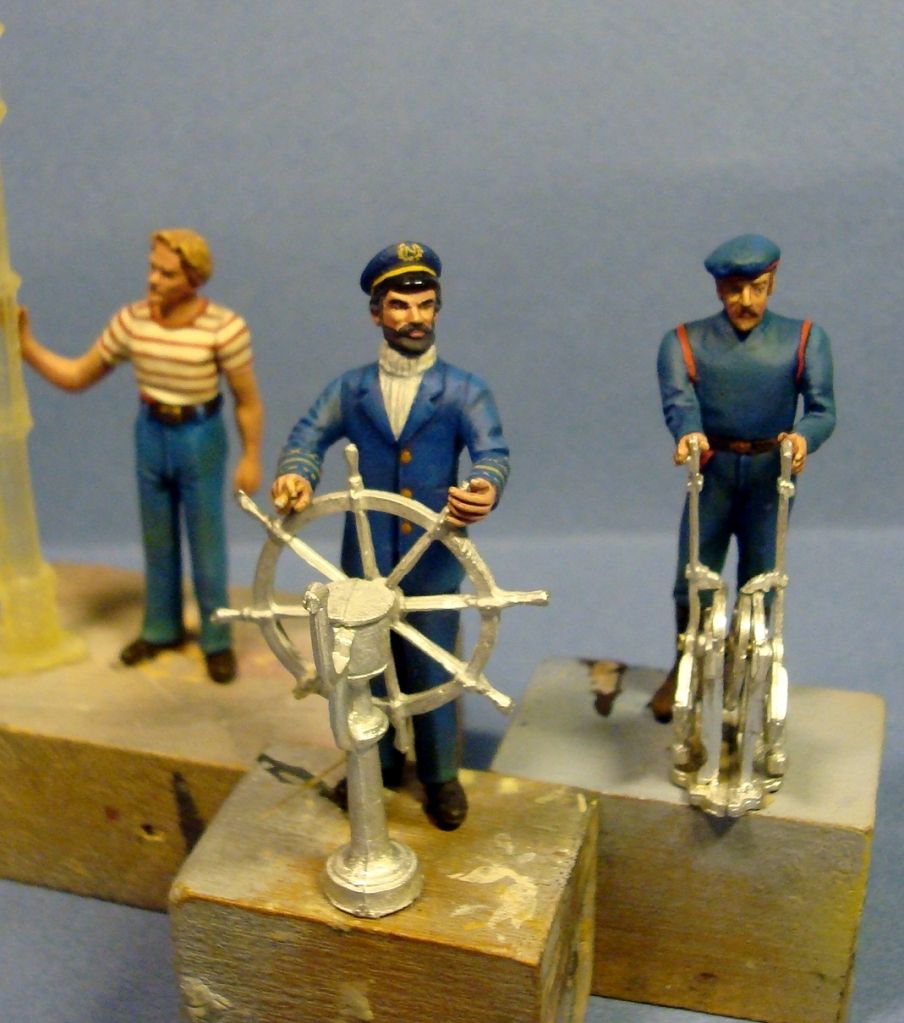
To refresh]supplied[/i] with the current version of the CR Nautilus kit), and 6) Lars Liljeblad, a very talented local static modeler who's just agreed to build and paint the movie actor figures for the wheelhouse plus, eventually, the interior wheelhouse build itself.
I've struggled to find time to work on Nautilus in recent months and weeks, but finally managed to get back to it in a big way today. May this be the start once again of regular and productive work on this long-delayed project.
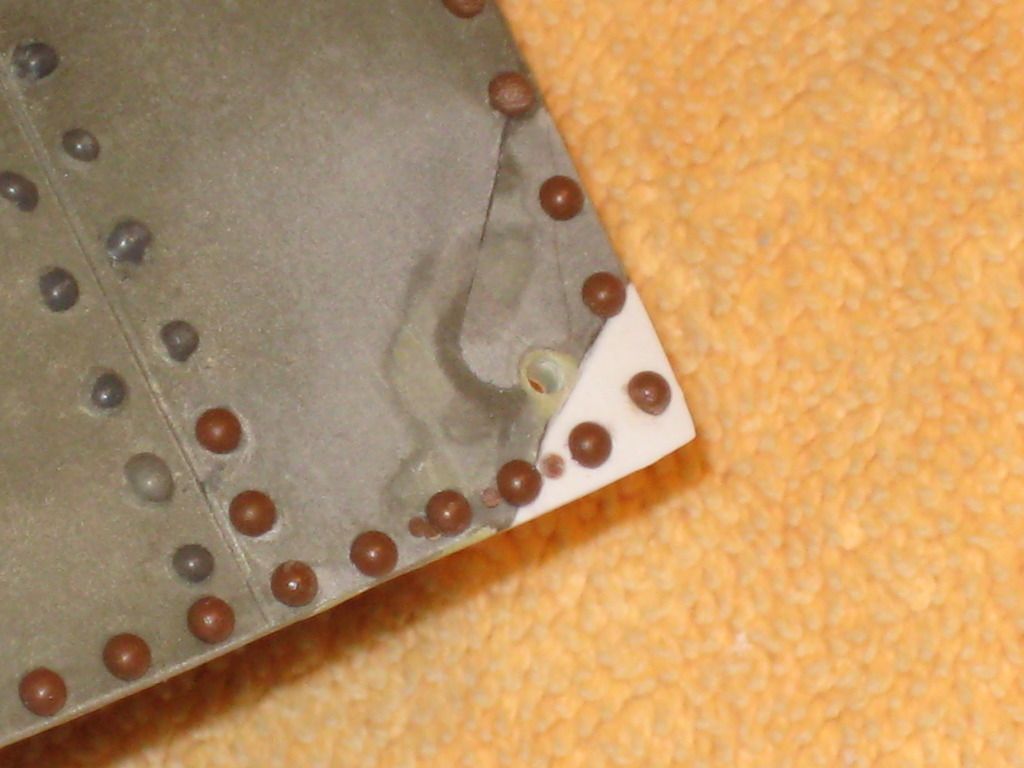
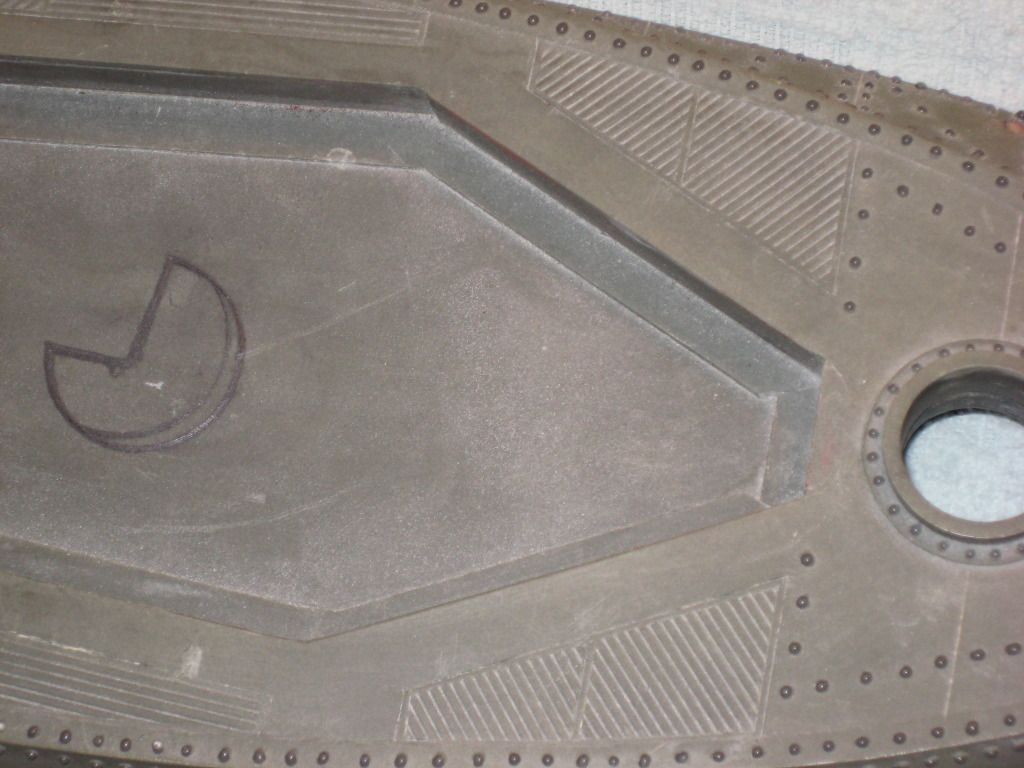
The other day I stupidly—if accidentally—broke off the corner of the main top deck hull piece and couldn't find it anywhere. So the first order of business today was to fabricate and attach a new one using thick styrene, CA, and two-part epoxy putty. You'll see upon close inspection that rivet replacement took two attempts to achieve acceptable spacing.
Eliot Brown's wonderful custom photo-etch grates arrived a few weeks ago, and I've been trying begin their installation ever since. Today I indeed successfully got that start. A long way to go yet, but work achieved so far has decidedly built my confidence.
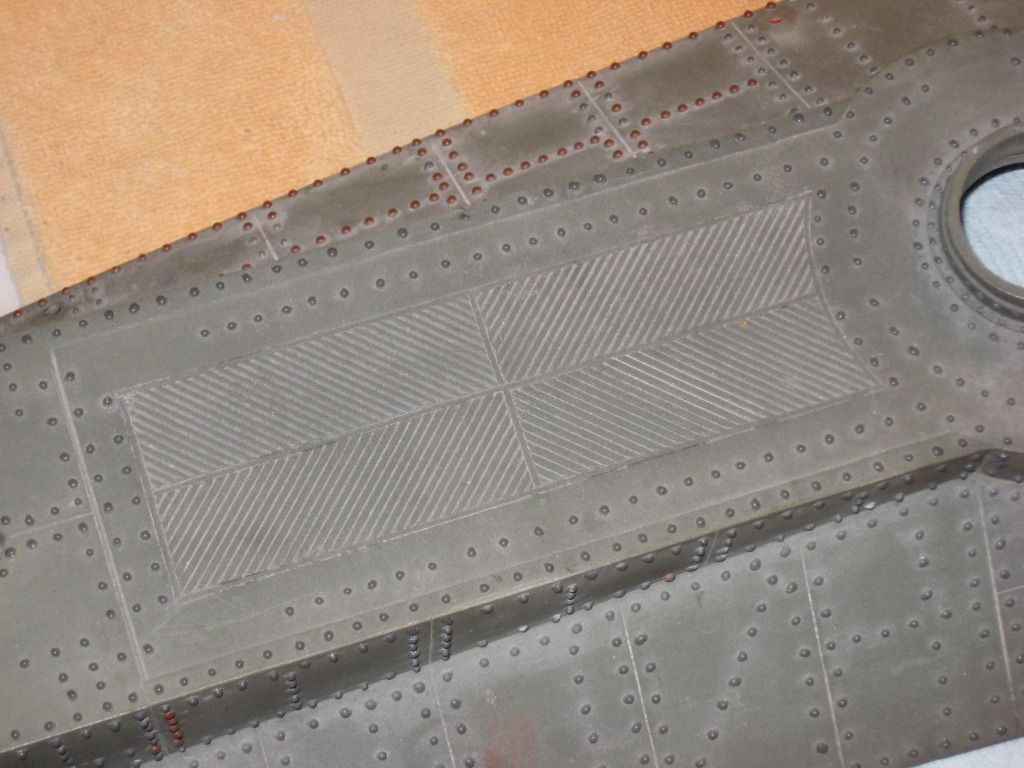
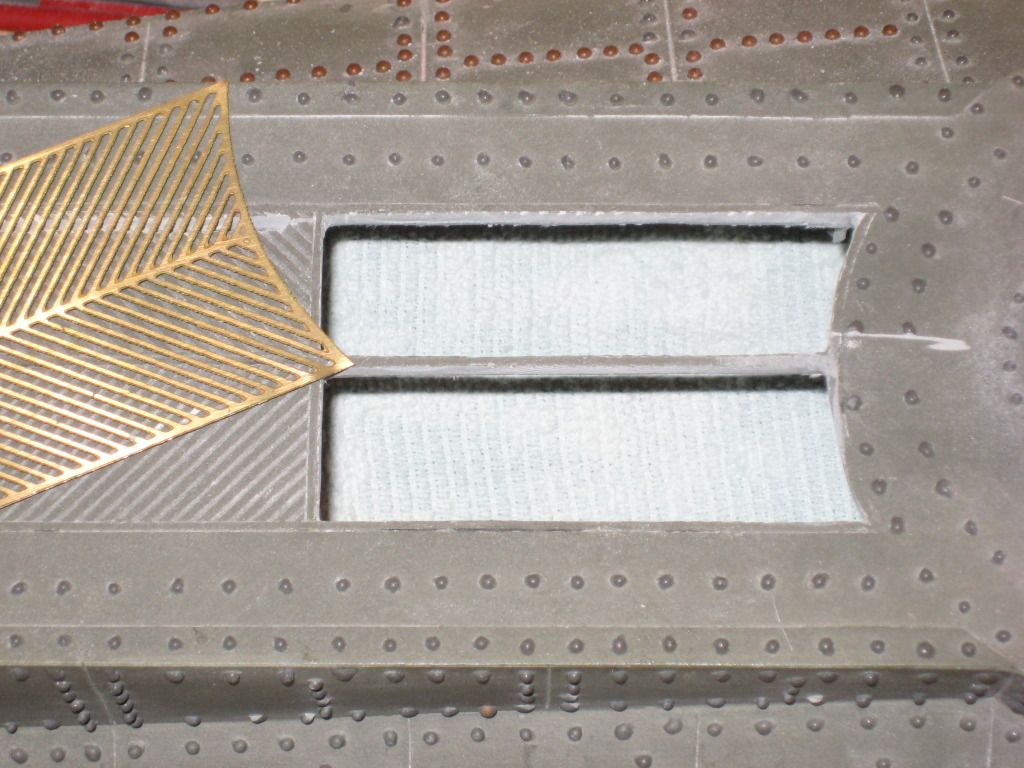
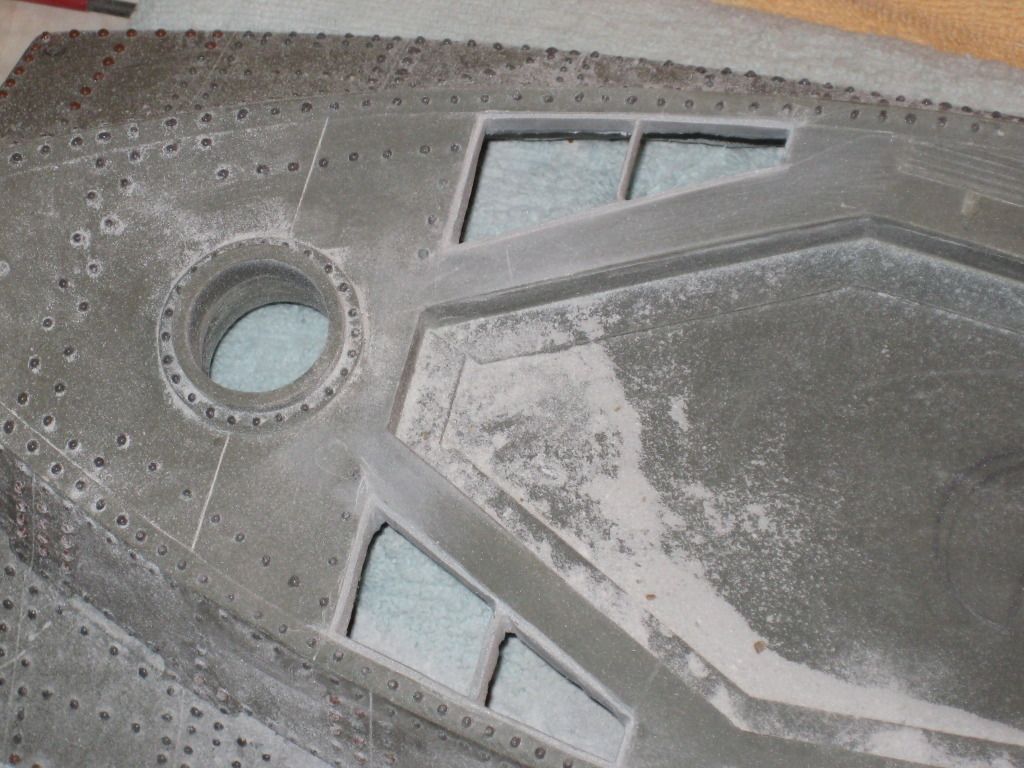
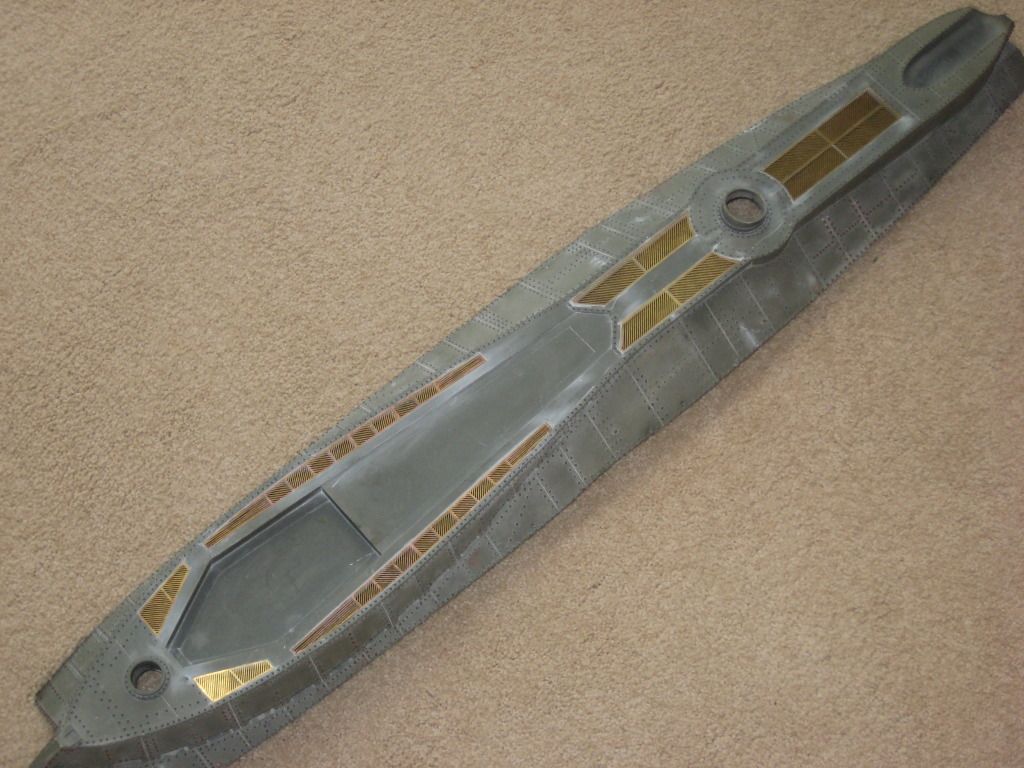
Here's a view of the grates I chose to start on as they appear molded-in to the aft end of the superstructure. I picked this grate as seemingly the easiest to do, so a good one to start on to determine exact methodology and to get in some valuable practice before moving on to the dicier ones.
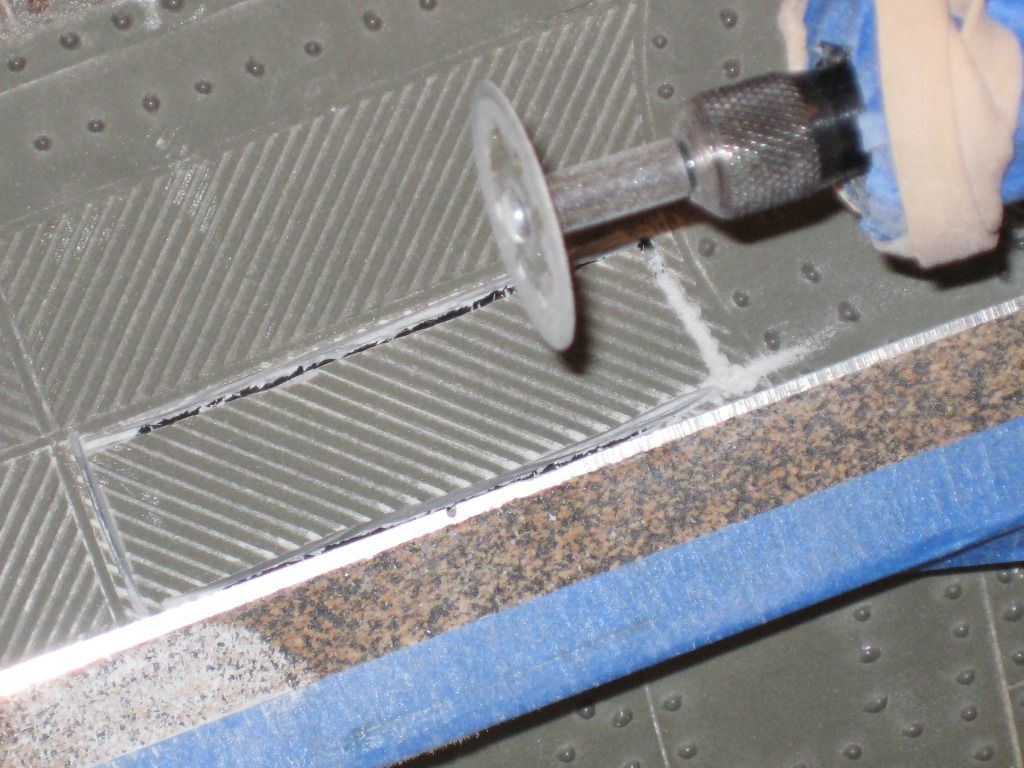
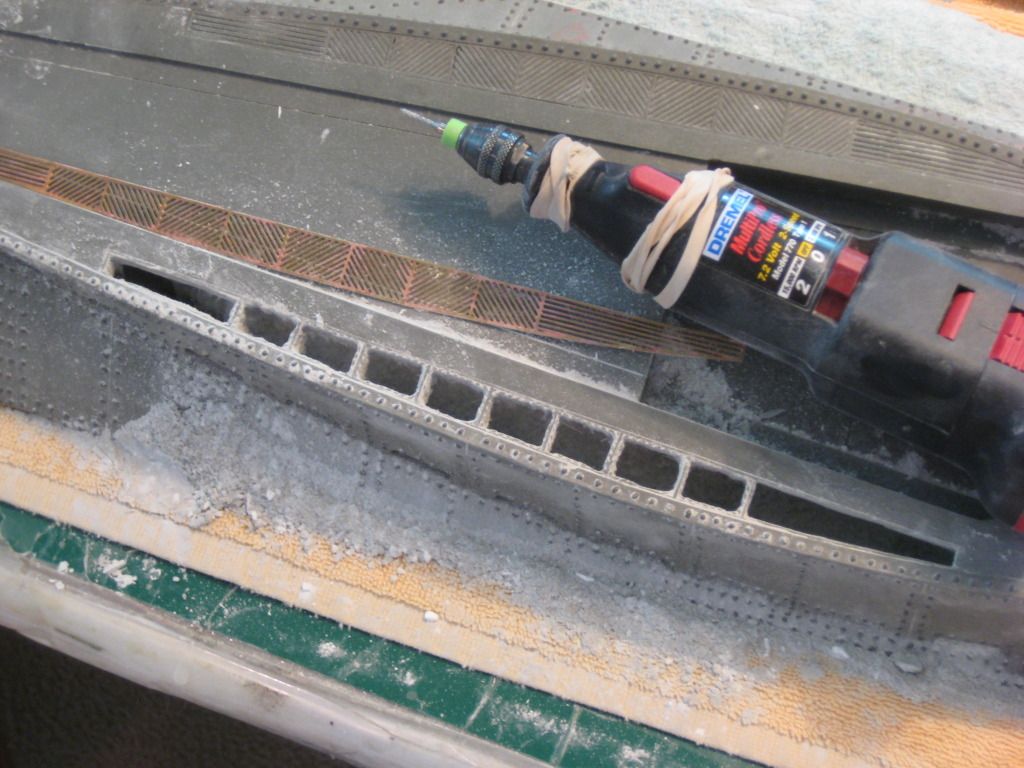
Initial straight cuts were made against a metal straight edge using a thin Dremel diamond cutting wheel. Small or curved cuts were made using the old standard method of drilling a daisy-chain of small holes linked together to form a cut (not shown).
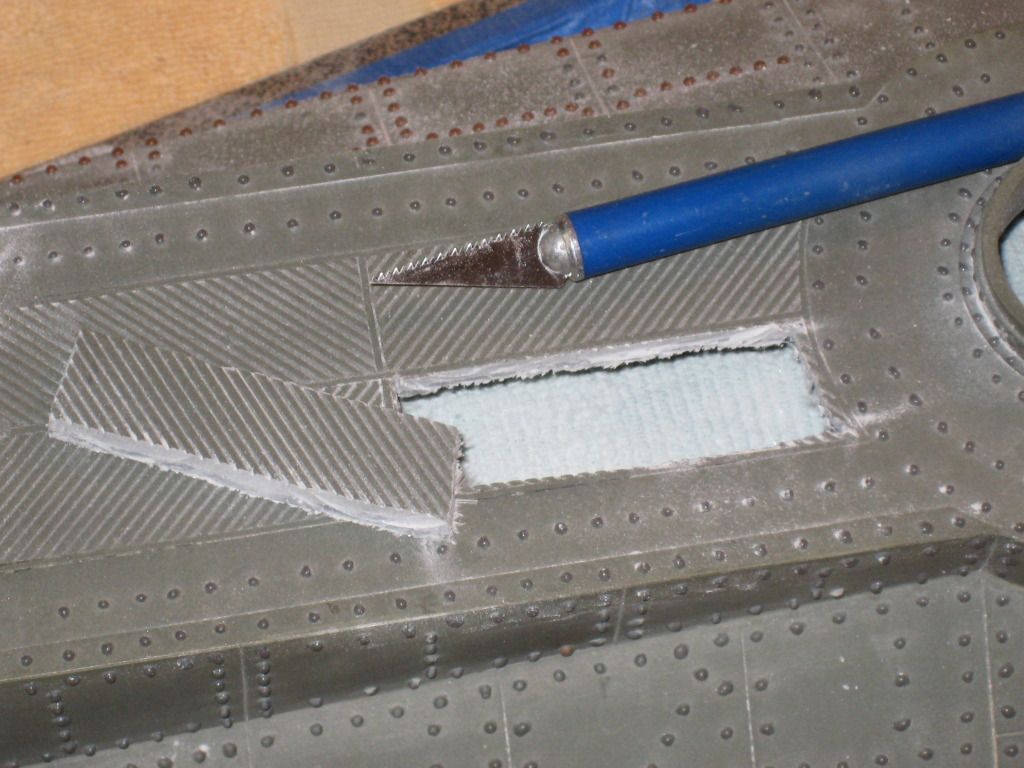
Final piece cutouts were achieved using an X-Acto knife with sawtooth blade.

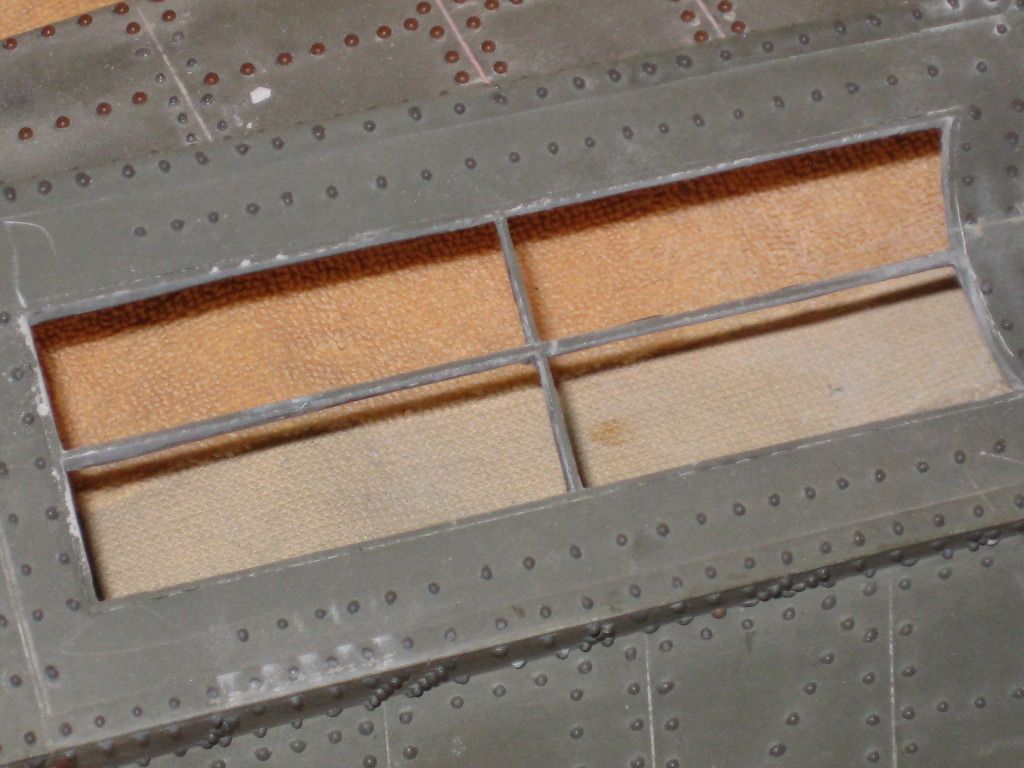
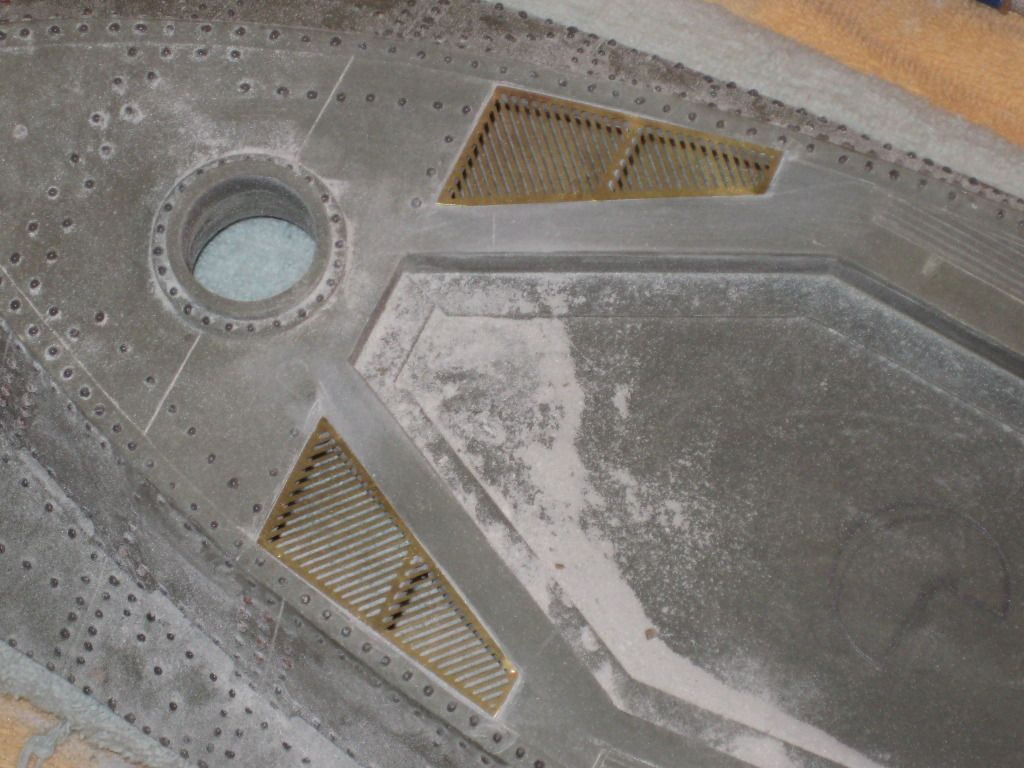
Cutting continues. Edge filing and cleanup starts.
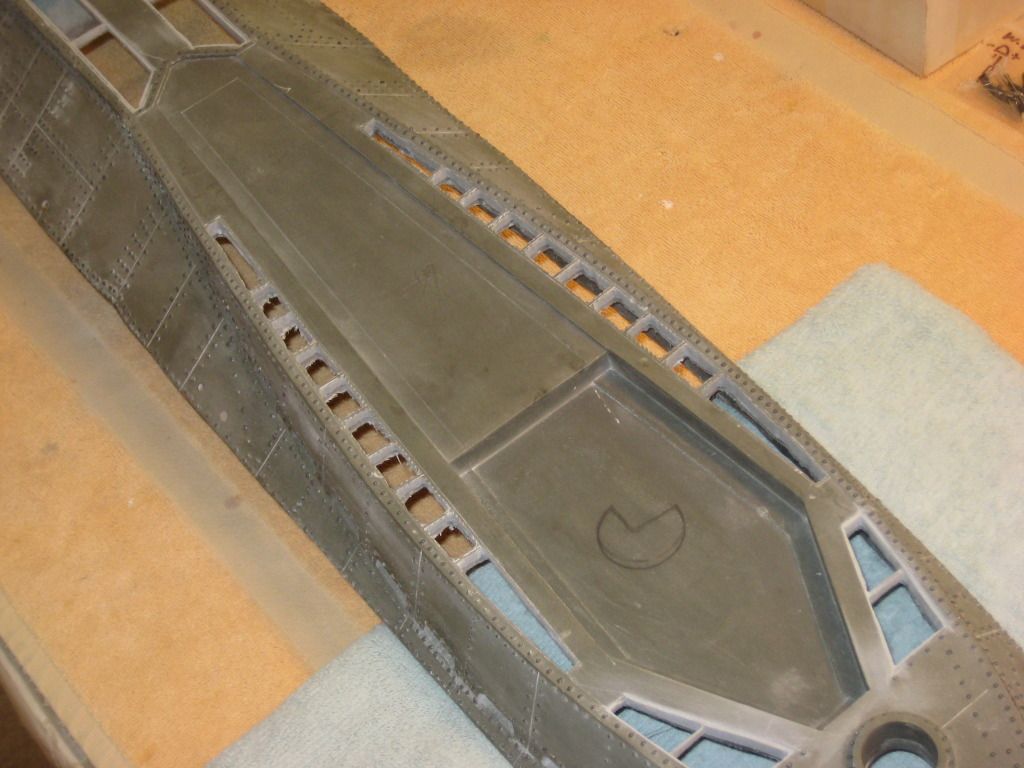
Cutouts complete.
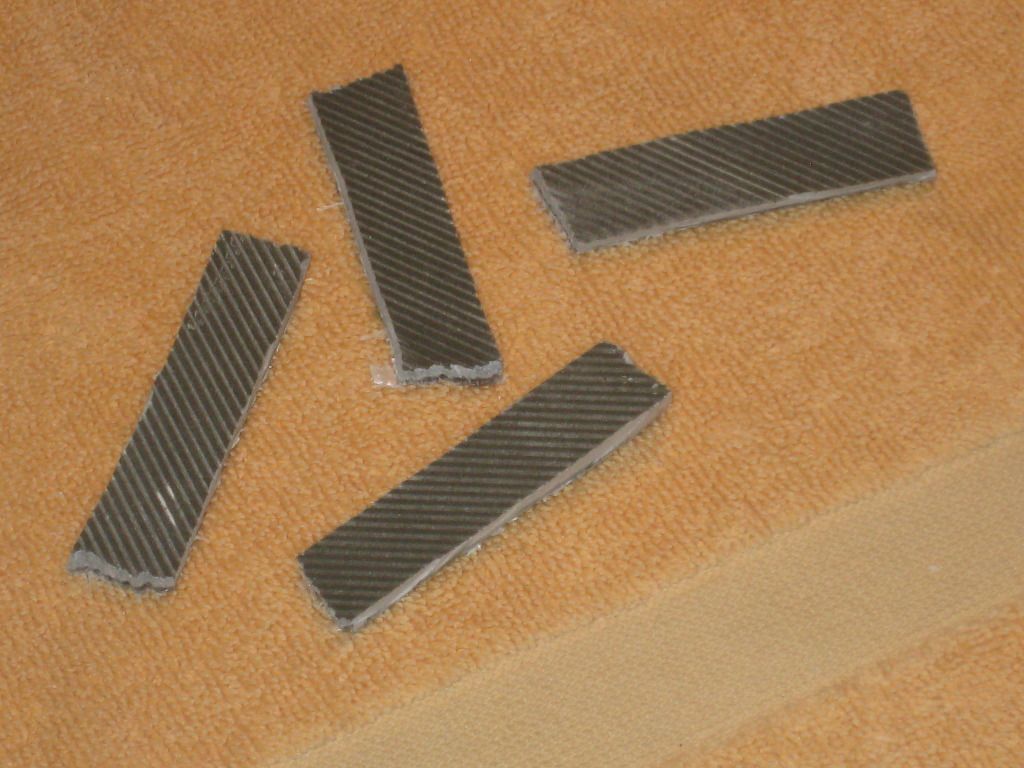
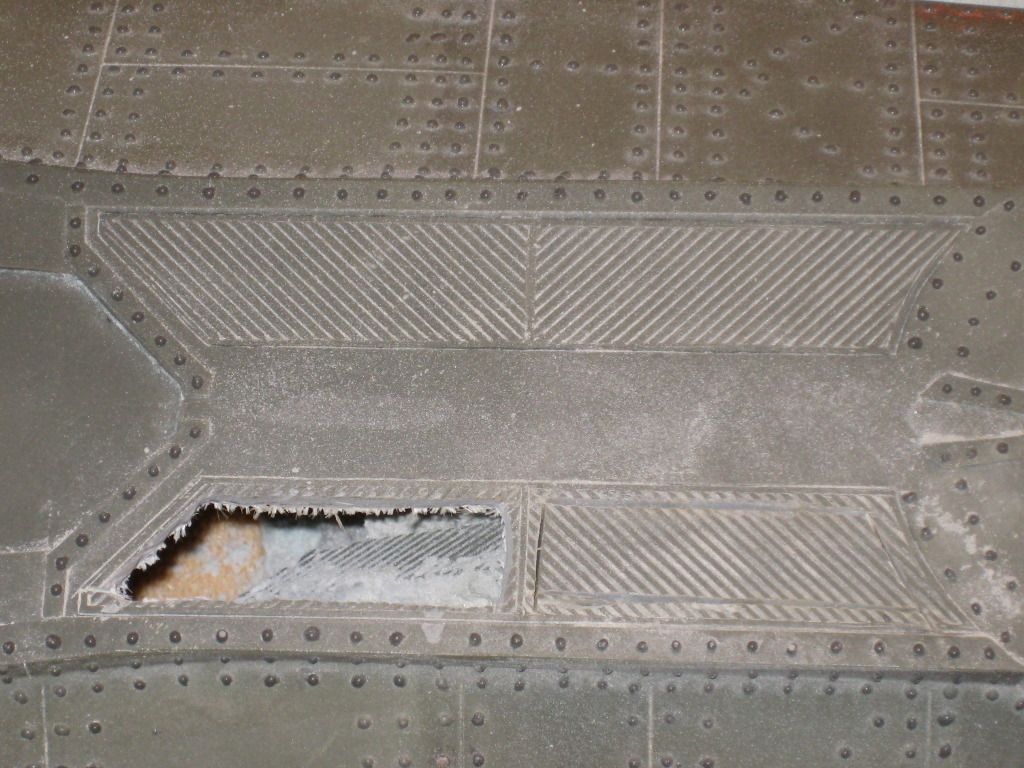
The thin frames left to support the PE pieces are undeniably thin and weak in this particular section of grating. So I flipped the superstructure over and CA'd lengths of carbon fiber underneath them to add reinforcement. Much stronger now!
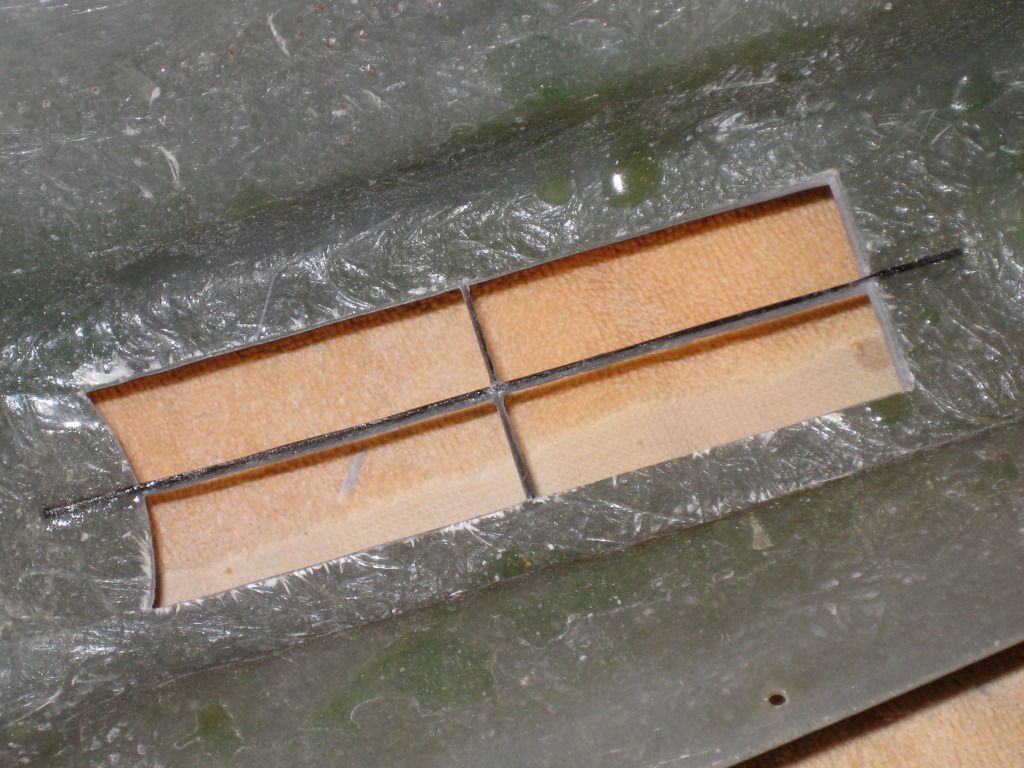
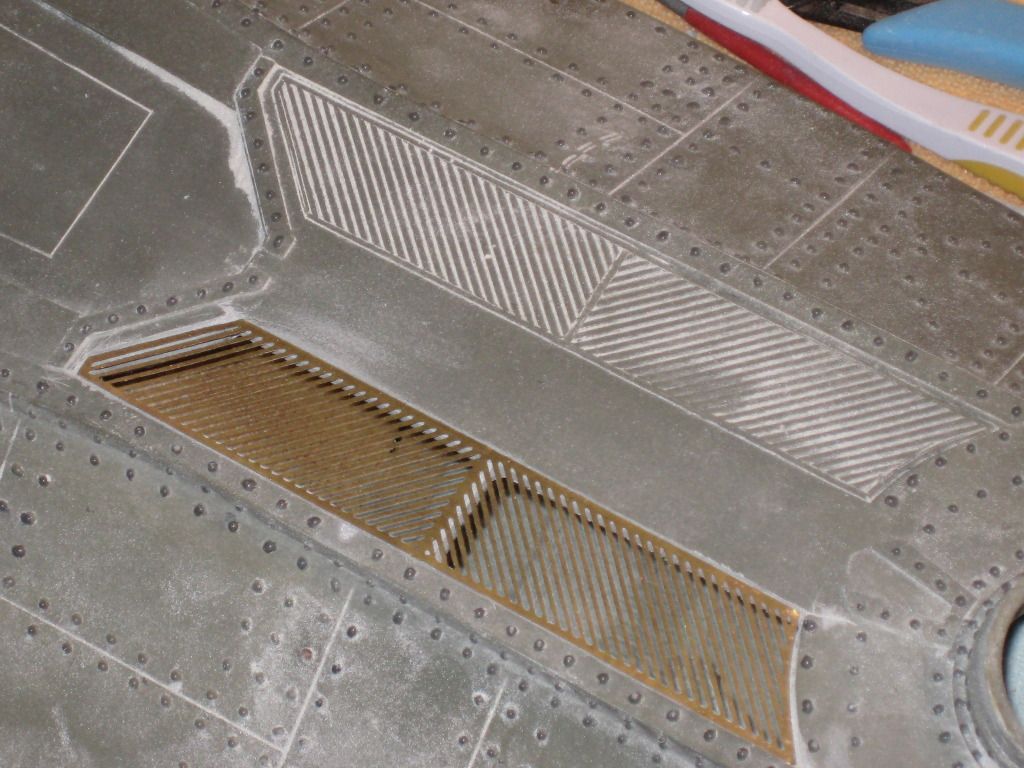
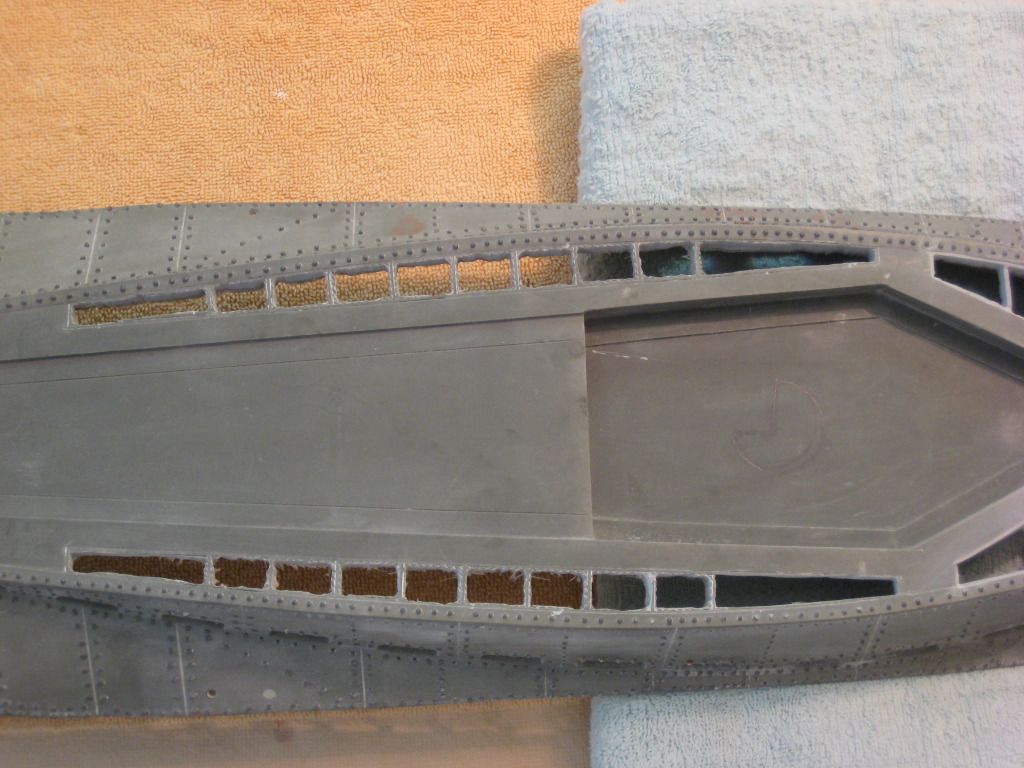
Lips around the edge of the grating now had to be carefully filed out to allow the PE piece to fit flush to the deck. This shot shows the area after this delicate work has been achieved. Yes, I managed to unavoidably add more scrapes and gouges to the deck during this process. Bad ones were puttied over, minor ones were just sanded down. Some others were simply ignored. Remember, this is a boat which makes its living bashing into things. Worn areas, scrapes and gouges will only add authenticity and "natural weathering" to this build. (How fortunate for me that the subject build is thus so forgiving!) Note]http://i1143.photobucket.com/albums/n637/jefftytoo/IMG_6672.jpg[/img]
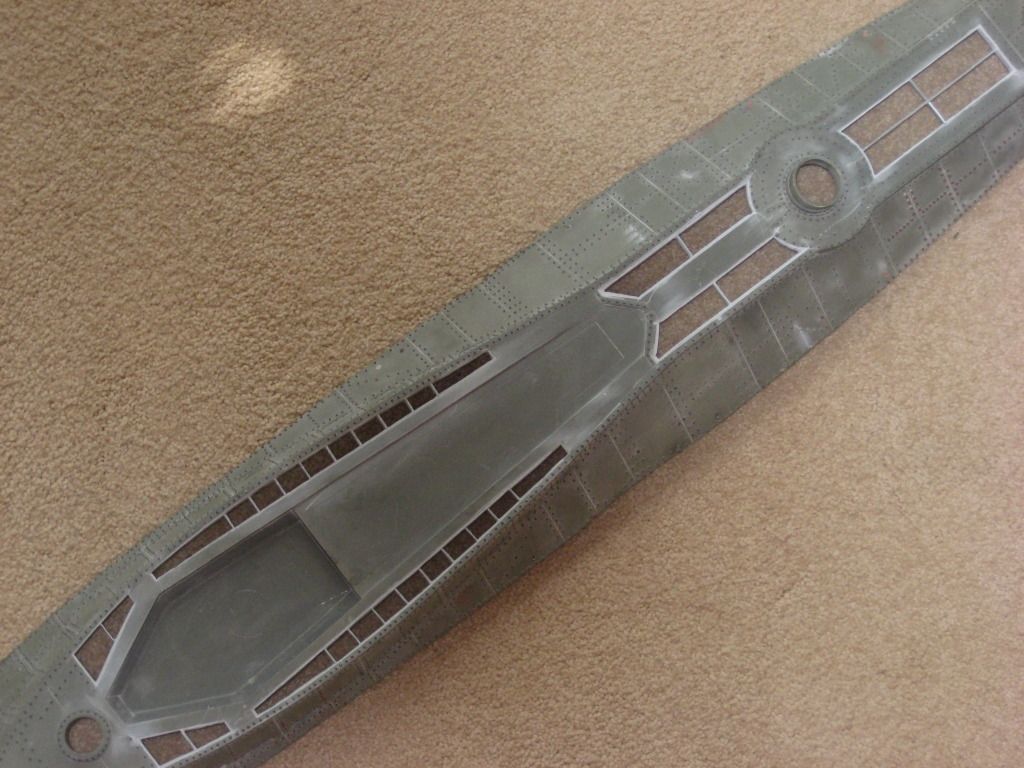
The big PE grating piece now laid into place (glue-down will come later, after underside painting). My time and patience paid off]http://i1143.photobucket.com/albums/n637/jefftytoo/IMG_6675.jpg[/img]
Now just memories...
It was definitely a lot of work, but I'm proud of how this first grate turned out. Those of you who know this boat know that much of its superstructure is covered with gratings like this—I've a lonnng way to go. But as I said above, I've made a good start. Crozier, if a ham-fisted dope like me can do this, so can you on your boat!
Till next time,
JeffP
Some of you have kindly followed my long-aborning 66" Disney Nautilus build occasionally documented over in the "Jeff Porteous' Repair Yard" thread of the SubRon5 chapter forum. Now that SubRonLA is official and has its own presence here, I thought I'd move the continuation of that thread over to this locale.
To refresh]supplied[/i] with the current version of the CR Nautilus kit), and 6) Lars Liljeblad, a very talented local static modeler who's just agreed to build and paint the movie actor figures for the wheelhouse plus, eventually, the interior wheelhouse build itself.
I've struggled to find time to work on Nautilus in recent months and weeks, but finally managed to get back to it in a big way today. May this be the start once again of regular and productive work on this long-delayed project.
The other day I stupidly—if accidentally—broke off the corner of the main top deck hull piece and couldn't find it anywhere. So the first order of business today was to fabricate and attach a new one using thick styrene, CA, and two-part epoxy putty. You'll see upon close inspection that rivet replacement took two attempts to achieve acceptable spacing.
Eliot Brown's wonderful custom photo-etch grates arrived a few weeks ago, and I've been trying begin their installation ever since. Today I indeed successfully got that start. A long way to go yet, but work achieved so far has decidedly built my confidence.
Here's a view of the grates I chose to start on as they appear molded-in to the aft end of the superstructure. I picked this grate as seemingly the easiest to do, so a good one to start on to determine exact methodology and to get in some valuable practice before moving on to the dicier ones.
Initial straight cuts were made against a metal straight edge using a thin Dremel diamond cutting wheel. Small or curved cuts were made using the old standard method of drilling a daisy-chain of small holes linked together to form a cut (not shown).
Final piece cutouts were achieved using an X-Acto knife with sawtooth blade.
Cutting continues. Edge filing and cleanup starts.
Cutouts complete.
The thin frames left to support the PE pieces are undeniably thin and weak in this particular section of grating. So I flipped the superstructure over and CA'd lengths of carbon fiber underneath them to add reinforcement. Much stronger now!
Lips around the edge of the grating now had to be carefully filed out to allow the PE piece to fit flush to the deck. This shot shows the area after this delicate work has been achieved. Yes, I managed to unavoidably add more scrapes and gouges to the deck during this process. Bad ones were puttied over, minor ones were just sanded down. Some others were simply ignored. Remember, this is a boat which makes its living bashing into things. Worn areas, scrapes and gouges will only add authenticity and "natural weathering" to this build. (How fortunate for me that the subject build is thus so forgiving!) Note]http://i1143.photobucket.com/albums/n637/jefftytoo/IMG_6672.jpg[/img]
The big PE grating piece now laid into place (glue-down will come later, after underside painting). My time and patience paid off]http://i1143.photobucket.com/albums/n637/jefftytoo/IMG_6675.jpg[/img]
Now just memories...
It was definitely a lot of work, but I'm proud of how this first grate turned out. Those of you who know this boat know that much of its superstructure is covered with gratings like this—I've a lonnng way to go. But as I said above, I've made a good start. Crozier, if a ham-fisted dope like me can do this, so can you on your boat!
Till next time,
JeffP
Comment