Delta Submersible - restoring a wreck!

Collapse
X
 
  • Time
  • Show
Clear All
new posts
  • steveuk
    Junior Member
    • Oct 2005
    • 467

    #1

    Delta Submersible - restoring a wreck!

    When life hands you lemons...

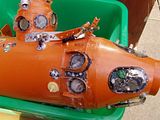
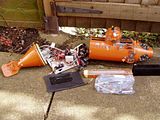
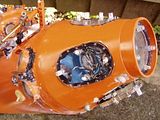
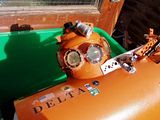
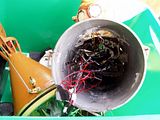
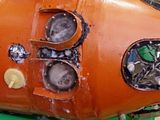
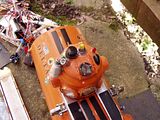
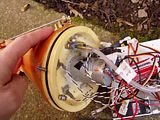
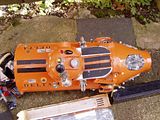
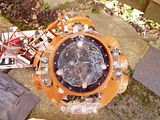
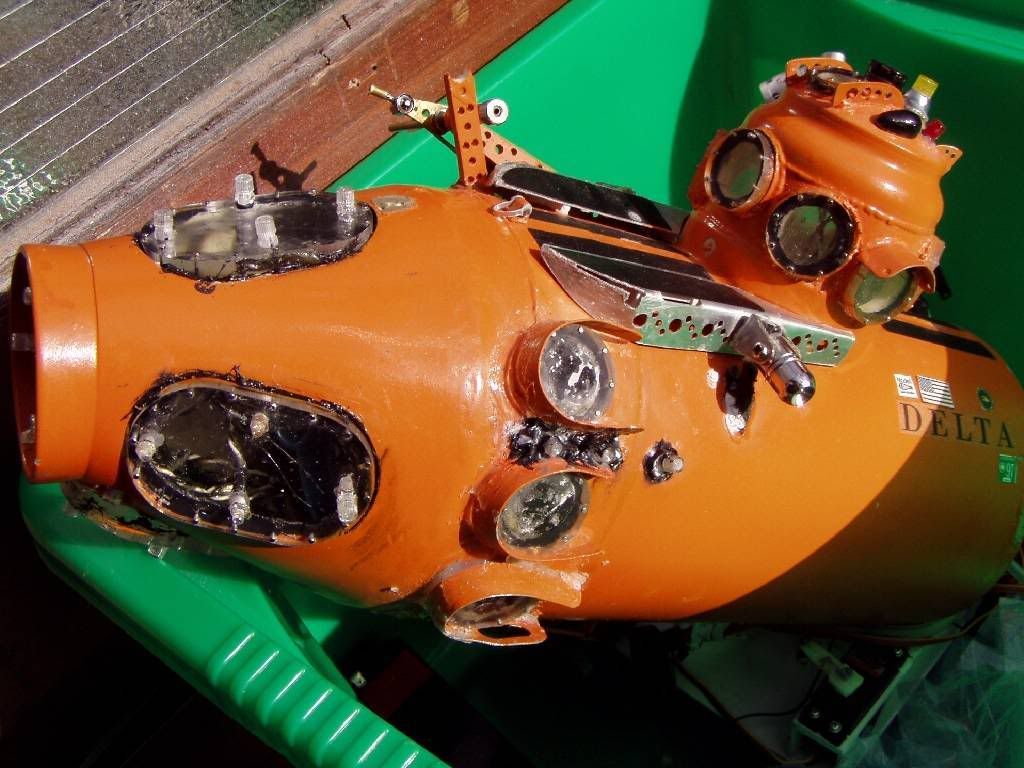
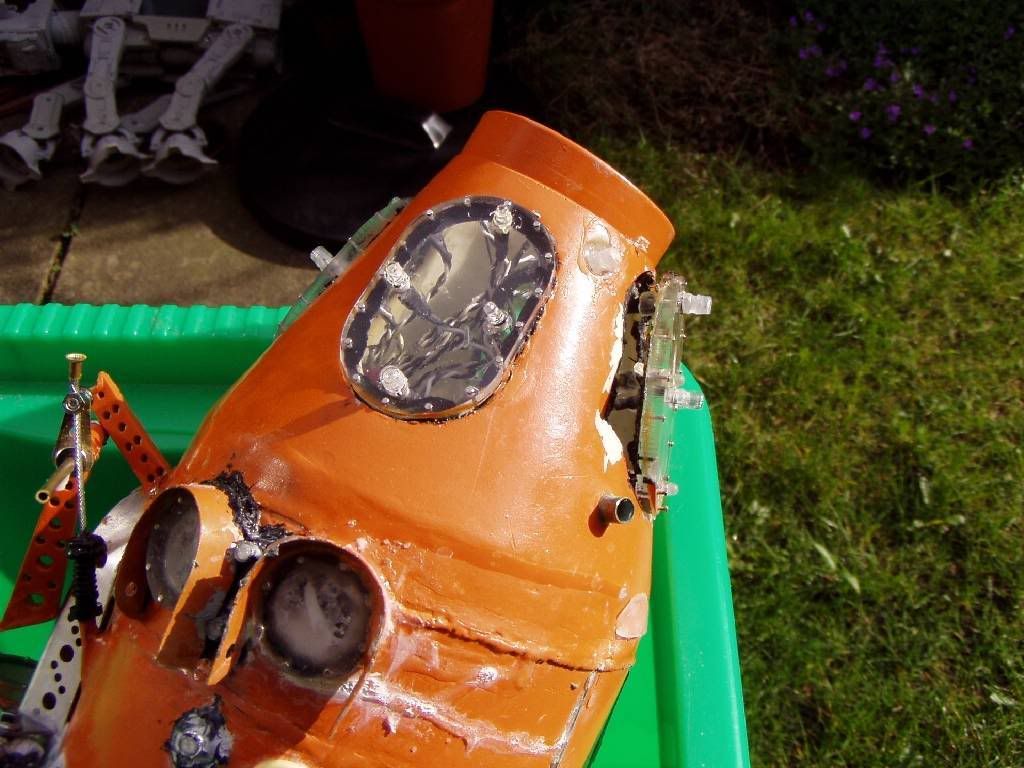
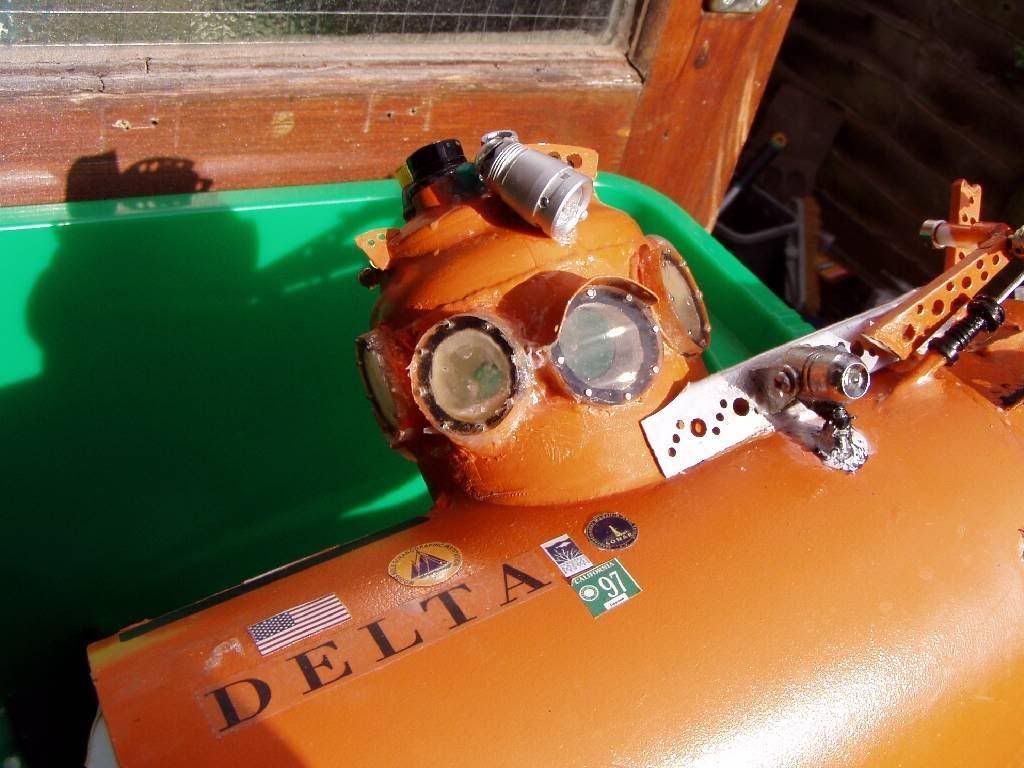
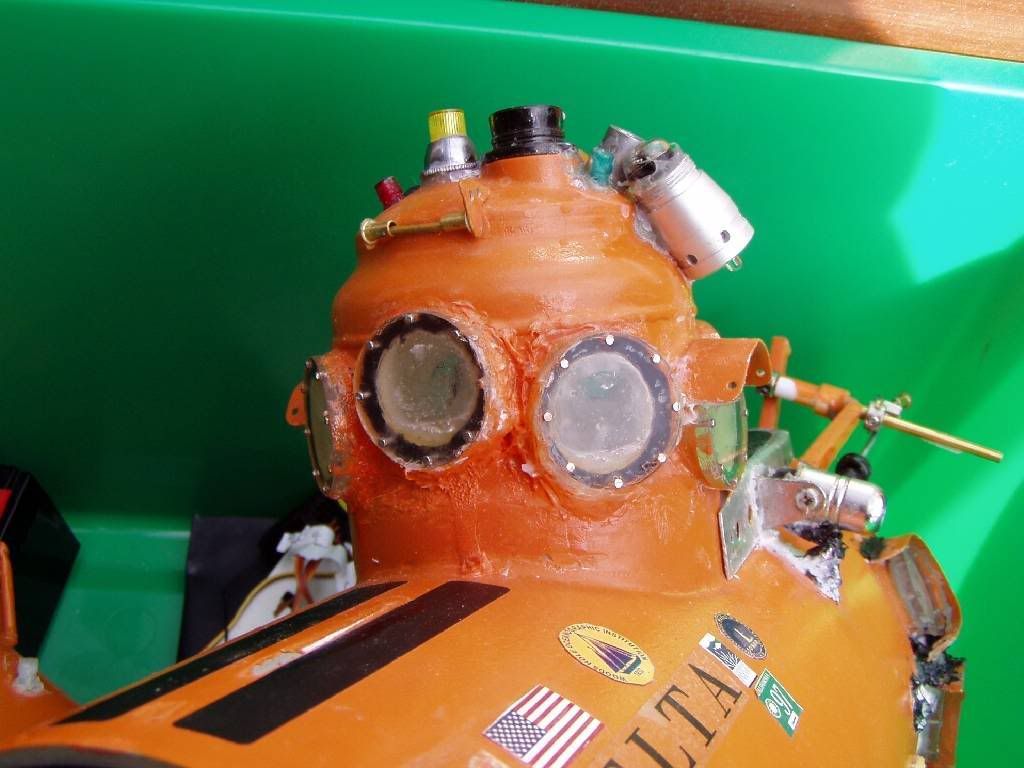
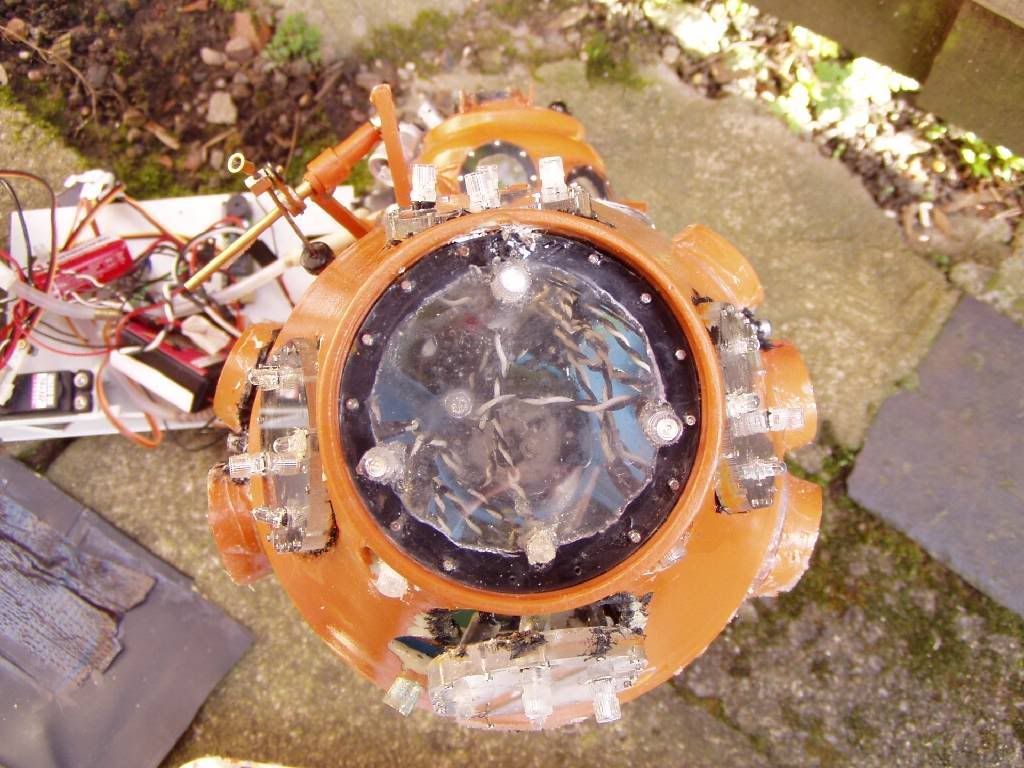
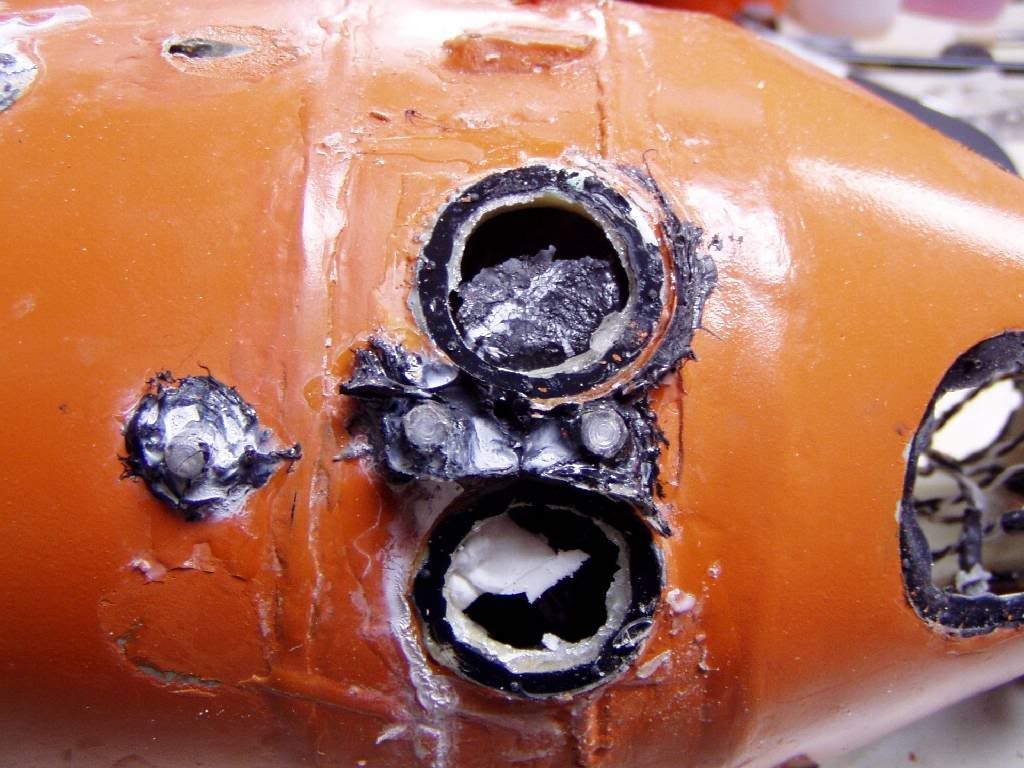
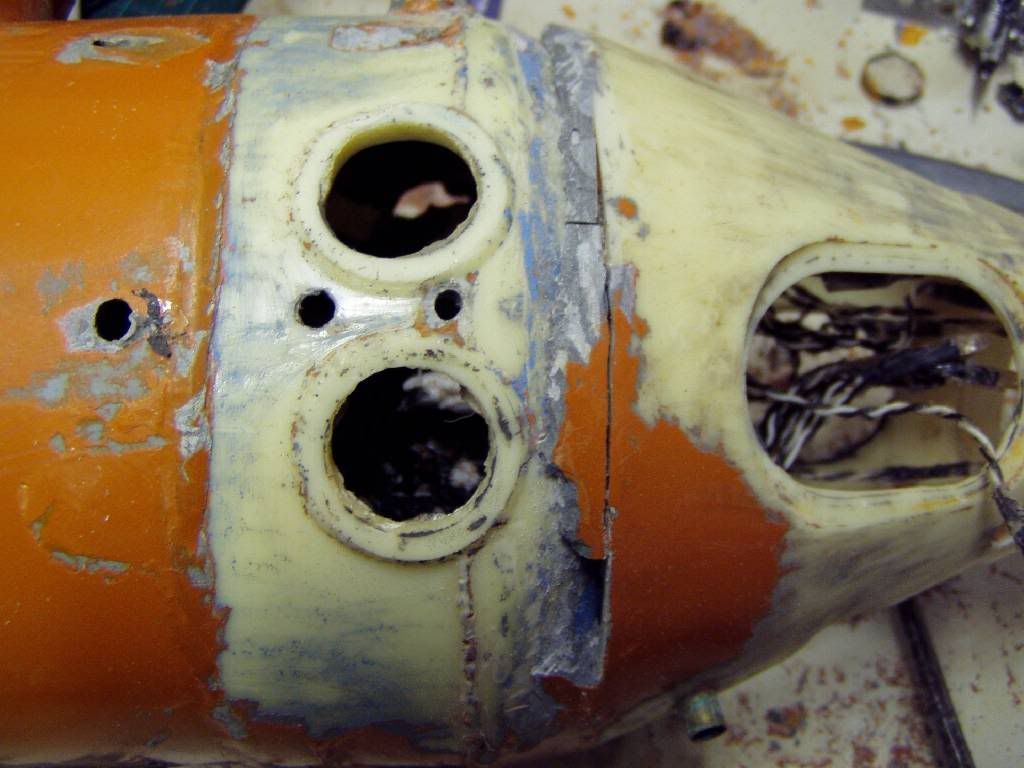
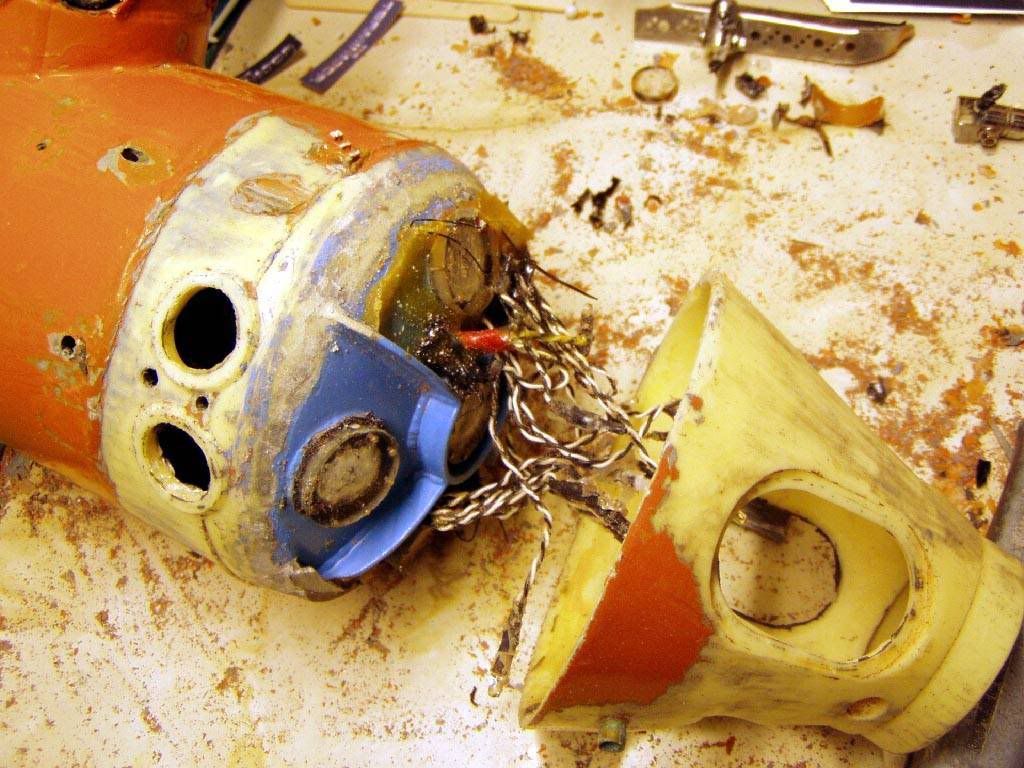
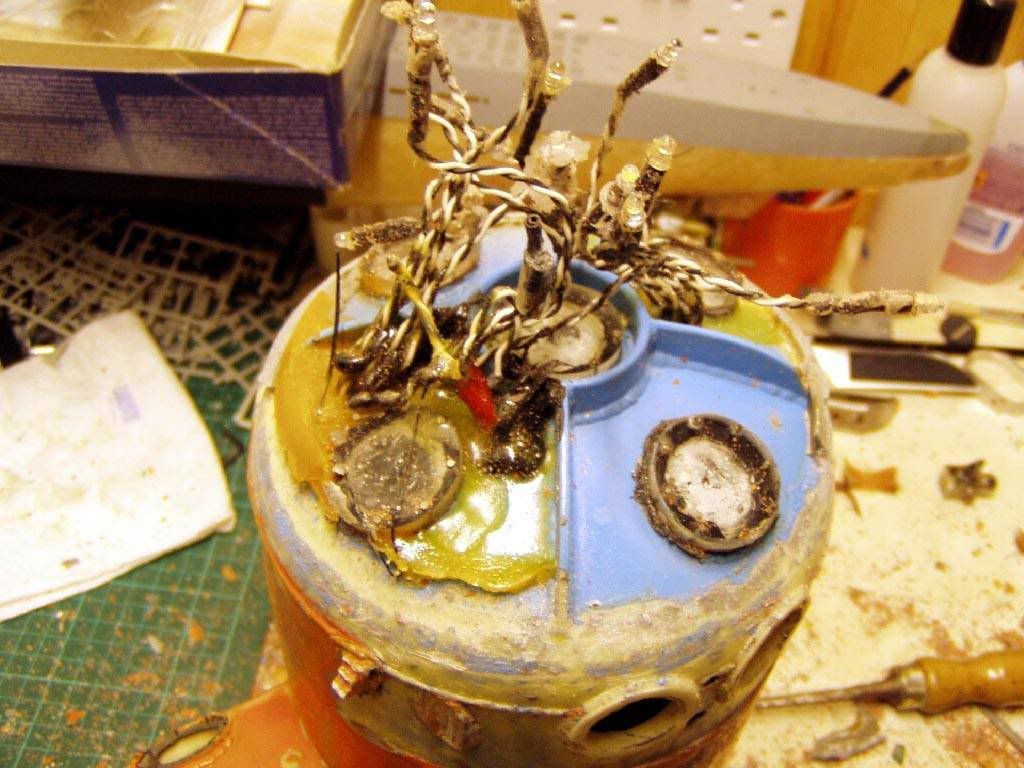
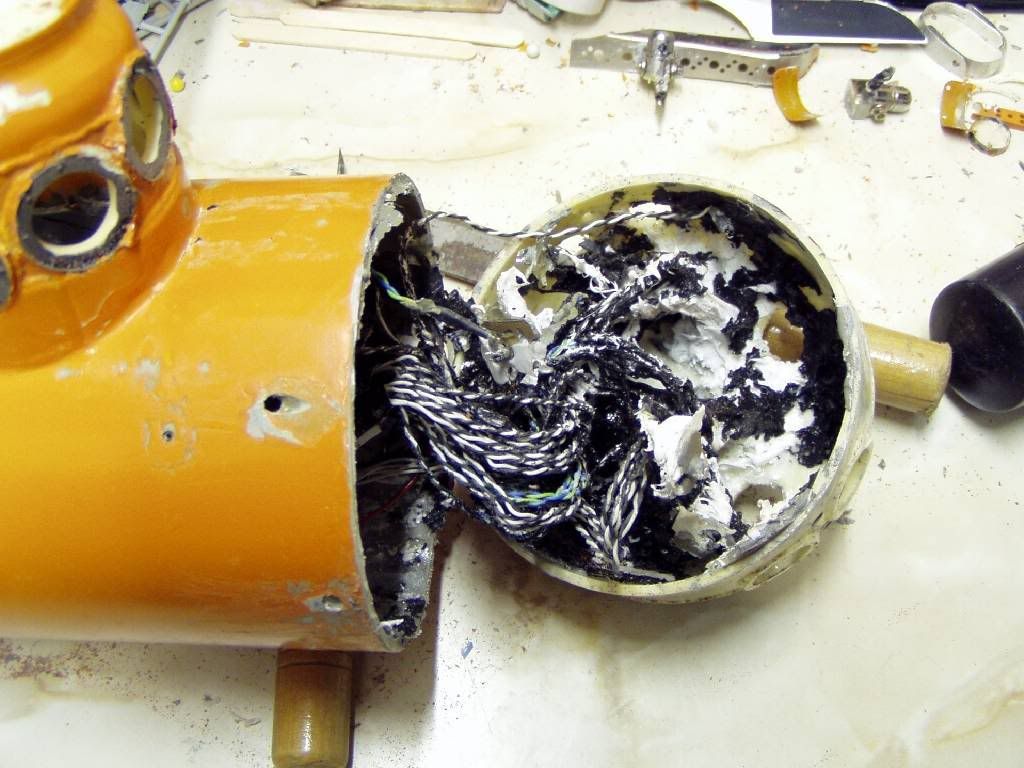
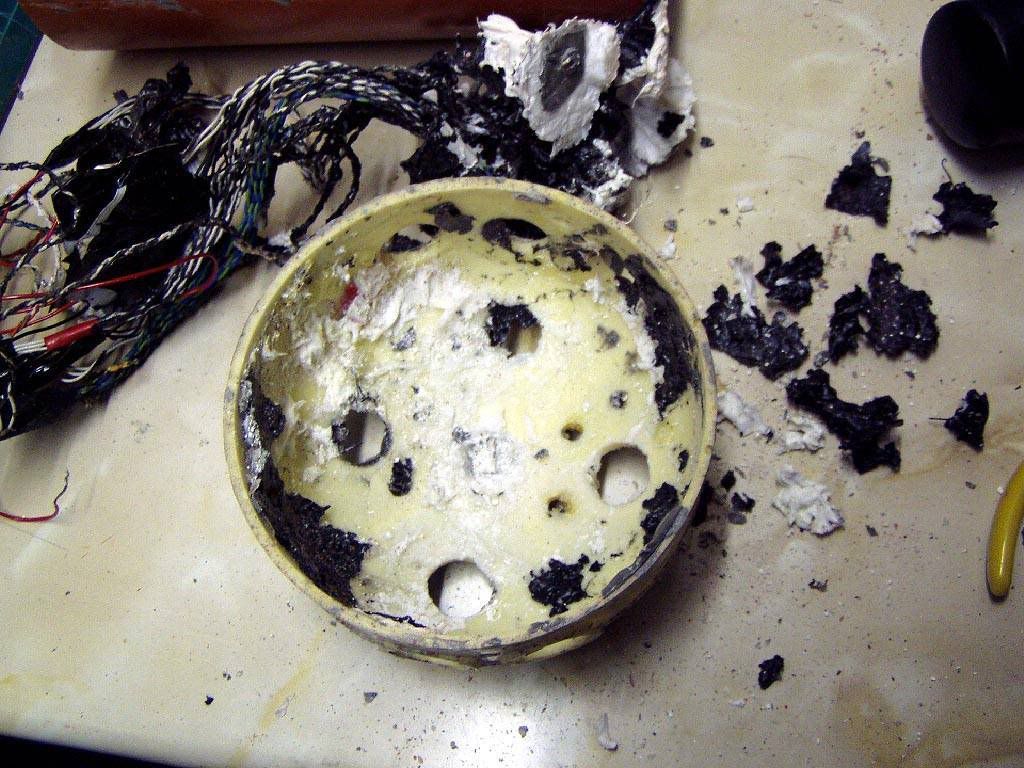
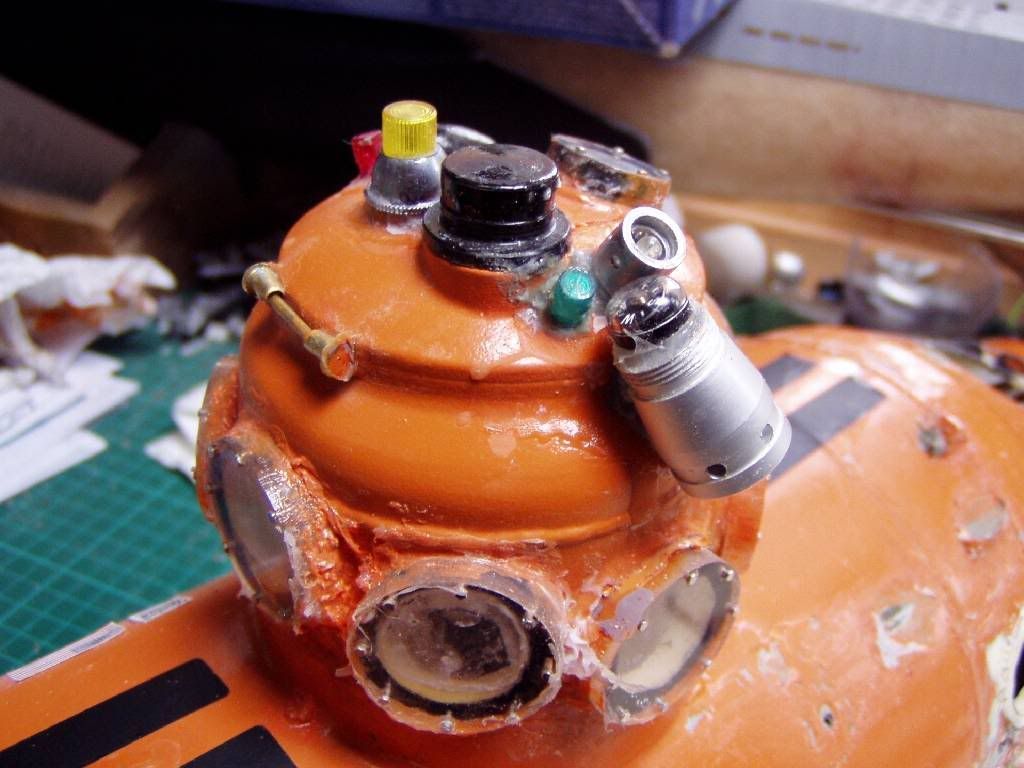
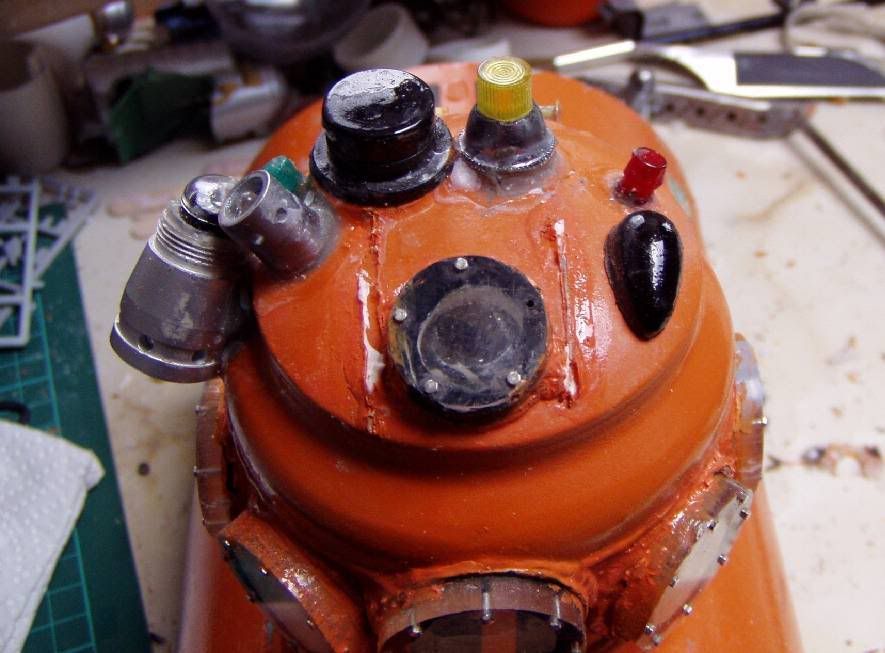
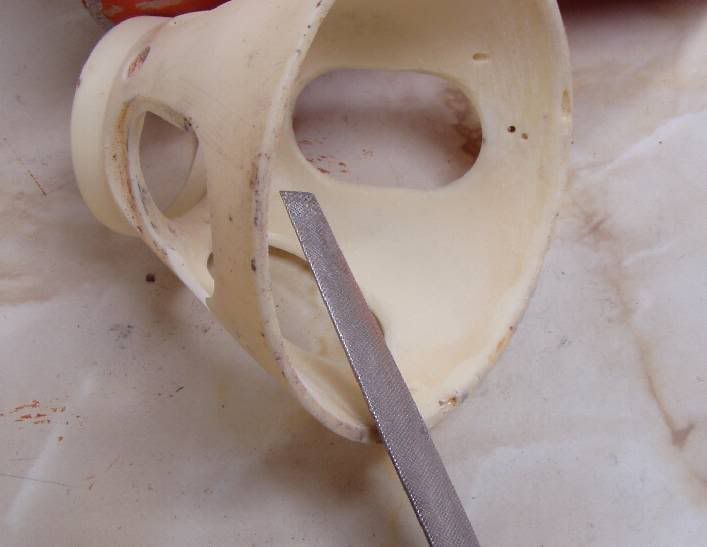
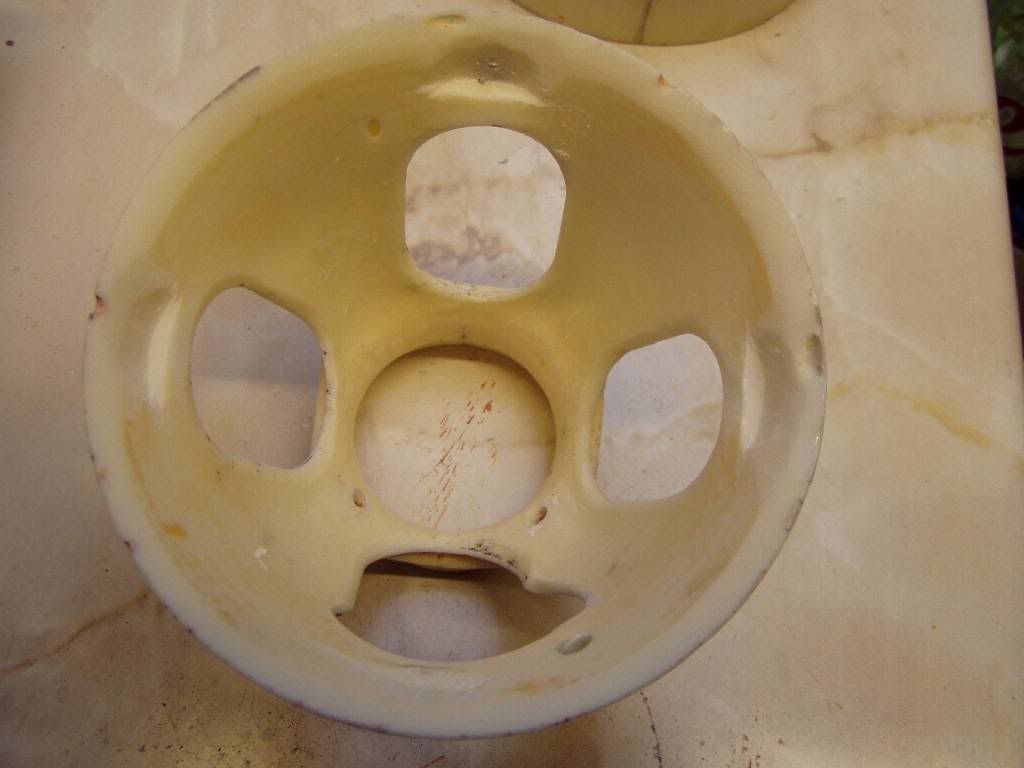
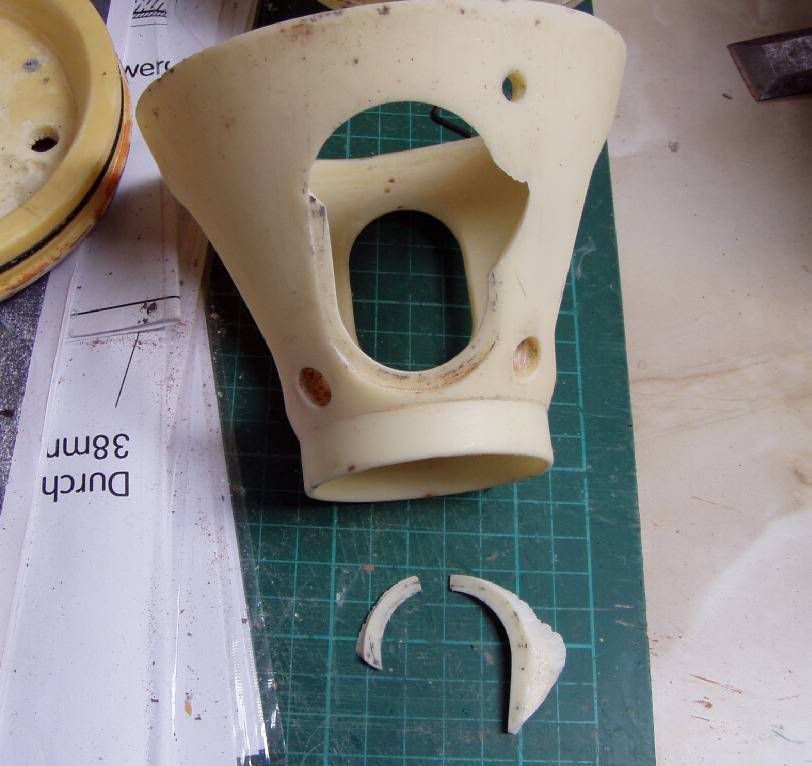
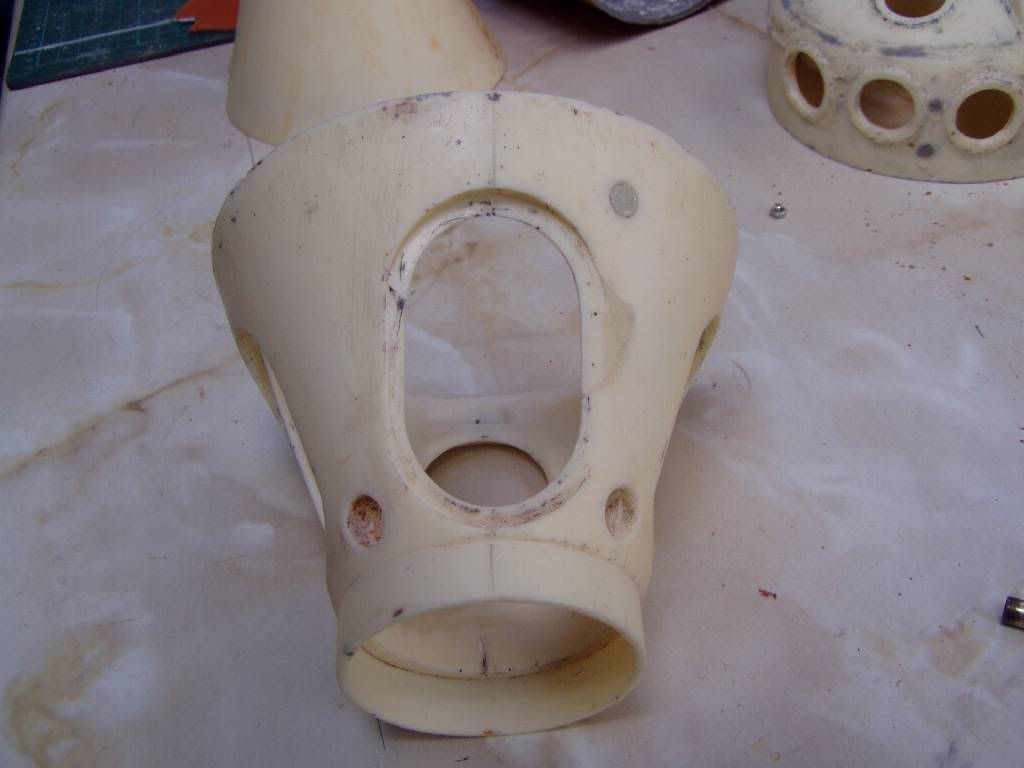
    I have just took on the job of fixing up this poor Delta submersible. It really came in a bad state. But I like a challenge, and I would hate to see this poor little sub get written off so prematurely. So here begins hopefully the story of an ugly duckling turning into a beautifull swan.

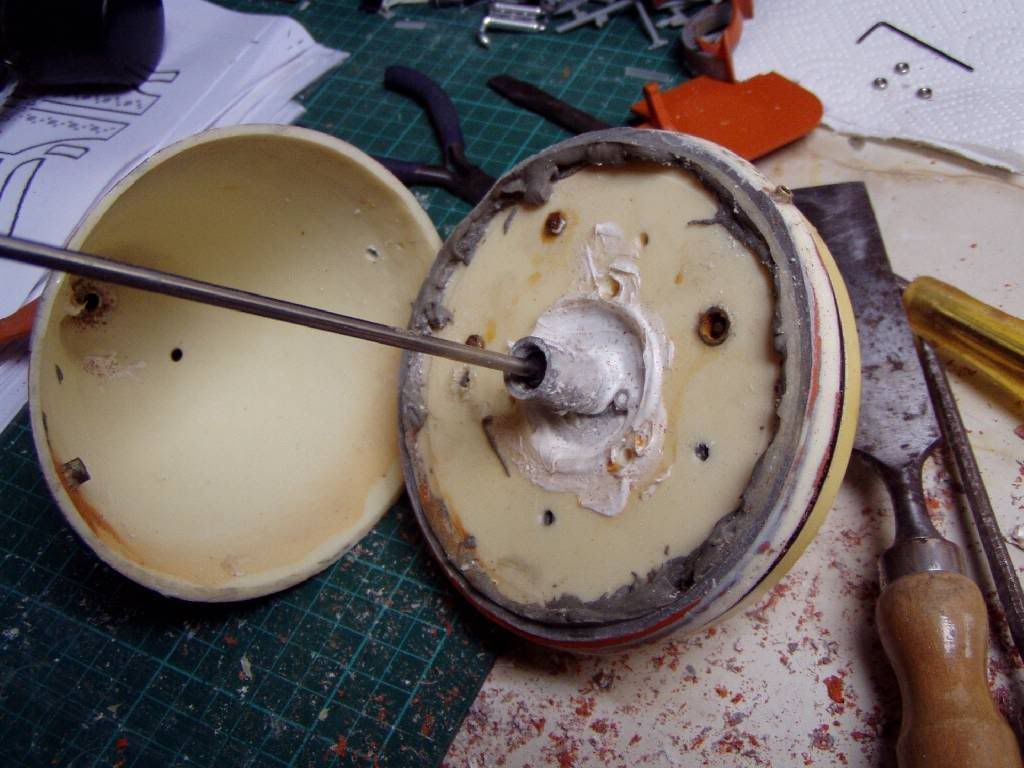
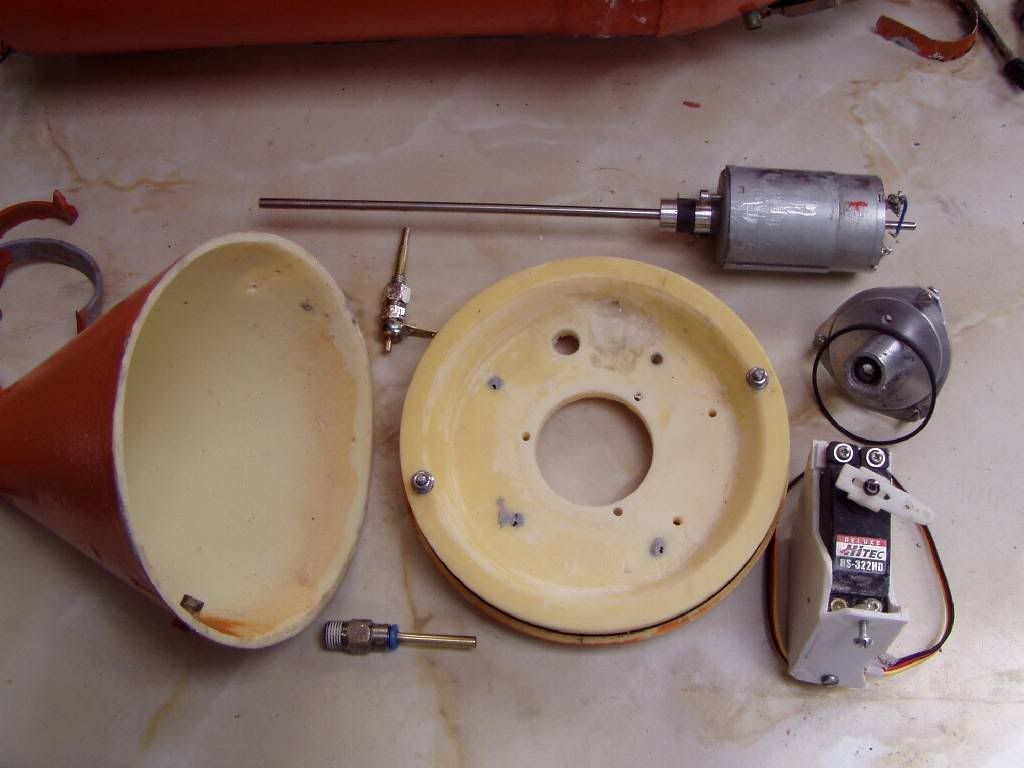
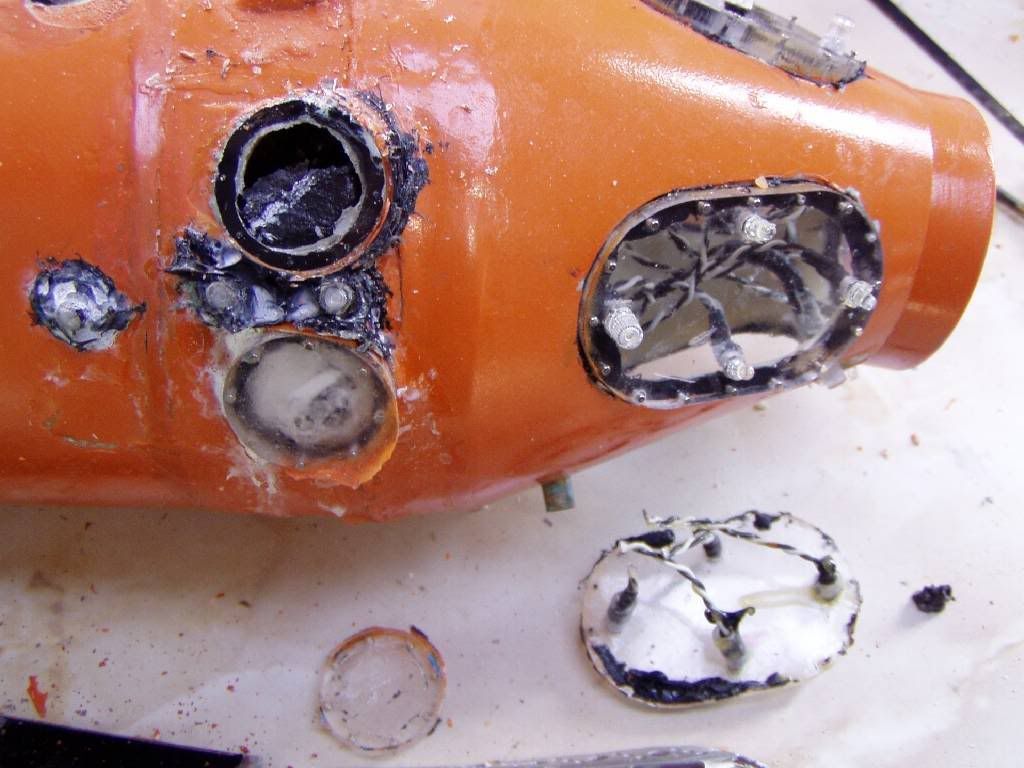
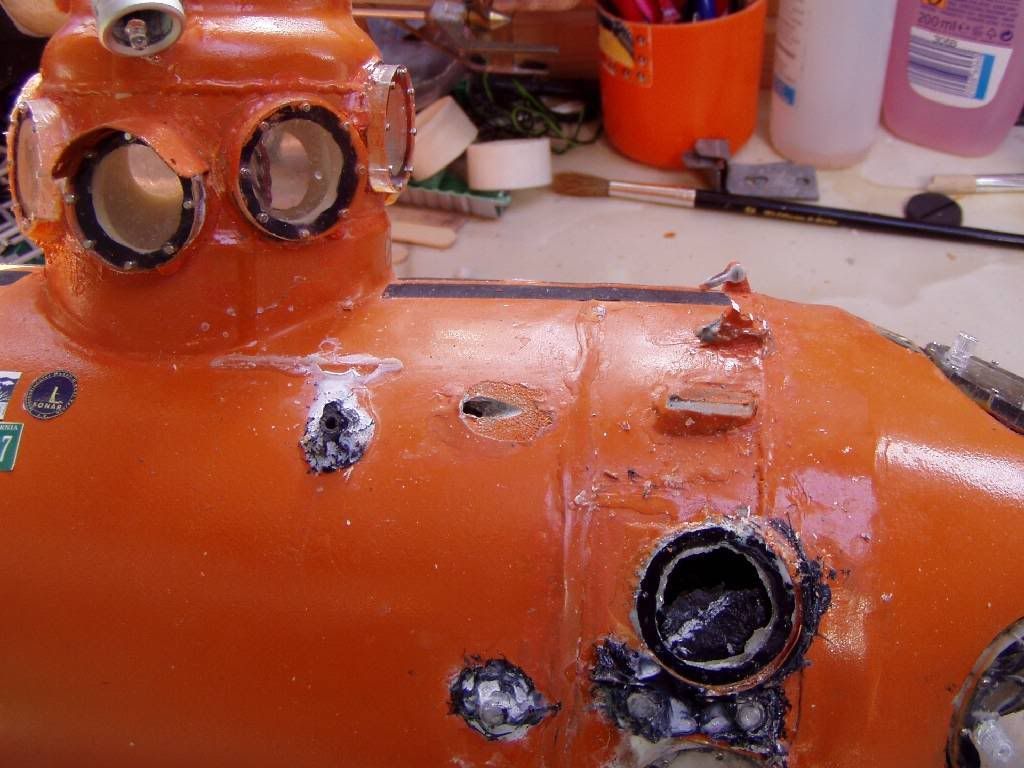
    Here are some pics I took as she came to me from the guy who has just bought her 'sold as seen' off e-bay.. (this is a commission job for him - I'm hoping to turn this job around in a couple of weeks.)

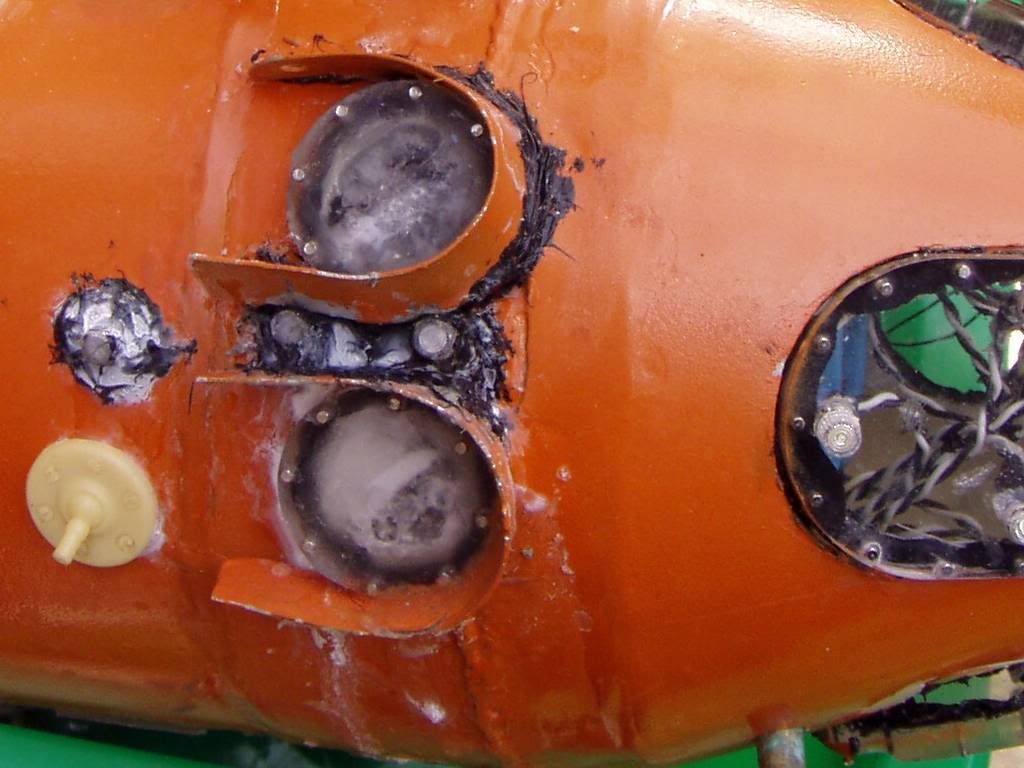
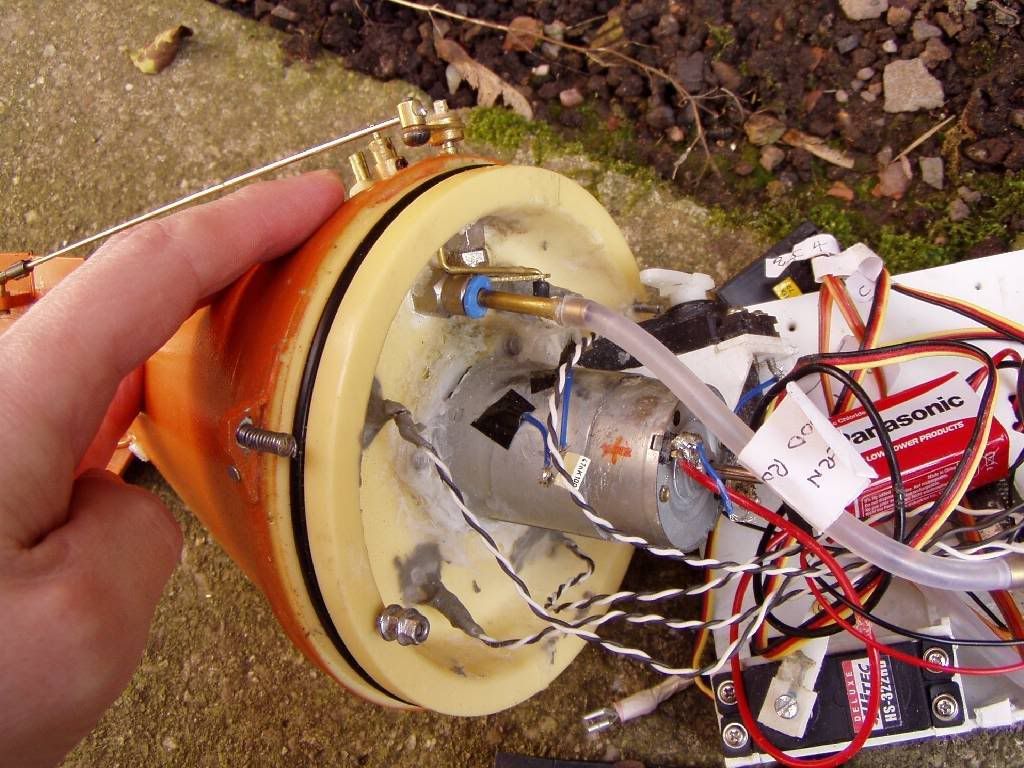
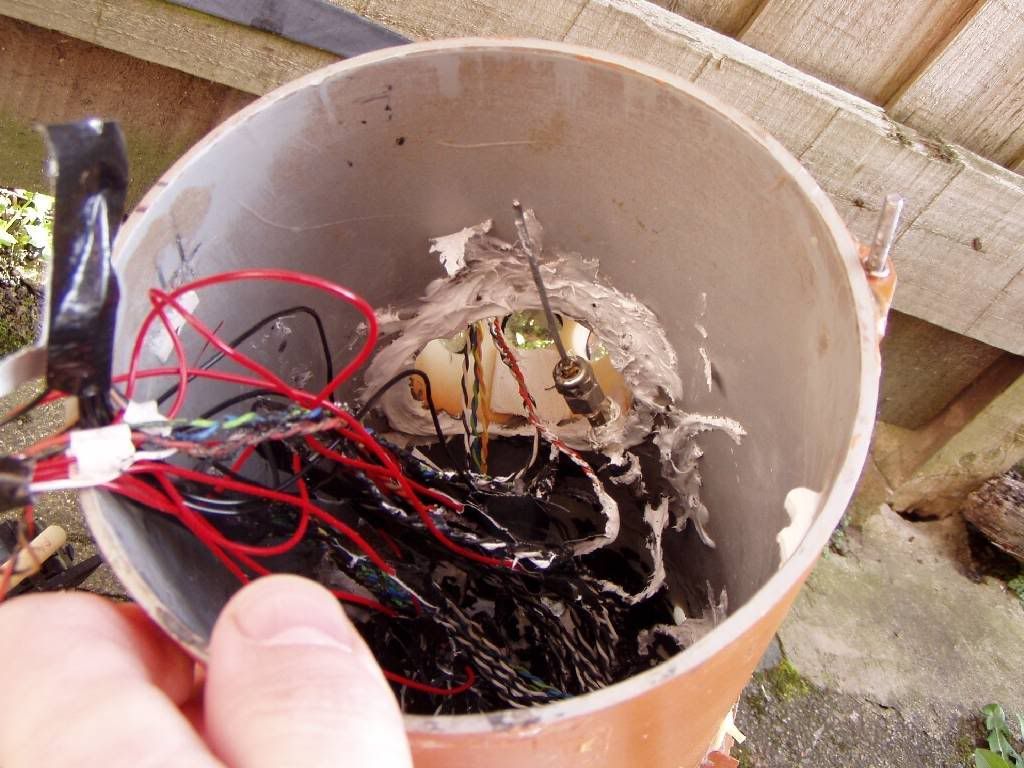
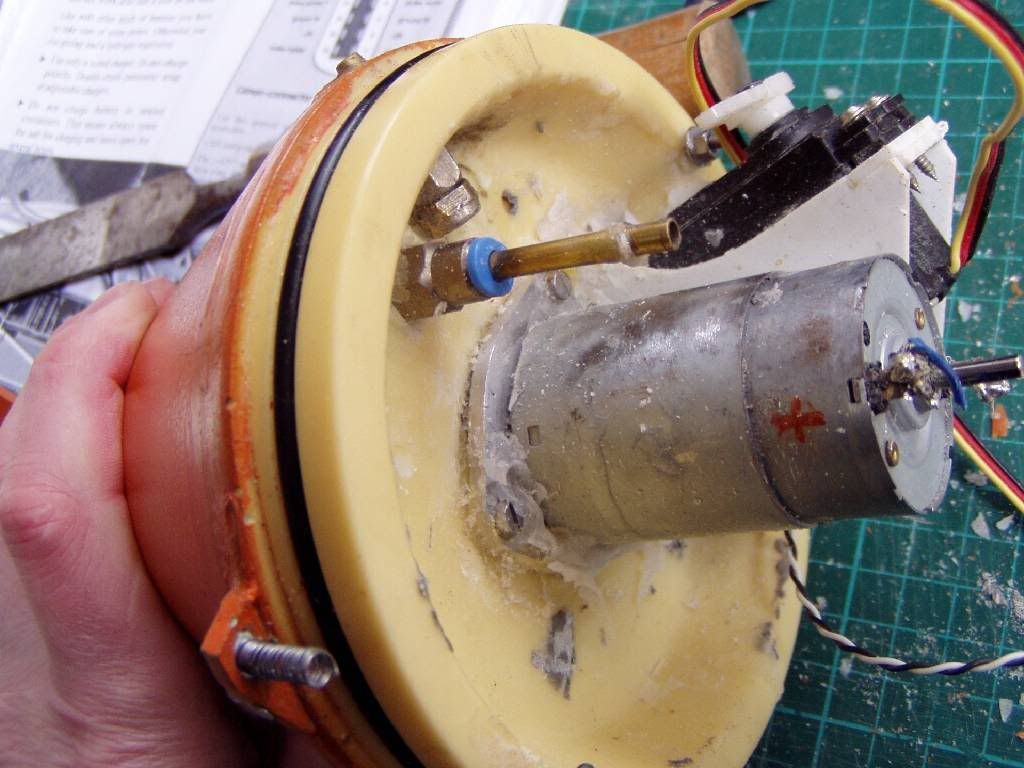
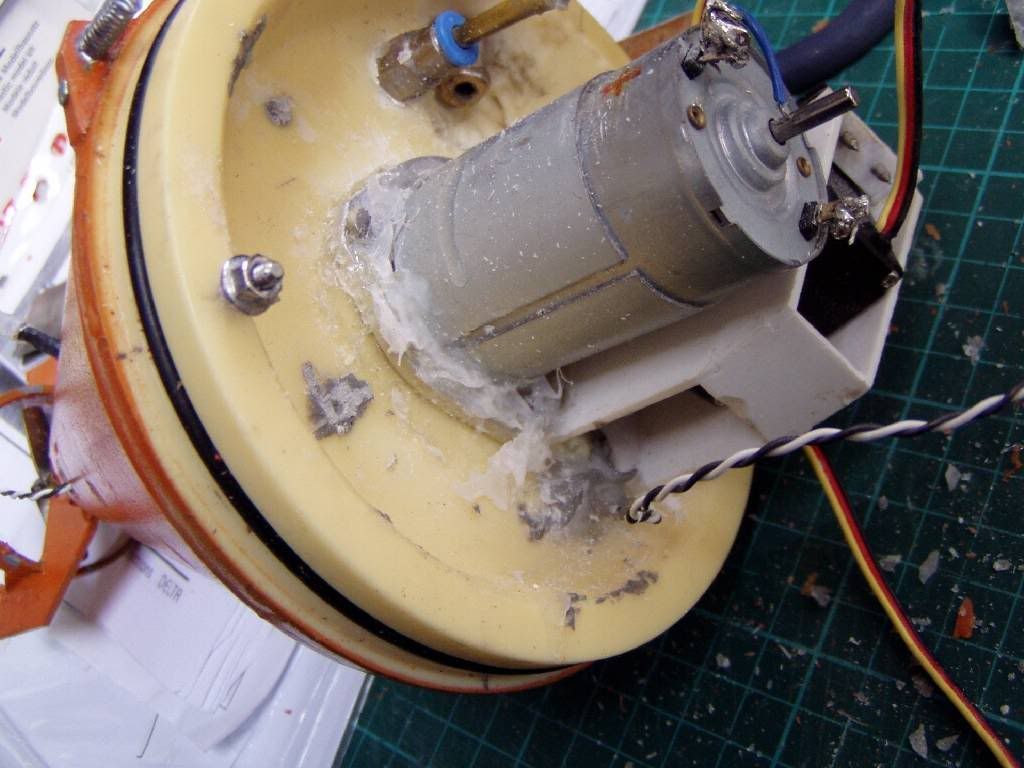
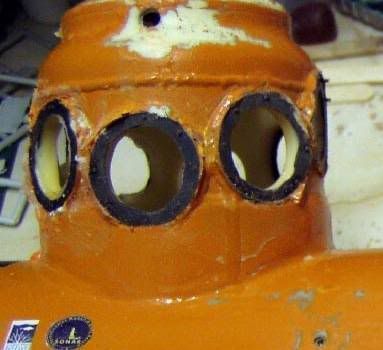
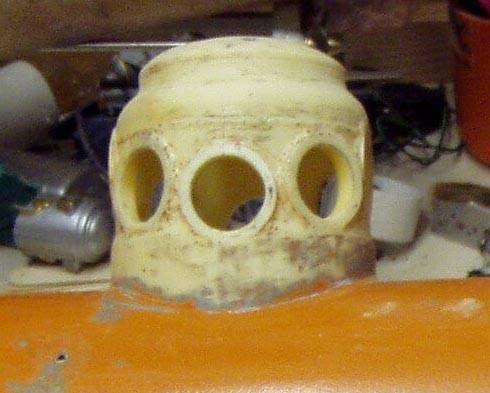
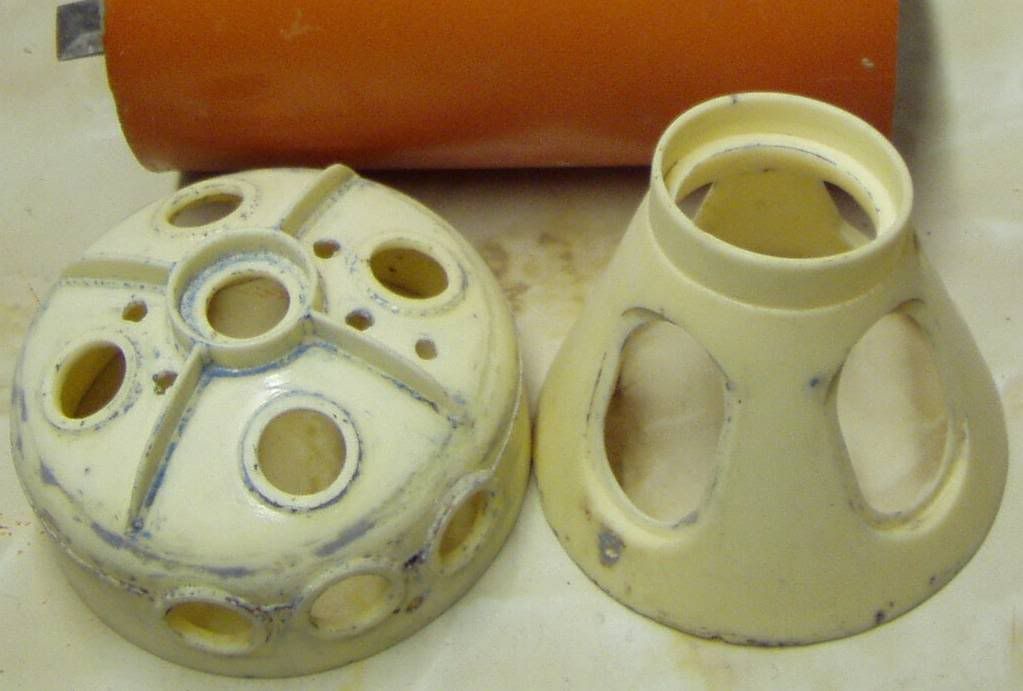
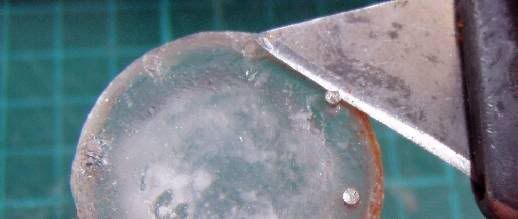
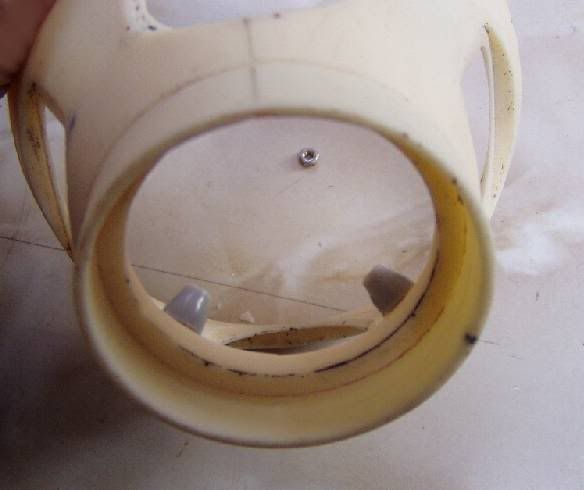
    At a guess I would say the previous builder had little or no experience with modelling in general. The building instructions have not been followed, so several things are missing or out of place. Worst of all is the plexi windows..for some reason the large fwd set have all been drilled through and had LED's installed in them!! The small porthole windows are either caked up with Cyano or black Sikaflex.

    I hope I can buy a relacement set of plexi windows or that is a lot of work just there.


    (edit: pics look bigger/clearer if you click on thumbnails)


  • Guest

    #2
    Crikey, what a horrible job!

    Have

    Crikey, what a horrible job!

    Have a word with Norbert, I'm sure he'll sort you out with a new set of glass- they're CNC milled.

    I'd dump the little bolts in a jar of acetone which should clean them up nicely - they're quite expensive, so worth salvaging.

    Andy

    Comment

    • steveuk
      Junior Member
      • Oct 2005
      • 467

      #3
      http://www.subcommittee.com/forum/icon_smile.gif
      I knew ther'd be some


      I knew ther'd be some gasps of horror. .. maybe this thread should come with a warning for submarine lovers of a gentle nature.


      I just sent Norbert an e-mail asking if it is possible to sell me some replacement parts like the whole window set. If not I will have to make my own, and I'd rather not do that if possible.

      I was telling Rick I am quite good at rescuing things from the brink. We'll see if I can pull this baby back from extinction.

      In its favour, I have done quite a bit of scratch building in the past and there are some very nice photo's of the real submersible on the disc which came with it (fortunately), so I have a good idea of where I'm heading.

      I'm pretty convinced (with the amount of holes drilled into her) that she hasn't been in so much as a bathtub. Any sub deserves better than that!

      ...lets see if I can get this baby ship shape.


      First stage is a complete strip down. Most pieces will be broken down into original constituent parts and cleaned of glue residue/paint etc. There is nothing to loose here because the hull is glooped up with so much hardened CA glue, silicone, etc and yet is punctured with so many holes for the numerous LED's it is just not watertight.
      Deck is actually not glued straight looking from above, and the aluminium treads have been bent the wrong way around - so the side with a slot for the hydroplane pushrod to extend through has been put on the port side! That is probably why the pushrod has been installed in the wrong place way outboard of the starbd deck casing!
      Looking at the engine room endcap - the motor mount isn't fixed correctly, and neither is the rudder mechanism. And it's packed full of silicone sealent. It all needs to be ripped out. I will even seperate the rear cone from the stern endcap as I am not confident the builder did the job properly in there with sealing the motor coupling box.

      I'll post up some WIP pics as I make progress.
      Feel free to comment, ask questions etc. It'd be nice to have some folks on board for the ride. I've been optimistic and given my friend a finish date of about two weeks!

      ..the clock is ticking.

      See you soon with updates.

      Comment

      • Guest

        #4
        You ought to send some

        You ought to send some pictures to Norbert- he'll probably take pity on you and send a window set post haste- I've always found he is very helpful.

        In the unlikely event you can't get some, let me know. I know a tame laser cutter who will cut some from acrylic, provided you can supply a CAD drawing.

        Andy

        Comment

        • steveuk
          Junior Member
          • Oct 2005
          • 467

          #5
          Thanks Andy.
          I have put a

          Thanks Andy.
          I have put a web link to my photobucket album of the sub in its present horrific state, and also a link to this thread, into the e-mail.

          I really hope he can help me out with the windows. It's not just cutting the shapes out but the thought of drilling all those tiny holes too .
          Ive also asked about a replacement ballast bladder, as the guy must have punctured this one somehow - it has patches on it and gaffa tape!! (see 2nd pic)
          I've also asked about the black Sikaflex sealent for the windows, presumably it isn't just black silicone sealent .

          Comment

          • aeroengineer1
            Junior Member
            • May 2005
            • 241

            #6
            It is a shame that

            It is a shame that someone put so much time into making a piece of junk. But, I hope that the person learned something in the process so that if he ever builds again he might do a better job. Good luck gettin the thing back into running shape.

            Adam

            Comment

            • steveuk
              Junior Member
              • Oct 2005
              • 467

              #7
              Adam, probably he learned to

              Adam, probably he learned to leave model submarining to model submariners, and, ..having a go can work out expensive! Paid about GBP 600 for this kit.
              Shame he didn't know about places like this!

              Comment

              • steveuk
                Junior Member
                • Oct 2005
                • 467

                #8
                Woo Hoo! I have been

                Woo Hoo! I have been contacted by Norbert and he has kindly agreed to sell me the spare parts I need to fix this poor little sub.


                Progress Update- endcap stripdown

                I have successfully removed the end cone and running gear from the resin endcap. Boy there was so much gunk in there..thick cyano, some gloppy glue, and silicone! (and I still think it wasn't wtaertight!)

                So now I have the parts all removed and cleaned up. Even the resin end cap has been scraped clean of all the gunk.


                Note the wrong position of the rudder lever pushrod seal - it has been mounted too close to the ballast inlet/outlet pipe. Also it has been mounted almost vertical instead of at an angle to match the rudder servo.
                Note also bolts holding the Aluminium motor mount are are the wrong way round - this means the motor can never be removed for inspection/replacement ..the nuts will simply fall off into the rear cone if it is attempted. Also the gunk between the Aluminium motor mount and end cap is negating the proper water seal which is an 'O' ring between the Aluminium motor mount and end cap.
                All this needed to be fixed.


                Already I am a lot happier. ..Now the parts can be put together properly.

                Comment

                • JWLaRue
                  Managing Editor, SubCommittee Report
                  • Aug 1994
                  • 4281

                  #9
                  That is a very impressive

                  That is a very impressive cleaning job. When I saw the first photos, I figured it would never look good again.

                  -Jeff
                  Rohr 1.....Los!

                  Comment

                  • wolfsong
                    Junior Member
                    • Jan 2005
                    • 189

                    #10
                    i have built the delta

                    i have built the delta myself. it is realy sad to see, what someone did with that beautiful kit.
                    if you need any info or pictures of certain stages during the built let me know.

                    stefan

                    Comment

                    • steveuk
                      Junior Member
                      • Oct 2005
                      • 467

                      #11
                      Thanks Jeff.

                      Thorough is my

                      Thanks Jeff.

                      Thorough is my middle name

                      Yes with a total stripdown and rebuild this little sub can be turned around. The new window set will really make this work!


                      Stefan, thanks for the offer of help. If I get stuck I will surely ask.
                      And if you see me putting something wrong please say so.

                      Comment

                      • Wheelerdealer
                        Junior Member
                        • Jun 2006
                        • 315

                        #12
                        Nice work so far, I

                        Nice work so far, I may have resigned it to the breakers yard by now.

                        Comment

                        • steveuk
                          Junior Member
                          • Oct 2005
                          • 467

                          #13
                          ..Progress Update

                          Main hull stripdown

                          I

                          ..Progress Update

                          Main hull stripdown

                          I have continued to break down the hull parts, removing all windows, stripping off the paint, glue, silicone etc. Most of the work was done using a Stanly knife (box knife), and a chisel and mallet. But I'm happy to say, as you can see below, I managed to successfully seprate the resin bow parts without damaging them. All the wiring for the led's has also been removed - permenantly.
                          The main hull parts are cleaned up now and ready to be re-assembled properly.


                          Here is a photo log of the progress..

                          This is what I found gunked up behind the porthole windows!


                          Decking removed


                          These windows are totally u/s


                          Yuk! The windows were caked in a concoction of cyano, white silicone sealant and black window sealent.


                          All windows removed, cleaning back to resin.


                          WooHoo! seperation.


                          Goodness me!!


                          ...it needs to be done!


                          No wonder the equipment tray wouldn't slide in, this birds nest or wires was in the way!


                          Starting the internal clean up.


                          Conning tower rear. eek!


                          Conning tower front. ..so many flashing lights!!


                          Equipment removed and scraping back to resin.


                          Cleaned up tower.


                          Cleaned up resin bow parts.


                          Salvaging the window bolts from the old windows
                          - prying them out with the sharp knife edge

                          Comment

                          • steveuk
                            Junior Member
                            • Oct 2005
                            • 467

                            #14
                            Nice work so far, I

                            Nice work so far, I may have resigned it to the breakers yard by now.
                            Thanks. ..I think I'm winning.

                            Comment

                            • steveuk
                              Junior Member
                              • Oct 2005
                              • 467

                              #15
                              Progress today...

                              I filed down a

                              Progress today...

                              I filed down a champfer on the inside edge of the nose cone to enable it to sit better against the bulkhead.


                              Another dry test fit showed the nose cone was being obstructed by the four porthole windows on the pressure hull bulkhead - so I ground out four spaces on the inside to give clearence to those windows.


                              The lower window frame came in a broken state but fortunately the broken pieces had been kept.


                              CA glued and filled - the lower window frame is restored.


                              Raided the bits box for some suitable lamp shapes to fit inside the nose cone as integral lighting detail.


                              Glued the lamp parts in the nose cone behind the light housings.
                              These have been drilled through in readiness to accept the wiring to the LED lighting.

                              Comment

                              Working...