Revell Gato build

Collapse
X
 
  • Time
  • Show
Clear All
new posts
  • landlubber
    Junior Member
    • Nov 2004
    • 60

    #16
    Well after fussing all week

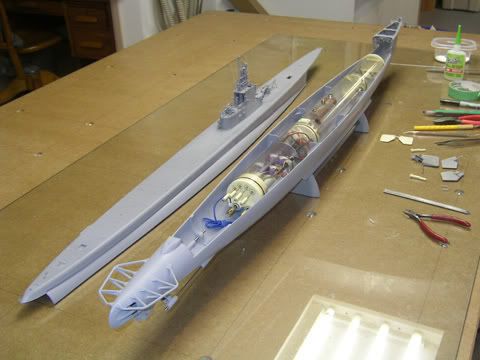
    Well after fussing all week with the sanding and filling,I finally got a fit and finish I was happy with.
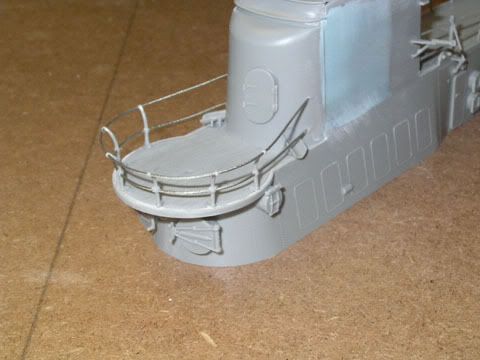
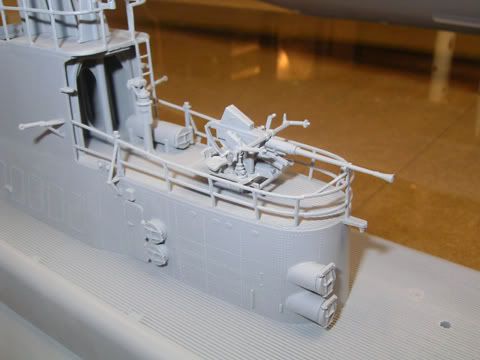
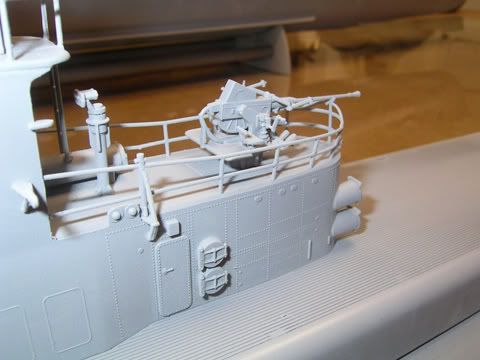
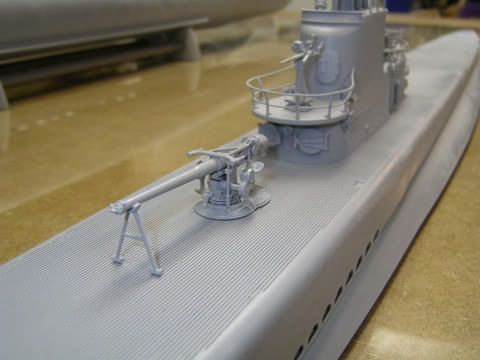
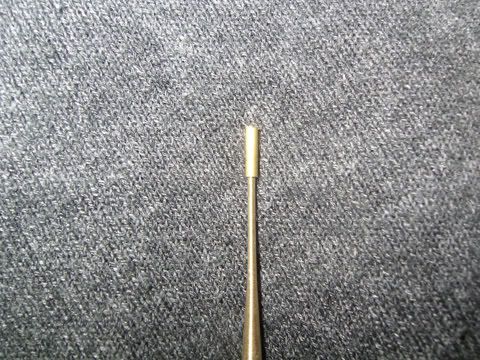
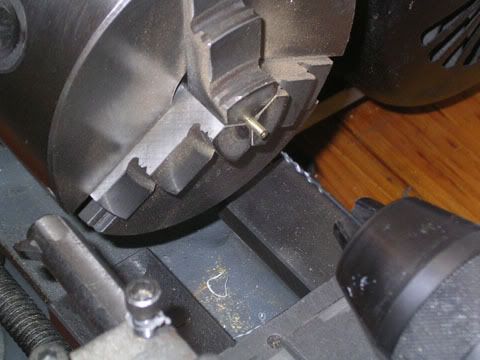
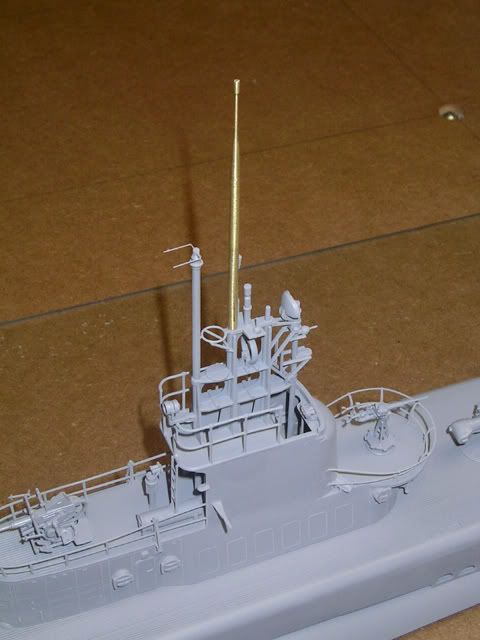
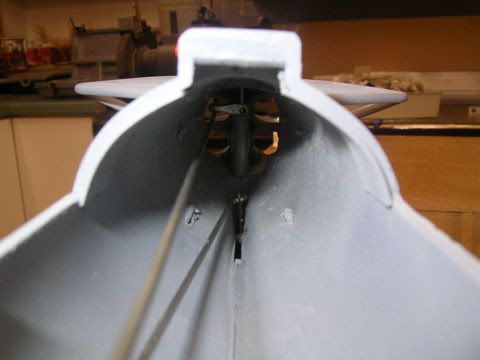
    As per Daved's gato I to decided to install .020 wire instead of the kit supplied thread. Drilled out the stantions while on the tree, cut them free and then attached them to the conning tower, threded the wire through all of them and into the front of the conning tower than applied ca at all joints. Turns out great and really strong. Incidently this wire came from a pull-pull assembly from a rc airplane.

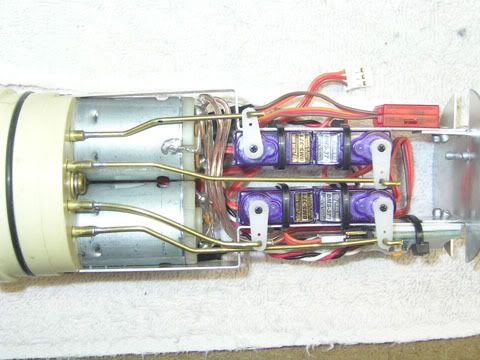
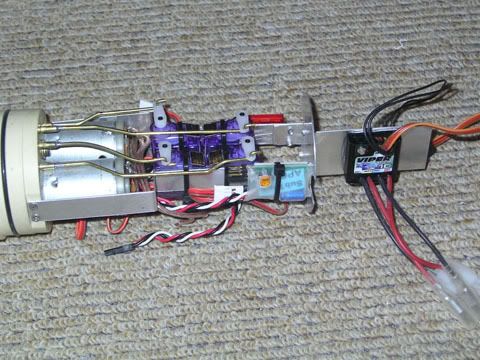
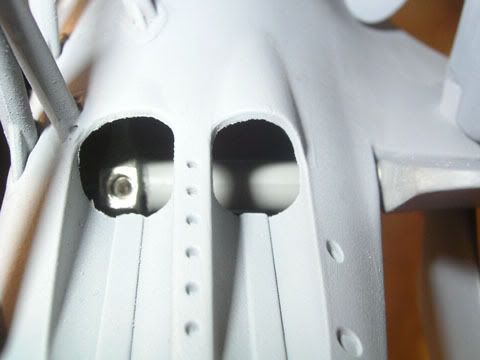
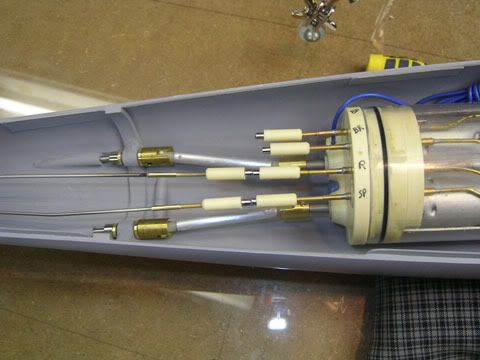
    Installation of the servos,pushrods speed control ,apc,failsafe etc.


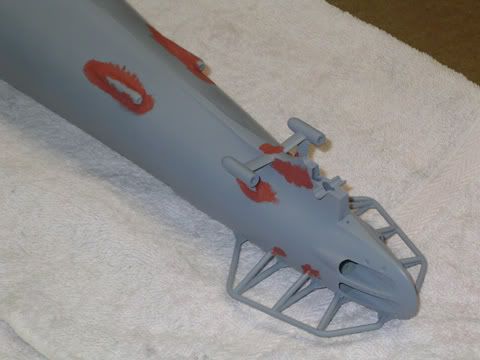
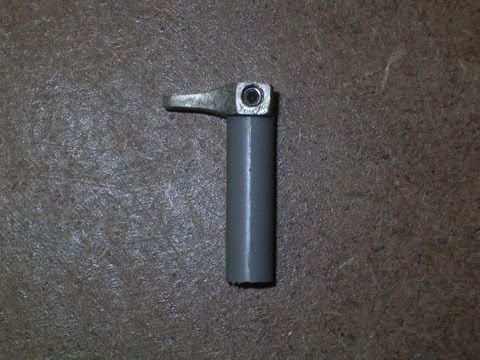
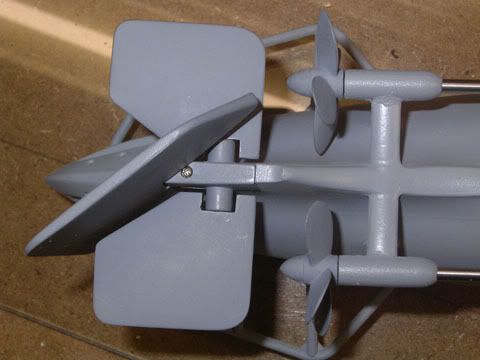
    Rear prop gaurds installed.

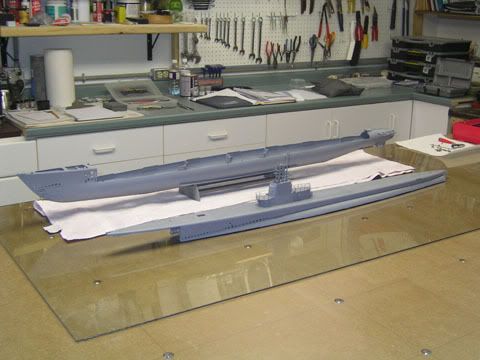
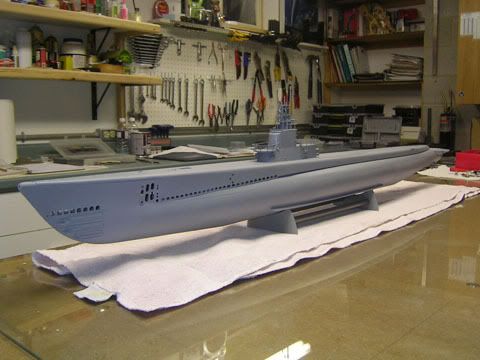
    Finally able to shoot the primer. and Its actually starting to look like a boat.

    Comment

    • landlubber
      Junior Member
      • Nov 2004
      • 60

      #17
      The priming allows you to

      The priming allows you to see all the blemishes and areas that need more filler and attention.

      Did the assembly of the guns and top side details next.


      There is alot of detail up top so you will want to stay deep away from any destroyers in your pond,or you will find yourself back at the yard for a refit.
      The wtc is fitted into the hull with the indexing pin in place,note I had to move the locating hole approx. 3/8" forward from Davids position as the wtc was interfering with the hull at the front spreading it apart when the wtc was put in place with the existing indexing hole..

      This week I will be installing the control surfaces, propellers and shafts
      and making two new perescopes as the kit supplied plastic ones just won"t due. Looking forward to receiving the final cd from Caswel and seeing what other clever tips David has in store for the final touches to the Gato build...

      Comment

      • Guest

        #18
        Revell Gato Build

        Your really moving along now landlubber, Your boat looks very good, you have a great looking work area there as well, nicely laid out, and room to move around, Nice. I would have liked those accommodations this past summer when working out of my 110 degree car garage while trying to complete the Gato build. I definitely need to get some air conditioning to that portion of the house. : ) You probably have the opposite up your way. In any case it appears you'll be triming out the boat before long and it looks like it's gonna turn out real " Sa-weet ". Good luck, and smooth sailing. Al,

        Comment

        • landlubber
          Junior Member
          • Nov 2004
          • 60

          #19
          Thanks Al. Your gato also

          Thanks Al. Your gato also turned out great. I feel for you with the 110 deg garage. You should try building at -30 up here. Actually today was the warmest recorded on record for this time of year 60 deg F. unheard of for January. I have the whole basement to play in,planed it that way when I moved in.
          On to the perescope buildup.
          Chucked up a piece of 1/8 brass rod in the lathe,used the dremel with a sanding drum to shape it using the plastic one as a guide. Lathe turns slow with dremel spinning fast, you could also do this in a drill press.


          Then chucked it in the drill press and polished it with fine emery paper at high speed using slight pressure between thumb and index fingure

          Then cut a 1/16 dia. piece of .014 wall brass tube about 3/16 long and slide it over the polished down end and soldered in place

          Then chucked up the other end of the rod and drilled a 1/16 hole to slide on the perescope mounting pin.

          Slide in on the mounting pin and secure with ca when ready to install.
          This gives an exceptable looking scope that should take a bit more abuse than the kit supplied plastic one,which i broke in the construction of this brass one. At least with a brass one it won"t droop in the 110 deg. Florida sun

          Comment

          • landlubber
            Junior Member
            • Nov 2004
            • 60

            #20
            Not much headway this week,

            Not much headway this week, holding back waiting on the final cd from Caswell to arrive. Made a standoff for the rudder control rod from left over spru runner. this gets the control horn off the bottom and also supplies a bearing surface for the rudder. Its tack glued to the control horn.


            The fastening screw is easy to get at through the rear torpedo tube opening.

            Made up the driveshafts and pushrods next.

            Also fastened the skeg into place with a small 2-56 screw. Glued a small piece of plastic inside the skeg at the screw location making it solid so the screw head could be countersunk in. This will make any future dissassembly easy to perform

            Comment

            • landlubber
              Junior Member
              • Nov 2004
              • 60

              #21
              In an effort to support

              In an effort to support both of my favorite websites
              Subcommittee and Sub-pirates I have decided to finish up the Gato build at the Sub-pirates website please look for the"revell gato build continues"under the building threads for the remaing details.

              Thx. Kent.

              Comment

              • ricknelson
                Junior Member
                • Dec 2006
                • 186

                #22
                I suggest that you remove

                I suggest that you remove the two Hatches (Port and Stb) on the fairwater. Only museum boats have them to limit access for liability issues. No Gato (or Balao for that matter) ever had a hatch. It should be an open access arch. Will help water/air flow when diving/surfacing.

                Comment

                • oldnoob
                  Junior Member
                  • Jun 2011
                  • 33

                  #23
                  Re: Revell Gato build

                  I find the neatness and efficiency of your work area to be highly disturbing.
                  jk
                  Im actually so very envious

                  P.S could not find your build thread on SUB-Pirates.

                  Comment

                  Working...