Revell type 7 build

Collapse
X
 
  • Time
  • Show
Clear All
new posts
  • landlubber
    Junior Member
    • Nov 2004
    • 60

    #1

    Revell type 7 build

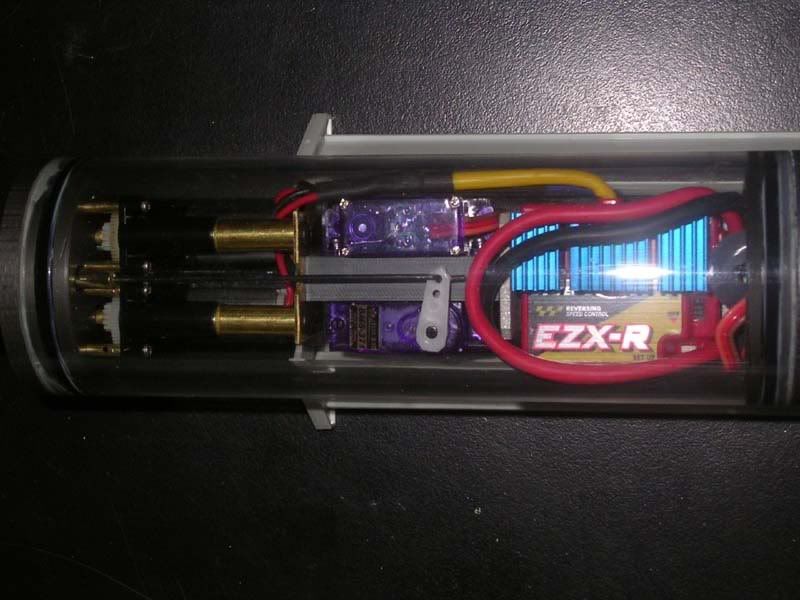
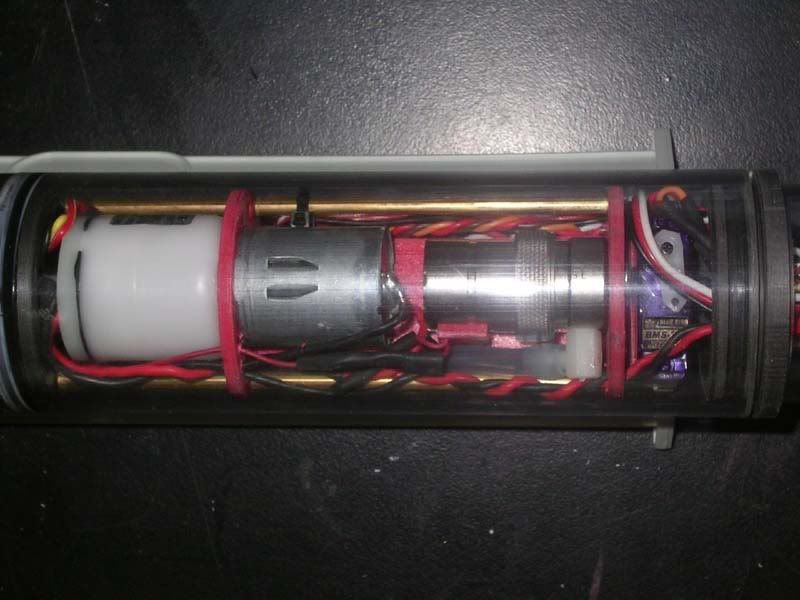
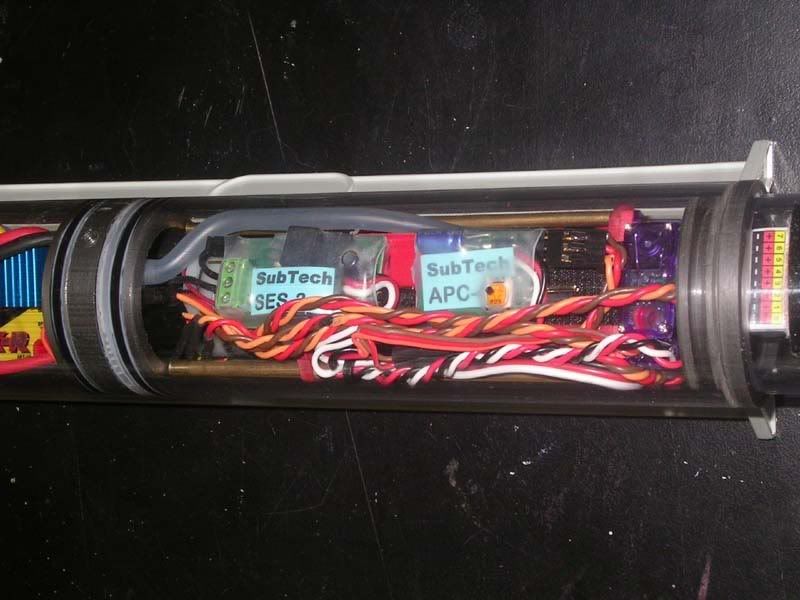
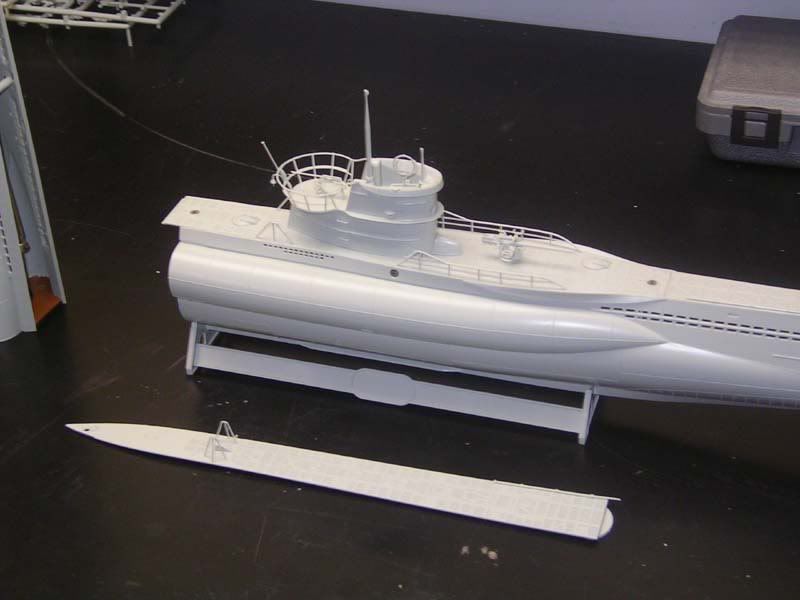
    Posting some images of my latest build. The main problem with my previous boat was trying to get the wtc together once inside the hull,I would compare it with a one arm man wrestling a 40 lb catfish. And of course during the build the wtc gets taken apart just a few times.

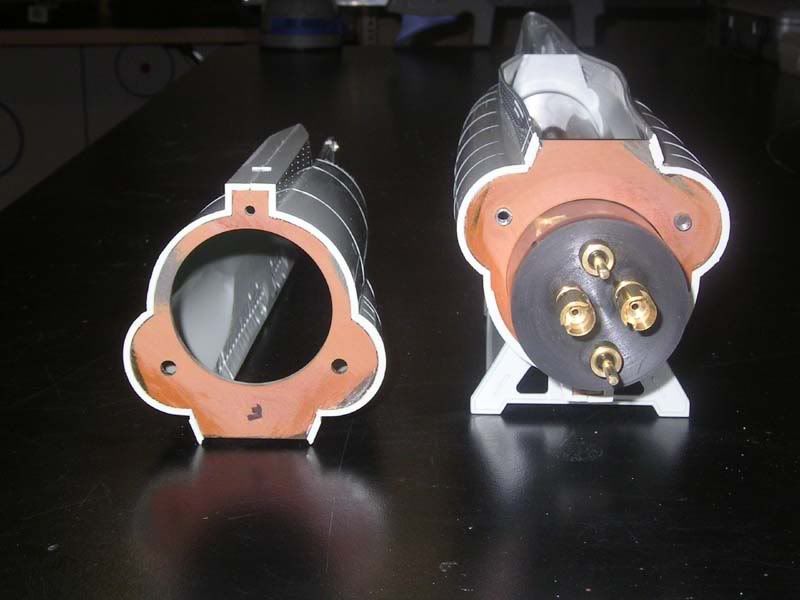
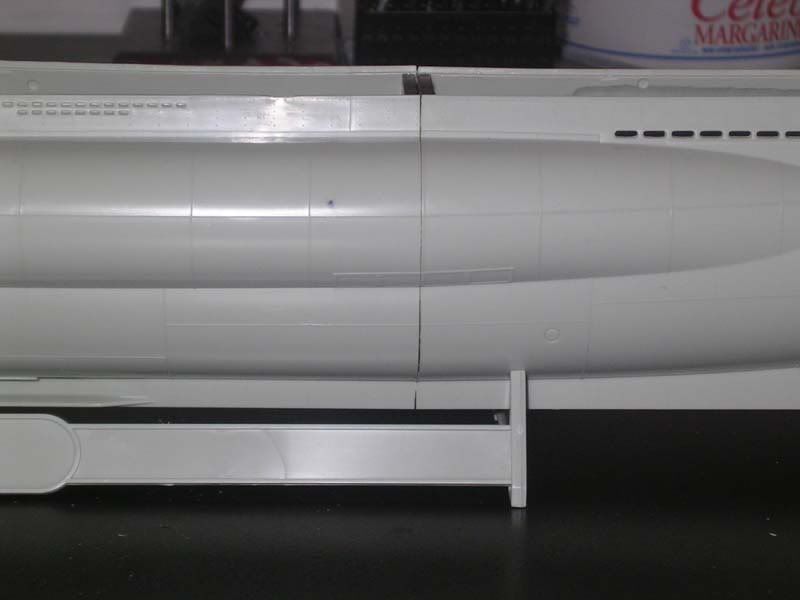
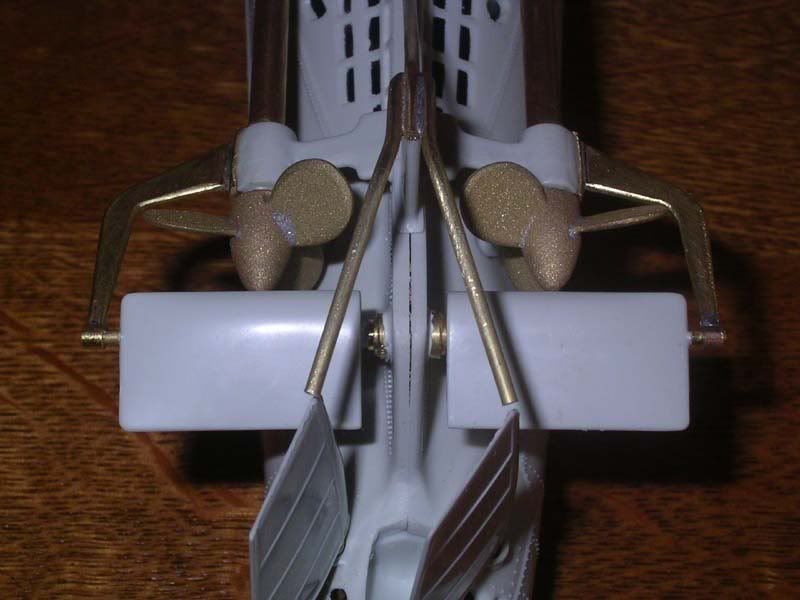
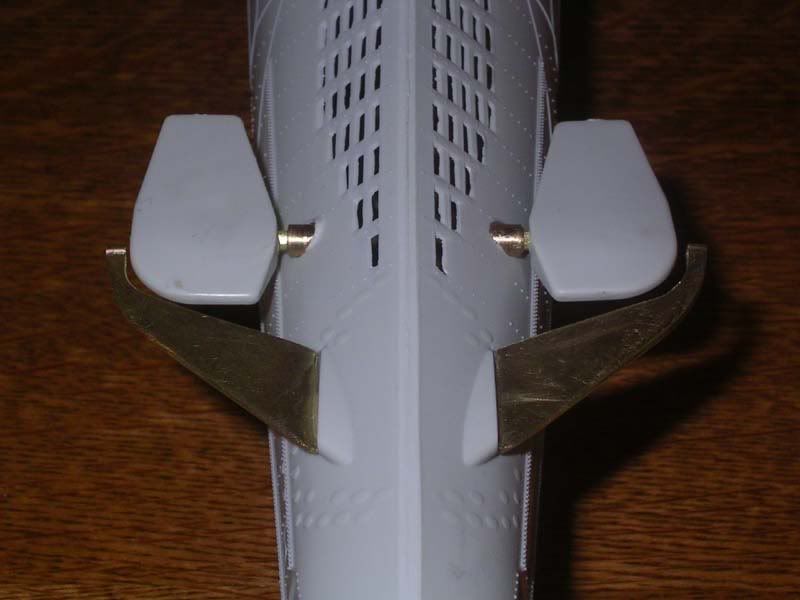
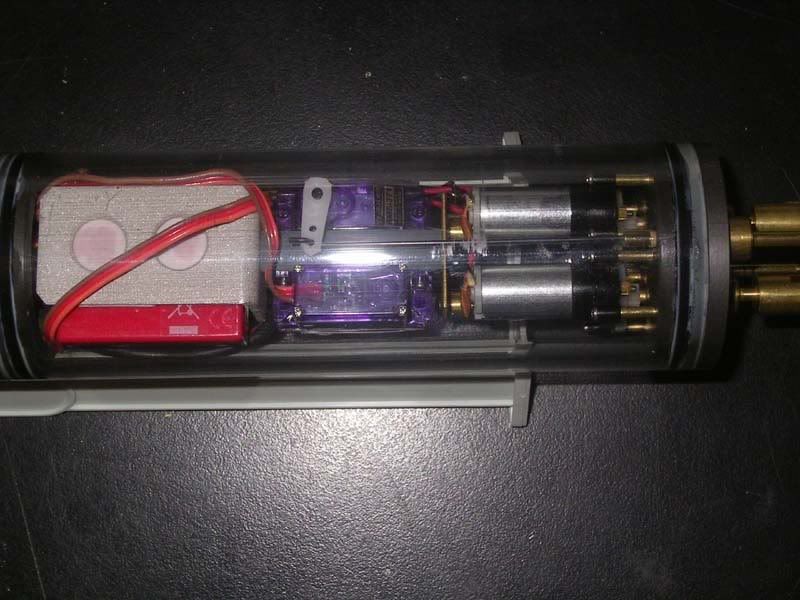
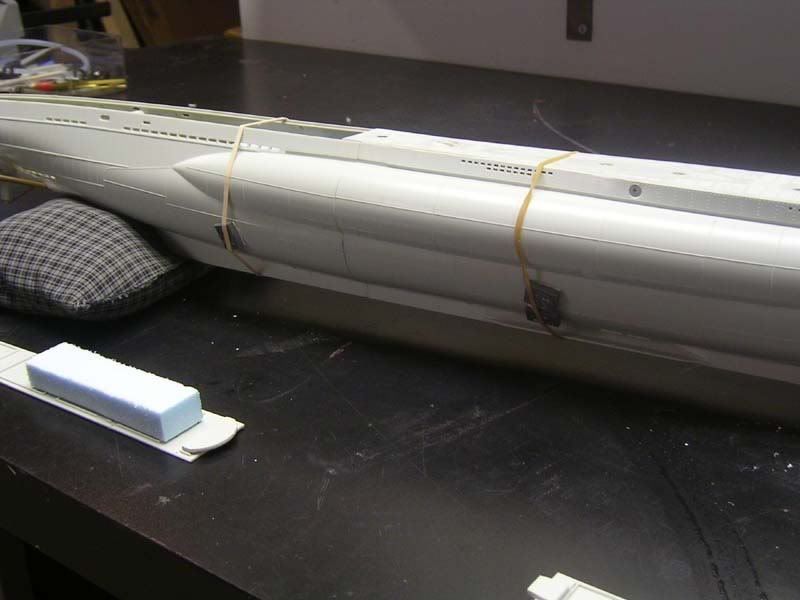
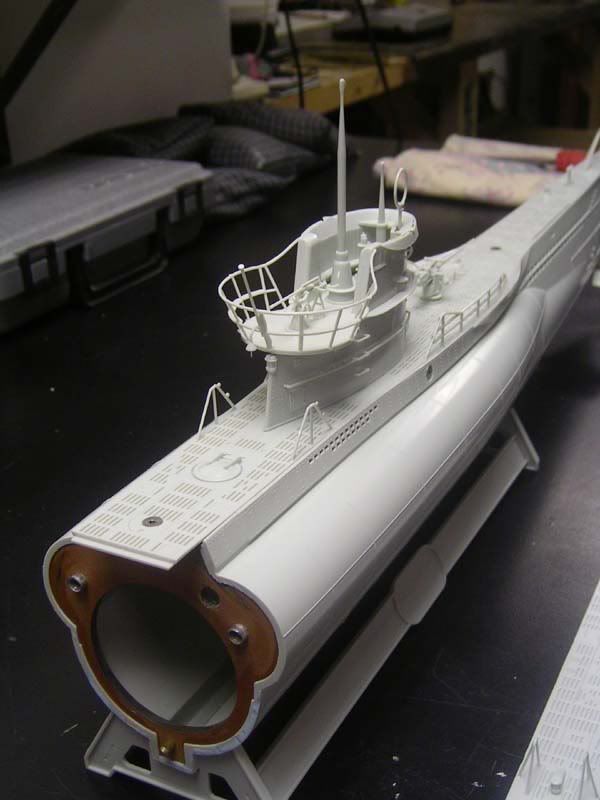
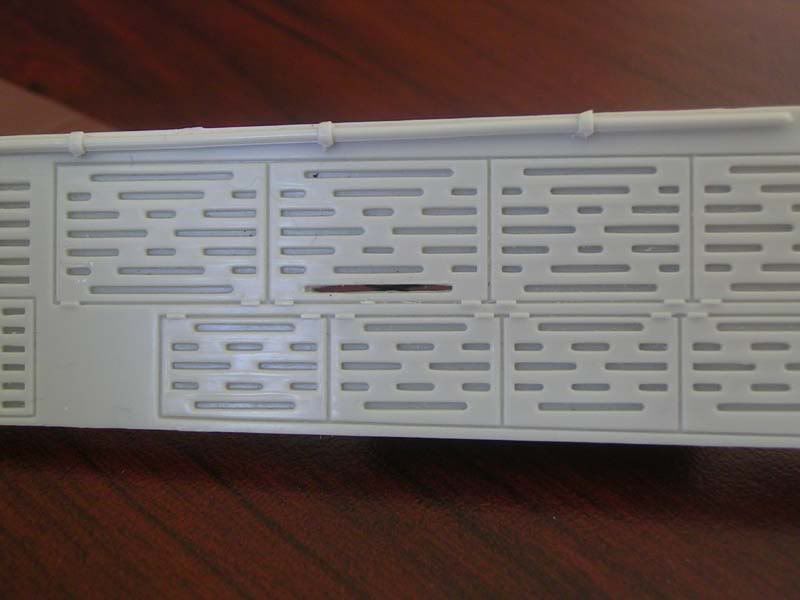
    Hull was cut at the rear bulkhead with a zona saw using the weld line as a guide. then new bulkheads that were made and drilled together to establish a good fit and location were glued into the hull parts.

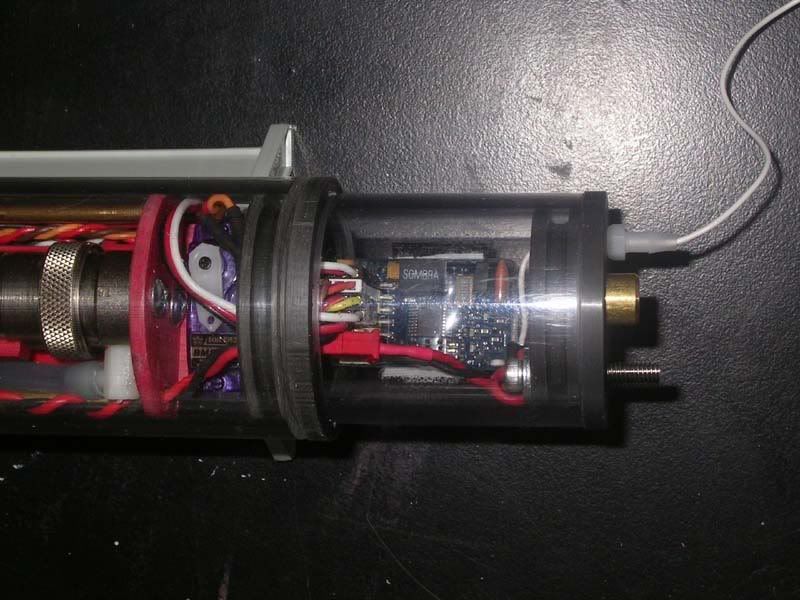
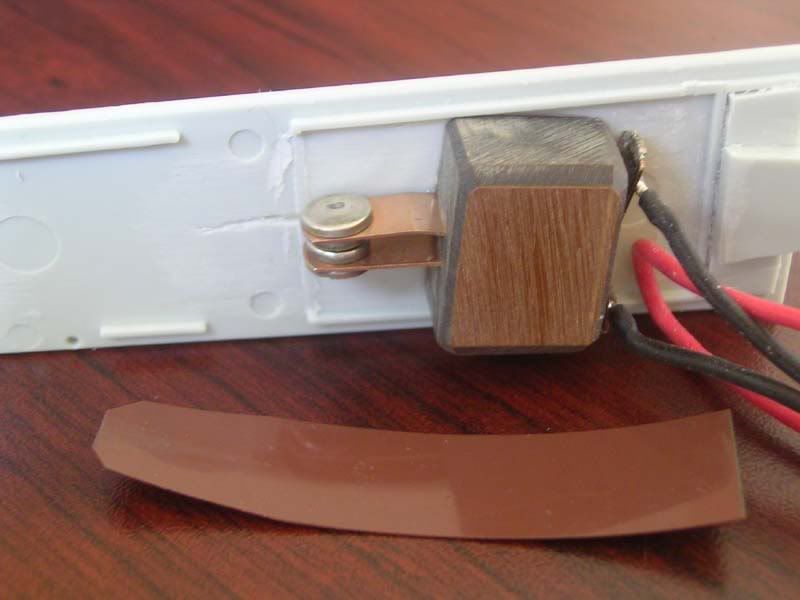
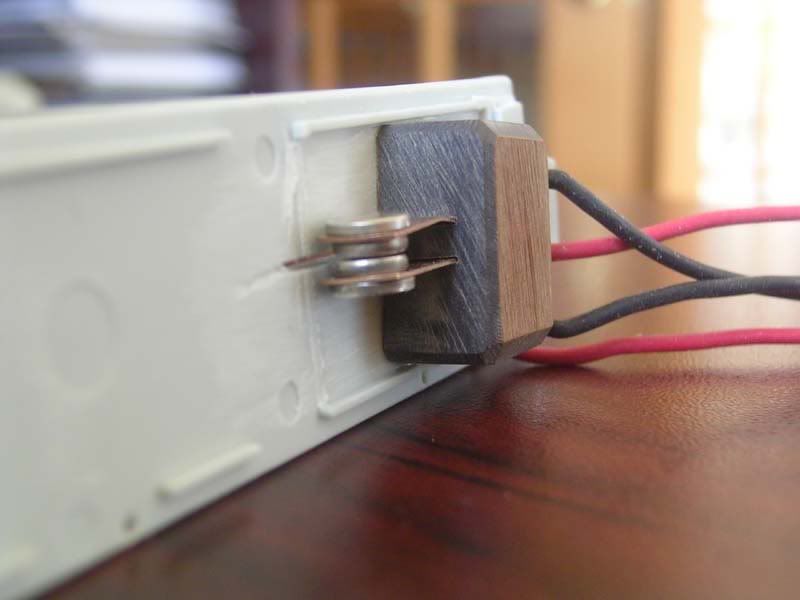
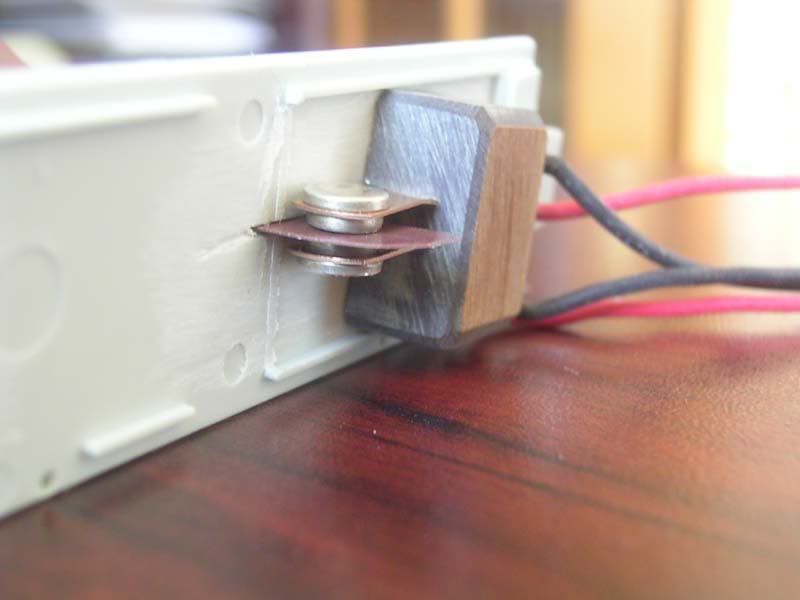
    6-32 Flange nuts and one 1/8 rod are used to align and secure the two parts together,using an extra long hex wrench

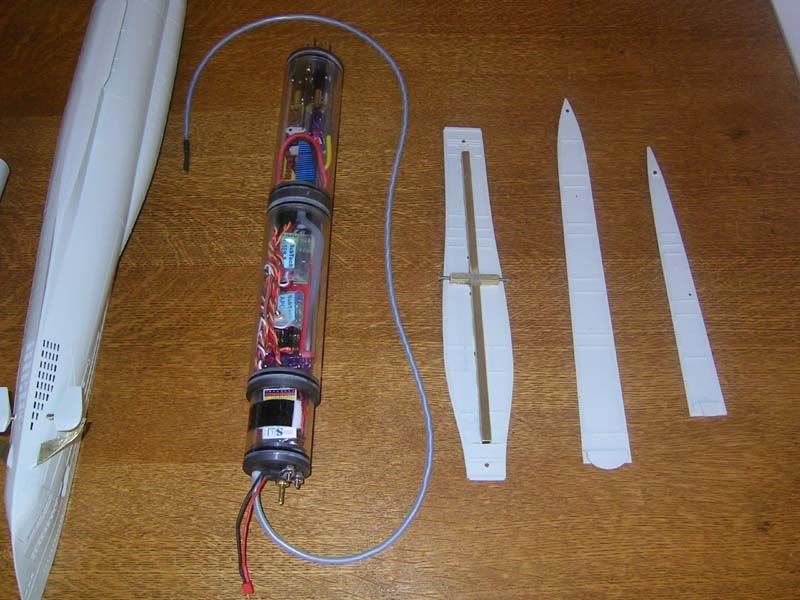
    Assembly as follows.
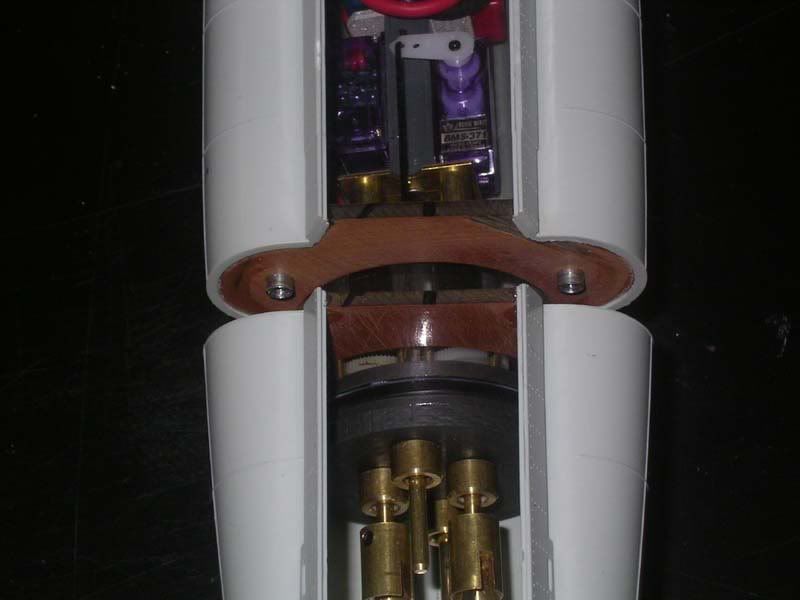
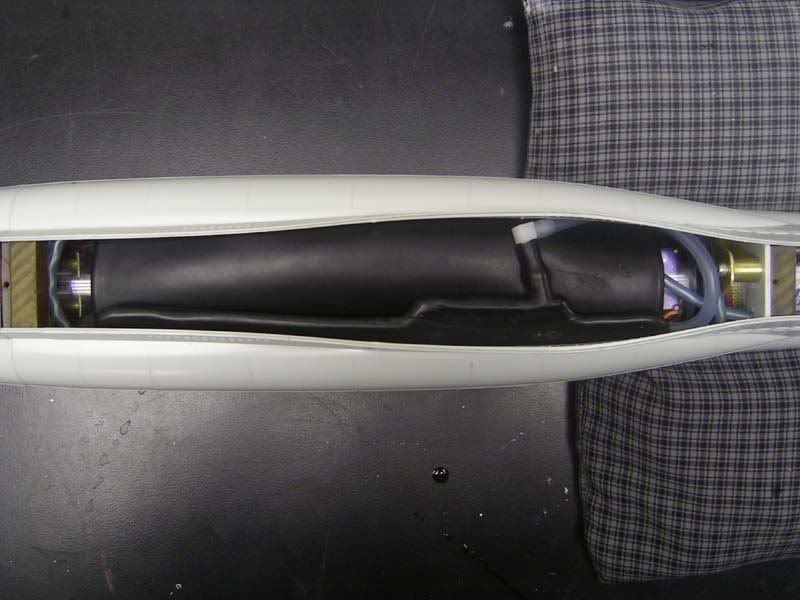
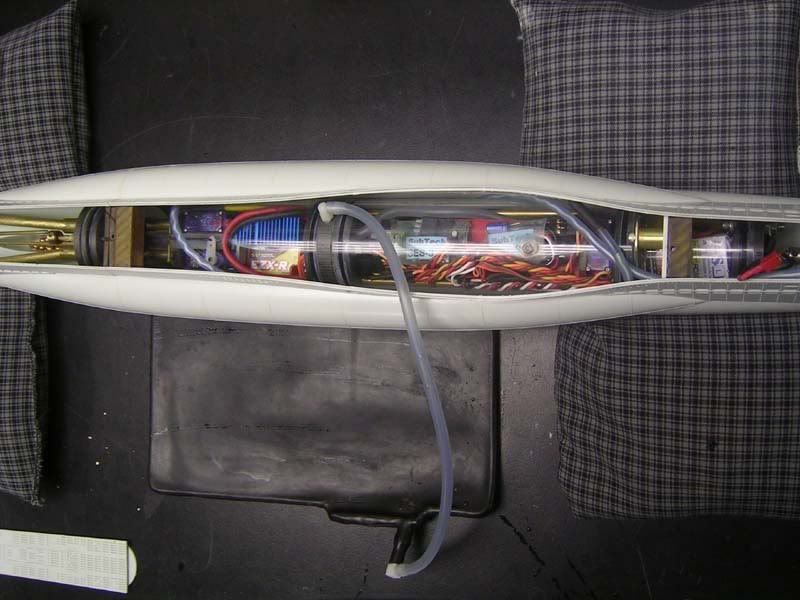
    1.wtc slides into front of hull
    2. back hull in aligned and placed over wtc
    3. screws are secured
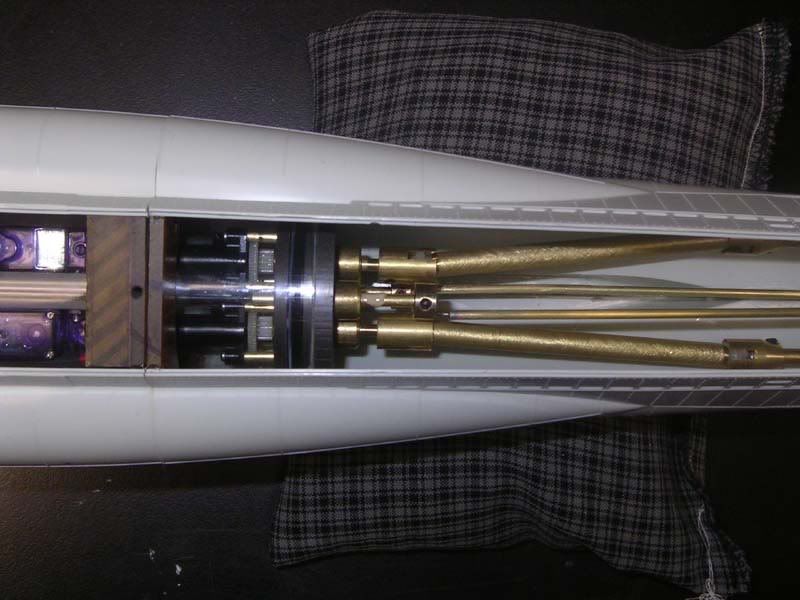
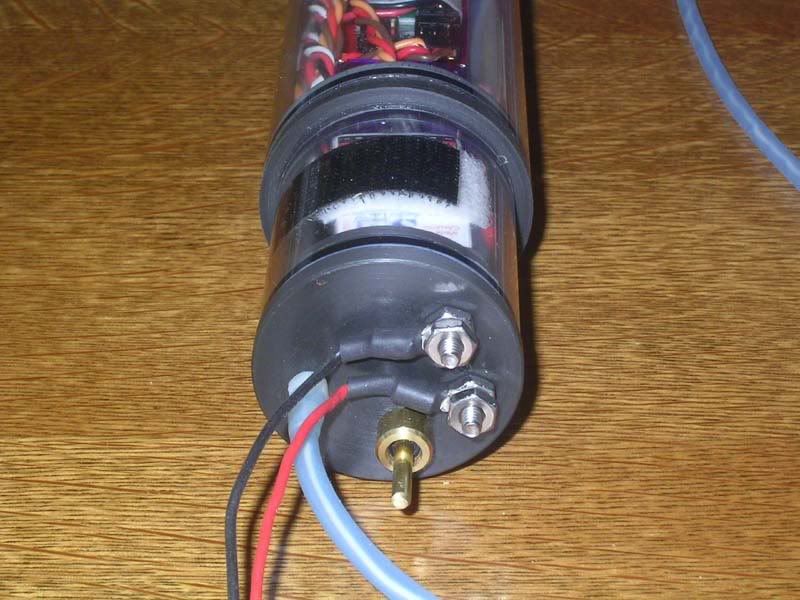
    4. drive shafts are put in place and wtc is slide back approx . 3/8" to engage shafts
    5.wtc lock is screwed to front bulkhead
    6.pushrods are fixed onto servo shafts. and no more trying to get the wtc and o-rings together inside the hull.


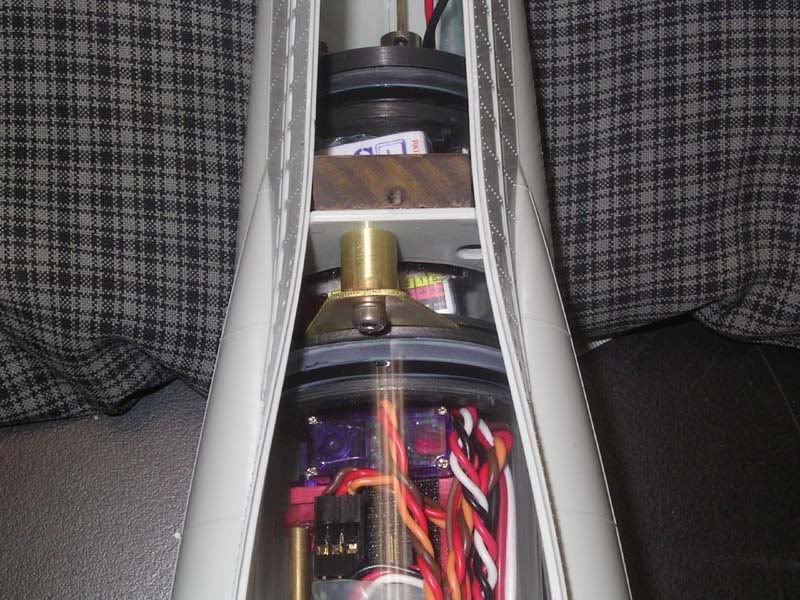
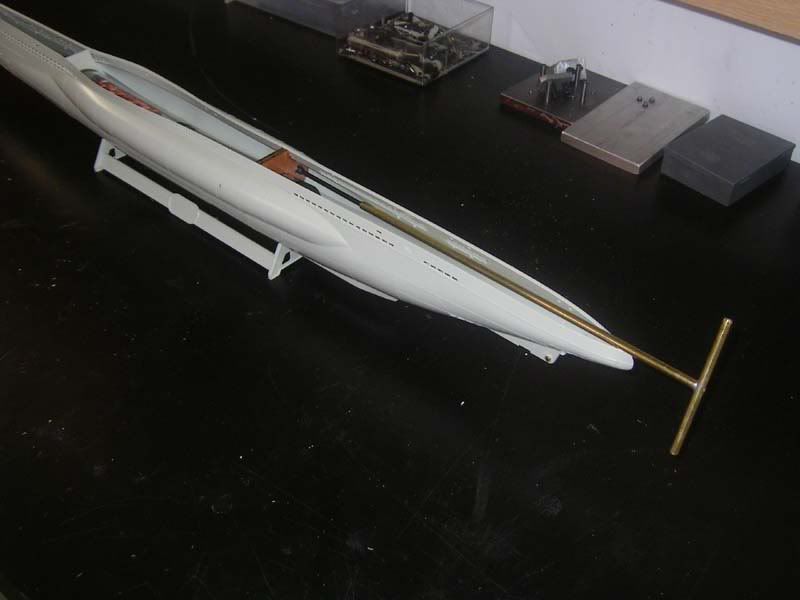
    This provides a strong secure joint that is not easily seen allowing for about a 3 minute removal of the wtc.
    More on the build to follow at a latter date. Regards Kent.
  • PaulC
    Administrator
    • Feb 2003
    • 1542

    #2
    Wow, Kent!

    That IS and extra

    Wow, Kent!

    That IS and extra long hex wrench -- and a cool way to solve the problem. Keep us posted.
    Warm regards,

    Paul Crozier
    <><

    Comment

    • landlubber
      Junior Member
      • Nov 2004
      • 60

      #3
      Type 7 props.

      I had a hard time finding props that looked scale,so I attempted to build my own,ullthough they haven"t hit the water yet I was happy with the way they turned out.
      Started by silver soldering the stainless shafts into the cone blank,then turning the cone to shape on the lathe.then I set up the dremel up on the crossslide of the lathe with a small fiber cutoff wheel. The cone was placed in the 3 jaw chuck which was used for the indexing the 3 slots that were cut into the cone to accept the blades.

      One cut left and one right. Then a aluminum fixture plate was made up with 3 screws with a 60 deg. angle turned on the ends and a center hole for the shaft to fit through screw are adjusted until everything looks concentric.


      When everything looks in place carfully solder the blades to the hub

      After blending the sharp edges and media blasting the props are complete.

      Also added some brass aroung the stern planes with 2 outrunning support bearings, The rudder supports are not hooked to the rudders, things were getting just a bit to small, but they should provide a guard the rudders.

      Photos are kind of crappy,just like my camera,I must try and get better lighting for the next ones.

      Comment

      • spitfiremk3
        Junior Member
        • Dec 2006
        • 43

        #4
        Hi... Maybe you should get

        Hi... Maybe you should get a job at the Robbe factory!!! LOL... And show them how stuff is done!!! As your joint in the hull is perfect!!! Not an eye sore... EXCELLENT WORK!!! Are you going to do a Gato 1/72 next? For I have one of those still in the box. Did you make your parts CNC or the old manual way? Like I do.
        THANX
        Scott

        Comment

        • paul von braun
          Junior Member
          • Jun 2004
          • 242

          #5
          One word. Quality!

          One word. Quality!

          Comment

          • landlubber
            Junior Member
            • Nov 2004
            • 60

            #6
            Thx for the kind words

            Thx for the kind words guys,but i,m just copying and adapting ideas I,ve seen on these and other forums. Building these are like playing chess-Alot of thinking and sometimes very little movement. Back to the fun,I would like to get it to the test tank today.
            Thx again..Regards Kent.
            attaching a few more pics.


            Comment

            • landlubber
              Junior Member
              • Nov 2004
              • 60

              #7
              todays update 1 step ahead

              todays update 1 step ahead 2 back. Didn"t like the way the front dive plane pushrod ran against the servo wire,s ,just not good parctice.so after some head scratching decided to install a baffle between the re. and the rod.

              But inorder to do this I had to gain some room.the receivers these days are accually smaller than the connectors so decided to get ride of the connectors and go direct with the wires.


              This worked out great,just make sure you get the wires in the right place the first time,also it's a good idea to shrinkwrap the exposed unused rec outputs.

              The finished installation,and abit more piece of mind.

              Got to the test tank (tub) today,Things are looking pretty good,but I think I need some help with trimming,if anyone can give me abit of a primer on the proper way to trim a boat.ie, when to add foam and when to add weight that would be great. when boat is on the surface its Ok but when it submerges it tends to roll one way.

              Regards kent

              Comment

              • landlubber
                Junior Member
                • Nov 2004
                • 60

                #8
                Sorry Scott,I didn"t get a

                Sorry Scott,I didn"t get a chance to address your question, Like you I make my parts by hand ,unless your mass producing or have something really complex its the only way to go. I'm amazed at some of the projects like Mylo,s Type 7 plug,man thats a boat load full of work. As for the Gato I have not purchased a kit as of yet,I have been selling almost all of my projects after completion .I must confess at being more of a builder than a sailer.I have a few other projects in the rc plane department that need some attention before spring and a dumas runabout that needs the fittings installed so I guess I have enough to keep me busy for a while.
                Regards Kent.

                Comment

                • oracle_9
                  Junior Member
                  • Jan 2007
                  • 15

                  #9
                  Awesome build.

                  I may have missed

                  Awesome build.

                  I may have missed it, but what material was the bulk heads made of? Plexiglass?

                  Comment

                  • landlubber
                    Junior Member
                    • Nov 2004
                    • 60

                    #10
                    Thx Oracle: Bulkheads are made

                    Thx Oracle: Bulkheads are made from 1/8" grade XX Garolite which is a paper based laminate with phenlic resin, Its realy strong,dimensionaly stable and easy to bandsaw and file,thread ext. Mcmaster# 8525K112
                    $4.58 sq. ft. I did a submersion test overnight in water,didn"t measure any dim. or other changes so its also waterproof.
                    Regards Kent.

                    Comment

                    • landlubber
                      Junior Member
                      • Nov 2004
                      • 60

                      #11
                      Well between digging out from

                      Well between digging out from 24" snow and trying to get to work with all the roads closed I've been able to get a few things done.

                      Boat has been balasted,had to add weight to the lower keel under wtc to get the boat stable with a lower cg.then added foam to get the water line correct,also had to add 1/2 oz of weight to the port side. tested wtc for about 1 hour submerged in 12" of tub water,so far so good


                      Also got the con.tower put together.


                      While getting my airbrush ready I dropped a needle and bent the tip,so I have to wait for about a week for a new one before I can splash some paint.
                      This will give me time to fig.out away to switch the battery on from outside the boat.Im carrying a 6 volt -1400 mah nicad pack up front
                      not sure of the run time yet until I can get to some open water ,

                      Comment

                      • landlubber
                        Junior Member
                        • Nov 2004
                        • 60

                        #12
                        Will waiting for the airbrush

                        Will waiting for the airbrush parts I was able to put together a workable battery switch ,The type 7 has very little room to mount a switch were you want it.I stripped a industrial cube relay on the contact bars. fitted them into a G10 (non conductive) block soldered on a few wires and a connector,opened up a slot in the deck,epoxied the G10 block to the underside of the deck,made a small insertable shim from .015 plastic shim stock(non conductive)


                        When the shim is slide through the slot int he deck it slips between the two contact points forcing them apart and turning off the power.
                        When your ready to sail pull the shim out and the contacts come together closing the circuit and powering the boat. being that water is a poor conductor of electricity this should work fine and is a simple solution. The only draw back maybe corrosion if running in heavy clorrinated pool water,and the contacts may need to be cleaned periodically.
                        Hopefully will get at the finishing of U69 later this week.

                        Comment

                        • anonymous

                          #13
                          Excellent work.

                          Steve

                          Excellent work.

                          Steve

                          Comment

                          • seahorse
                            SubCommittee Member
                            • Mar 2005
                            • 320

                            #14
                            Mr. Landlubber,

                            what material do you

                            Mr. Landlubber,

                            what material do you use for your end caps?

                            Comment

                            • landlubber
                              Junior Member
                              • Nov 2004
                              • 60

                              #15
                              Thx Steve,the work you and

                              Thx Steve,the work you and alot of others here have done is a good inspiration......
                              Seahorse , I turned the end caps out of 2" dia. black nylon rod on my myford lathe,The black machines alot nicer than the white.
                              Regards Kent.
                              Seahorse. Mat'l is actually Black Delrin available from mcmaster carr
                              approx. $14.00/ft. for 2.0" dia. Its available in many dia's and machines easily.Just be carefull when maching in th o-ring groove to get the right fit.
                              These dimensions are available in most o-ring seal catalogues and likely on the net somewhere.

                              Comment

                              Working...