
1/25 Type VIIC/41 Scratch Build by Mylo.
Acknowledgement
First off, I would like to extend my thanks to all those who took the time to post "How to do it" threads on this forum as well as those who consistantly are there to offer assistance. Without you, I would never have attempted what I'm about to undertake. I am as green to this as they come. A special thanks to Steve Neil and Kevin McLeod for their very educational threads on scratch building from A to Z and then some. Gentlemen, it's because of you two in particular that I decided I wanted to spend a ton of time and money to scratch build a sub.......I'm not sure whether thanks are in order or not come to think of it. I hope this thread might inspire other "greenies" to give this stuff a try. Most of the techniques that I use I can not claim as being my own. The only knowledge I have on how to build an R/C sub is from I've read on the Subcommittee forums and it is only through the skills and expertise of others who have shared their knowledge that has even given me enough "know how" to attempt to try. If you see a technique or tool, or material, or whatever, that you recognize as being one that you "invented", PLEASE feel free to step up and take credit. I would appreciate remembering from where I gathered some of this stuff. If you happen to be one of the modelers that I "borrowed" a technique off of, please consider it a compliment. As can be seen, I have included the time in hours it takes me to complete each step. I don't claim to be slow, fast, maticulous, careless, or in between, nor do I care, but I do admit to having zero experience in R/C Sub building with every inch of the way requiring that I "read up" on it or in some other way try and figure out how it's done. I thought this time line might come in handy for other novices who simply don't have a clue how much time goes into building one of these things. Again, a HUGE thanks to everyone at Subcommittee for giving me enough tools to try.
Step 1]http://i119.photobucket.com/albums/o153/Mylo42/1e.jpg[/img]
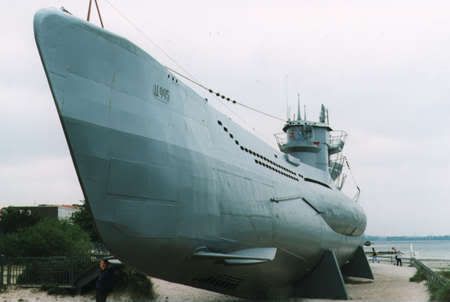
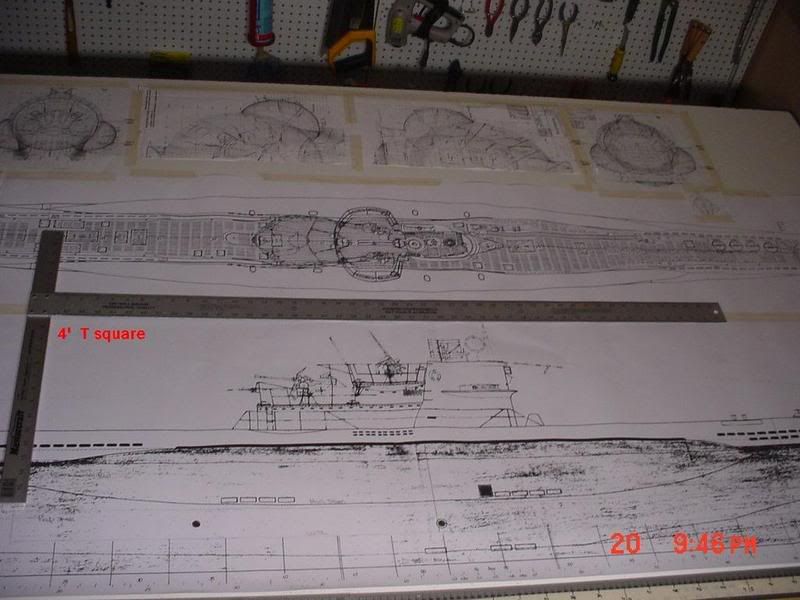
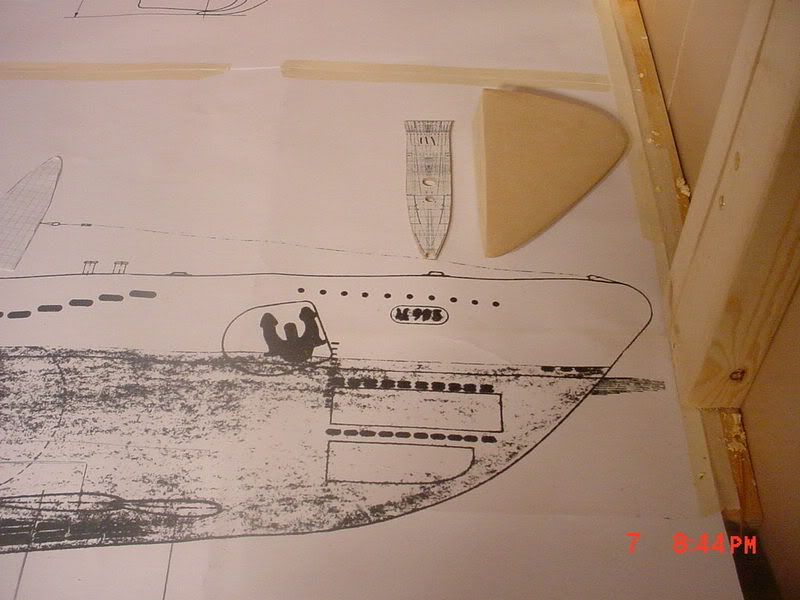
I dug out the credit card, went online, and ordered the plans straight from Germany. I was quickly notified that the plans were on back order and that there was no known date as to when some would become available. *sigh*. My search on the net continued. Six weeks later, I got a notification from Fritz Kohl that the plans I requested were now available. I placed the order for 39,95 Euros. Three weeks later, they arrived in the mail. Nine weeks just to get some plans in my hands. I was beginning to wonder just how long this thing was going to take to actually build. I spent the next two weeks looking over every inch of those diagrams. I was very pleased with the quality. The attention to detail is astounding. I'm quite sure someone could build the actual boat with these plans. I was surprised to see that the plans cover the Type VIIc (1939) and the Type VIIc/41 with different diagrams for each. I decided that the Type VIIc/41 was most thoroughly represented including some excellent cross section diagrams. After some further research, I discovered that the Type VIIc/41 in the plans were of U995 which is on display in Laboe Germany as an exhibit. There are many good current photographs available of this boat as well, which I was happy to find. It suddenly made sense why this particular boat was detailed so well in the plans. I'm sure Fritz himself crawled all over the actual U995 with his tape measure to create them. So, the decision on what U-Boat to model was made, it would be a type VIIc/41. The final major decision remained, what about scale ? My goal with this boat is to not only have it look to scale, but to perform to scale. I also wanted goodies such as a extendable/retractable periscope and functioning torpedoes. I knew that to best accomplish this, the boat would have to be big. I decided that I was going to build the biggest boat that I could feasibly handle by myself and still fit in the back of my truck. I absolutely love the big boats. I decided that 1]http://i119.photobucket.com/albums/o153/Mylo42/1g.jpg[/img]
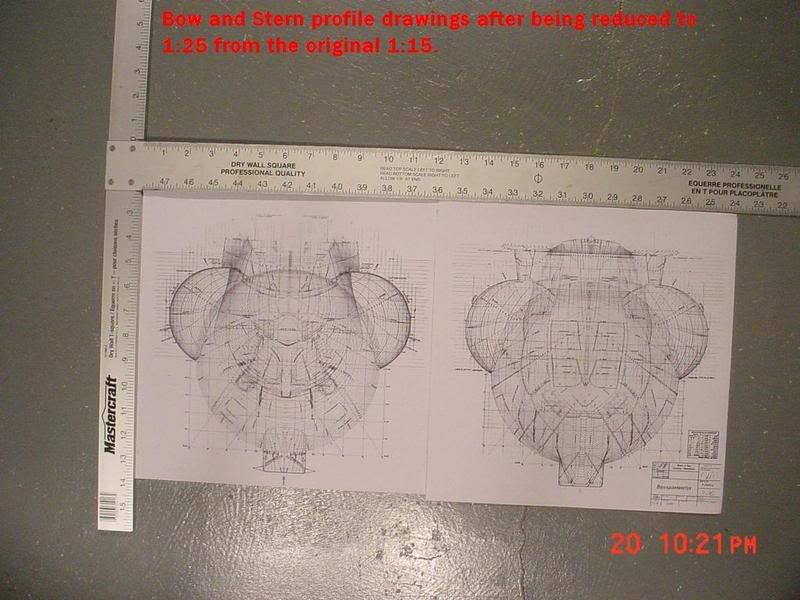
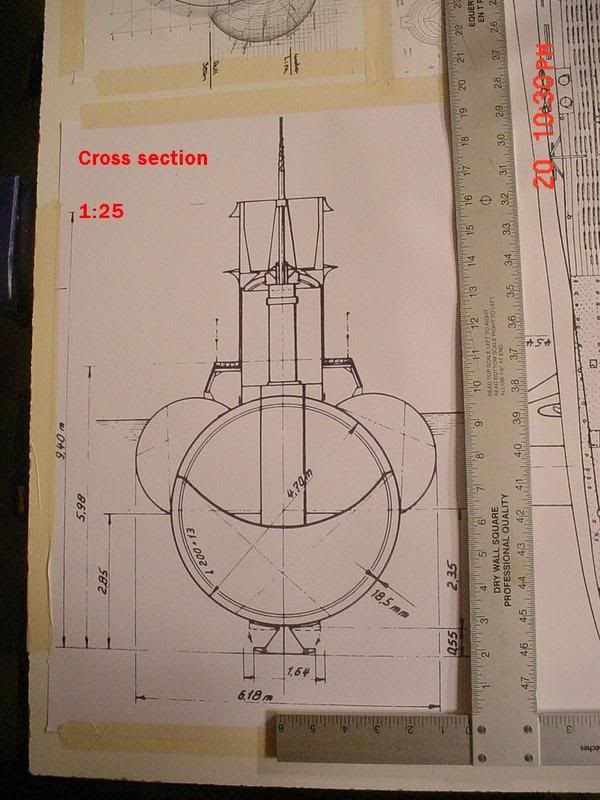
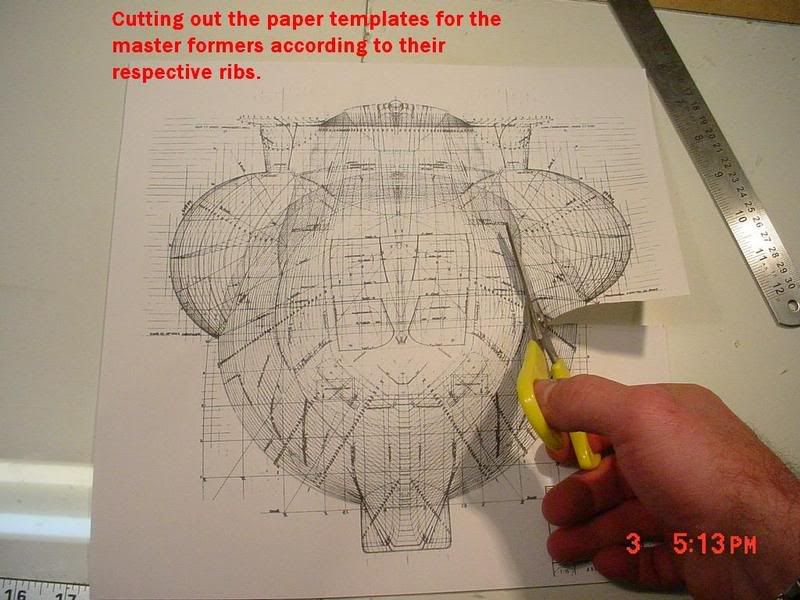
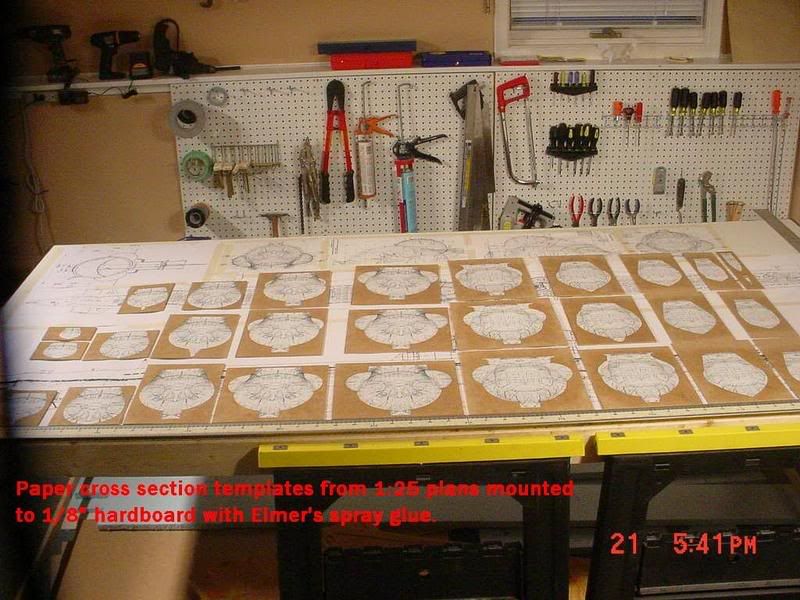
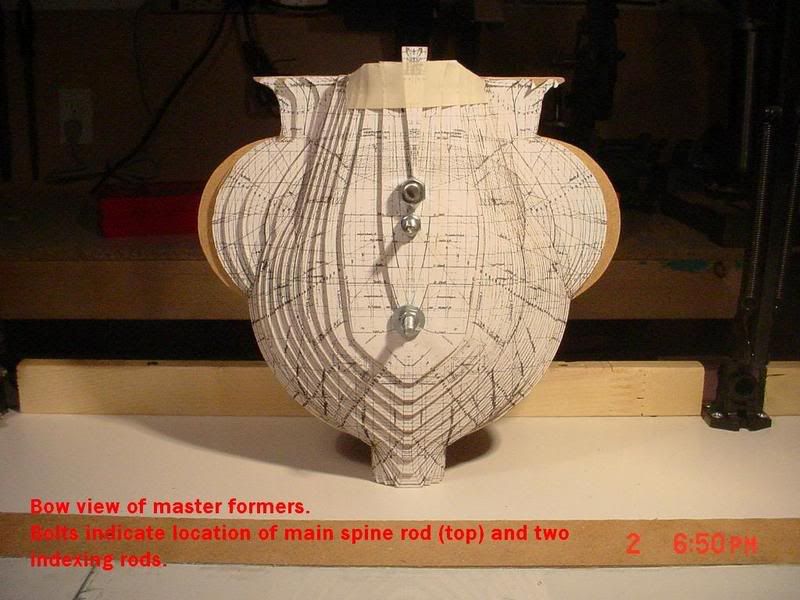
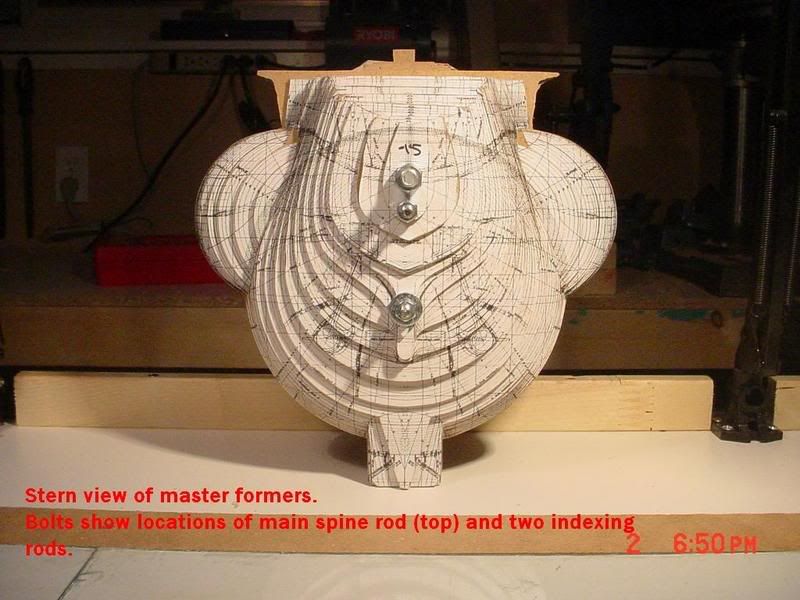
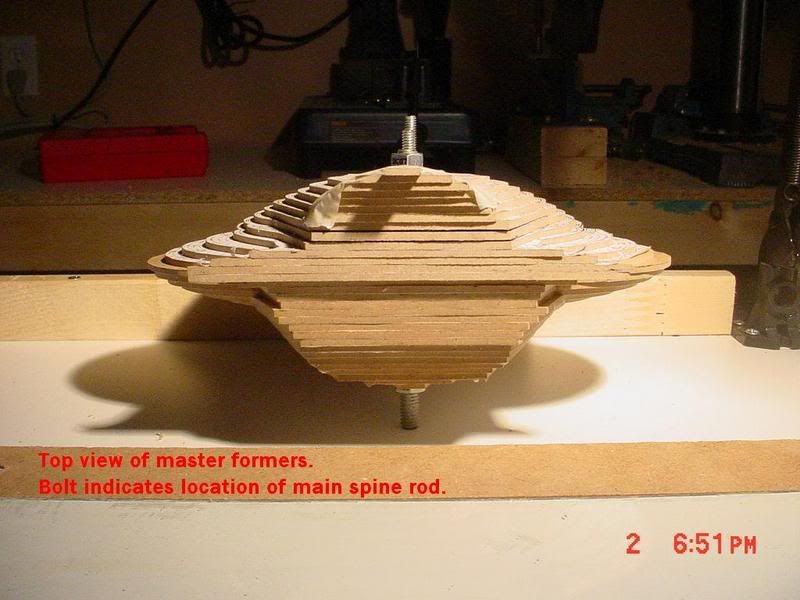
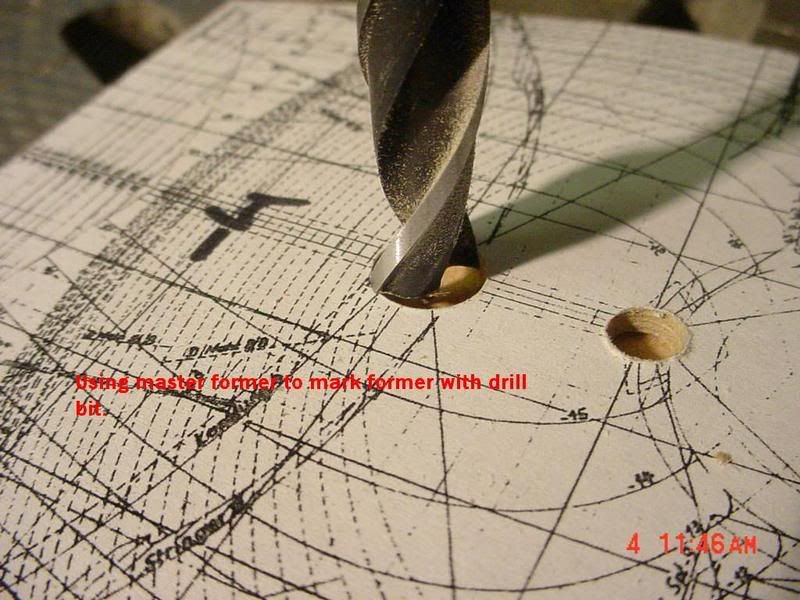
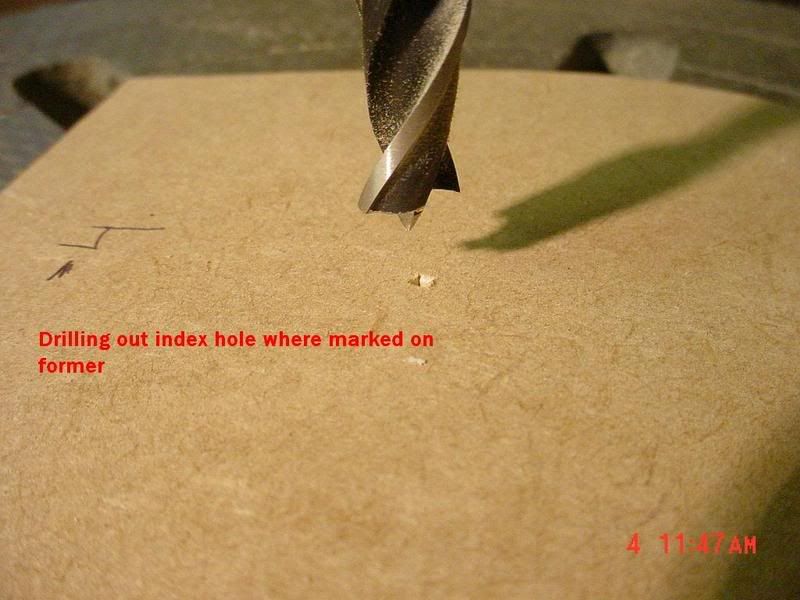
The most important ones, the cross sections, were 1]http://i119.photobucket.com/albums/o153/Mylo42/1k.jpg[/img]

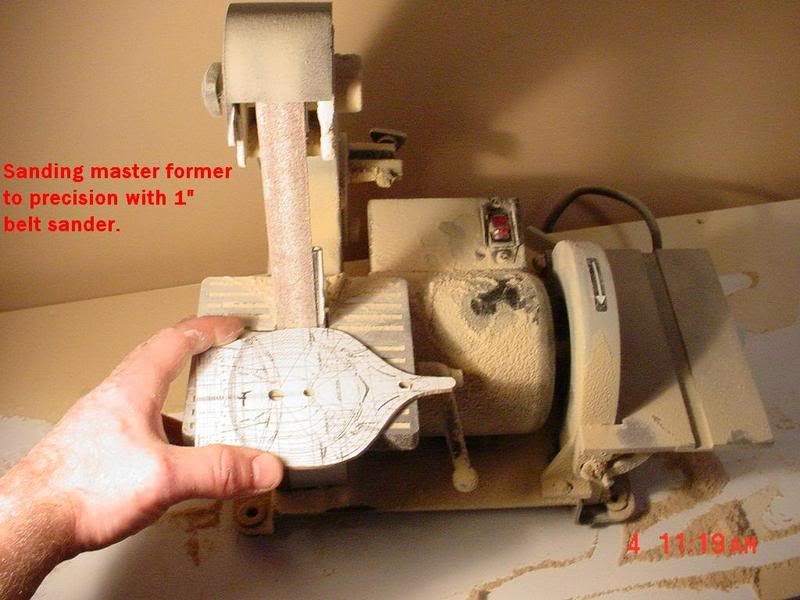
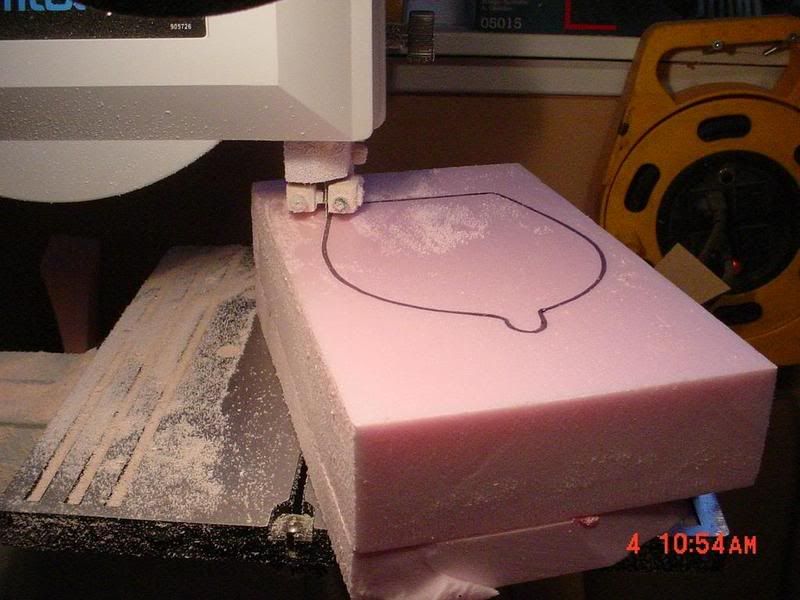
I had purchased a few power tools specifically for this sub build project. A 9" band saw, a table saw, and a 6"/1" sander combo as well as some odd's N' ends hand tools. All these tools are of your "cheap" brands (No DeWalt or Makita here) as the work needed to be done is really light duty. I believe in total I spent well under $500 on the tools I thought I would need for this project. I am a believer in that the right tools make the difference between being frustrated, and enjoying your project. Since I prefer to enjoy my hobbies, I chose to spend a few bucks on tools.....which, ....I'll have to build more subs with With tools and plans ready to go, and I was good to start on this endeavour. The bank account was already starting to feel the hit.
Step 2 : Model Stands
Time to complete: 4 hours.
Total to date: 4 hours.
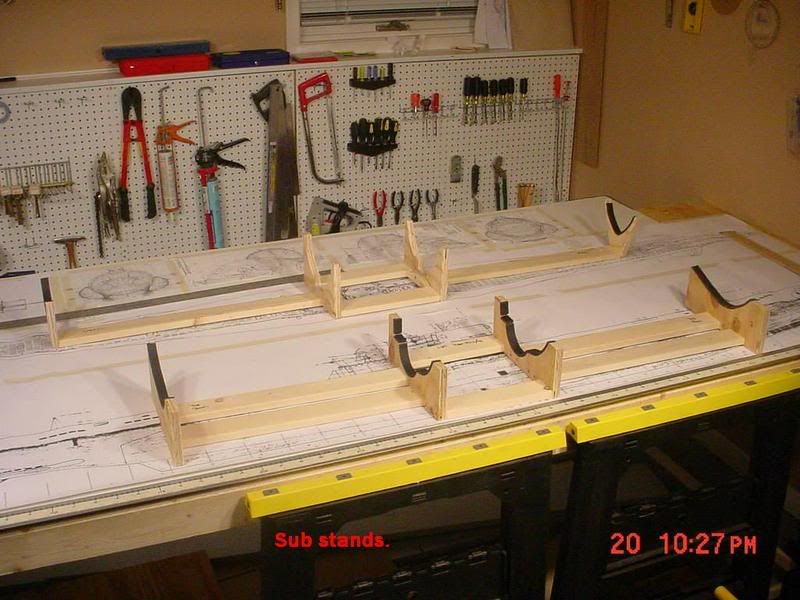
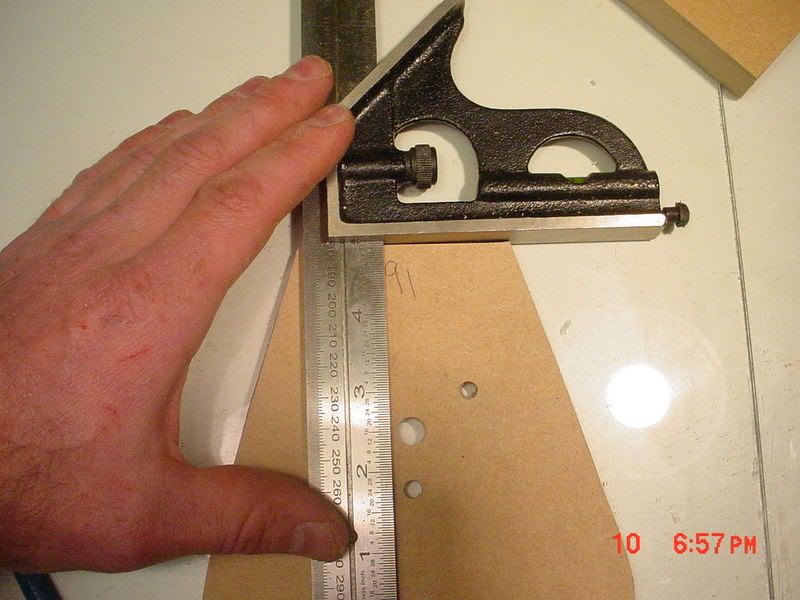
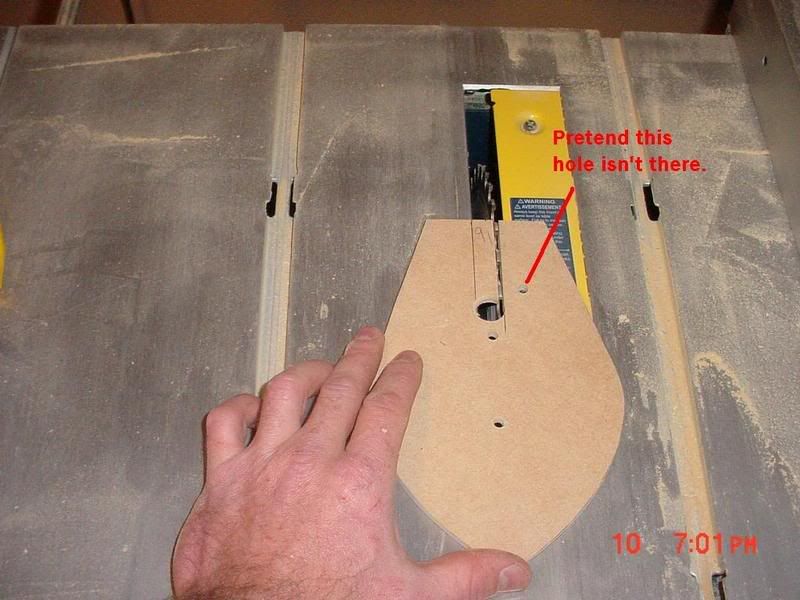
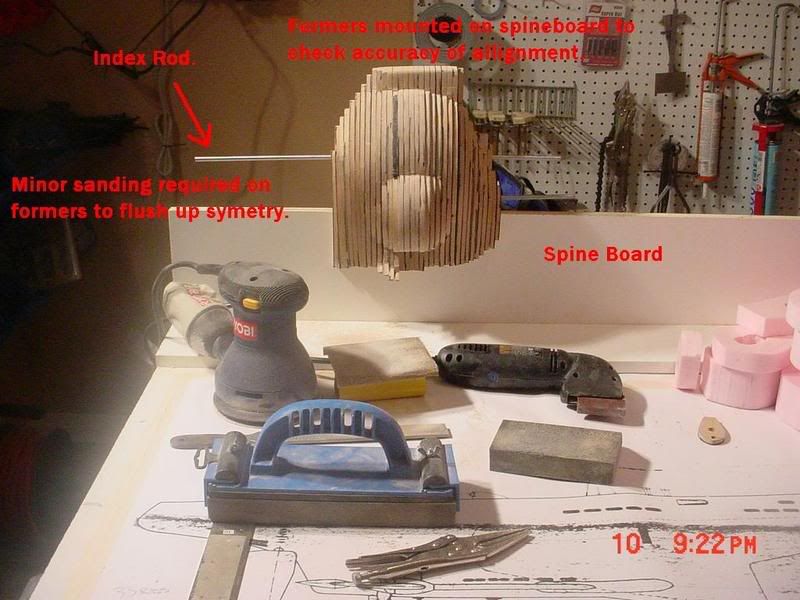
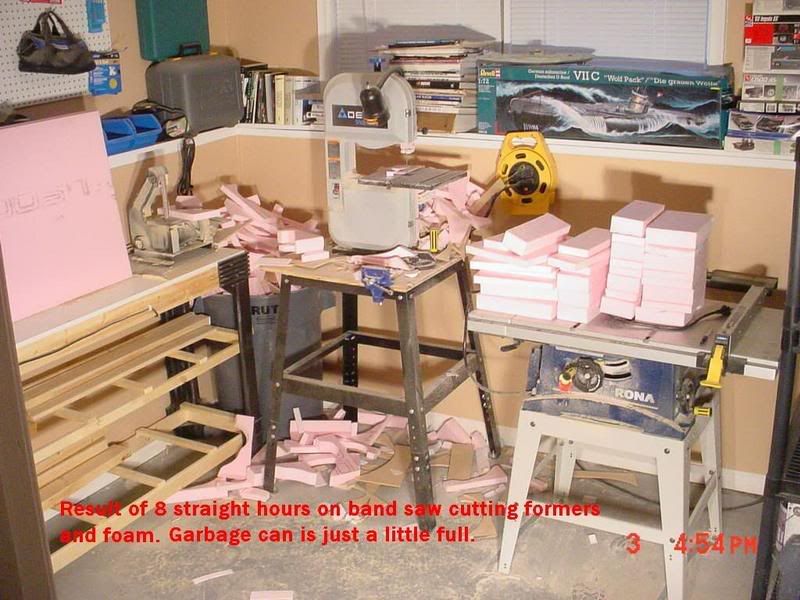
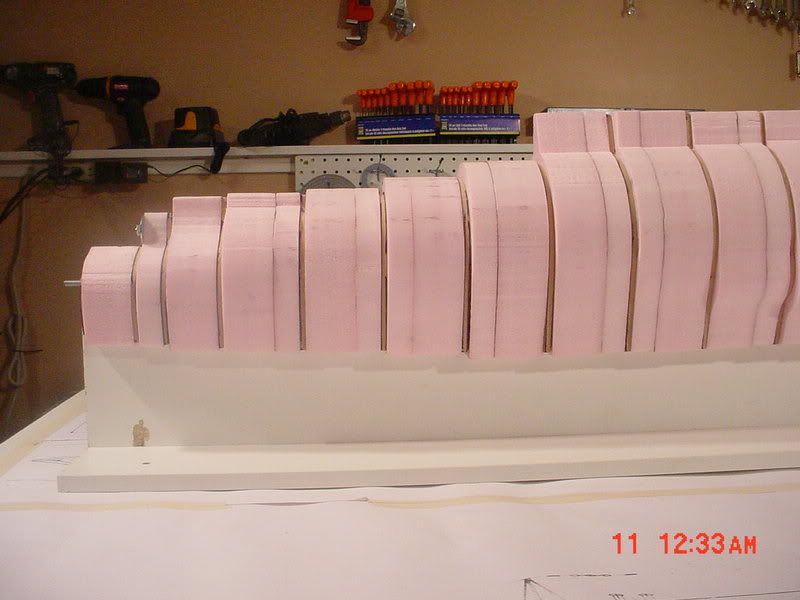
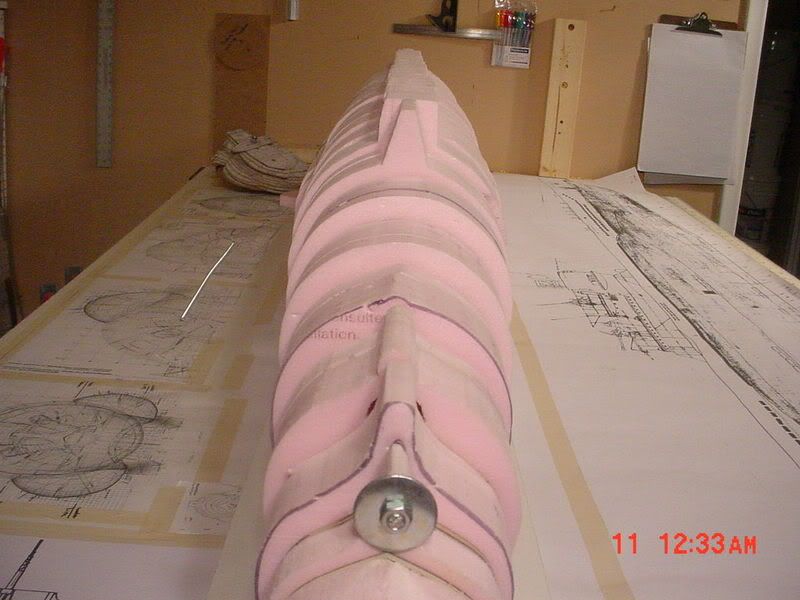
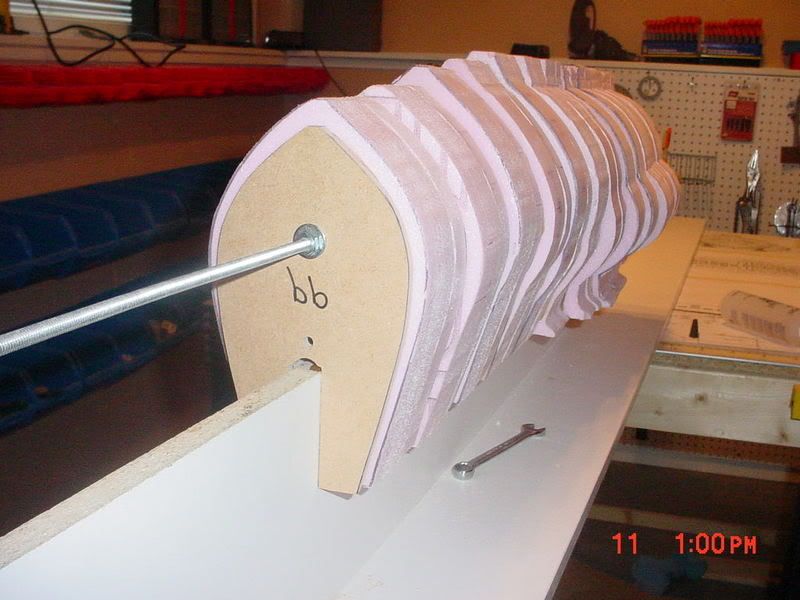
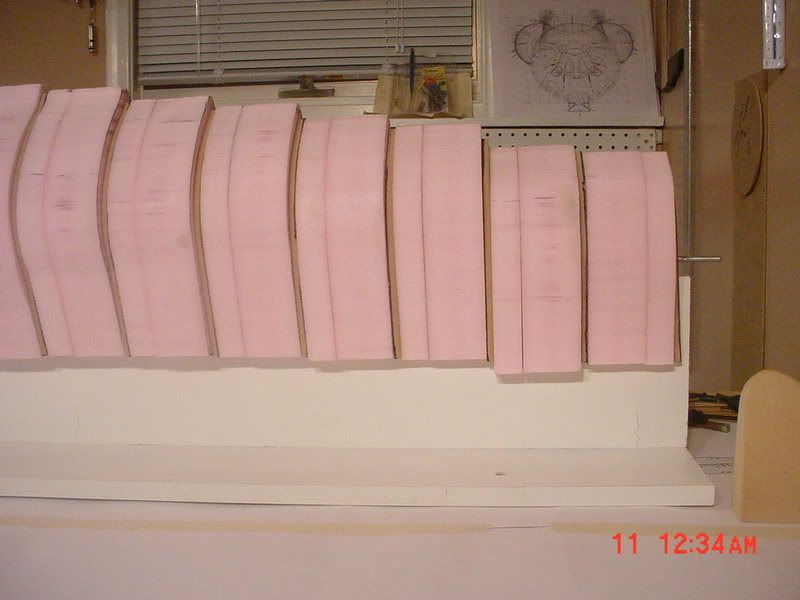
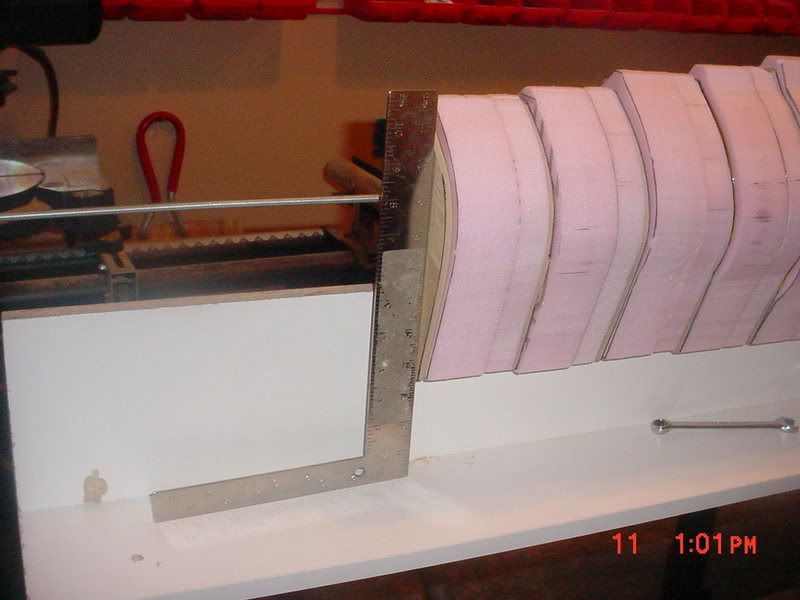
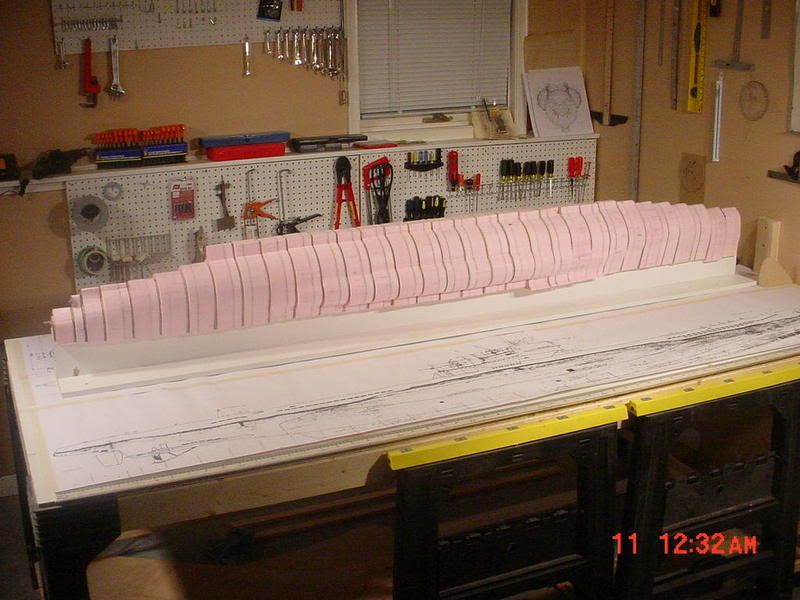
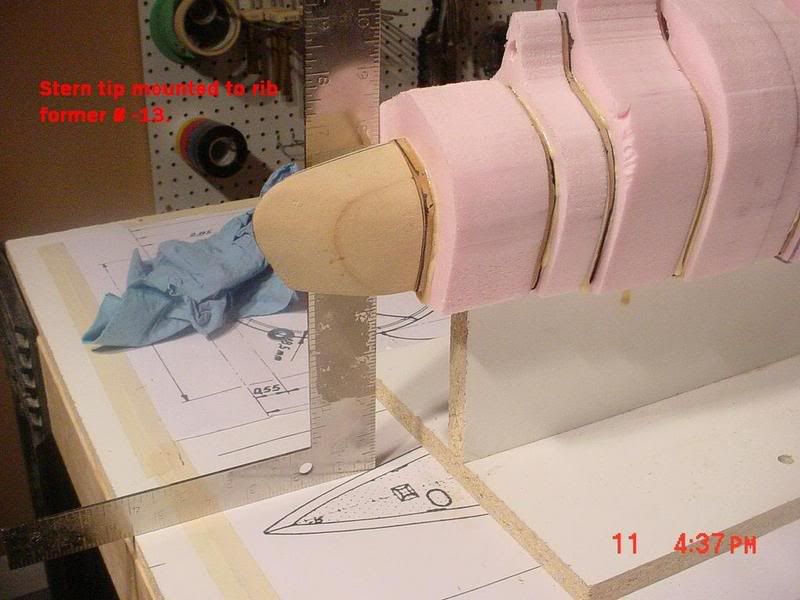
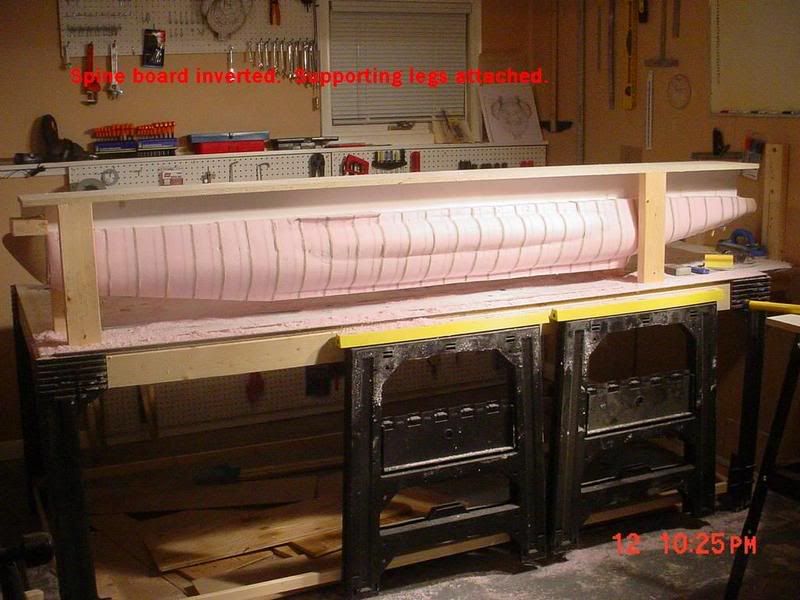
The first thing I decided to do was build a couple stands to hold the mold plug / boat once it was built. I wanted one stand to hold the hull upright, as a model is "normally" displayed, and I wanted a stand to hold the hull laying on it's side, in the event I needed to do this down the road for whatever reason. I knew that working with a hull of this size was going to be awkward so I wanted to minimize any problems the best I could. I figured building the stands first was a good idea. I used one of my 1:25 hull cross section copies as a template and cut the supports out of 3/4" plywood. I used a total of 4 supports for each stand that are roughly 20" apart. The edges of the supports that make contact with the model were lined with door weather stripping. The contruction of the supports took longer than I anticipated, making sure that I was cutting the proper contour at the specific distance took some measuring, and re measuring, ...cutting, ..and recutting, throwing pieces away and starting over. I wrote the experience off as good practice on my band saw as well as the importance of being maticulous with the measurements.
More progress to follow.
Due to the fact that I started this project on October 20, 2006, I have quite a bit of progress done on it already. I will be adding a few "Steps" to this thread on a daily basis until I get to where I am currently in the build.
I hope thread is of interest to novice and experienced builders alike.
Mylo
Acknowledgement
First off, I would like to extend my thanks to all those who took the time to post "How to do it" threads on this forum as well as those who consistantly are there to offer assistance. Without you, I would never have attempted what I'm about to undertake. I am as green to this as they come. A special thanks to Steve Neil and Kevin McLeod for their very educational threads on scratch building from A to Z and then some. Gentlemen, it's because of you two in particular that I decided I wanted to spend a ton of time and money to scratch build a sub.......I'm not sure whether thanks are in order or not come to think of it. I hope this thread might inspire other "greenies" to give this stuff a try. Most of the techniques that I use I can not claim as being my own. The only knowledge I have on how to build an R/C sub is from I've read on the Subcommittee forums and it is only through the skills and expertise of others who have shared their knowledge that has even given me enough "know how" to attempt to try. If you see a technique or tool, or material, or whatever, that you recognize as being one that you "invented", PLEASE feel free to step up and take credit. I would appreciate remembering from where I gathered some of this stuff. If you happen to be one of the modelers that I "borrowed" a technique off of, please consider it a compliment. As can be seen, I have included the time in hours it takes me to complete each step. I don't claim to be slow, fast, maticulous, careless, or in between, nor do I care, but I do admit to having zero experience in R/C Sub building with every inch of the way requiring that I "read up" on it or in some other way try and figure out how it's done. I thought this time line might come in handy for other novices who simply don't have a clue how much time goes into building one of these things. Again, a HUGE thanks to everyone at Subcommittee for giving me enough tools to try.
Step 1]http://i119.photobucket.com/albums/o153/Mylo42/1e.jpg[/img]
I dug out the credit card, went online, and ordered the plans straight from Germany. I was quickly notified that the plans were on back order and that there was no known date as to when some would become available. *sigh*. My search on the net continued. Six weeks later, I got a notification from Fritz Kohl that the plans I requested were now available. I placed the order for 39,95 Euros. Three weeks later, they arrived in the mail. Nine weeks just to get some plans in my hands. I was beginning to wonder just how long this thing was going to take to actually build. I spent the next two weeks looking over every inch of those diagrams. I was very pleased with the quality. The attention to detail is astounding. I'm quite sure someone could build the actual boat with these plans. I was surprised to see that the plans cover the Type VIIc (1939) and the Type VIIc/41 with different diagrams for each. I decided that the Type VIIc/41 was most thoroughly represented including some excellent cross section diagrams. After some further research, I discovered that the Type VIIc/41 in the plans were of U995 which is on display in Laboe Germany as an exhibit. There are many good current photographs available of this boat as well, which I was happy to find. It suddenly made sense why this particular boat was detailed so well in the plans. I'm sure Fritz himself crawled all over the actual U995 with his tape measure to create them. So, the decision on what U-Boat to model was made, it would be a type VIIc/41. The final major decision remained, what about scale ? My goal with this boat is to not only have it look to scale, but to perform to scale. I also wanted goodies such as a extendable/retractable periscope and functioning torpedoes. I knew that to best accomplish this, the boat would have to be big. I decided that I was going to build the biggest boat that I could feasibly handle by myself and still fit in the back of my truck. I absolutely love the big boats. I decided that 1]http://i119.photobucket.com/albums/o153/Mylo42/1g.jpg[/img]
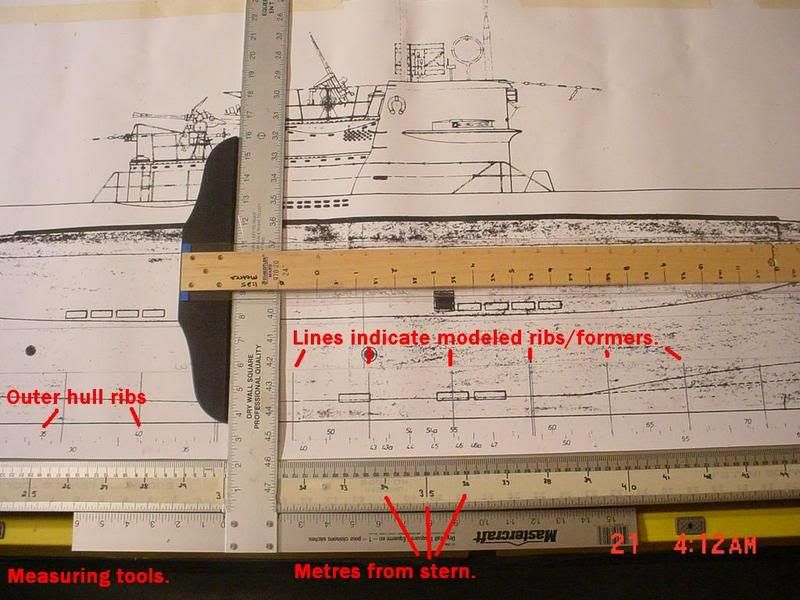
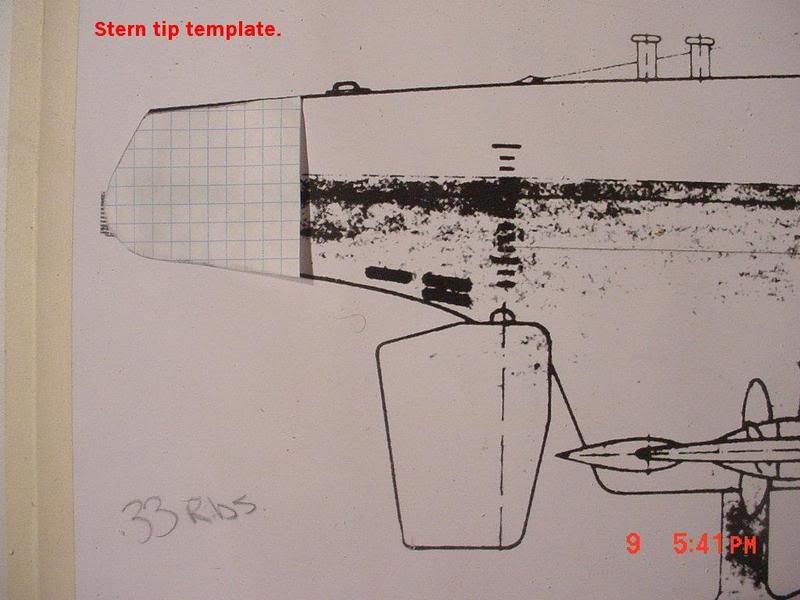
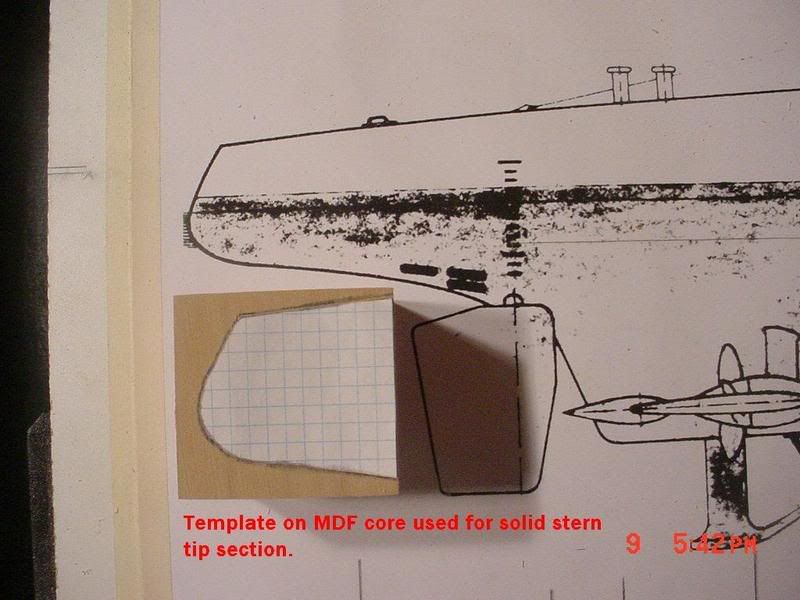
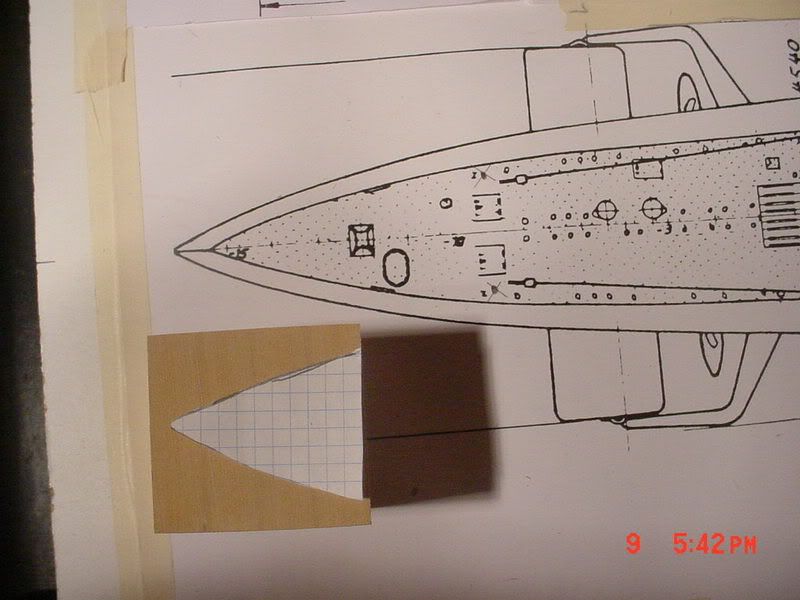
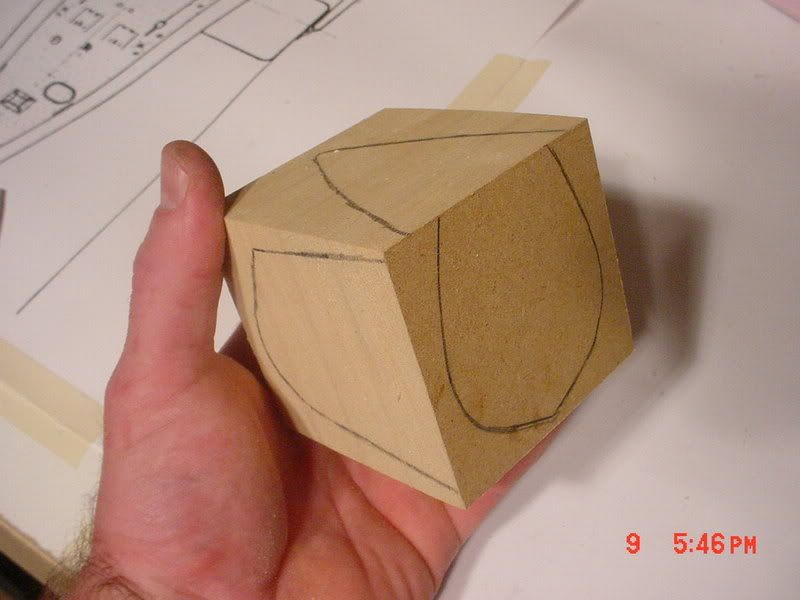
The most important ones, the cross sections, were 1]http://i119.photobucket.com/albums/o153/Mylo42/1k.jpg[/img]
I had purchased a few power tools specifically for this sub build project. A 9" band saw, a table saw, and a 6"/1" sander combo as well as some odd's N' ends hand tools. All these tools are of your "cheap" brands (No DeWalt or Makita here) as the work needed to be done is really light duty. I believe in total I spent well under $500 on the tools I thought I would need for this project. I am a believer in that the right tools make the difference between being frustrated, and enjoying your project. Since I prefer to enjoy my hobbies, I chose to spend a few bucks on tools.....which, ....I'll have to build more subs with
Step 2 : Model Stands
Time to complete: 4 hours.
Total to date: 4 hours.
The first thing I decided to do was build a couple stands to hold the mold plug / boat once it was built. I wanted one stand to hold the hull upright, as a model is "normally" displayed, and I wanted a stand to hold the hull laying on it's side, in the event I needed to do this down the road for whatever reason. I knew that working with a hull of this size was going to be awkward so I wanted to minimize any problems the best I could. I figured building the stands first was a good idea. I used one of my 1:25 hull cross section copies as a template and cut the supports out of 3/4" plywood. I used a total of 4 supports for each stand that are roughly 20" apart. The edges of the supports that make contact with the model were lined with door weather stripping. The contruction of the supports took longer than I anticipated, making sure that I was cutting the proper contour at the specific distance took some measuring, and re measuring, ...cutting, ..and recutting, throwing pieces away and starting over. I wrote the experience off as good practice on my band saw as well as the importance of being maticulous with the measurements.
More progress to follow.
Due to the fact that I started this project on October 20, 2006, I have quite a bit of progress done on it already. I will be adding a few "Steps" to this thread on a daily basis until I get to where I am currently in the build.
I hope thread is of interest to novice and experienced builders alike.
Mylo


Comment