1/128 Moebius Seaview (Four Window Reissue)

Collapse
X
 
  • Filter
  • Time
  • Show
Clear All
new posts
  • PaulC
    Administrator
    • Feb 2003
    • 1542

    1/128 Moebius Seaview (Four Window Reissue)

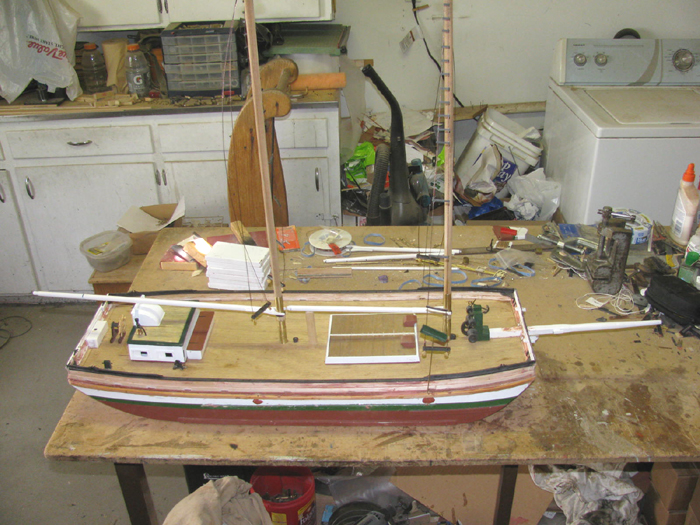
    Recently, we sold our house of 17 years and relocated in Houston. To say it was a long, difficult job is an understatement. The good news is I now have a sizeable in-ground test tank in the back yard. The bad news is the shop in which I built all my R/C subs is no more. All that forced downtime has stirred up my desire to build a boat.

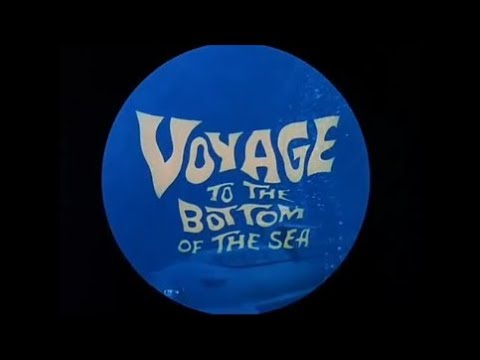
    One of my earliest submarine memories was watching the opening credits of “Voyage to the Bottom of the Sea” as a kid before I was shuffled off to bed circa 1967-1968. I built several Aurora Seaviews growing up which saw a lot of action. But with all my other projects, and a major Disney Nautilus fixation, the original Moebius Seaview kits passed me by. When Moebius had their founder's day 1/2 price sale last year, I picked up one of the reissued 1/128 scale four window Seaview kits.


    Of course it has to be R/C’d. So I cast about in the SubSwap forum for a used Caswell fittings kit and/or WTC. They were hot when Moebius originally released the kit back in 2008 or so. I figured there’d be at least one gathering dust somewhere that I could pick up for a good price. To my surprise, Dave Merriman himself dropped me a line and made me an offer. Caswell (since sold to Nautilus Drydocks) was willing to provide a new fittings kit and the latest Seaview WTC for the project in exchange for an honest assessment of the products in a build thread and article for the SCR. I warned him that historically my build speed is glacial but if he promised not to hound me I would finish the Seaview project before any other boat. Having reached an agreement, Merriman quickly fired off a fittings kit and WTC – which I will review in due course.

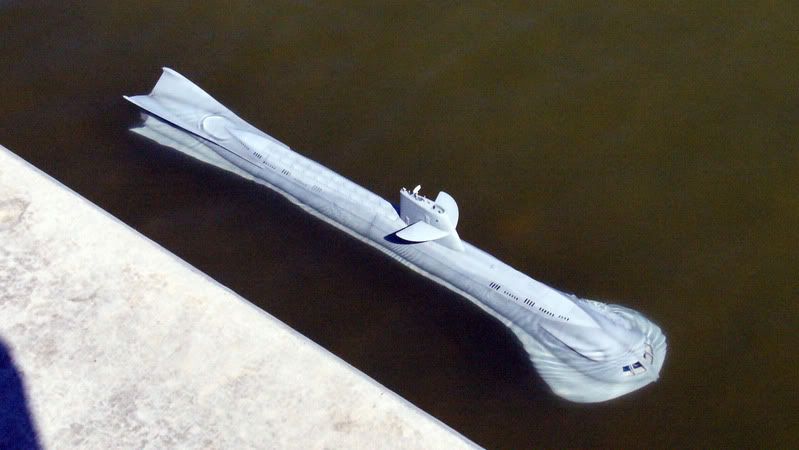
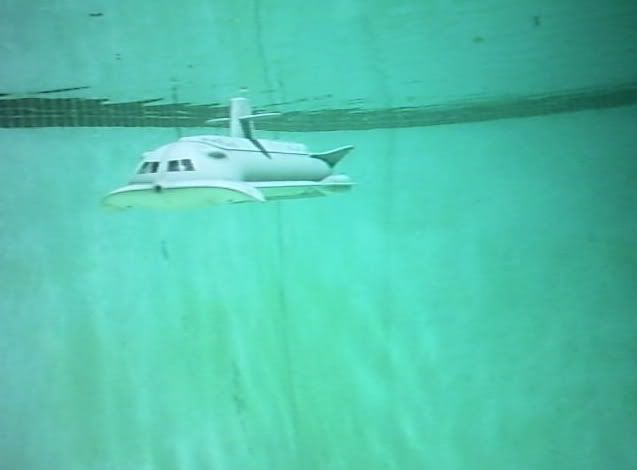
    In the meantime, I have been very impressed with the Moebius kit. Everything fits together well. As mentioned when it was first introduced, the boat is laid out with radio control in mind. One big improvement of the reissue is the fully molded observation windows. I would not want to have to install and smooth in the separate window piece as originally issued. Overall, the boat is a very nice size and should look good on display as well as on the water.

    Click image for larger version

Name:	DSCN2772.jpg
Views:	1
Size:	87.7 KB
ID:	136949

    I do have a request regarding this thread. As anyone who has followed my Revell Gato build will know, I have a tendency to rivet count. But my thinking on the Seaview build is since the studio models were so varied, and the deck set was different as well, there’s no real standard to build to. I’ve seen heated discussions on other forums regarding “inaccuracies” in the Moebius kit that “need” to be corrected. I think it looks just fine as is. With that being said, if I start to fall down a kit modifying rabbit hole at any point please bring a few friends to my house and hold an intervention. I want to get this boat built sooner rather than later.
    Last edited by PaulC; 04-18-2018, 10:22 PM.
    Warm regards,

    Paul Crozier
    <><
  • PaulC
    Administrator
    • Feb 2003
    • 1542

    #2
    My first step is opening up the limber holes in the superstructure. My tools of choice are a drill bit and #11 X-ACTO blade. Yes, the knife is pretty rusty -- its the only one I can currently find. If I can get my Dremel set up I might try to speed things up from the back side using a cutter bit. I'll precut the ribs inside to make it easier to remove the superstructure as a complete piece once the hull is assembled. I'm also thinking it might be easier to shape and install the foam blocks that will line the inside of the hull before I join the halves.

    Click image for larger version

Name:	limber1.jpg
Views:	1
Size:	83.7 KB
ID:	129945

    The model depicts the limbers canted towards the bow as they appeared on the 17' shooting miniature which was used for surface shots and Flying Sub launching sequences. I personally prefer the stern canted limbers found on the 8' miniatures. But to stick with my "out of the box" rule, I will just open them up and depict the 17'-er. This will mean using the 20 tube missile deck as opposed to the 16 tube piece. And leaving the bow windows frameless. Less work for me.

    Click image for larger version

Name:	limber2.jpg
Views:	1
Size:	46.2 KB
ID:	129944

    Click image for larger version

Name:	95a7ca7cc1c4e07742b70cb87542d457.jpg
Views:	1
Size:	43.3 KB
ID:	129946

    If you look closely you can see a very faint outline where the old observation window piece went in the bow. Otherwise the hull is very crisp and looks good.

    Click image for larger version

Name:	limber3.jpg
Views:	1
Size:	90.6 KB
ID:	129947
    Warm regards,

    Paul Crozier
    <><

    Comment

    • Ralph --- SSBN 598
      Junior Member
      • Oct 2012
      • 1417

      #3
      I have been using the same Exacto knife blade for 15 years.
      I use it to trim.
      I use it to cut.
      I use it to the back of the blade to scribe plastic until it becomes two pieces. (the sharp side wonders off line)
      I have used a hammer on it to cut through thick parts or wood.
      I use it to apply glaze.
      I use it to apply glue. (even CA)
      I use it to hold parts and hope I can remove it after the glues or bonders set.

      I have a piece of 220 wet / and dry sand paper and a wooden block to clean the blade and resharpen it.
      The blade is about 1/4" shorter than a new blade.
      Why not use a new blade?
      I put them somewhere for safe keeping.
      They are certainly safe because I can not find them.
      When at the hobby stores I never think to get blades.

      Working with that blade is almost a daily event.
      It does all that I want.

      My point is, Rusty Exacto knife is only rusty until I get after it with my sanding block.

      Comment

      • PaulC
        Administrator
        • Feb 2003
        • 1542

        #4
        Pretty funny, Ralph. I'll have to do that. I may be able to scare up some sandpaper.
        Warm regards,

        Paul Crozier
        <><

        Comment

        • Ralph --- SSBN 598
          Junior Member
          • Oct 2012
          • 1417

          #5
          My blade sharpening sand paper is years old and was used before I started using it on the blade.
          It buffs more than sands.

          More like 600 or 800 grit.
          Maybe finer.

          I know it puts a very nice edge on the blade.

          Comment

          • PaulC
            Administrator
            • Feb 2003
            • 1542

            #6
            You raise an interesting question, Ralph. What is everyone's favorite/go-to hobby tool? The one you can't build without?
            Warm regards,

            Paul Crozier
            <><

            Comment

            • Ralph --- SSBN 598
              Junior Member
              • Oct 2012
              • 1417

              #7
              I build a lot from scratch, with only a drill press, band saw and a bunch of hand tools.
              I finally broke down and bought a Dremel about three years ago.
              For everyone reading this . . . If you have ever thought about buying a Dremel . . . do not make excuses to put it off.
              Since I got one, I can say I use it for something almost every day.
              Mostly the cutoff wheel and sanding drums.

              But as far as my favorite tool. . .
              it has to be the Exacto knife.
              It cuts, trims, scribes, cleans sharp edges.
              I use it and a steel straight edge to make strips from sheet plastic by using the back side of the knife blade to scribe a line several times. . until it cuts through 1/16" plastic.
              I work from a 4'x8' sheet.
              I use it to shape parts in the drill press.
              I use it to mark where to cut or place parts as I build.
              I use it to hold parts in place while the glue cures or cement bonds.
              Just used it last week to hold a deck railing in place while bending it on the hull.
              I guess I could use hobby straight pins, but I have never had any.

              First think I reach for on my work bench is the Exacto knife and a ruler.
              It all starts there.

              Project currently on my work bench is ALMA schooner, built from plans gotten from the San Fransisco Maritine Museum.
              How much building?
              Well, I started with a wooden door that the skin was coming off off.
              There are a few parts I bought but not many.
              Made 3 cleats and 2 anchor chain stops since Wednesday.
              Scale is 1/24. Boat deck is 30.66" with a width of 11.25"
              Cleats are 1" long and stops are less than 1/2" by 1/4".
              Here's a photo I took Wednesday morning before making the cleats and stops.

              This is a long term project because I have built a couple of subs and I am making a sub plug.
              Also, did some home rebuilding as well.


              Also have various grits of sand paper on the bench wrapped around wooden blocks.
              I have several build logs and small projects, I keep current..

              Comment

              • PaulC
                Administrator
                • Feb 2003
                • 1542

                #8
                When my wife got me a Dremel set for Christmas 25 years ago or so it changed my hobby life. I've done all kinds of things with it. It definitely serves as a "must have" for me.

                Who has one of these?

                Click image for larger version

Name:	aqualock1.jpg
Views:	1
Size:	56.0 KB
ID:	129950

                I got one when I was a kid and still use it to hold essential hobby tools. Lost the original contents a long time ago unfortunately.
                Warm regards,

                Paul Crozier
                <><

                Comment

                • PaulC
                  Administrator
                  • Feb 2003
                  • 1542

                  #9
                  Progress: starboard side forward limbers are roughed in.

                  Click image for larger version

Name:	DSCN2809.jpg
Views:	1
Size:	87.9 KB
ID:	129951
                  Warm regards,

                  Paul Crozier
                  <><

                  Comment

                  • steveneill
                    SubCommittee Member
                    • Jul 2009
                    • 716

                    #10
                    Paul I still have my Seaview from the original days when BigDave was building cylinders for it with the internal pump jet. To this day she still runs flawlessly. Never a drop inside of a leaky bladder.

                    It will be fun watch this build.

                    For some reason this boat set up right runs very smoothly under water. You have to fly it a bit on the dive planes but it runs smooth.

                    All the larger Seaviews I have built were harder to get right. As if the inherit problems of the bow ray magnifies the tendencies for her to down plow her nose.

                    I have found making the boat a bit tail heavy helps and the those stators in the stern outputs also help but it takes some playing with and flying the boat to get it. Once you do she dives well and stays level under water. I'm running mine at LA Subron this weekend.


                    www.steveneillsgarage.com

                    Comment

                    • salmon
                      Treasurer
                      • Jul 2011
                      • 2306

                      #11
                      I got to get mine running soon. Not enough time with life and subs sometimes! All I have to do is populate my Sub-Driver and trim. Steve, you and Paul are inspiring me to press forward. I love this hobby of ours!
                      If you can cut, drill, saw, hit things and swear a lot, you're well on the way to building a working model sub.

                      Comment

                      • PaulC
                        Administrator
                        • Feb 2003
                        • 1542

                        #12
                        Thanks for the encouragement, Steve. I hope to get my boat running as good as yours.

                        Tom, please post your sub-driver fitting out process. Would love to follow along.
                        Warm regards,

                        Paul Crozier
                        <><

                        Comment

                        • jefftytoo
                          SubCommittee Member
                          • Mar 2003
                          • 920

                          #13
                          Hey Paulerino!

                          Forgive me for being a bit late to this party, but I just HAD to check in with my public congrats upon your joining the Seaview brotherhood. Welcome to the NIMR! Next time you're in So. California, we'll head out to Santa Barbara and tour the Admiral's hush-hush base...the West Coast's worst-kept secret!

                          First and foremost, let me compliment you on deciding to build your own boat decidedly your own way. Though as you know our Seaview tastes run in the same overall 8-footer and limber hole directions, you can't go wrong with taking the 17-footer approach, given the limber hole slant the kit provides, and the fact that you can choose a 20-missile deck that's appropriate for said version as well. (You'll recall I specifically went out-of-Miniature-canon with my own boat by including details seen only on the full-size deck set, plus the grab irons seen in the underwater diver entrance/egress scenes, and even adding a couple of "real" sub-of-the-era eye candy touches like a scale capstan forward and a chock back aft.) Bend your Seaview to your own iron will, I say!

                          Second, though you're a long way from this at the moment, you'll eventually need to give some thought to how and where you'll want your flood holes to provide water to the nacelles for propulsion. May I suggest my own approach? Don't alter those lovely nacelles in any visible area, as some unfortunately have done (with Moebius happily getting the look of those famous intake louvers EXACTLY right, you're definitely not going to want to alter them). Instead, cut any flood openings into the ventral side of the boat, on the INSIDE CURVES of the tubes, where they are fully blocked from view and thus can't be seen while on the shelf OR in the water. Kerry Addington now refers to this approach as "Jeffries Tubes" in a punning nod to Matt Jefferies' famous TOS Enterprise set -- perhaps the finest compliment I've ever been paid.

                          Finally, at least for now, I have every expectation our boats will one day be running together in a scene very much like this one, which I believe I've sent you before. I think the Moebius Seaview in question alongside my Teskey hull here belongs to Lance Ellingson; we've certainly run together in San Francisco enough times. (However, it might actually be one of the couple of other Seaviews seen regularly at that event -- there's just no end to the popularity of Capt. Crane's ride!)

                          Happy building, my friend, and give Harriman my best,
                          JeffP

                          Click image for larger version

Name:	IMG_0556.jpg
Views:	1
Size:	71.7 KB
ID:	129965

                          Comment

                          • PaulC
                            Administrator
                            • Feb 2003
                            • 1542

                            #14
                            Thanks for the kind words, Jeff. My iron will is skewing towards out of the box on this one.

                            Amazing how much bigger your Teskey boat is. On my bench the Moebius looks much bigger.

                            Keep those beauty shots of finished boats coming. Definitely inspiring.
                            Warm regards,

                            Paul Crozier
                            <><

                            Comment

                            • PaulC
                              Administrator
                              • Feb 2003
                              • 1542

                              #15
                              Been whittling plastic again. The bow limber holes are now roughed in. Next stop, the stern section. And don't worry, Jeff. When the time comes, I'll keep the pump jet nacelle opening hidden underneath.

                              Click image for larger version

Name:	limber-bow.jpg
Views:	1
Size:	90.6 KB
ID:	130043

                              Been also test fitting the parts. Isn't this bebe FS-1 cute? Don't know what I'll do with it as it would just be supercargo in the R/C application. But it is fun on the bench.

                              Click image for larger version

Name:	fs1-1.jpg
Views:	1
Size:	65.7 KB
ID:	130042

                              Also working on the sail. The Nautilus Drydock sail plane parts fit well. Looking forward to getting this section put together.

                              Click image for larger version

Name:	sail-1.jpg
Views:	1
Size:	89.7 KB
ID:	130041
                              Warm regards,

                              Paul Crozier
                              <><

                              Comment

                              Working...
                              X