
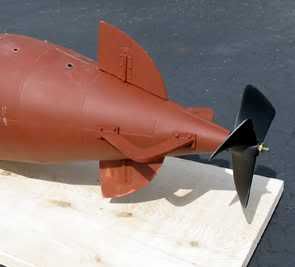
Here is my dirt simple casting setup for my work on the Alligator prototype model...
I made the appendage masters from a nifty expanded styrene product called "Sintra". It cuts and shapes easily and its fairly inexpensive. Clockwise]http://i124.photobucket.com/albums/p18/tmsmalley/mould1.jpg[/img]
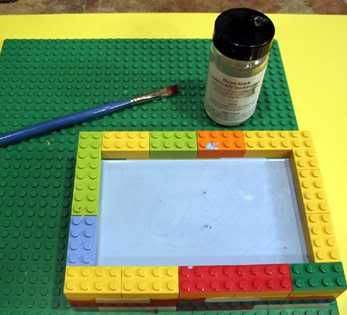
Here are the supplies I am using to make molds of the masters so I can produce multiple copies of the parts. Lego parts make a great mold box that you can re-size to fit the part you want to duplicate. Surprisingly - the box doesn't leak if you squeeze the parts together tightly. I use Micromark mold making rubber - it works fine and you don't need to buy it in Industrial quantites for small jobs. I use Alumalite casting resin to make the part.
You are supposed to use "Klean Klay" in the base of the box in which
to press the master to make the first half, but the local hobby shop
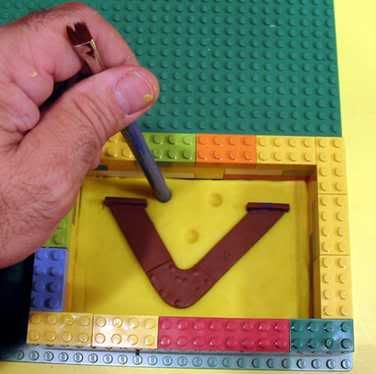
was out so I got some nice soft Play-Doh. It took a little more time
to clean up than Klean Klay does but hey, "any port in a storm!" Be sure to push the part half way down into the clay.
I used a paintbrush handle to make dimples in the Play-Doh. The craters
will create raised bumps in the rubber mold that will lock the two halves of
the mold together in perfect "registration".
Here is the mold after the mold making material is poured in on the
top of the master part pushed half way down into the Play-Doh. The part
has a light coating of mold release painted on to keep it from sticking to
the rubber. You are supposed to pour in the RTV in a thin stream and try
to avoid mixing in a lot of bubbles. The couple that are showing popped
a second after I took this photograph.
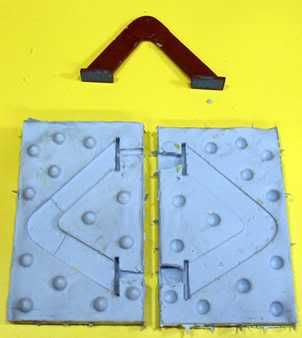
After side one cures, flip it over and do the other side with the part still in...viola! you have your mold. Prop guard master, with two halves of mould. Note the funnels at the bases of the guard - these were made from clay to give a place to rour in the casting resin. Pour in an adequate amount of Alumalite casting resin so a little runs out all your vent holes and tap the mold on your workbench to drive out any bubbles.
Then it's a simple process to cut a couple of plywood strongbacks and rubber band them around the two mold halves (to keep them from bulging out) and pour in the casting resin to make your parts.
Prop guard master, with two halves of mould. Pour in an adequate amount of Alumalite casting resin so a little runs out all your vent holes and tap the mold on your workbench to drive out any bubbles.
And this is the rudder with the sprues still attached. Sprues are the result of excess casting medium that has filled up the vent channels. They are simply clipped off with a wire cutter.
Thanks to Matt Spade for the idea of using Legos to make the mold box!
I made the appendage masters from a nifty expanded styrene product called "Sintra". It cuts and shapes easily and its fairly inexpensive. Clockwise]http://i124.photobucket.com/albums/p18/tmsmalley/mould1.jpg[/img]
Here are the supplies I am using to make molds of the masters so I can produce multiple copies of the parts. Lego parts make a great mold box that you can re-size to fit the part you want to duplicate. Surprisingly - the box doesn't leak if you squeeze the parts together tightly. I use Micromark mold making rubber - it works fine and you don't need to buy it in Industrial quantites for small jobs. I use Alumalite casting resin to make the part.
You are supposed to use "Klean Klay" in the base of the box in which
to press the master to make the first half, but the local hobby shop
was out so I got some nice soft Play-Doh. It took a little more time
to clean up than Klean Klay does but hey, "any port in a storm!" Be sure to push the part half way down into the clay.
I used a paintbrush handle to make dimples in the Play-Doh. The craters
will create raised bumps in the rubber mold that will lock the two halves of
the mold together in perfect "registration".
Here is the mold after the mold making material is poured in on the
top of the master part pushed half way down into the Play-Doh. The part
has a light coating of mold release painted on to keep it from sticking to
the rubber. You are supposed to pour in the RTV in a thin stream and try
to avoid mixing in a lot of bubbles. The couple that are showing popped
a second after I took this photograph.
After side one cures, flip it over and do the other side with the part still in...viola! you have your mold. Prop guard master, with two halves of mould. Note the funnels at the bases of the guard - these were made from clay to give a place to rour in the casting resin. Pour in an adequate amount of Alumalite casting resin so a little runs out all your vent holes and tap the mold on your workbench to drive out any bubbles.
Then it's a simple process to cut a couple of plywood strongbacks and rubber band them around the two mold halves (to keep them from bulging out) and pour in the casting resin to make your parts.
Prop guard master, with two halves of mould. Pour in an adequate amount of Alumalite casting resin so a little runs out all your vent holes and tap the mold on your workbench to drive out any bubbles.
And this is the rudder with the sprues still attached. Sprues are the result of excess casting medium that has filled up the vent channels. They are simply clipped off with a wire cutter.
Thanks to Matt Spade for the idea of using Legos to make the mold box!